|
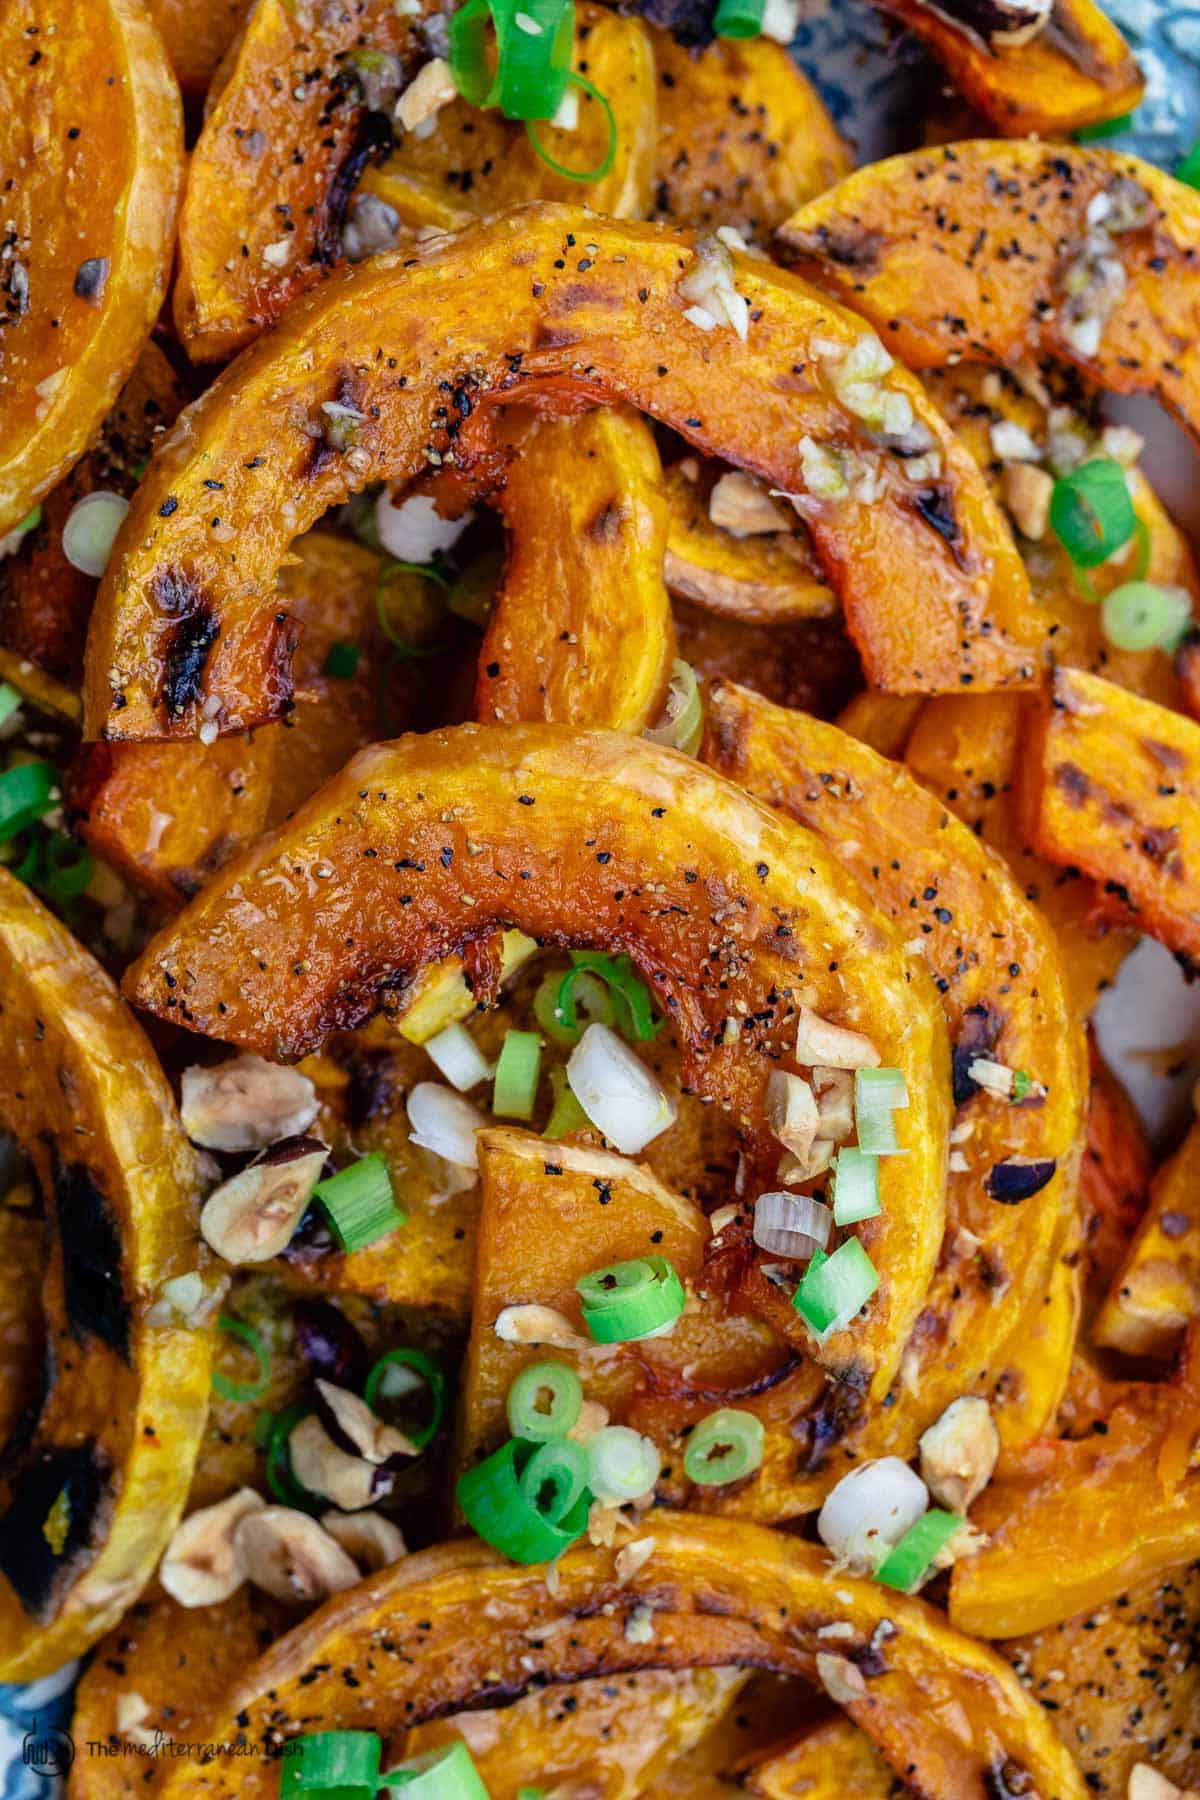
Sweet, perfectly tender roasted butternut squash recipe, made extra special with the addition of a bright lime vinaigrette and a sprinkle of crunchy nuts for great texture. This recipe is adapted from Melissa Clark's book Dinner in French with permission from the author. 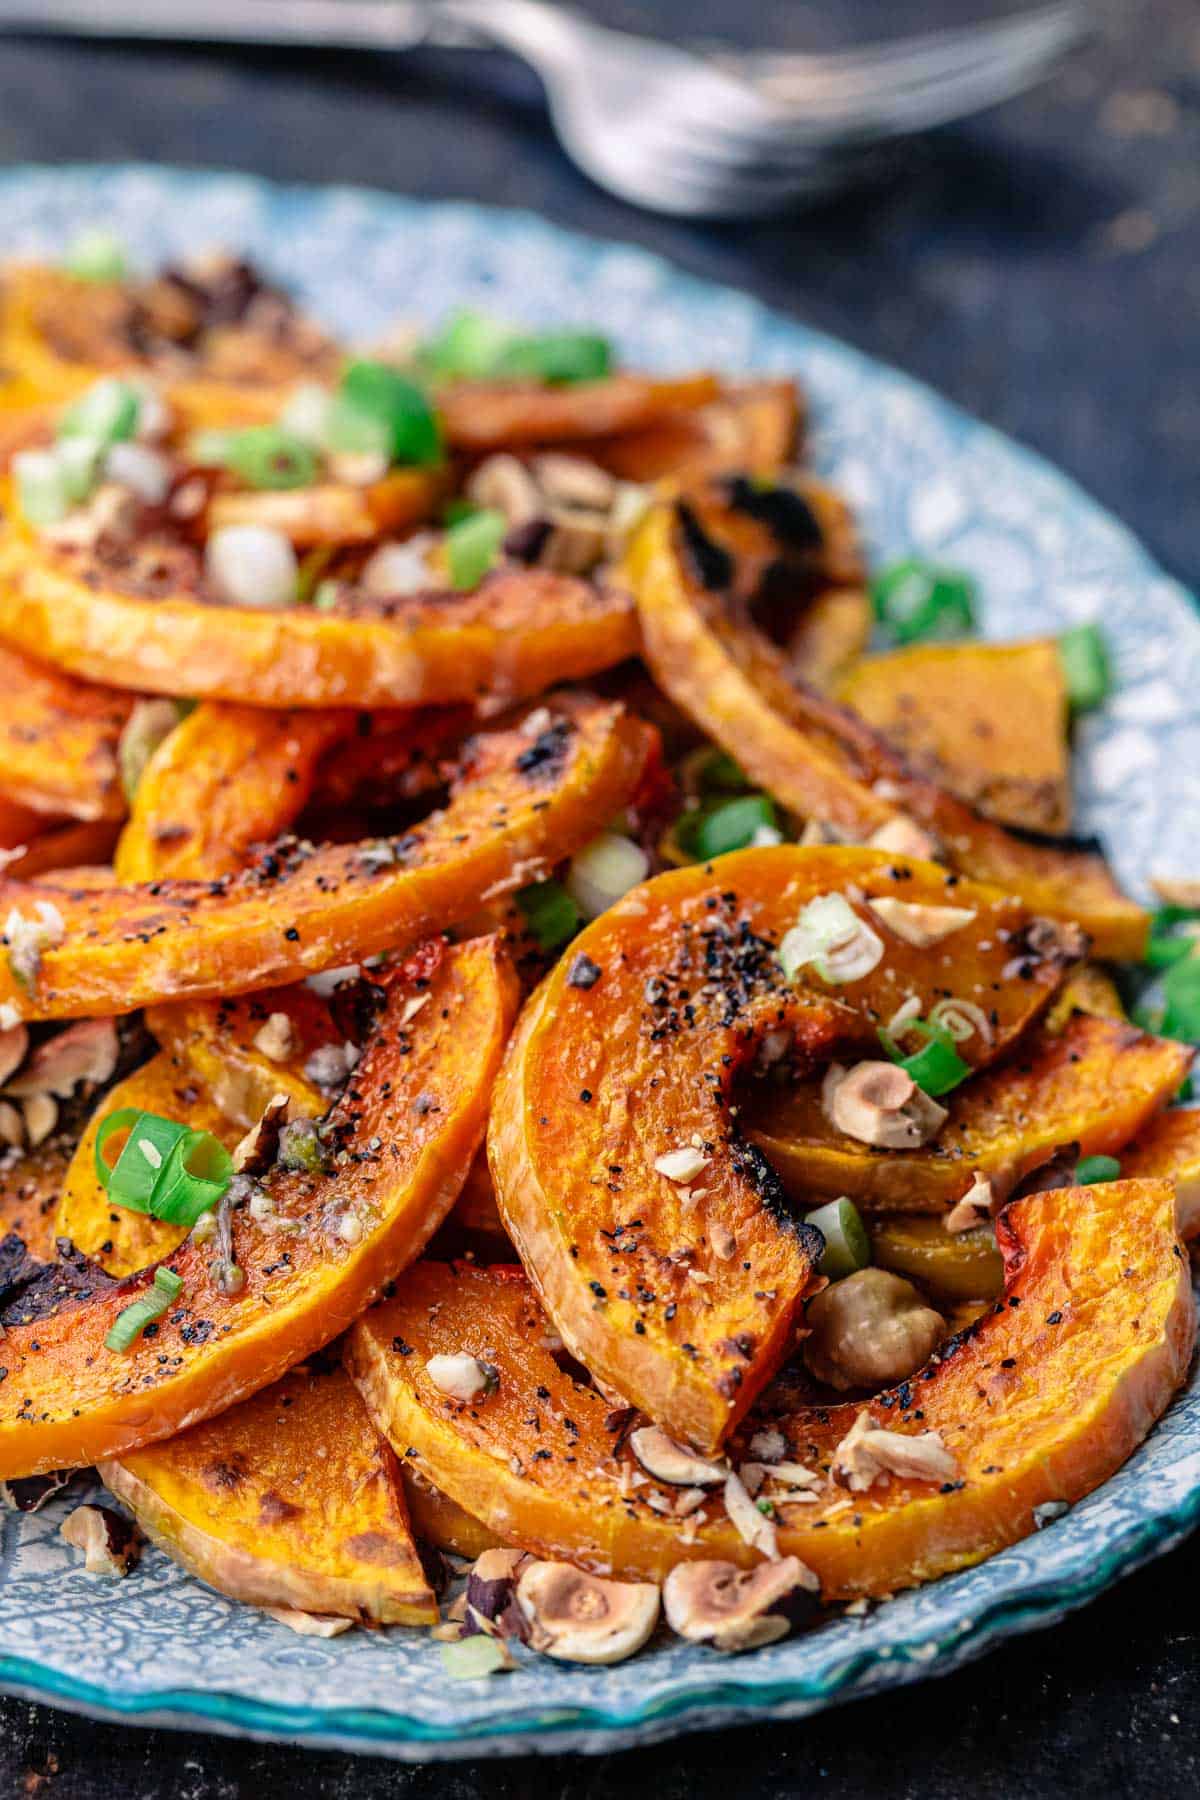 Melissa Clark's Butternut Squash Recipe!Who can resist sweet roasted butternut squash with crispy edges and a tender, creamy center?! Just as we do with roasted sweet potatoes, butternut squash needs a little bit of seasoning, a good drizzle of extra virgin olive oil, and high heat. But today's recipe from one of my favorite cookbooks Dinner in French by Melissa Clark, takes your basic butternut squash a few notches up with just some simple additions... Here, the perfectly caramelized thin slices of butternut squash are topped with a bright lime vinaigrette (with red pepper flakes) to bring out the sweetness of the squash with their contrasting pungency + a sprinkle of chopped, nutty hazelnut for crunch! 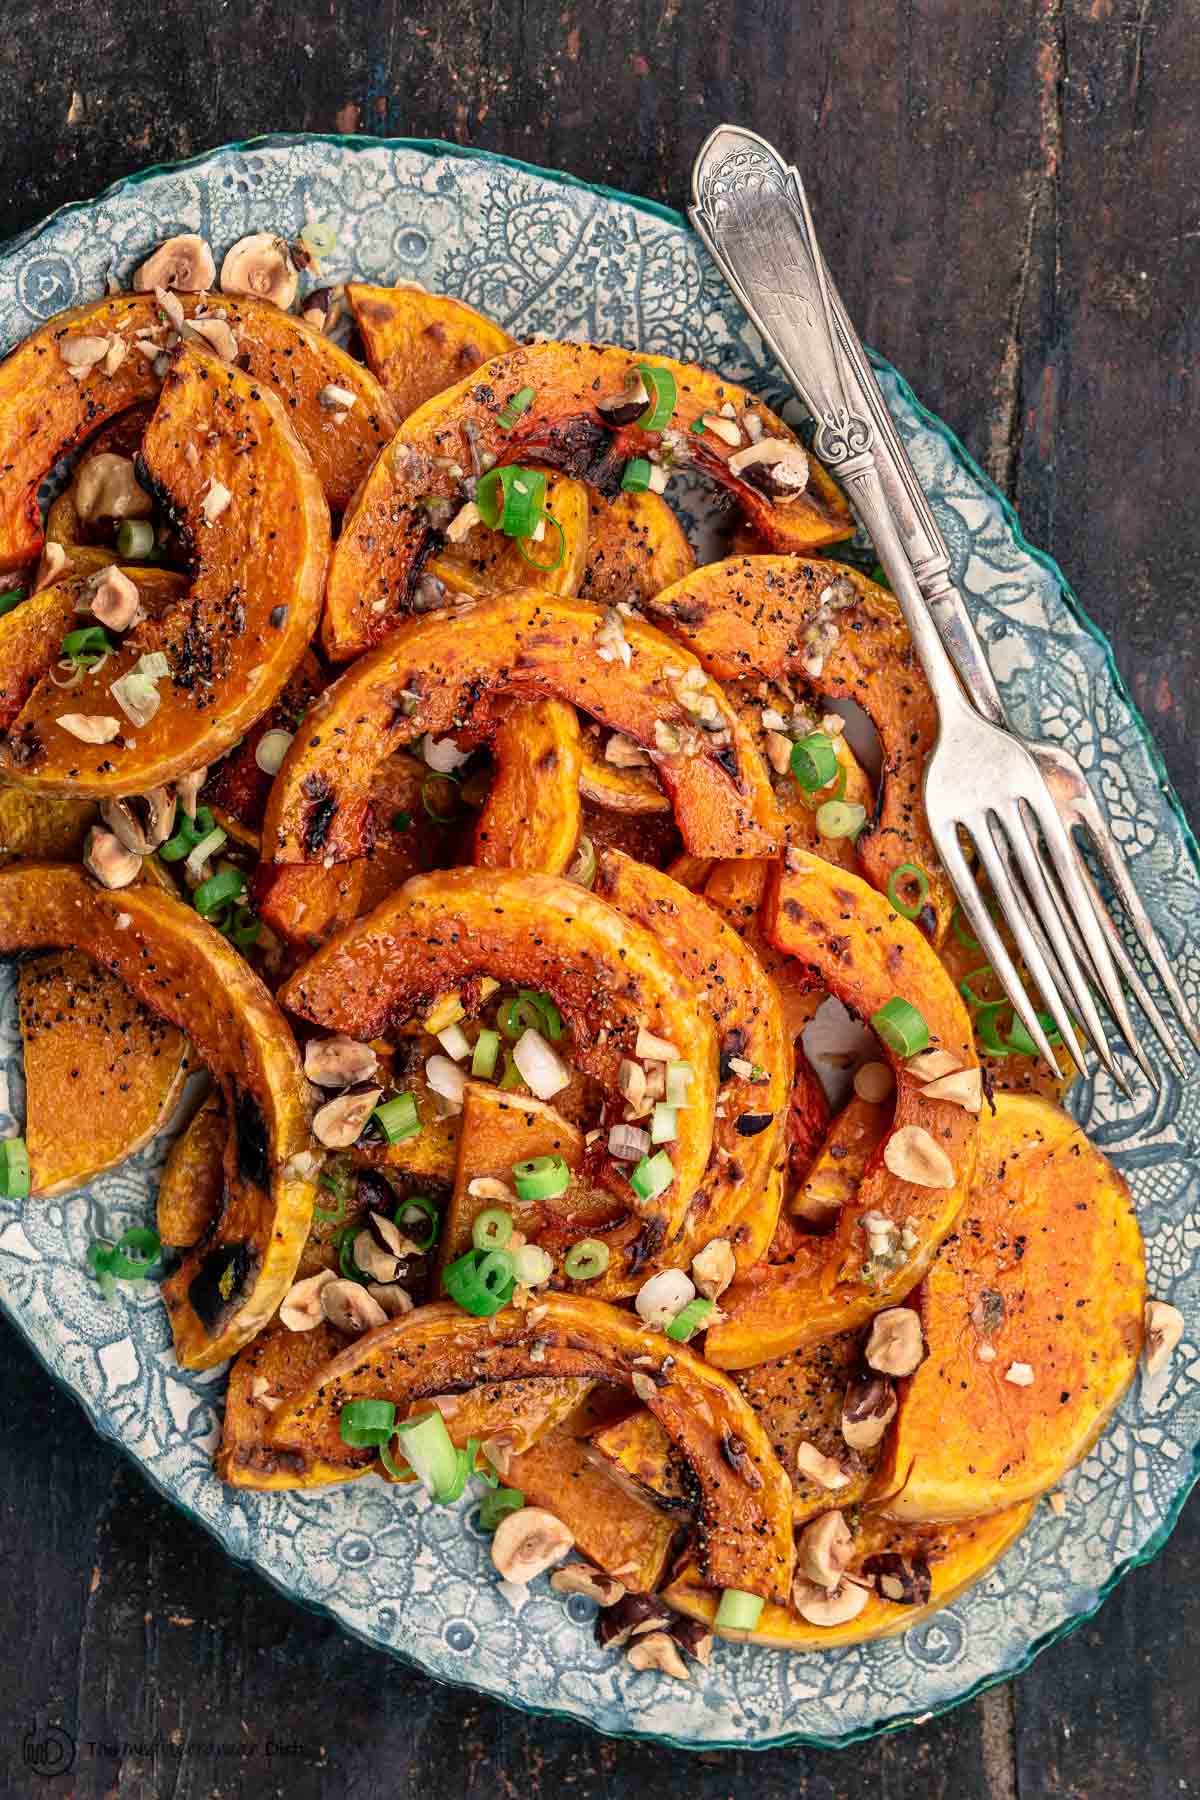 Do you have to peel butternut squash before roasting?While butternut squash skin is edible and it can even turn nice and crisp when roasted, many people prefer to peel it first so it's easier to eat. Butternut squash skin is smooth and thin and the best way to peel it is by using a sharp vegetable peeler. It really is that simple! How to peel butternut squash:To prepare for this roasted butternut squash recipe, here is what you do:
Now you're ready to make this epic pan roasted butternut squash recipe! How to cook butternut squash: step-by-stepFor perfectly tender squash, start with a high heated oven! Here is what you need to do:
Add flavor & finishing touches!Now, what really puts a special spin on your basic butternut squash recipe are Melissa's finishing touches: lime vinaigrette, chopped hazelnuts (walnuts or pecans will work too), and a handful of chopped scallions. I like adding the lime vinaigrette to the butternut squash while still hot, then follow with the chopped nuts and scallions. 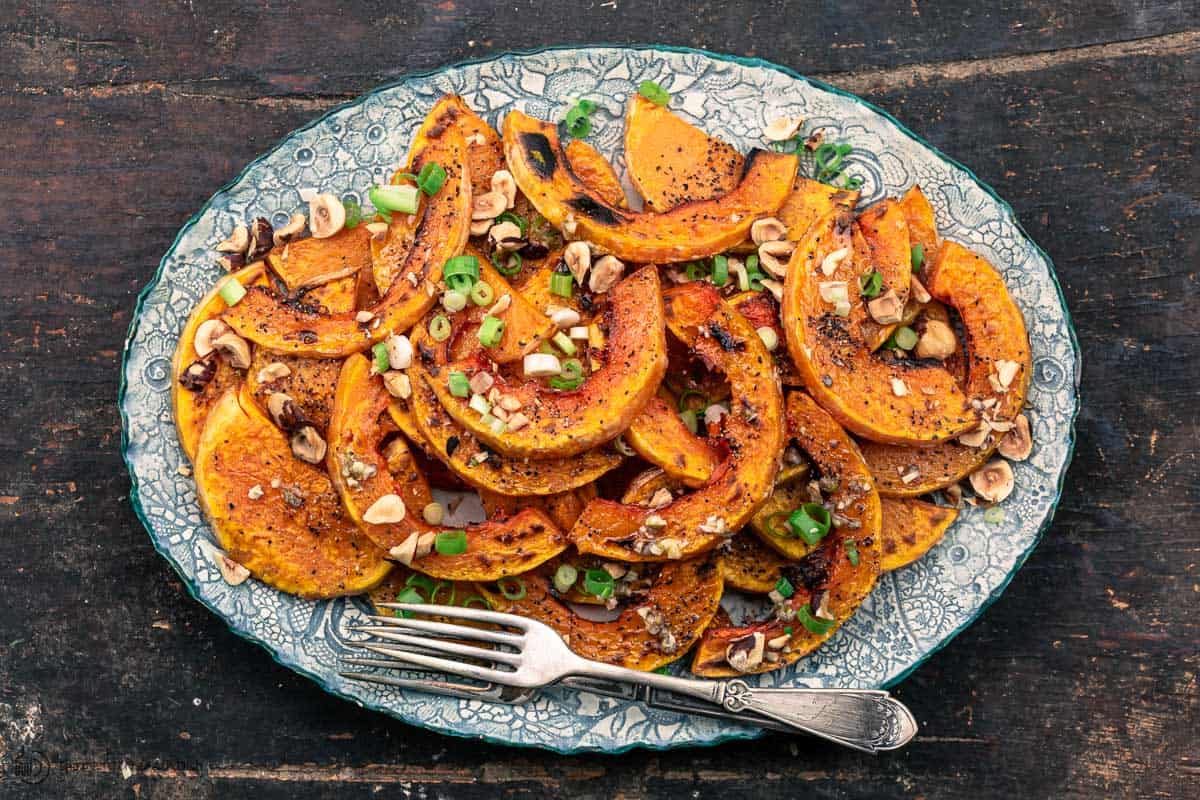 Serve it withFor me, I see this simple side next to any number of mains including: juicy roast turkey breast; cranberry chicken; cornish hen; or even boneless leg of lamb. Make-ahead and storage tipsFor this pan roasted butternut squash recipe, there are a couple of things you can do in advance to save time:
 Recommended Tools & Special Ingredients
More butternut squash recipe etcBrowse our collection of top Mediterranean diet recipes. All Mediterranean recipes.  Roasted Butternut Squash Recipe
This roasted butternut squash is a simple and comforting side dish made extra special with the addition of a bright lime vinaigrette and a sprinkle of crunchy nuts for great texture.
Servings 6 people
Calories 96kcal
Ingredients
Instructions
Notes
Nutrition
Calories: 96kcal | Carbohydrates: 1.5g | Protein: 0.9g | Saturated Fat: 1.2g | Sodium: 97.8mg | Potassium: 45mg | Fiber: 0.6g | Vitamin A: 39.9IU | Vitamin C: 1.8mg | Calcium: 8.6mg | Iron: 0.3mg
The post Simple Roasted Butternut Squash with Lime and Hazelnut appeared first on The Mediterranean Dish. via The Mediterranean Dish https://www.themediterraneandish.com/roasted-butternut-squash-recipe/
0 Comments
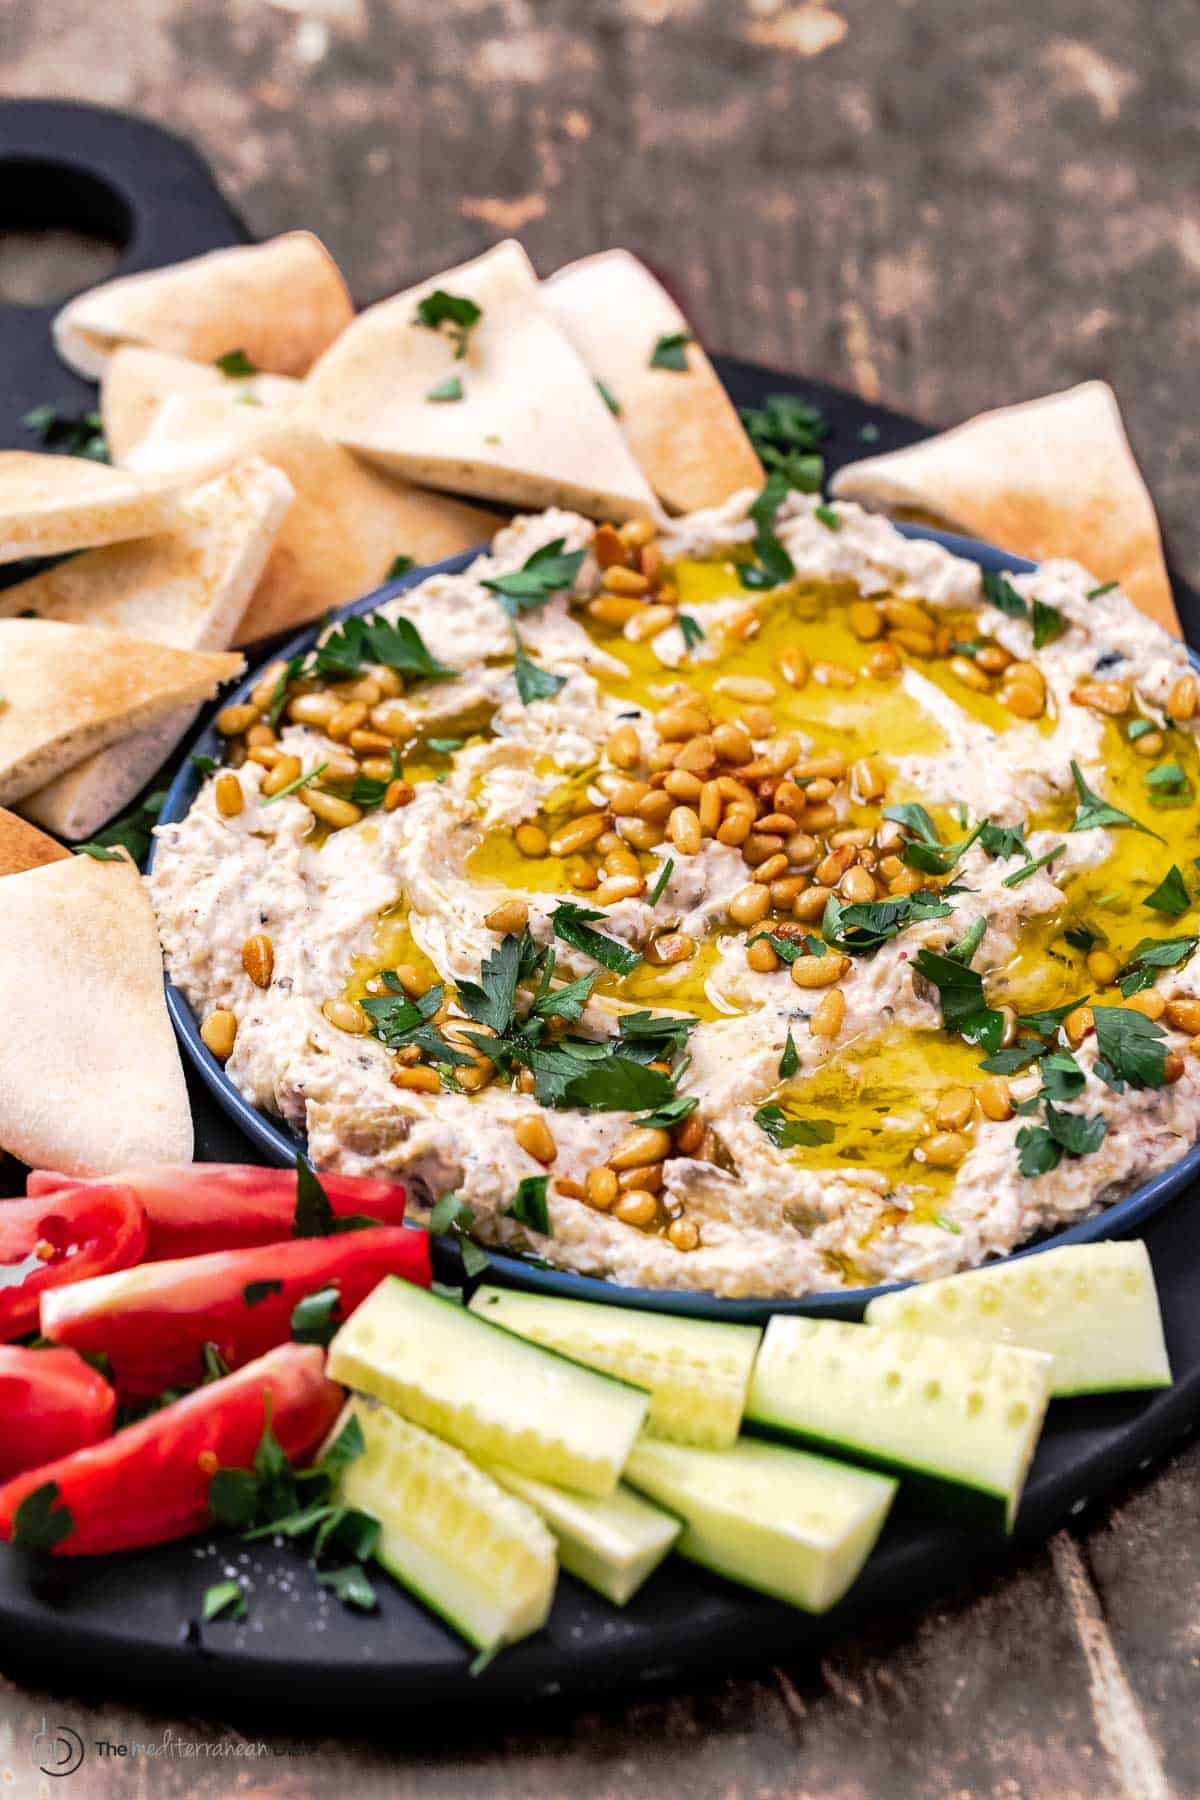
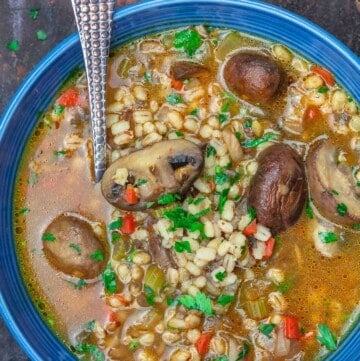
Creamy, savory, smoky eggplant dip with tahini, garlic and citrus, this authentic baba ganoush recipe is a must-try! Expert tips + video. 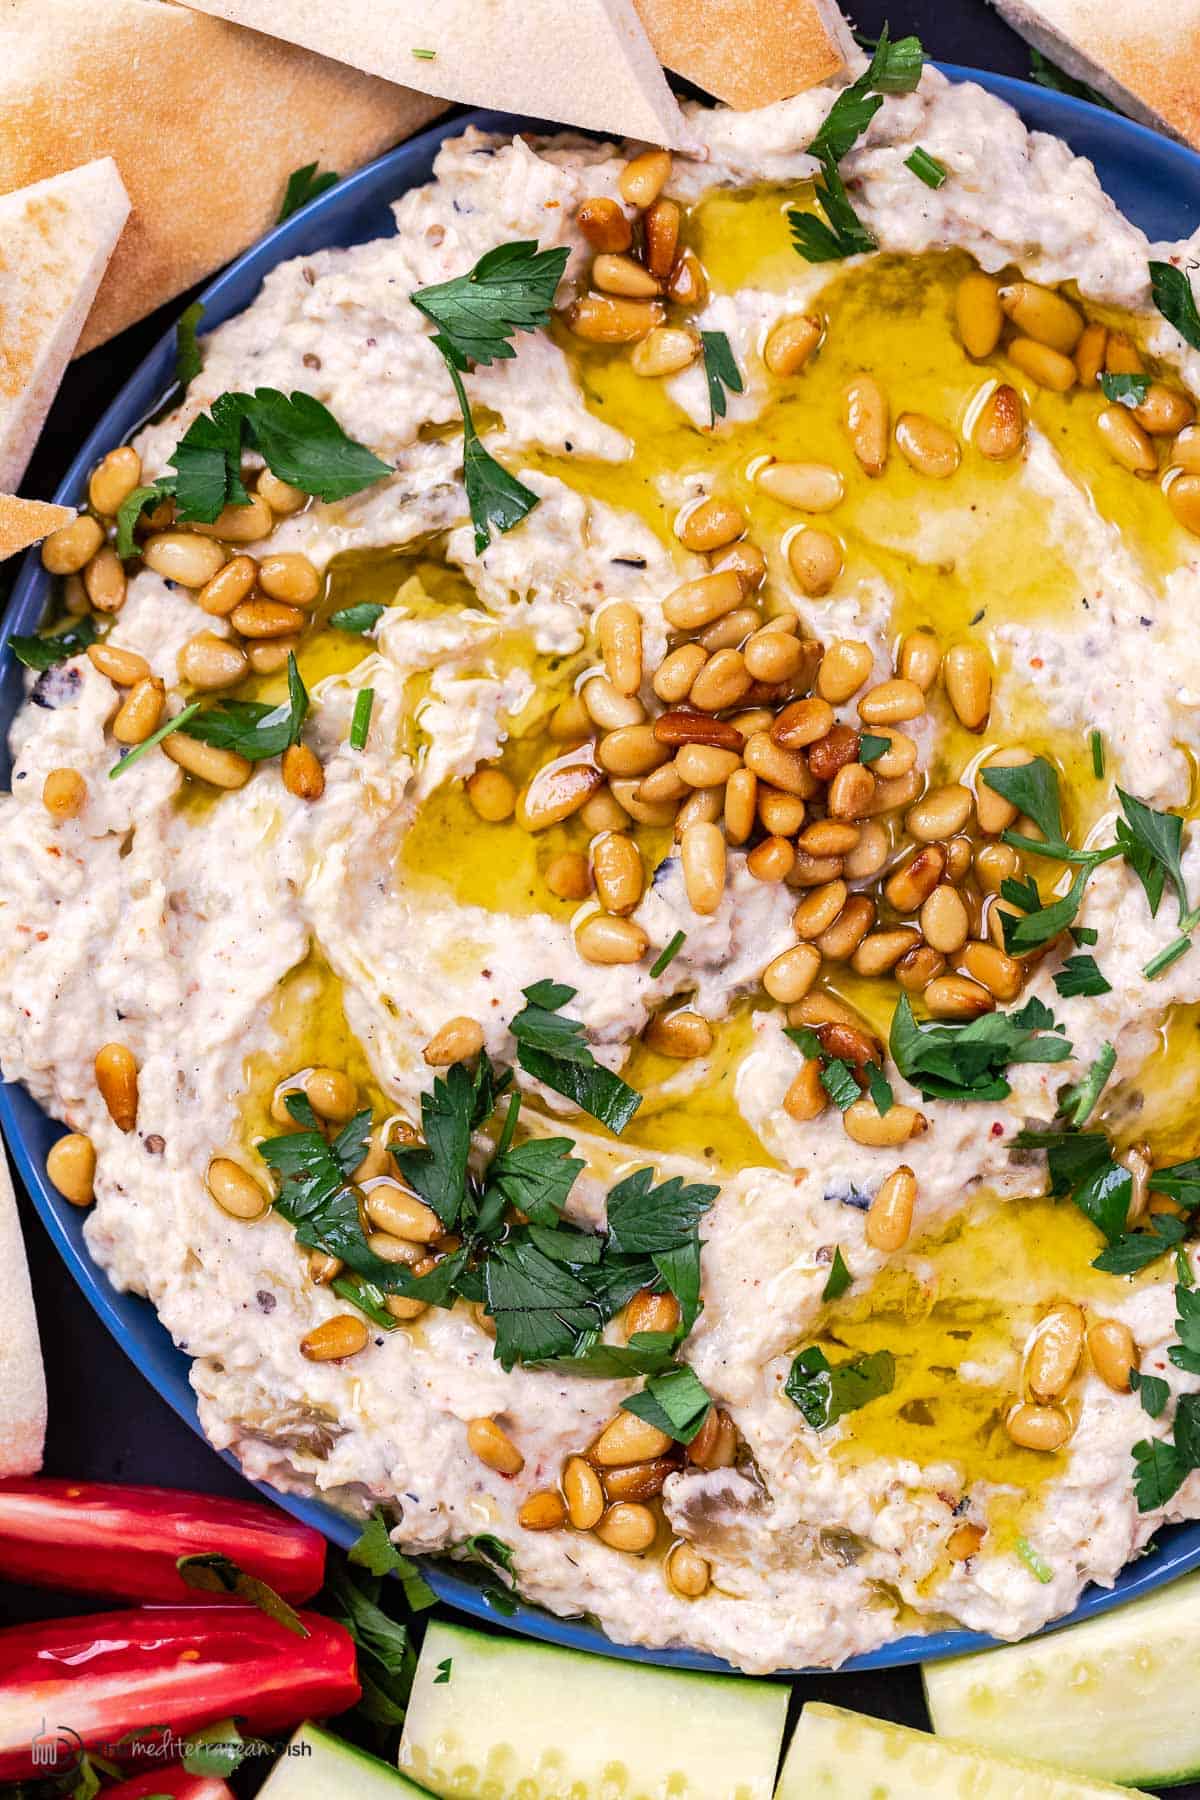 People of the Mediterranean sure love their dips! From Greek tztaziki to hummus, muhammara, and, of course, baba ganoush! I mean, what better way to kick-start your dinner than a creamy, dreamy dip and some homemade pita to go with it?! I'm excited to share with you my family's baba ganoush recipe (smoky eggplant dip), complete with a few secrets that make all the difference! What is Baba Ganoush?Baba ganoush--also known as baba ganouj, muttabal, or salat hatzilim--is a smoky, rich, and creamy eggplant dip, traditionally made by mixing tender roasted (or charred) eggplant and nutty tahini with garlic, citrus, and spices. The literal meaning of baba ganoush or baba ganouj is "spoiled dad," referring to the fact that when you eat it, you just can't help but feel a bit spoiled! There is a reason the French call it caviar d’aubergines, it is that delectable! Luckily, this eggplant dip is easy to make at home, and I'm excited to share with you my family's recipe complete with tips for how to make baba ganoush perfectly every time! Baba ganoush ingredientsLet's walk through the simple ingredients you need to make it:
 How to make baba ganoushBaba ganoush is easier to make than you think, you'll start by cooking the eggplant (either by grilling over open flame or baking it in the oven), and then mixing it with the remaining ingredients to make a delicious dip! Here is how:
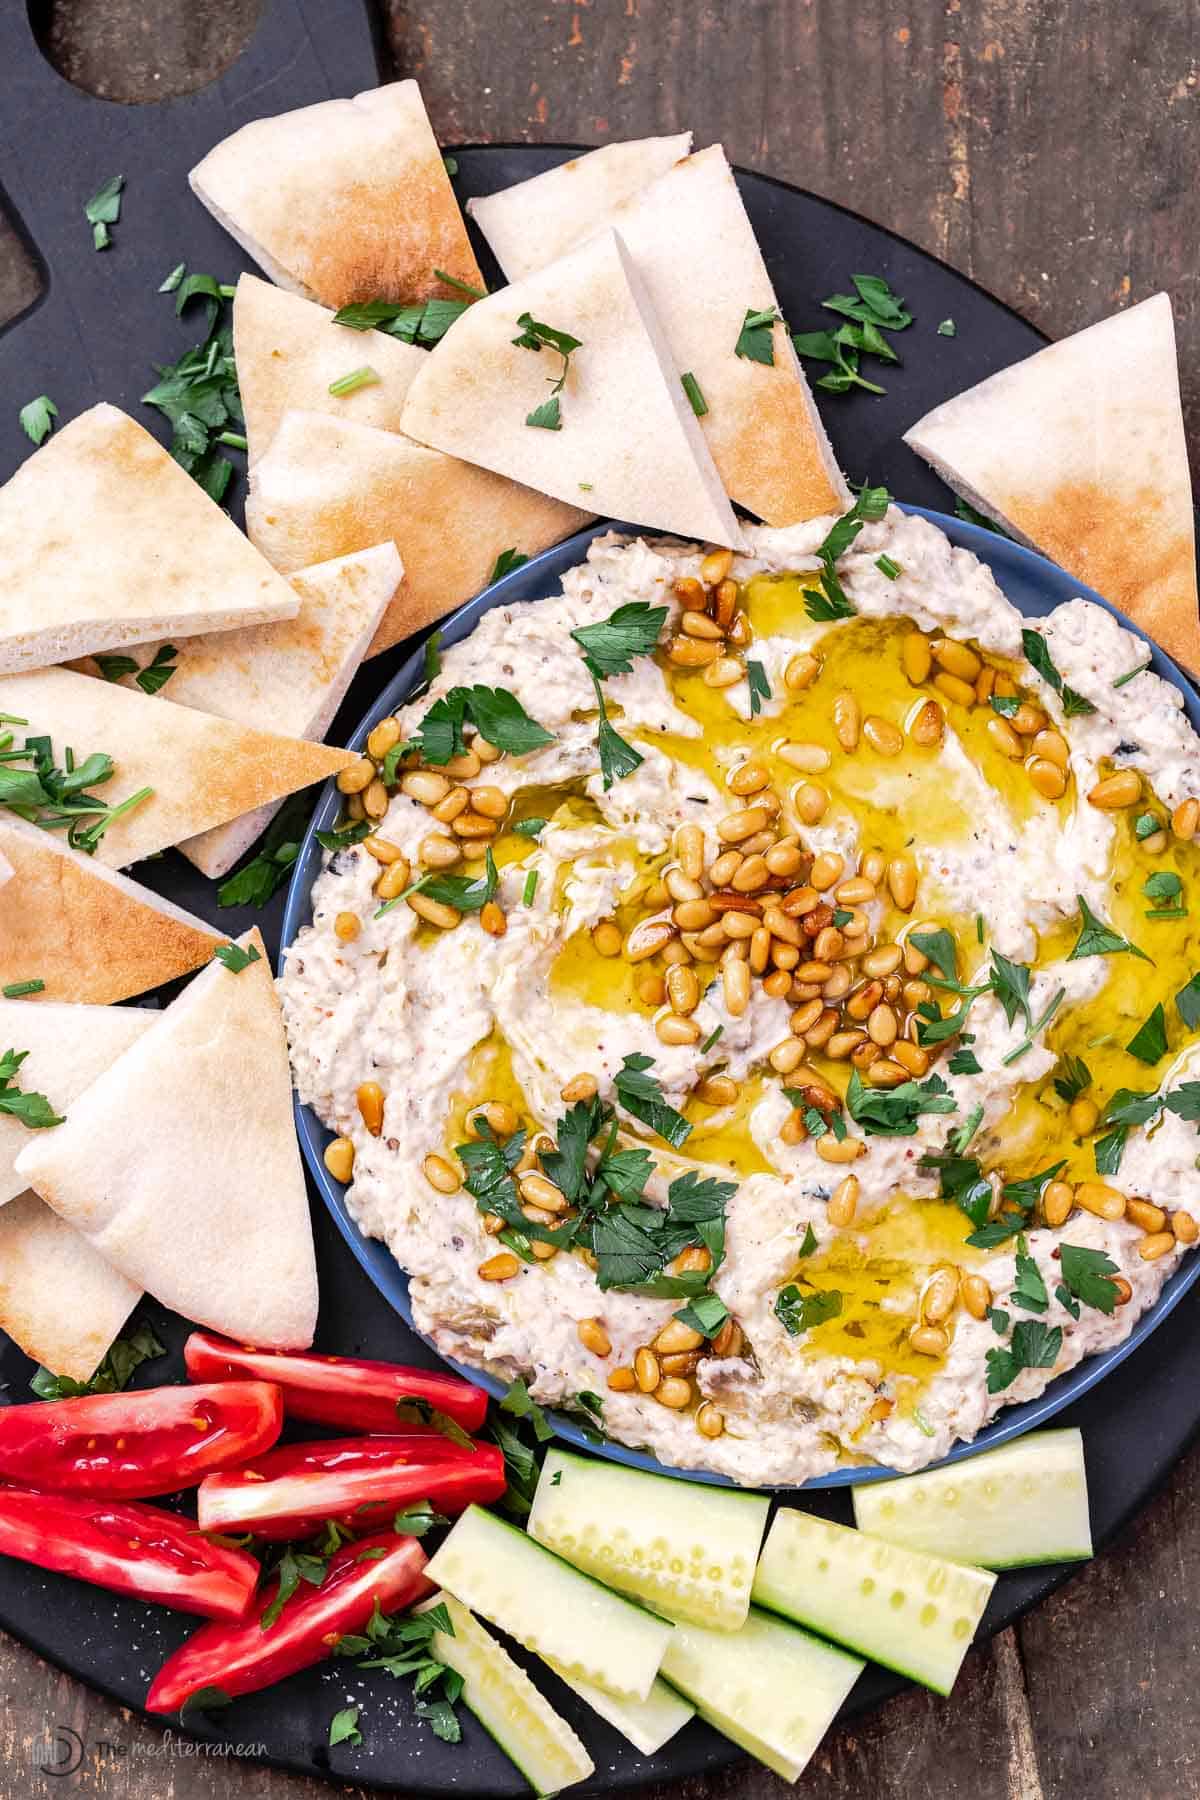 What to serve with itObviously, I'm a big fan of serving babaganoush the traditional way with pita bread to dip. But you can use baba ganoush in different ways:
5 Important tips for the best baba gnoush:
More Recipe FAQs
Is baba ganoush healthy?
Although it tastes super rich, creamy, and delightful indulgent, you can see from the list of ingredients that it is a healthy option. The main ingredient here is eggplant, which is a great source of vitamin B, vitamin E, fiber, and antioxidants. Plus, we have things like garlic, citrus, and tahini, which is also rich in nutrients and contains some anti-inflammatory properties. Baba ganoush is Mediterranean diet friendly, vegetarian (vegan if you don't use the yogurt), and fairly low in carbs.
What is the difference between hummus and baba ganoush?
Both are popular delicious dips throughout the Mediterranean and the Middle East. But, they are two very different dips. While hummus is made of cooked chickpeas with tahini, garlic, and citrus, the star ingredient in baba ganoush is eggplant (grilled or roasted). The preparation method is also different. Hummus is meant to be silky smooth, and it is prepared in a food processor (see how to make hummus). Baba ghanouj is a more rustic dip that is best prepared by gently mixing the cooked eggplants with the rest of the ingredients using a wooden spoon or a fork. A food processor is not recommended for making this eggplant dip because you do risk the texture as it can easily become runny.
How long will it keep?
Homemade baba ganoush can be stored in the fridge in a tight-lid container for about 4 days or so (some say up to a week, but mine never lasts that long). More dips to tryBrowse more Mediterranean recipes  Baba Ganoush Recipe
Here is how to make the best baba ganoush, the smoky, rich, and extra creamy eggplant dip, packed with flavor thanks to tahini, garlic, and lemon juice. Grilling the eggplant over open flame will give you the deepest flavor. And if you have the time, allow the dip to chill in the fridge for 30 minutes to 1 hour. It will thicken and the flavors will meld. Be sure to watch the video and read the notes for additional tips!
Servings 6 or more people
Calories 86.6kcal
Ingredients
Instructions
VideoNotes
Nutrition
Calories: 86.6kcal | Carbohydrates: 8.6g | Protein: 3g | Fat: 5.6g | Saturated Fat: 0.8g | Monounsaturated Fat: 2g | Cholesterol: 0.1mg | Sodium: 204.4mg | Potassium: 250.2mg | Fiber: 3.3g | Vitamin A: 103.6IU | Vitamin C: 11.8mg | Calcium: 30.3mg | Iron: 0.8mg
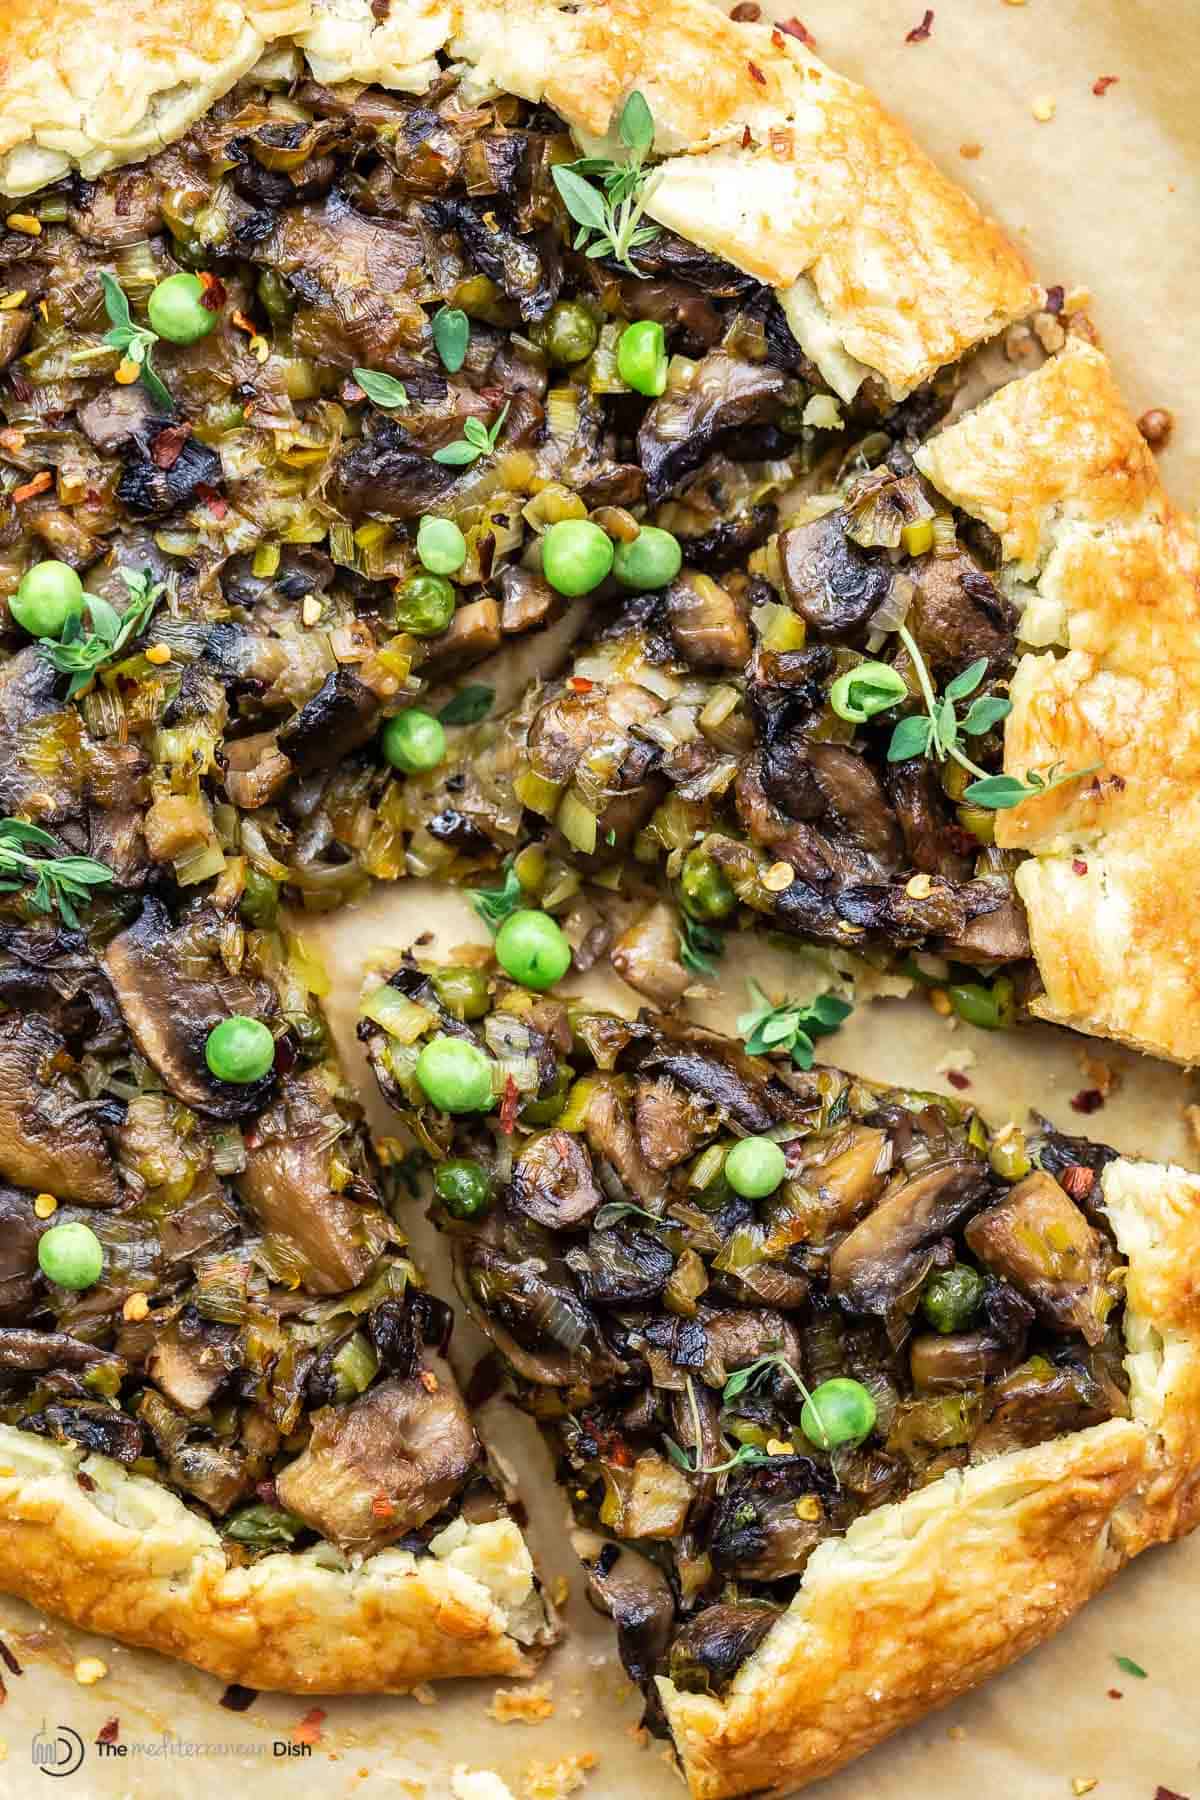
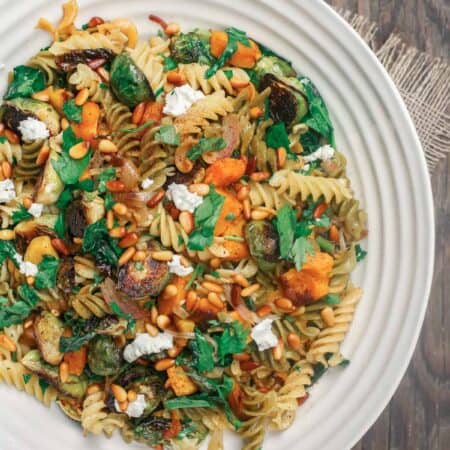
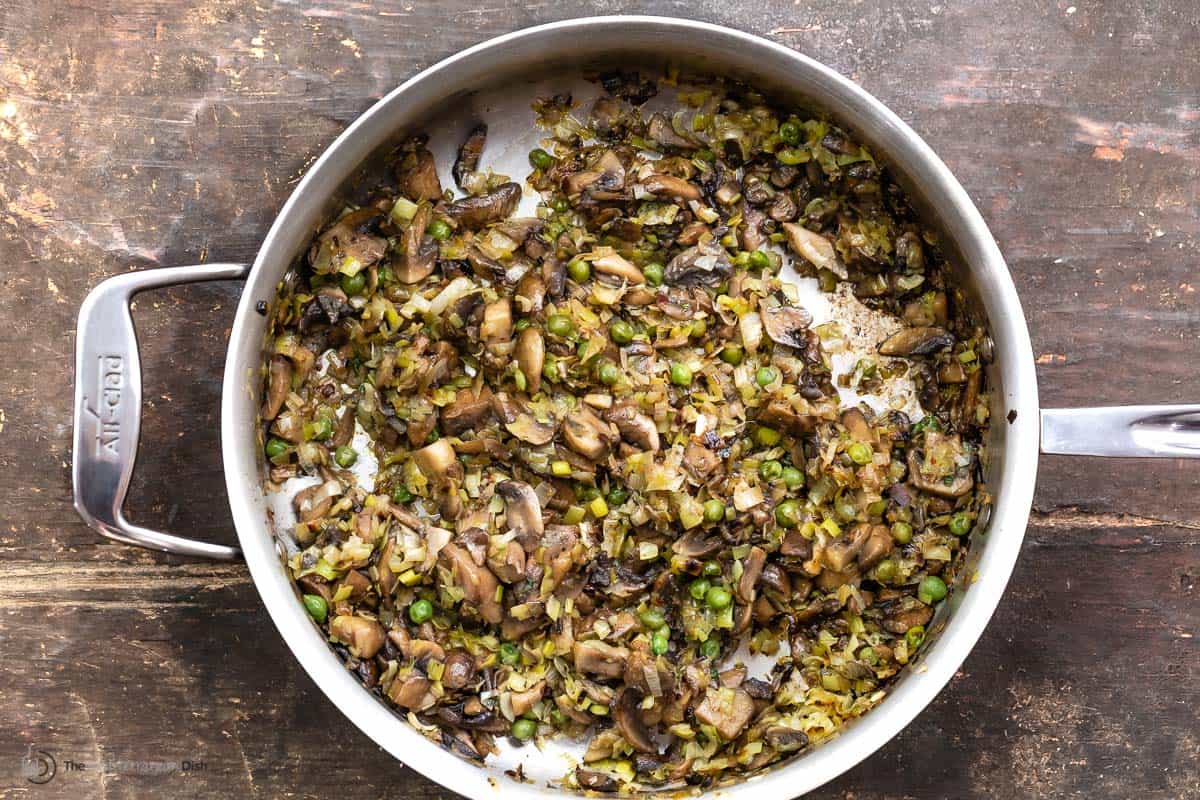
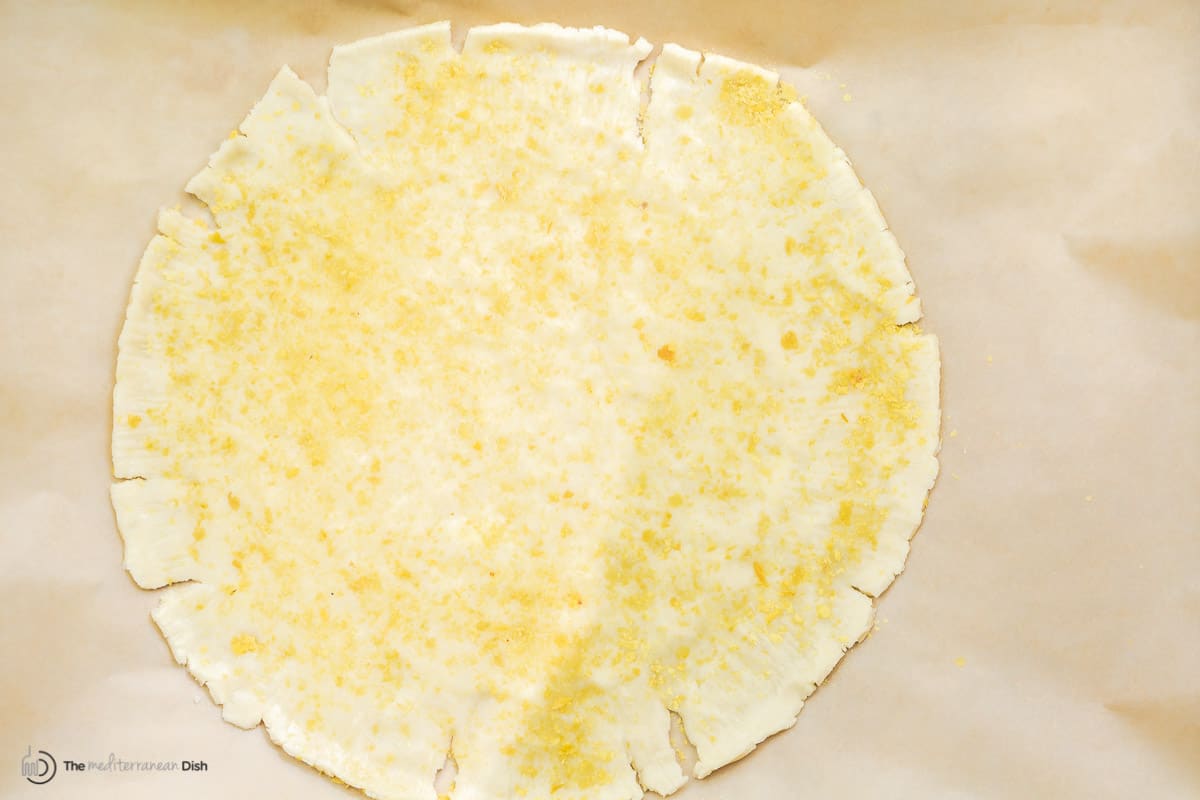
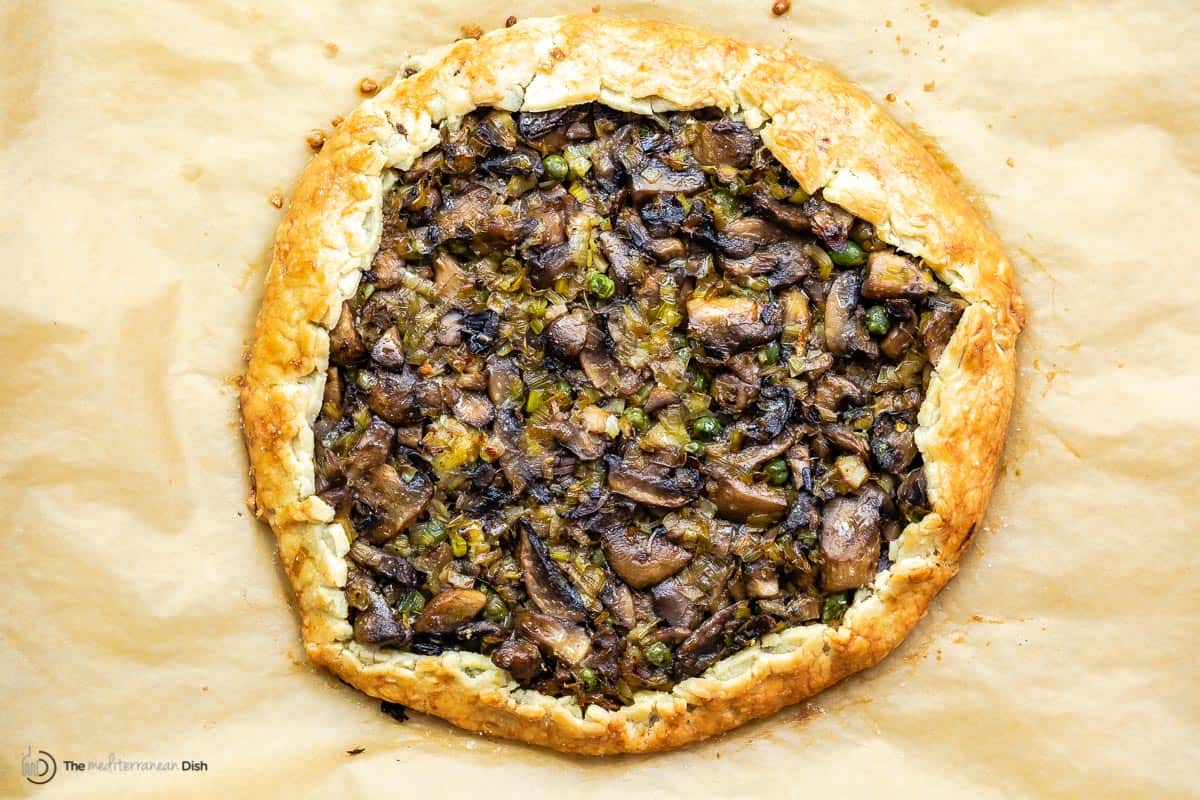
The post Easy Baba Ganoush Recipe appeared first on The Mediterranean Dish. via The Mediterranean Dish https://www.themediterraneandish.com/baba-ganoush-recipe/ Made with pie crust and a handful of fresh ingredients, this Savory Mushroom Galette with Leeks is a delicious vegetarian dish that's perfect served for dinner (with your favorite salad) or as an appetizer for a small crowd. This easy recipe comes from the Weekday Vegetarians, a new cookbook I love by Jenny Rosenstarch. Be sure to enter the giveaway below for a chance to win a copy of this book! 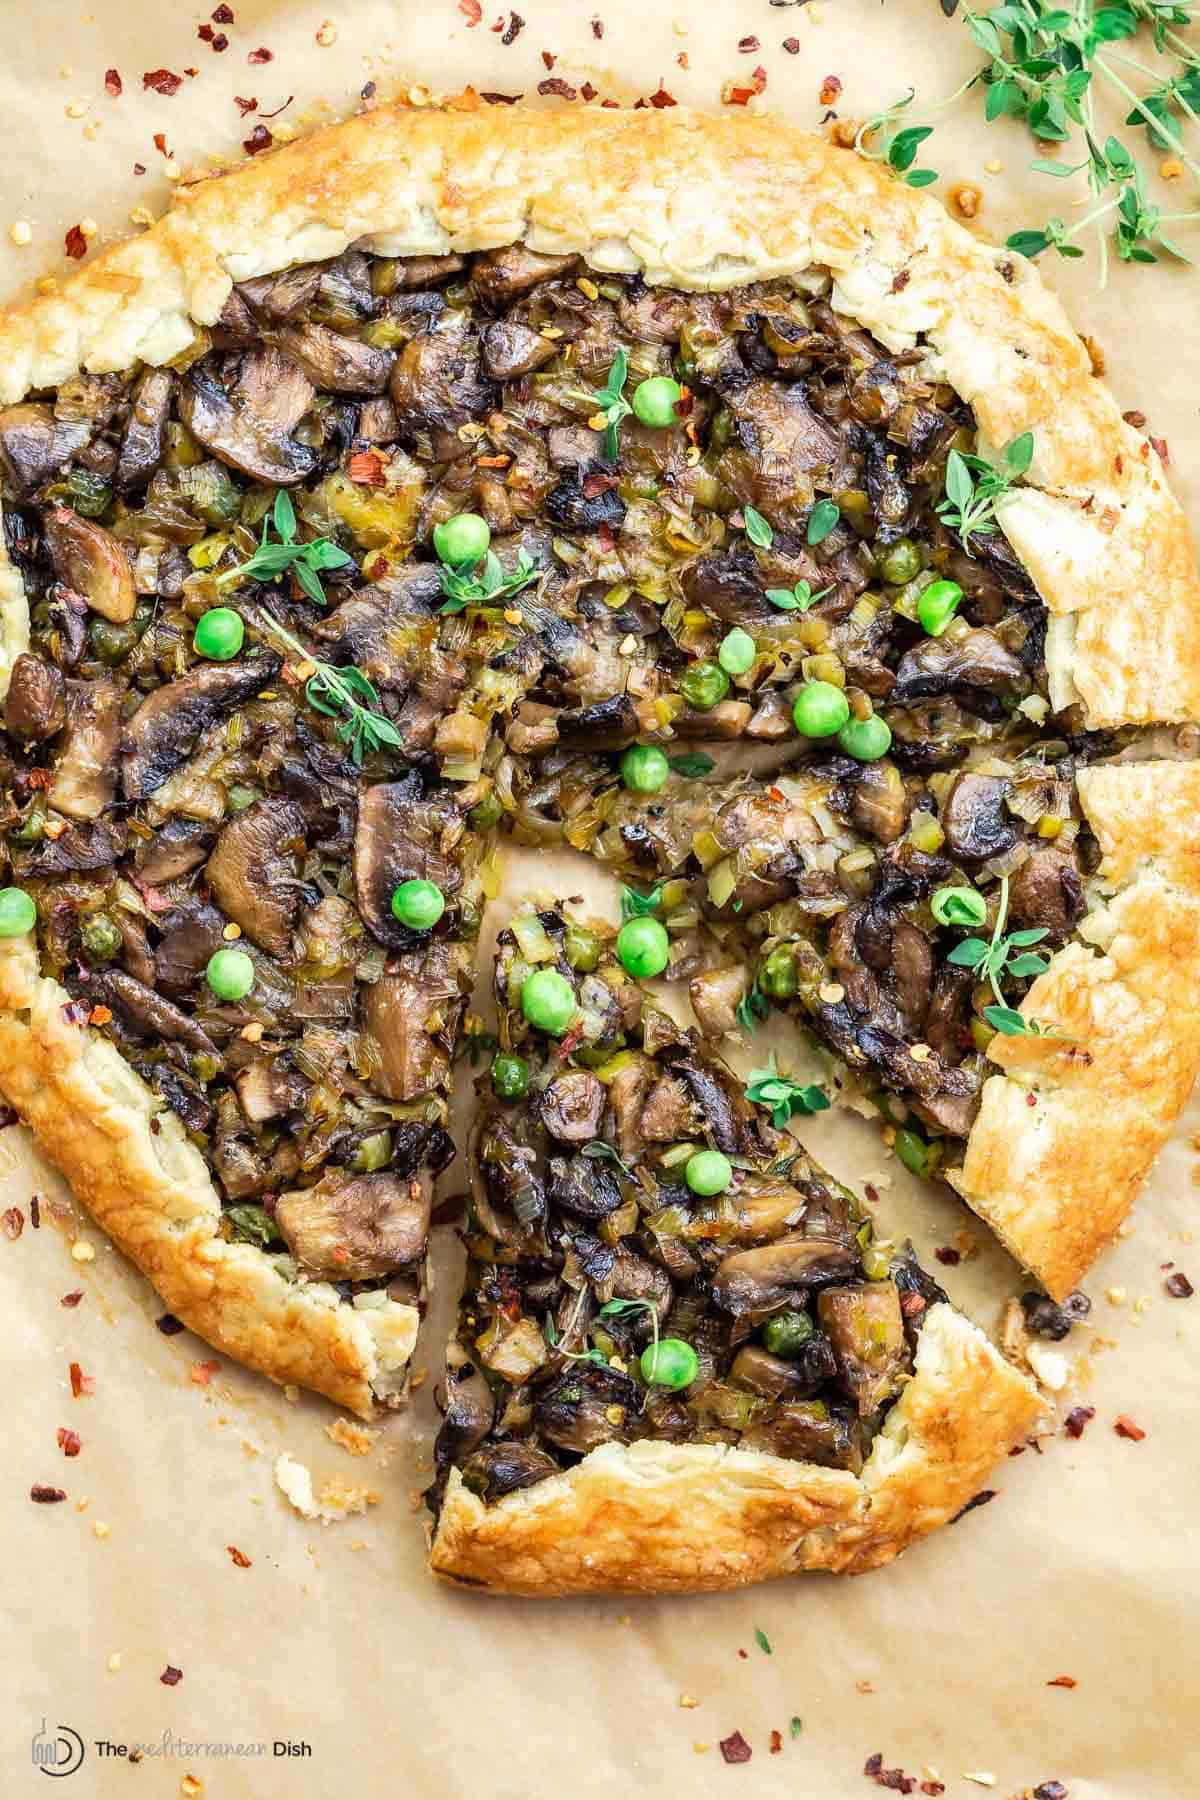 Every so often, I get a chance to share a recipe from a new book in my library. Today's recipe is from Jenny Rosenstrach's cookbook The Weekday Vegetarians with 100 recipes and a real-life plan for eating less meat. While I do eat and enjoy meat, I incorporate several vegetarian meals each week as part of my Mediterranean lifestyle, so this book is right up my alley! It was hard to select just one recipe to share with you today, but this rustic, savory galette recipe (or tart) ultimately won. I mean, who doesn't love to eat pie for dinner! No-Fuss Savory GaletteFirst off, you can use store-bought pie crust for this recipe--bonus points for ease! The golden, crispy pie shell is filled with a combination of comforting sautéed toppings: mushrooms, leeks, and peas. Jenny's secret ingredient here is a dash of nutritional yeast sprinkled all over the pie crust, adding a nutty, savory, cheesy flavor to the tart without the use of cheese! It took about 20 minutes to bake in a high-heated oven. I served it for dinner with a side of fresh shirazi salad. Thumbs up all around! 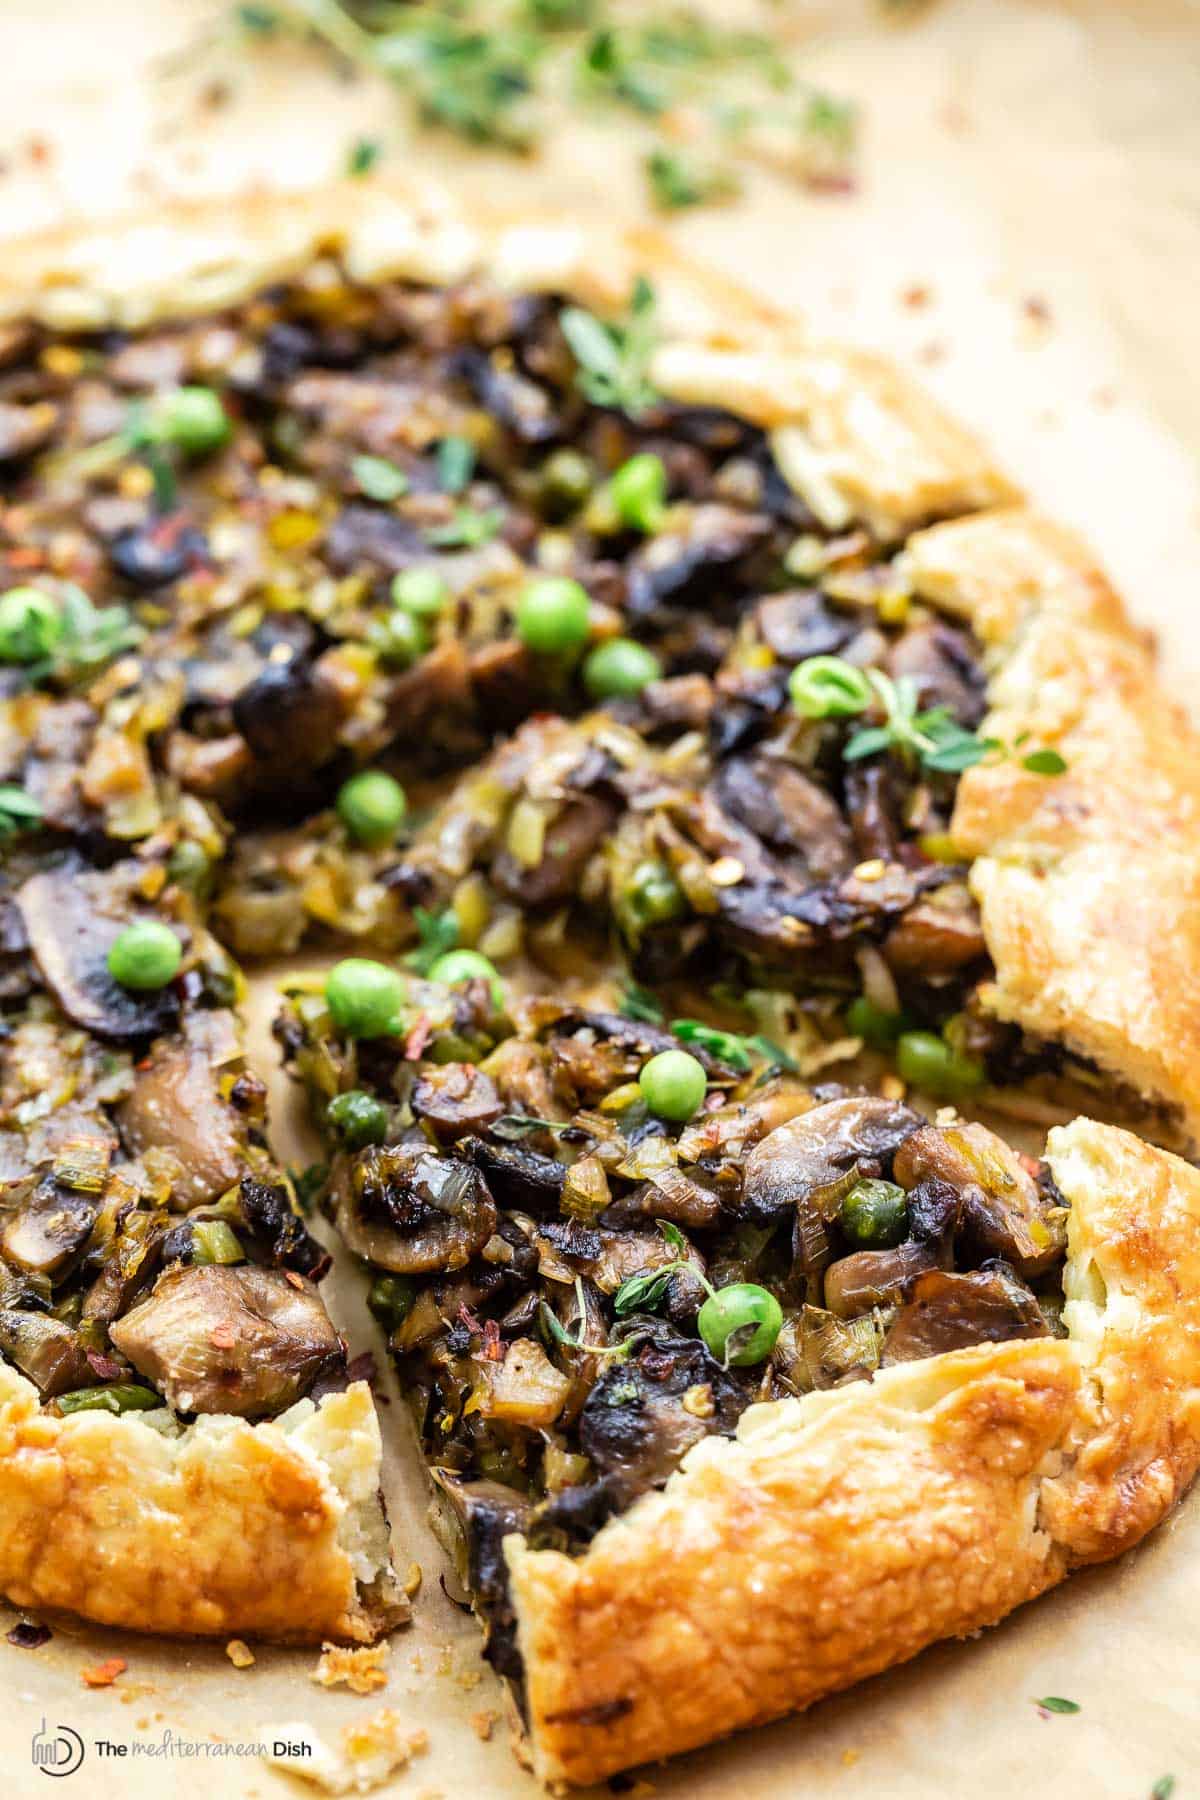 What you'll need to make this galette recipeYou need just a handful of ingredients and spices to make this mushroom-leek galette.
How to make this savory galette with mushrooms and leeksMaking this savory galette is super simple and requires no pie pan or any special equipment. Here is the step-by-step for how to make it (the print-friendly recipe with measurements follows below):
A few tipsIf you're making a galette for the first time, here are some things to keep in mind
 Storage and reheating tipsThis mushroom-leek galette is best when enjoyed the same day. However, if you have leftovers, they can be stored in the fridge for up to 3 days. Reheat your galette in an oven preheated to 350 F, until just warmed through. If necessary, wrap in aluminum foil to prevent burning on the crust. If you try to reheat in the microwave the crust may become soggy so I definitely recommend reheating in the oven. Enter the Cookbook Giveaway!Feeling lucky? Enter the giveaway for a chance to win a copy of The Weekend Vegetarians, courtesy of Clarkson Potter. Please review the terms before participating: a Rafflecopter giveawayMore mushroom recipes:Browse all Mediterranean recipes  Savory Mushroom and Leeks Galette
Made with pie crust and a handful of fresh ingredients, this Savory Mushroom Galette with Leeks is a delicious vegetarian dish that's perfect served for dinner (with your favorite salad) or as an appetizer for a small crowd.
Servings 8 Slices
Calories 188.5kcal
Ingredients
Instructions
Notes
Nutrition
Calories: 188.5kcal | Carbohydrates: 13.6g | Protein: 4.6g | Fat: 13.3g | Saturated Fat: 2.9g | Monounsaturated Fat: 7.9g | Cholesterol: 20.5mg | Sodium: 245.4mg | Fiber: 1.7g | Sugar: 1.5g | Vitamin A: 131IU | Vitamin C: 4.2mg | Calcium: 12.4mg | Iron: 1.2mg
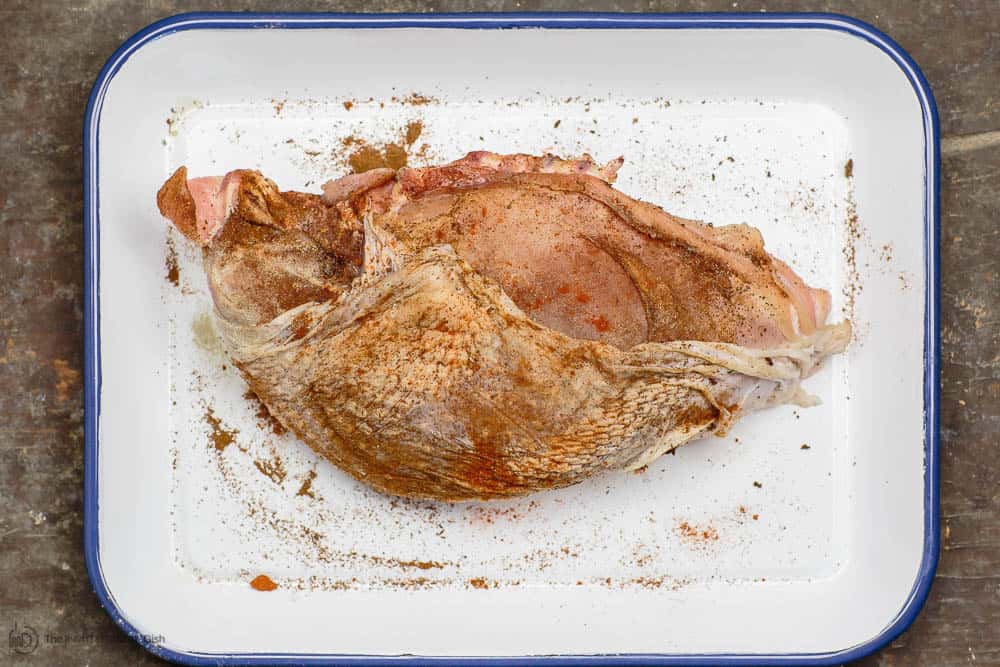
The post Savory Mushrooms and Leeks Galette appeared first on The Mediterranean Dish. via The Mediterranean Dish https://www.themediterraneandish.com/savory-mushroom-galette/ This no-fuss roast turkey breast recipe is the answer to getting beautiful, never-dry turkey meat (no flipping or basting needed). And you'll love the bold Mediterranean garlic and herb coating. Be sure to read through for important tips on how to cook turkey breast perfectly every time! 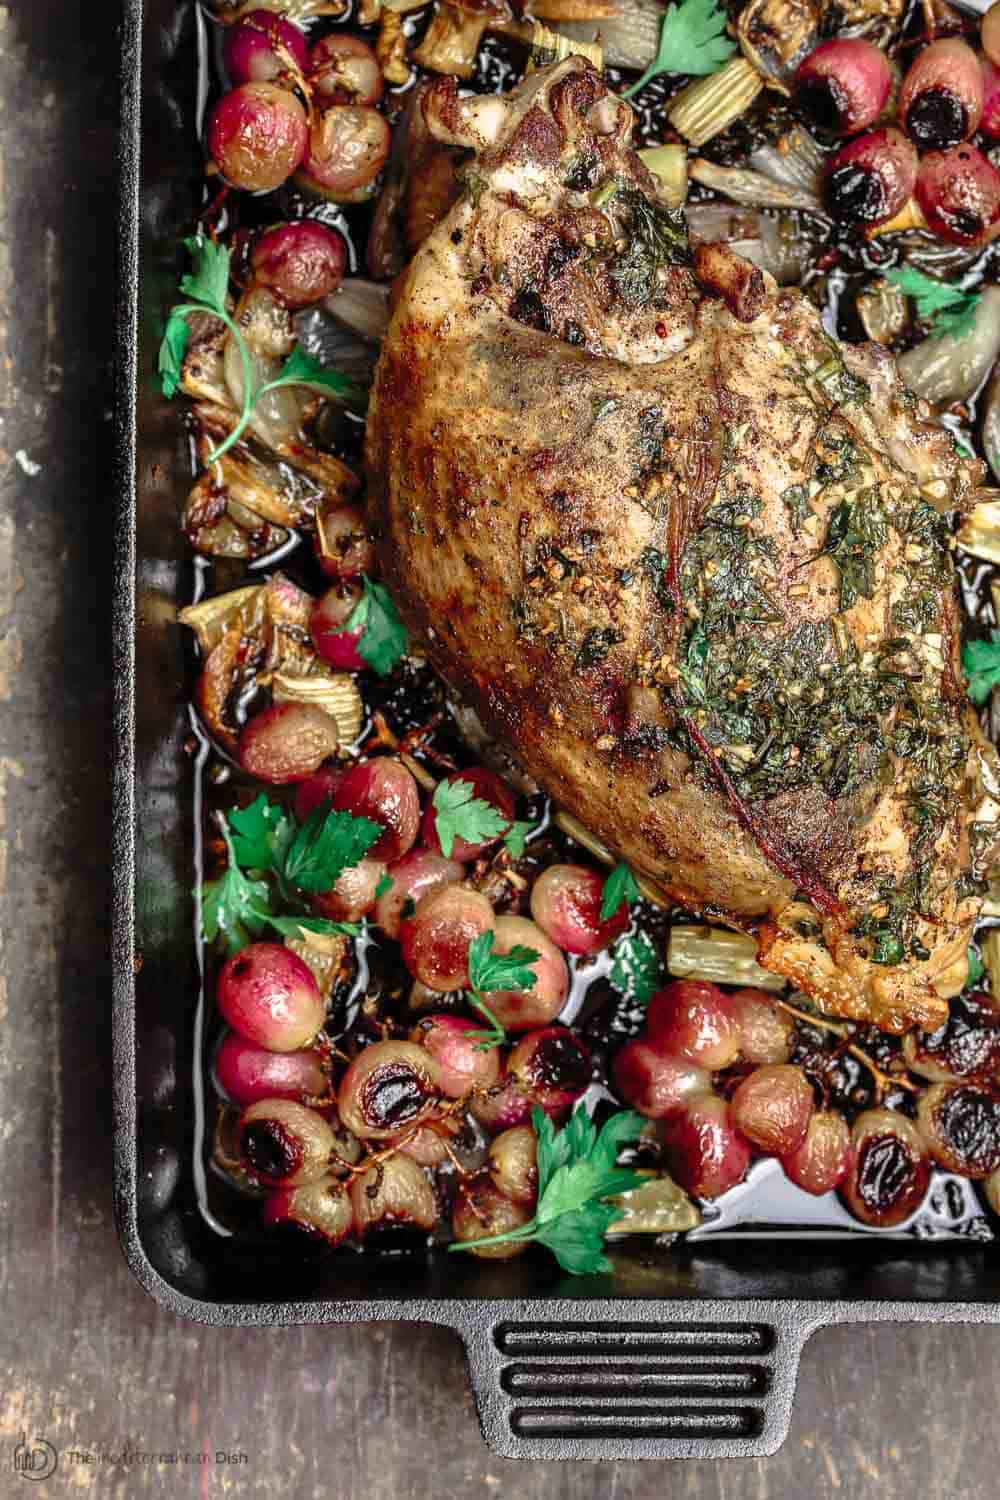 No-Fuss Oven Roasted Turkey BreastTurkey is hands-down the prized holiday meat. And for the health-conscious, it's a great lean-protein for any night of the week! But why would you want to roast just the breast as opposed to the whole bird? If you're hosting a smaller dinner, turkey breast could easily feed 4 to 6 people. Or maybe you just want great, juicy turkey for lunch sandwiches or to add on top of some delicious toasted orzo or roasted cauliflower salad. Roasting a turkey breast is far less involved than roasting a whole bird--no flipping or fussing. With just a few tips, you'll learn how to roast turkey breast perfectly every single time! And you'll love the coating of bold Mediterranean spices, garlic and herbs! To cook your turkey breast perfectly every time, there are a few basic questions to answer: Boneless or bone-in turkey breast?I am partial to bone-in turkey breast (with the skin on, of course). Turkey breast attached to the bone but with the legs and wings removed is called the turkey crown. It is a meaty part of the turkey and can make a beautiful centerpiece on the table. But more importantly, I choose bone-in breast because it is more flavorful and will yield juicier meat.  How long to roast turkey breast?First, what temperature you roast the turkey breast will determine how long you need to roast it. In this recipe, the oven is first heated to 450 degrees F, but as soon as you put the turkey in, turn the heat down to 350 degrees F. It will take 15 minutes per pound or until the turkey juices run clear (start checking after 45 minutes then every five minutes after that). How do you keep turkey breast from drying out?Like chicken breast, turkey breast has the tendency to dry out if not cooked properly. Here are a few tips to keep in mind:
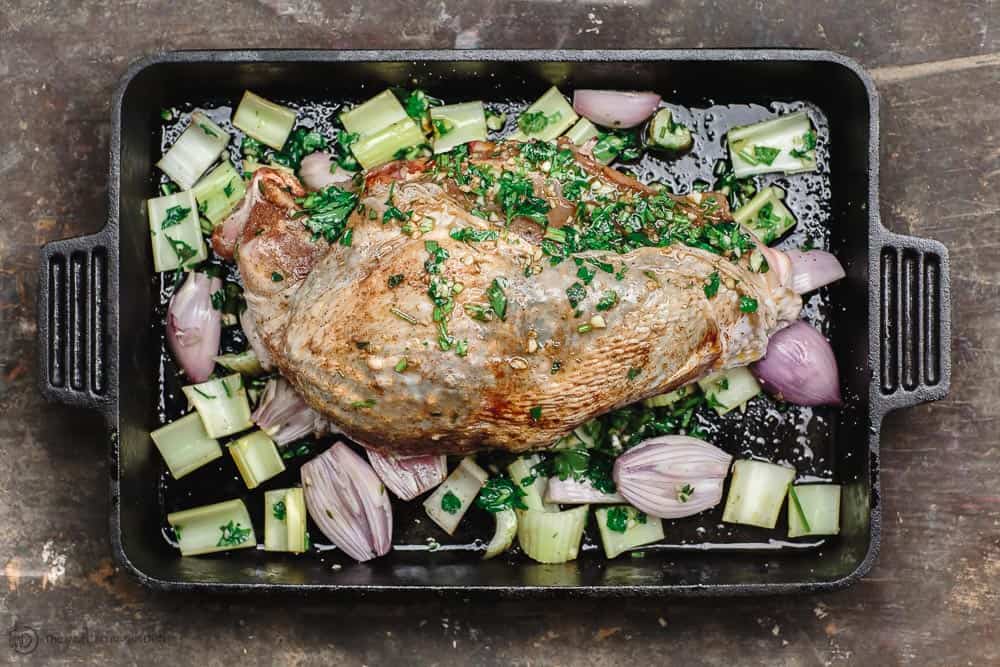
How to roast turkey breast:Follow these steps for the juiciest most flavor packed oven roasted turkey breast (print-friendly recipe to follow):
How long will it keep?If you end up with leftovers (or if you make more by doubling the recipe. See notes), you can easily store leftovers for later use. Refrigerate in a tight-lid glass containers for up to 4 days. Or divide leftovers into individual portions and freeze. Thaw in the fridge overnight. Use cold or warm. What to serve along?I took advantage of the heated oven and roasted some grapes first before I made the turkey. If you haven't tried roasted grapes, you simply must, they're a simple sweet touch that I like in lieu of cranberry sauce. But to throw a festive meal together, here are a few more delicious options to serve with this turkey breast recipe:
Hungry for more? Here are all our Mediterranean Recipes! Check out our 50+Top Mediterranean Diet Recipes.  Juiciest Garlic Herb Roast Turkey Breast Recipe
BEST roast trukey breast recipe! Fool-proof guide for juiciest turkey breast with perfectly crispy skin. Flavored with Mediterranean spices, garlic & herbs. See suggesgtions for what to serve along!
Servings 6 people
Calories 254.2kcal
IngredientsFor Turkey
For Grapes
Instructions
VideoNotes
Nutrition
Calories: 254.2kcal | Carbohydrates: 7.3g | Protein: 30.7g | Saturated Fat: 3.2g | Cholesterol: 80.7mg | Sodium: 2606.7mg | Potassium: 126.9mg | Fiber: 1.4g | Vitamin A: 185.1IU | Vitamin C: 2.5mg | Calcium: 18mg | Iron: 0.5mg
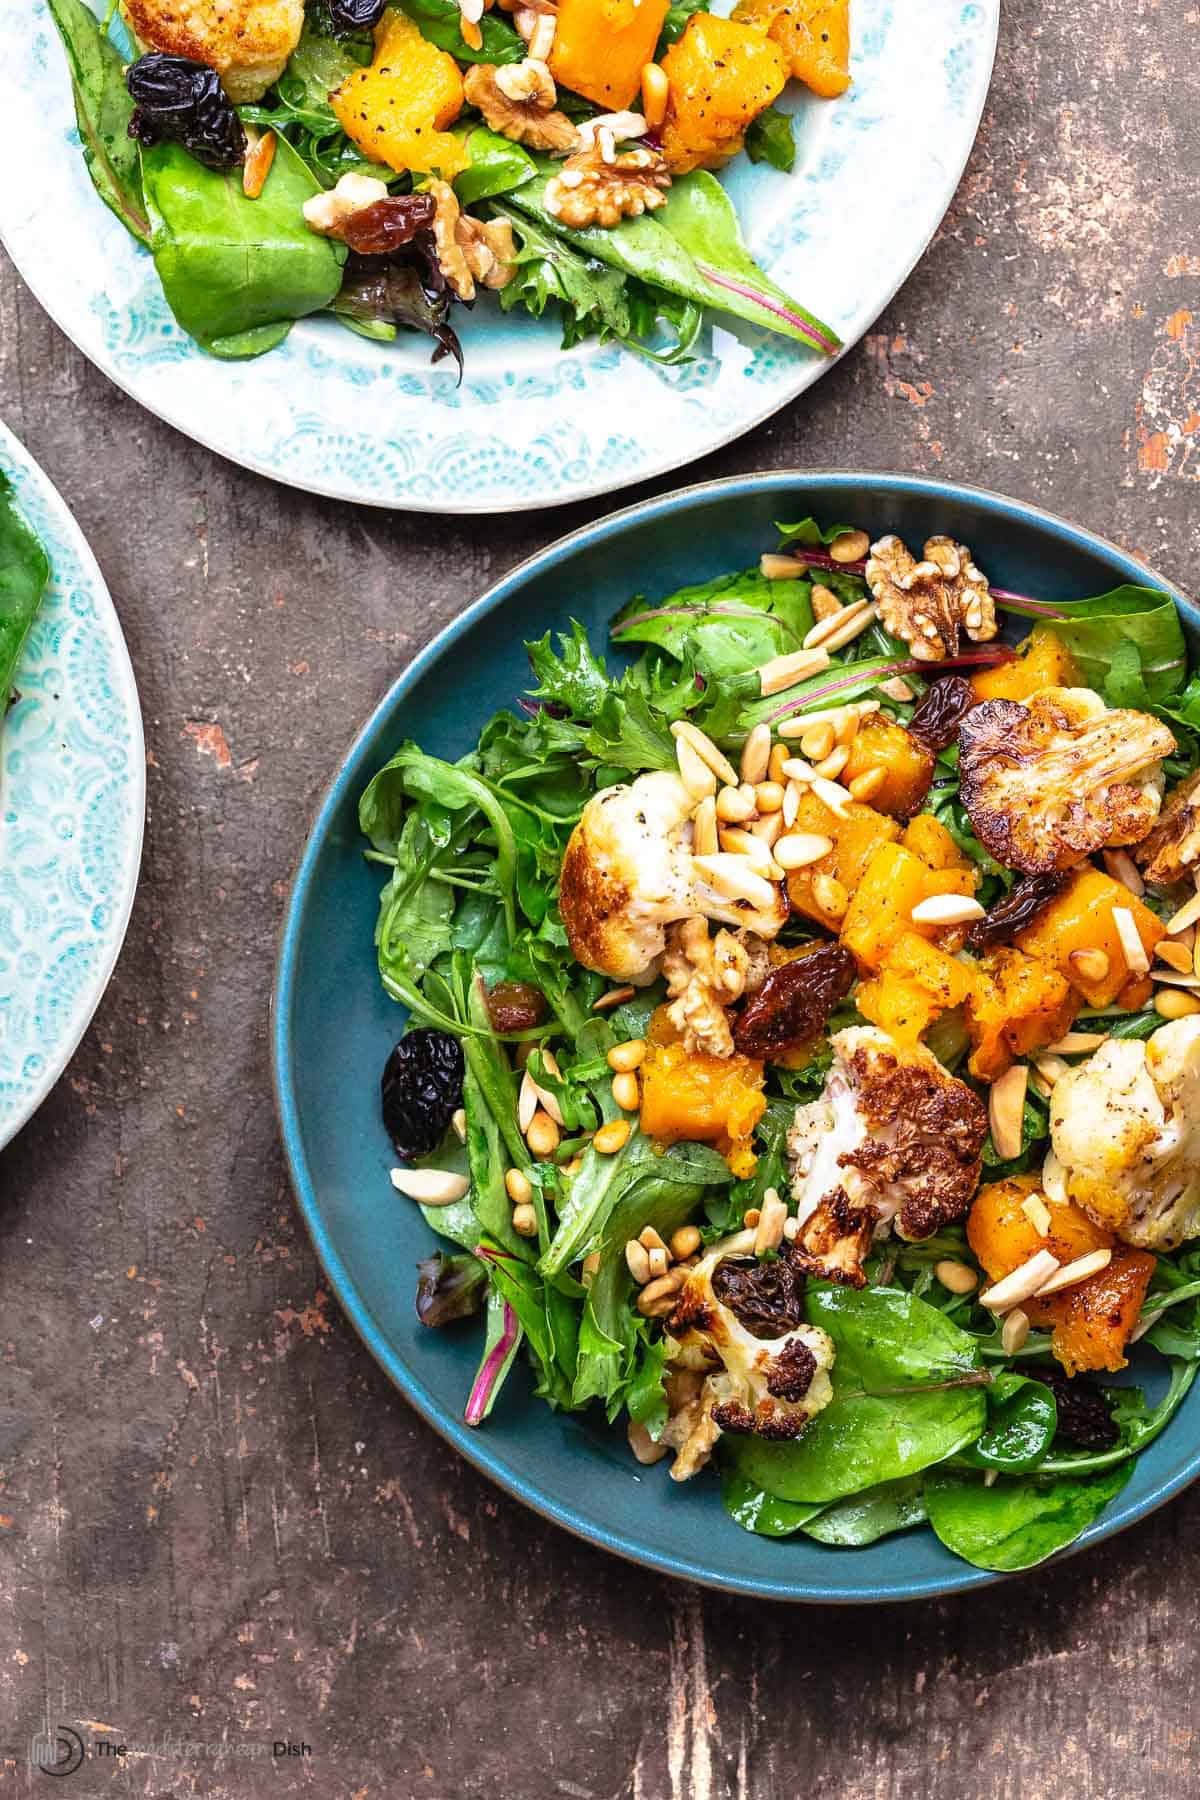
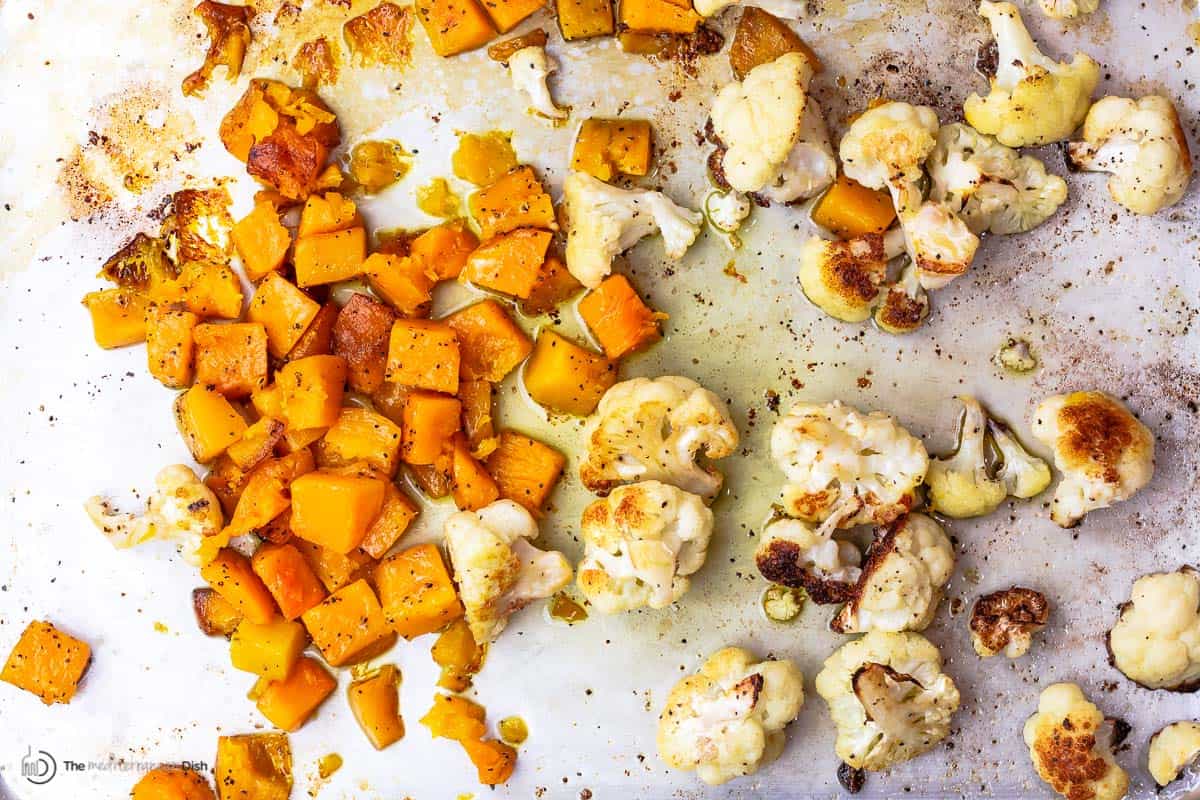
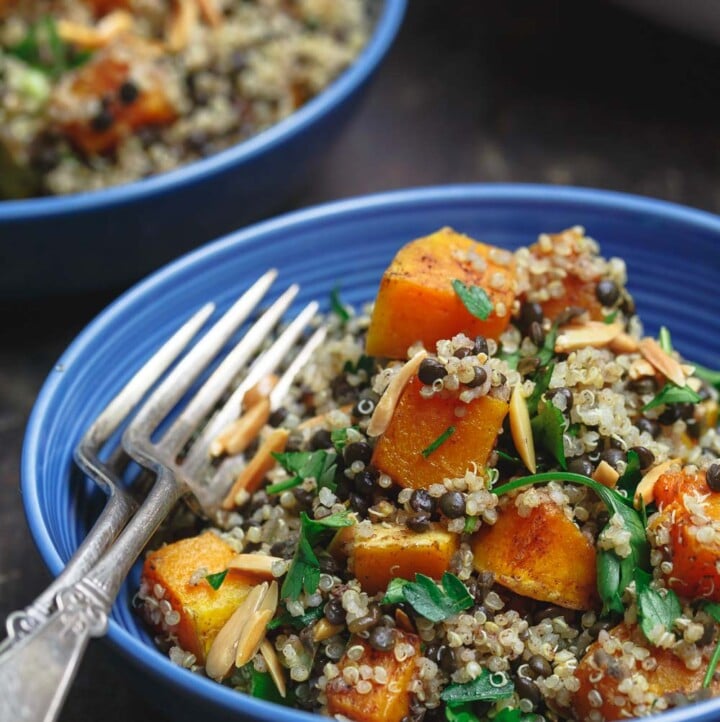
*This post originally appeared on The Mediterranean Dish in 2018 and has been recently updated with new information and media for readers' benefit. Enjoy! The post Garlic and Herb Roast Turkey Breast (Extra Juicy!) appeared first on The Mediterranean Dish. via The Mediterranean Dish https://www.themediterraneandish.com/roast-turkey-breast-recipe/ Simple, and festive roasted cauliflower salad with butternut squash, spring greens, and a lemon-honey vinaigrette! Serve this fall salad for lunch or pair it with your favorite entree for the perfect meal. 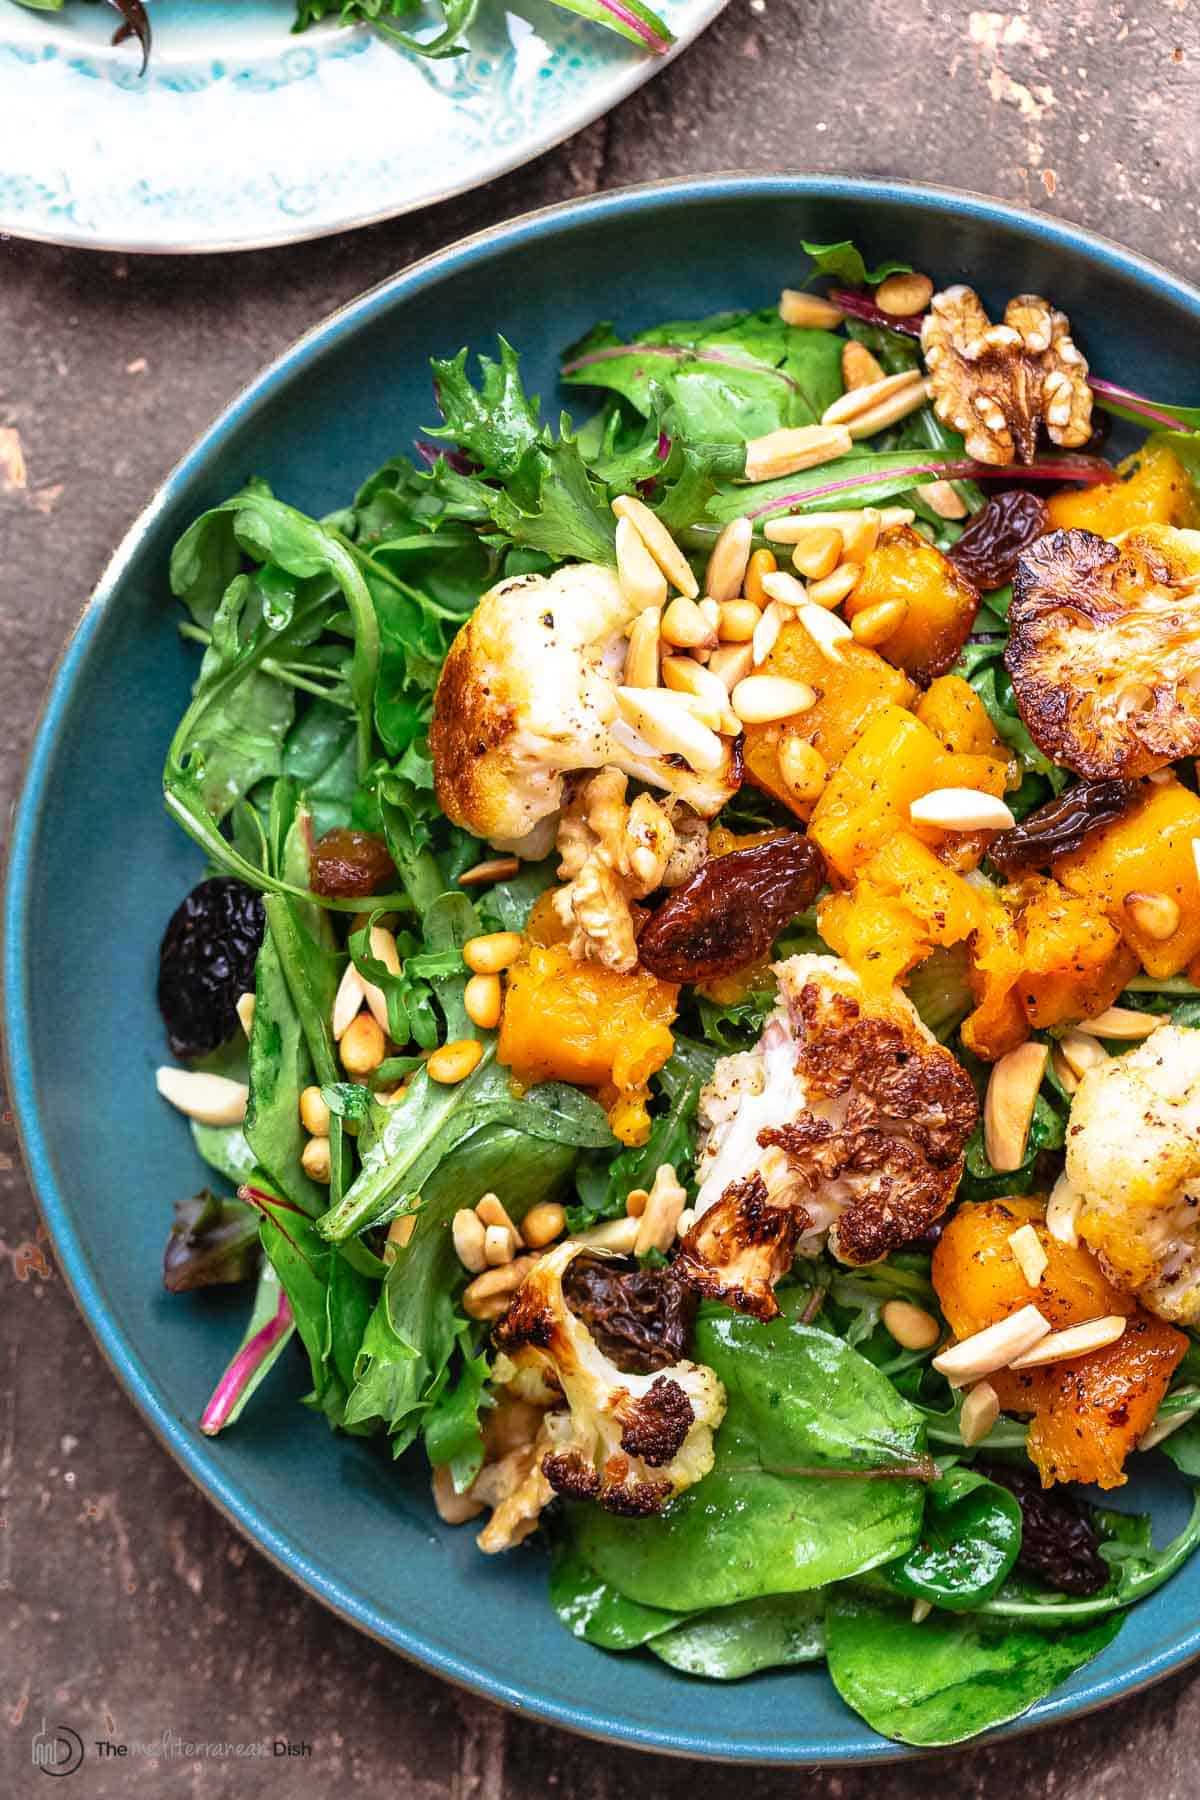 The perfect cauliflower salad for the fall!The beauty of this healthy roasted cauliflower salad with butternut squash, is that it combines the simple comforts of roasted vegetables with fresh, crisp salad greens – all dressed in a delightfully bright lemon-honey vinaigrette. Roasted vegetables, particularly roasted roots, taste great simply cooked with a drizzle of olive oil and salt--the kind of comfort I look forward every fall. In this simple recipe, cauliflower and butternut squash share the spot light as the star ingredients. Roasted to tender perfection, then tossed (while still warm) in a light lemon and honey vinaigrette, and piled on top of spring greens, you have the perfect fall roasted vegetable salad. For texture, I love to add some toasted nuts and raisins or cranberries, which make this salad a festive little dish. If I were the planning type, I'd file this roasted butternut squash and cauliflower salad under "Thanksgiving side dishes." 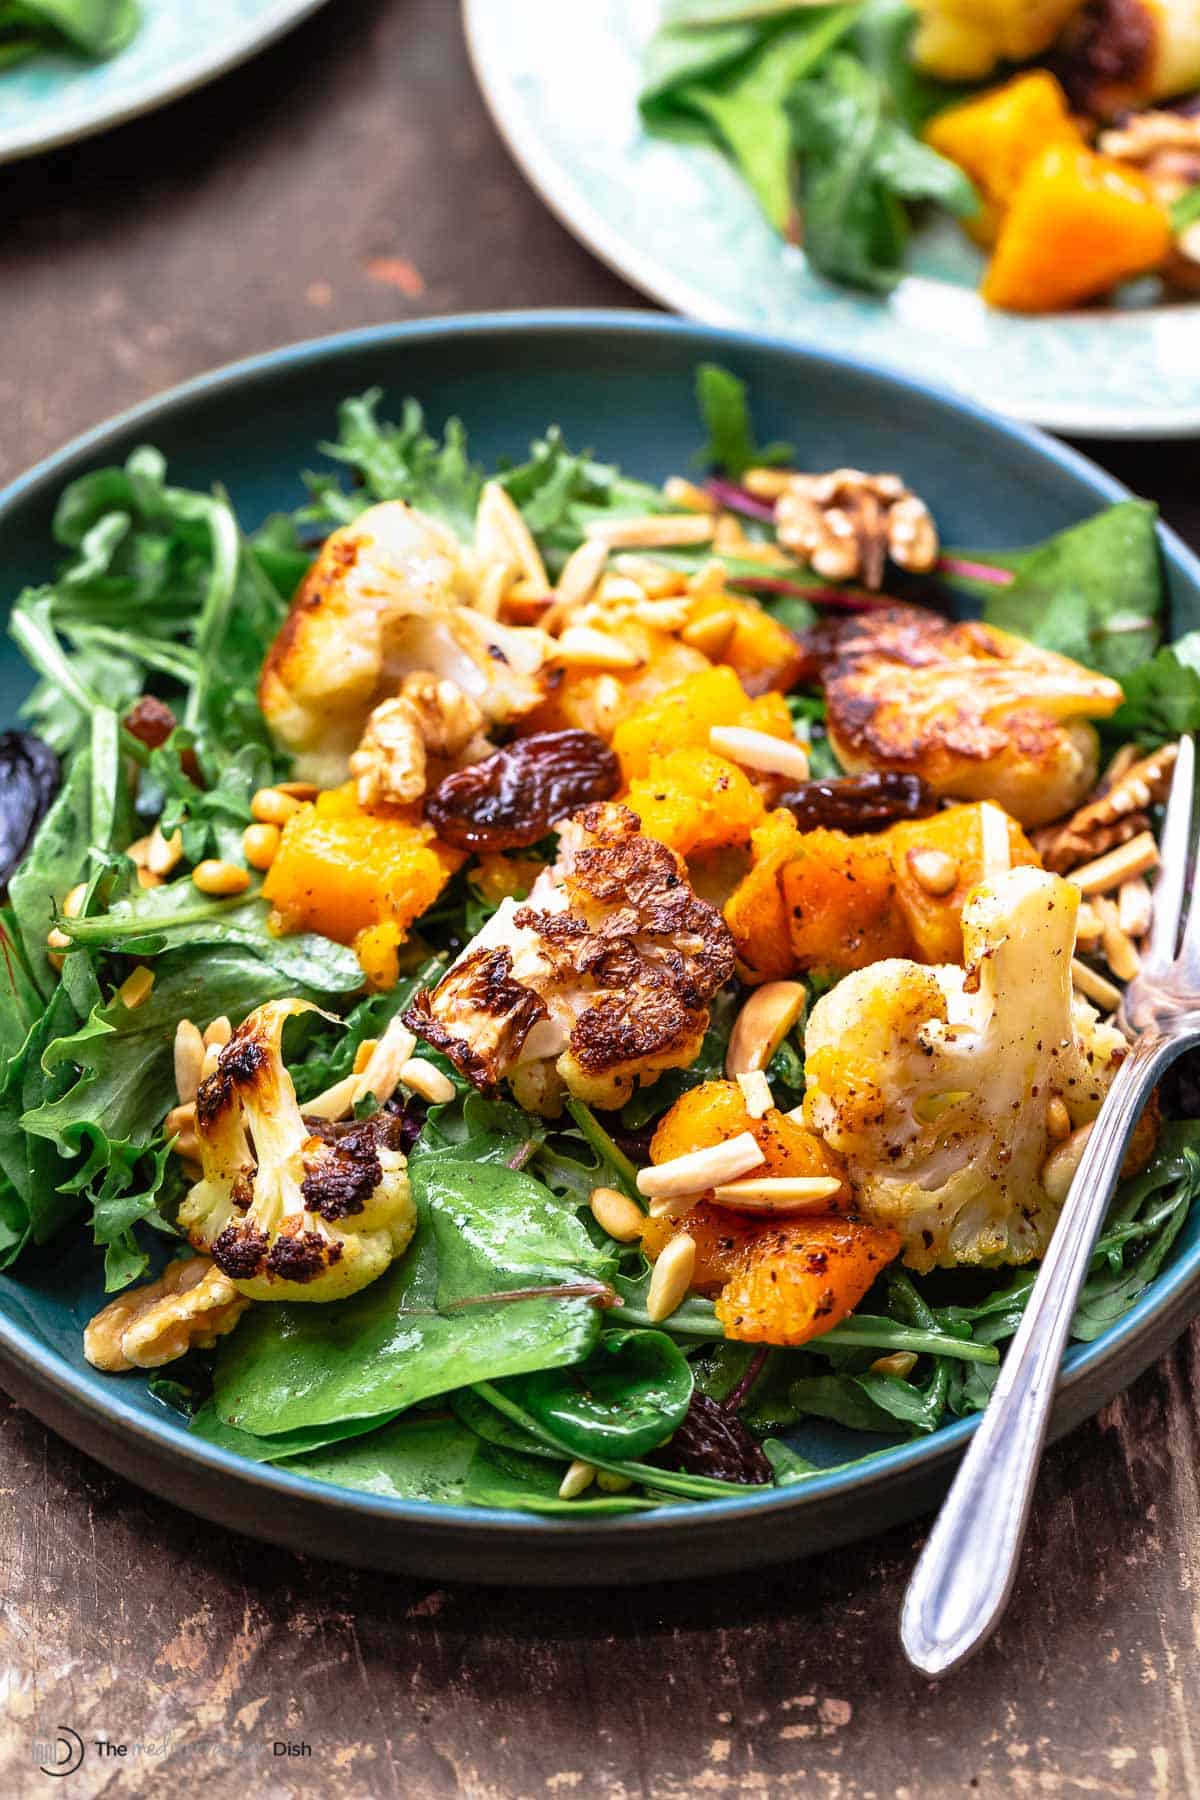 Ingredients you need to make this fall salad
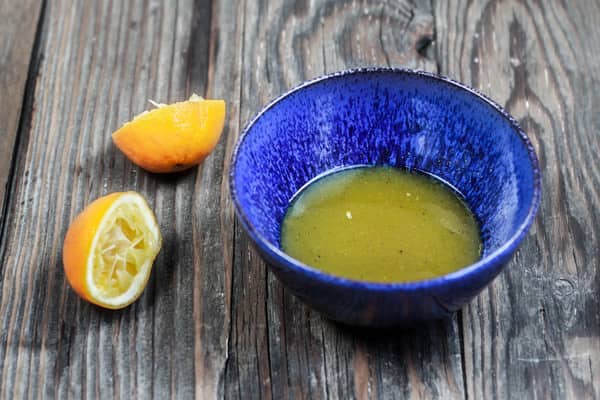
Dressing for roasted vegetable saladThe lemon-honey dressing is really what makes this salad shine, giving the roasted vegetables lots of flavor, brightness, and a hint of sweetness. Remember to toss the roasted veggies up with the dressing while they're still pretty warm so that they will absorb as much for the flavor as possible. Here is what you need to make it this dressing:
How to make roasted cauliflower salad:Caramelized roasted vegetables, fresh salad greens, a bright, zesty dressing, and a sweet and crunchy topping all come together to create a gluten-free, vegan fall salad that is both healthy and comforting. Here’s how to make this roasted vegetable salad:
 How to roast cauliflower without getting it mushy?I wrote a full post on how to roast cauliflower perfectly so that it is beautifully charred with just a hint of sweetness but never mushy. The secret? First, start with fresh cauliflower rather than frozen bags. Make sure the cauliflower is cut into similar size florets so they cook evenly at the same time. To cook it well, at first, cook the cauliflower covered in a high-heated oven (this will help trap the moisture to cook it properly on the inside). Then uncover and finish cooking it in high heat so that it will crisp and char on the outside. How to serve this fall saladThis beautiful fall salad recipe is perfect served while the roasted veggies are still warm or at room temperature. I like to serve it as a composed salad with the roasted vegetables arranged on a bed of my spring greens on a large platter or salad dishes. It looks lovely that way, and you get to enjoy all the fall colors and textures. What to serve alongThis roasted vegetable salad makes a perfect light meal on its own or next to a fall soup like roasted butternut squash soup. It would also be a delicious side for festive entrees like Citrus Rosemary Chicken, Roast Rack of Lamb. More cauliflower and butternuts squash recipes to tryBrowse more salad recipes. Browse all Mediterranean recipes. Visit Our Shop.  Roasted Cauliflower Salad
Simple roasted cauliflower salad with butternut squash, spring greens, a light zesty dressing, and toasted nuts. You'll love the texture and flavor of this fall salad. Serve on its own or next to your favorite fall entree (I've added some suggestions in the post)
Servings 6 up to
Calories 210.2kcal
Ingredients
Lemon-Honey Vinaigrette
Instructions
Notes
Nutrition
Calories: 210.2kcal | Carbohydrates: 21.1g | Protein: 2.8g | Fat: 14.4g | Saturated Fat: 2g | Monounsaturated Fat: 10.3g | Sodium: 242mg | Potassium: 542.8mg | Fiber: 3.2g | Sugar: 8.7g | Vitamin A: 5229.9IU | Vitamin C: 63.7mg | Calcium: 49.4mg | Iron: 1.1mg
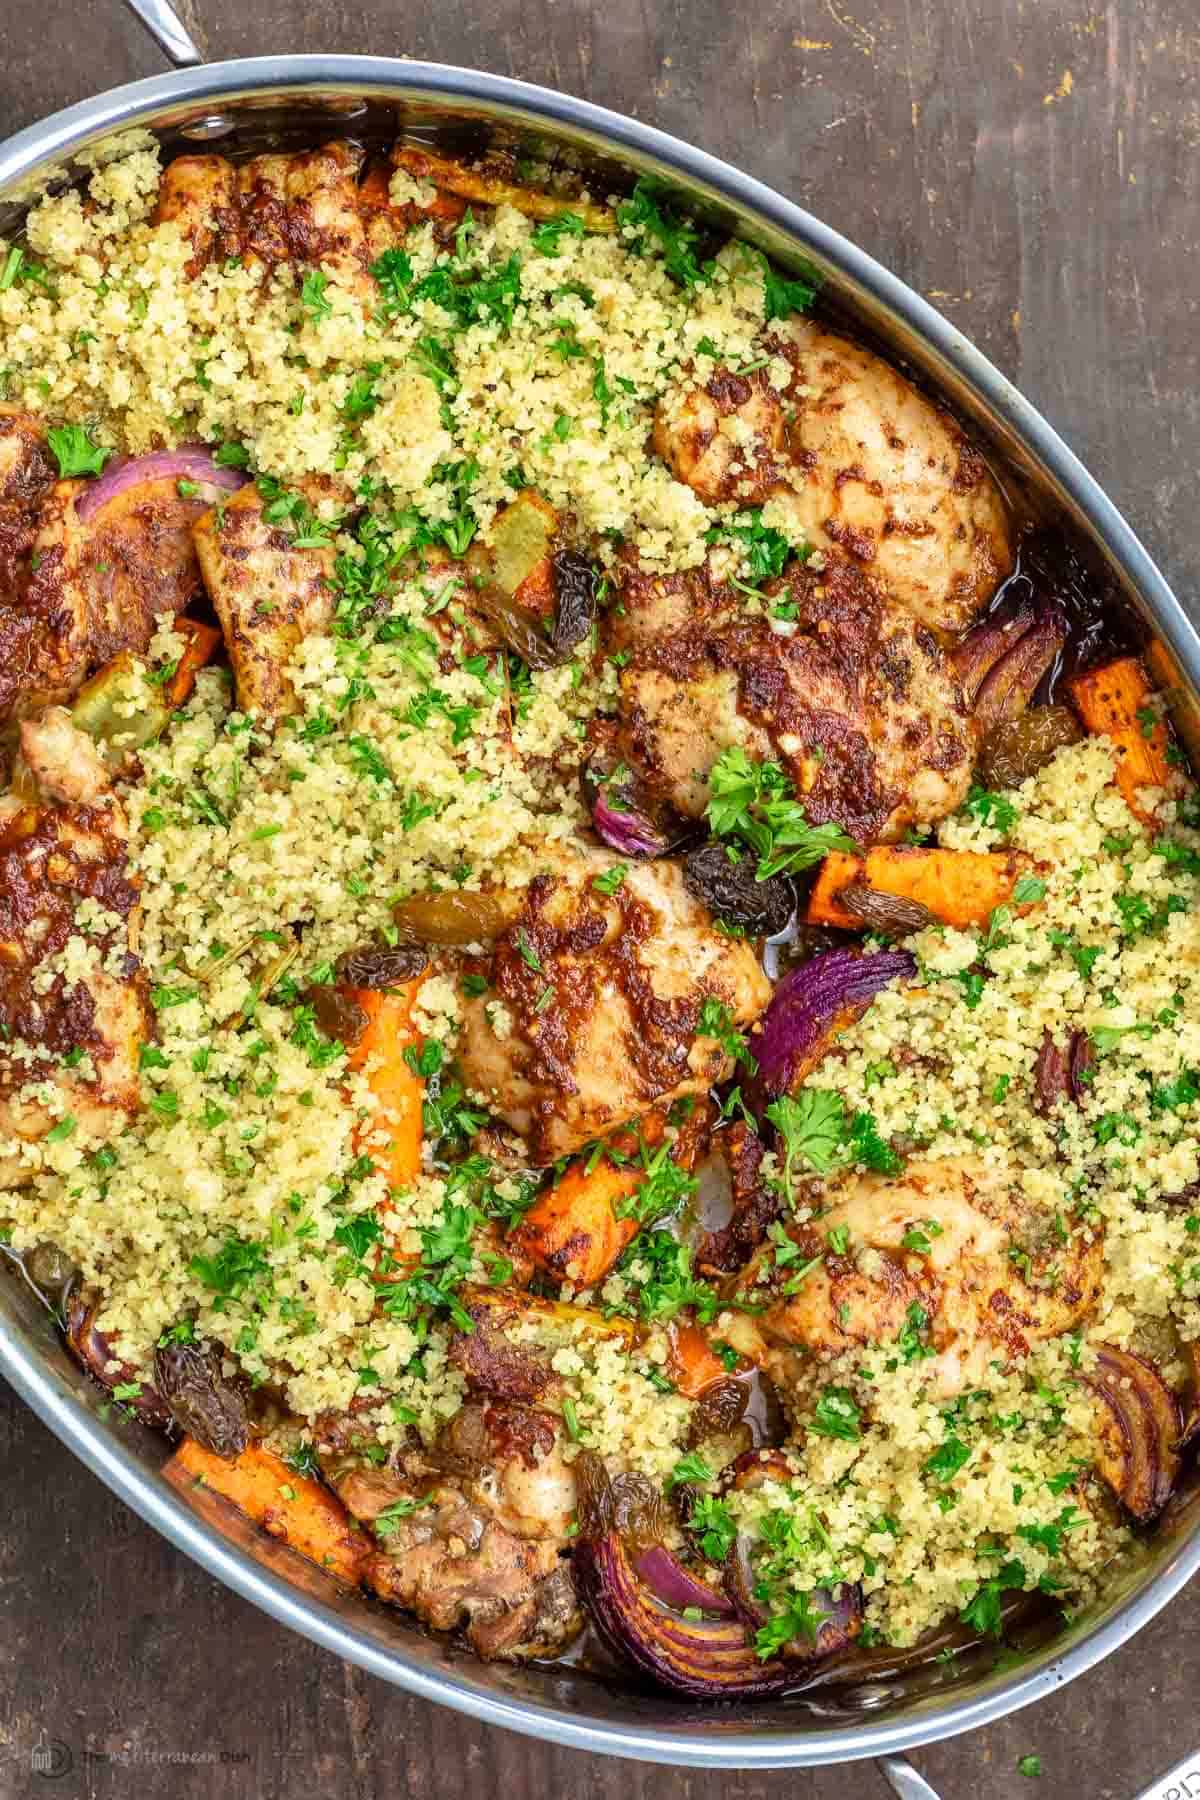
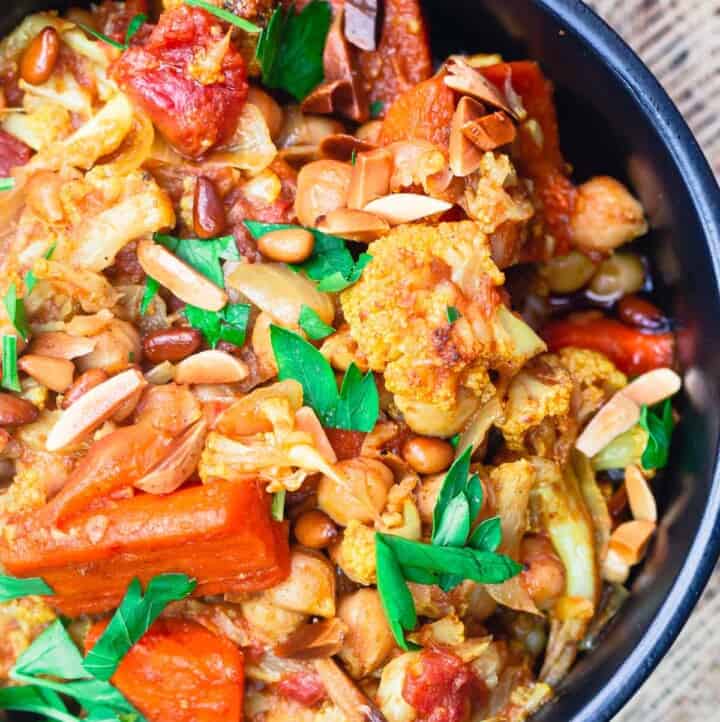
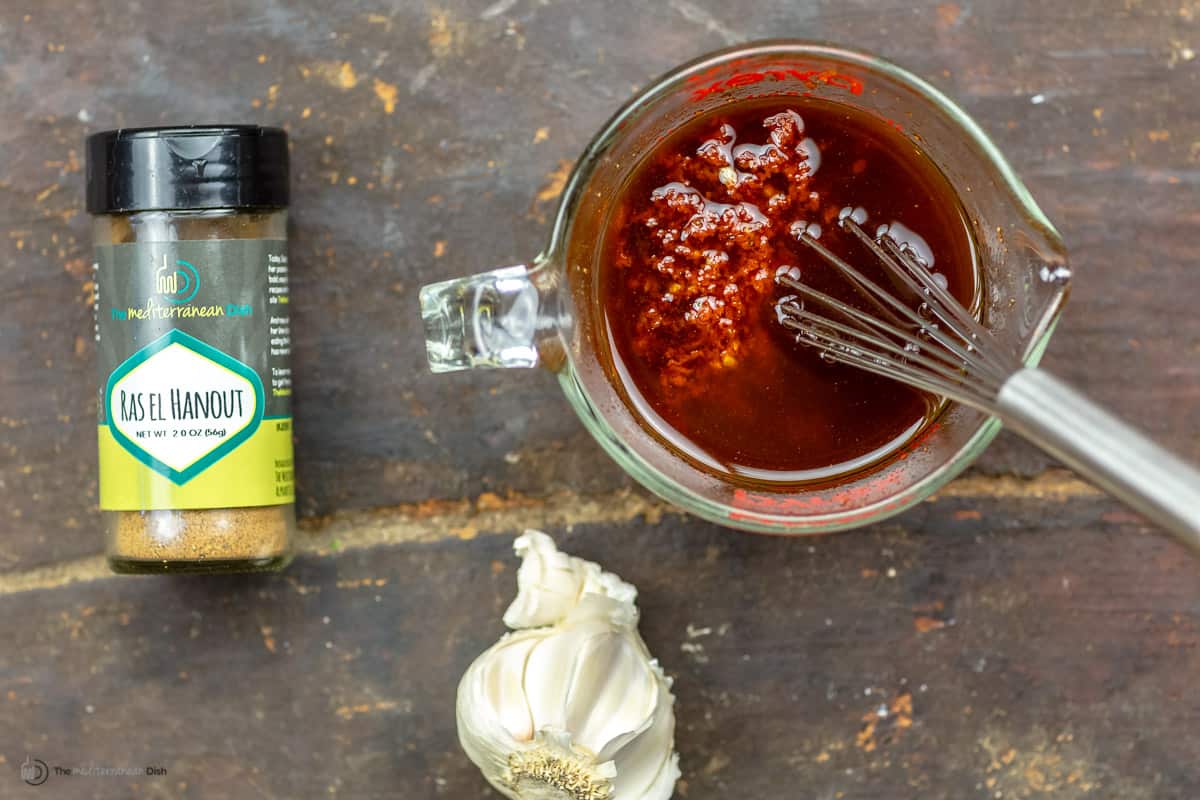
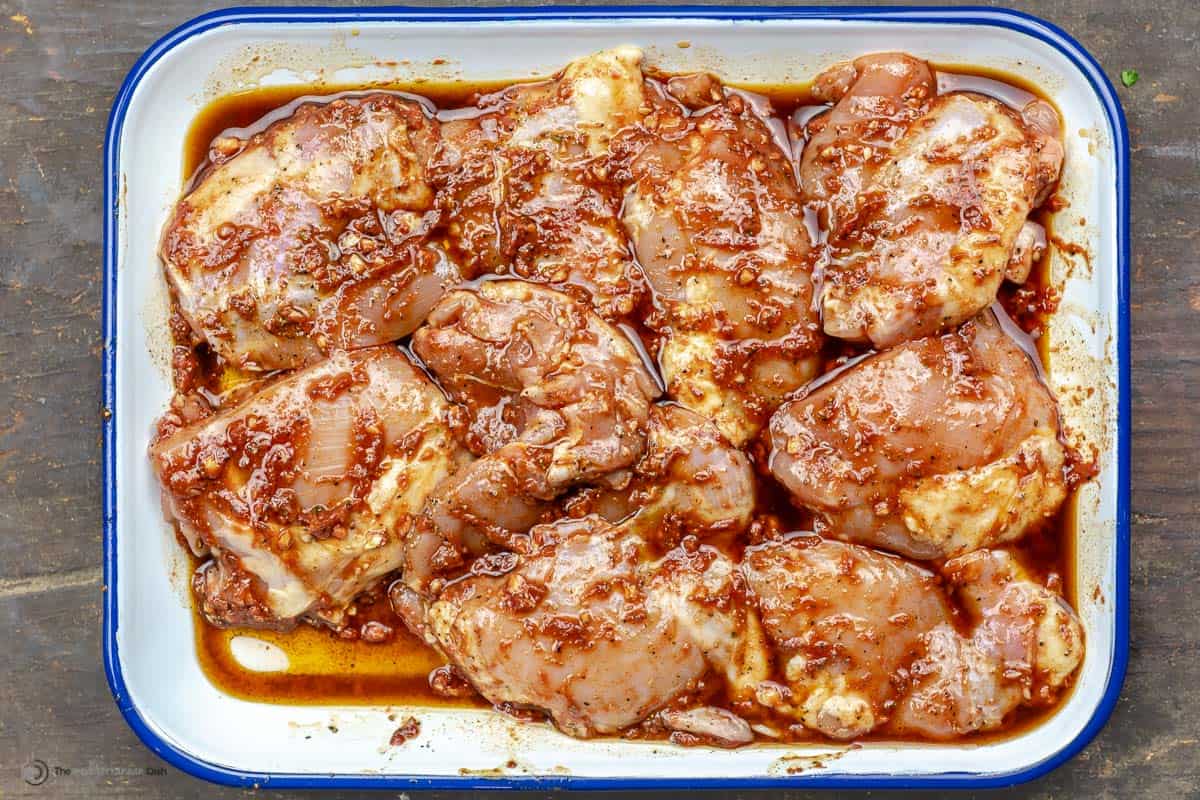
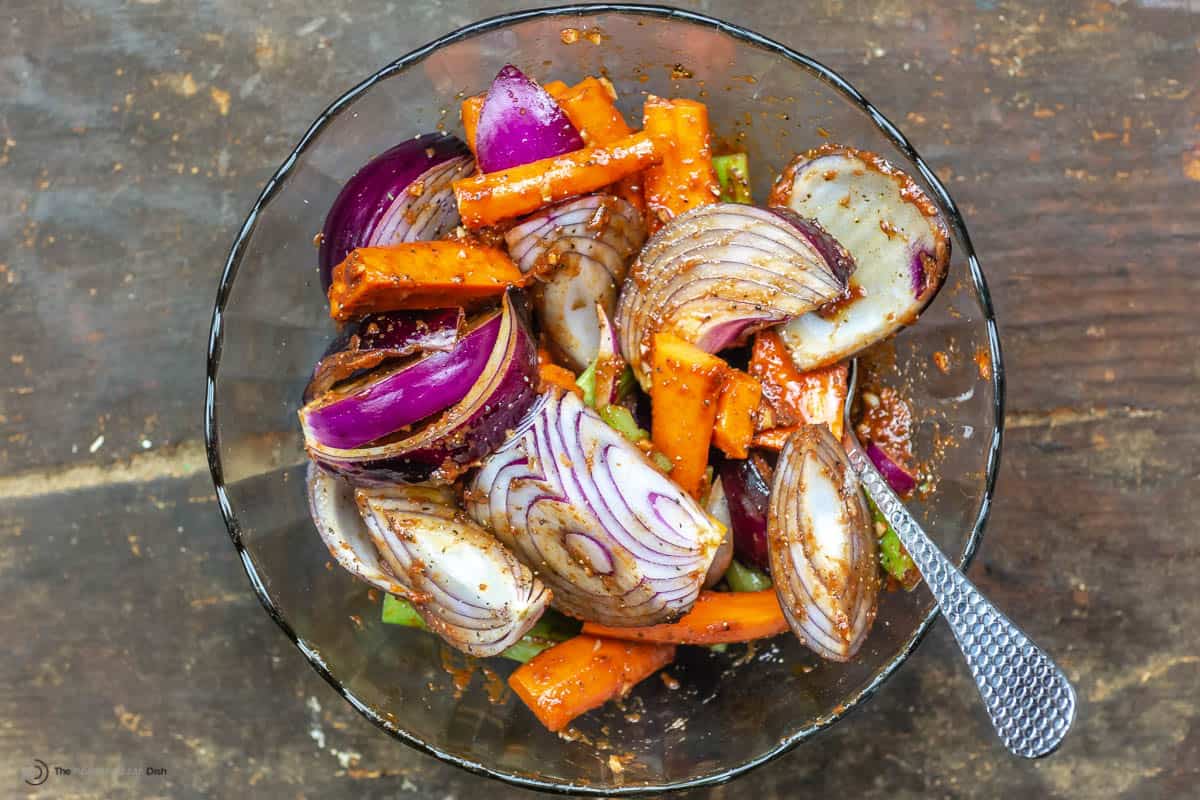
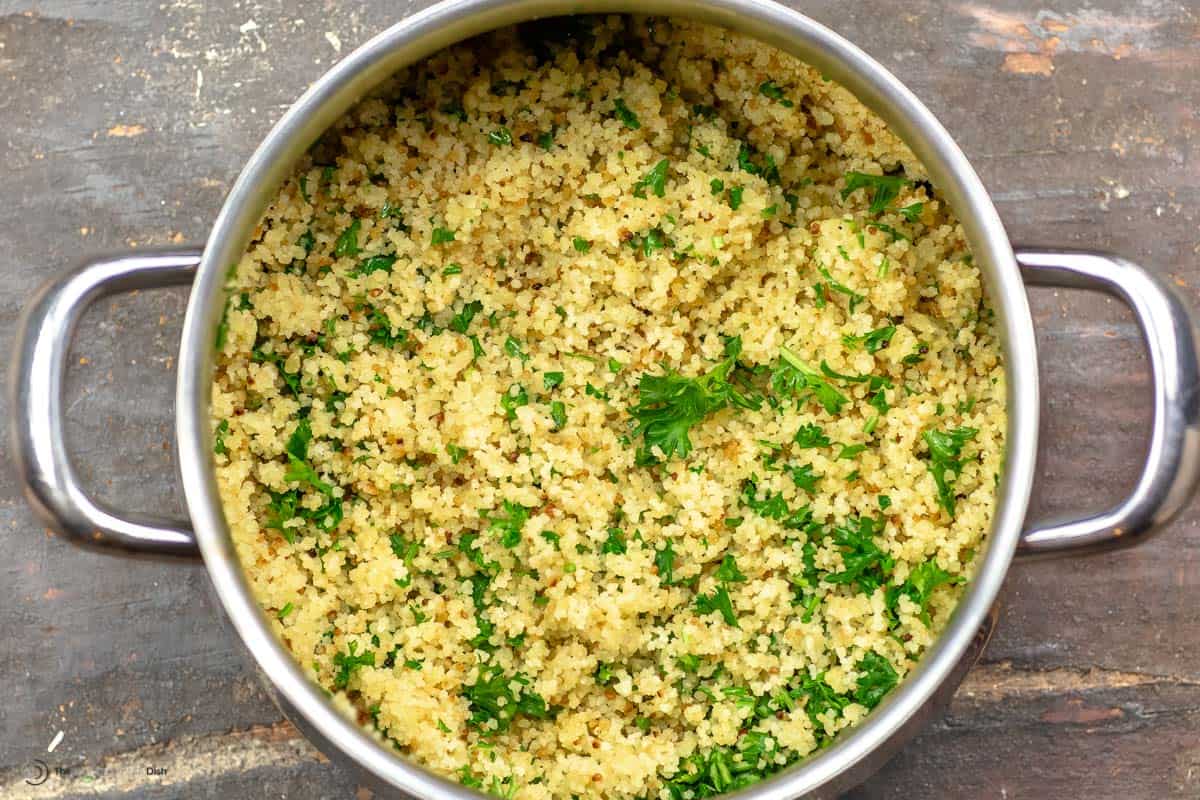
*This post originally appeared on The Mediterranean Dish in 2015. The recipe and post have been updated with new information and media for readers' benefit. The post Roasted Cauliflower Salad with Lemon-Honey Vinaigrette appeared first on The Mediterranean Dish. via The Mediterranean Dish https://www.themediterraneandish.com/roasted-butternut-squash-and-cauliflower-salad-with-lemon-honey-vinaigrette/ You'll love this easy Chicken Couscous dinner with baked chicken thighs in warm Moroccan spices, vegetables, and fluffy couscous. 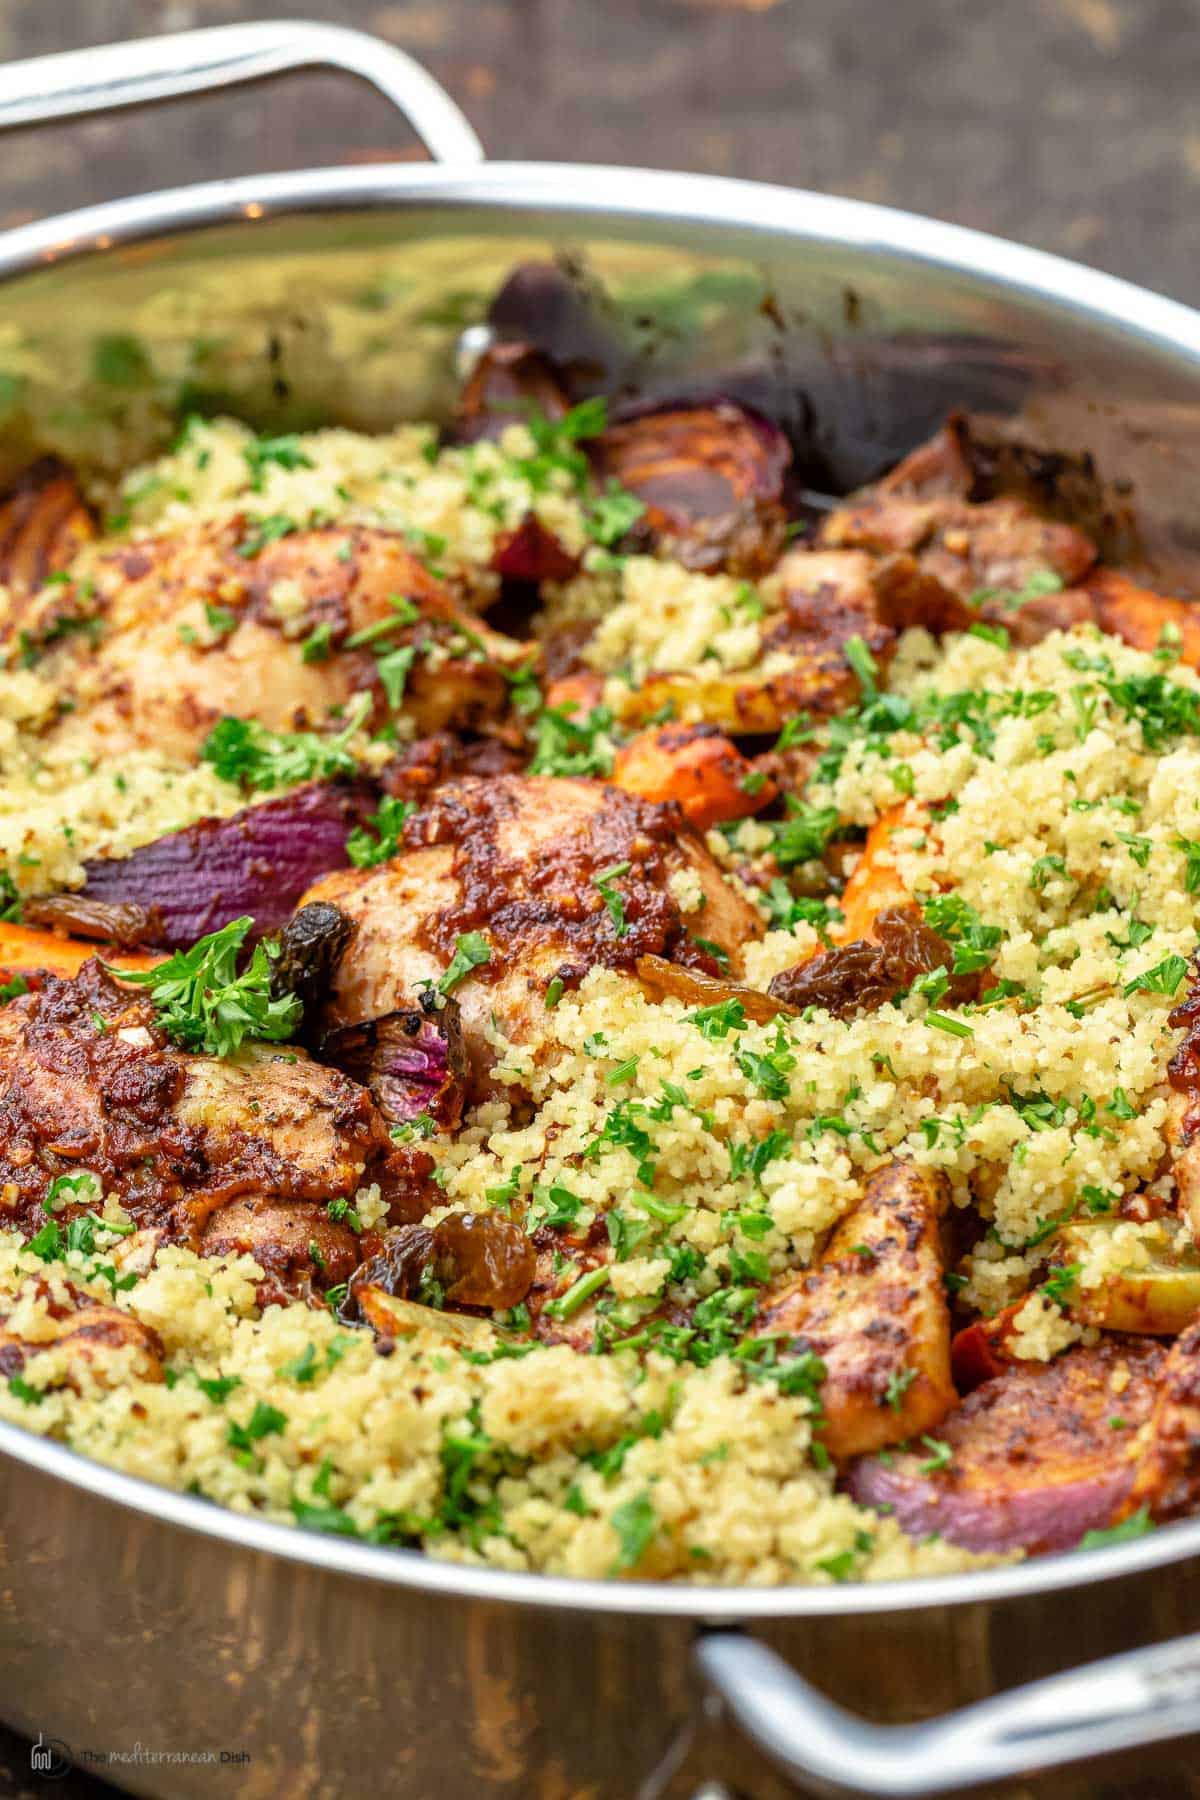 Easy chicken and couscous recipeIf you need a little inspiration to step up the chicken dinner game, today's recipe is for you! The tantalizing flavors in this Moroccan-inspired chicken and couscous recipe will have This couscous chicken is a riff on my earlier Moroccan chicken. In this version, I use boneless skinless chicken thighs, coated with a Moroccan-inspired rub with garlic, tomato paste and warm seasonings including Ras El Hanout, cinnamon and ginger. I add in vegetables--carrots, celery, and onions--to make a one-pan baked chicken dinner. Couscous is the perfect thing to finish this pan of baked chicken thighs, and it literally takes only 10 minutes to make. This chicken with couscous and vegetables is a winner every time! What is couscous and how do you cook it?Though many confuse it with a grain, couscous is actually a tiny pasta made out of semolina flour, and it is a staple in North African and Middle Eastern cooking. There are a few types of couscous, including the pearl couscous I used in this earlier salad recipe, but in today's recipe, I opted for Moroccan-style couscous. Using this fine couscous that’s already been steamed makes for a quick addition to this pan of chicken. I like to start by toasting the couscous in extra virgin olive oil, this is a great way to add flavor right off the bat. To cook this fine Moroccan couscous, you'll add 1 cup of boiling water or broth to 1 cup of couscous, then simply cover and let the couscous soak up the water(off the heat) and do not disturb it for 10 minutes before fluffing it with a fork. (Check out my earlier post for How to Cook Couscous for more helpful tips). 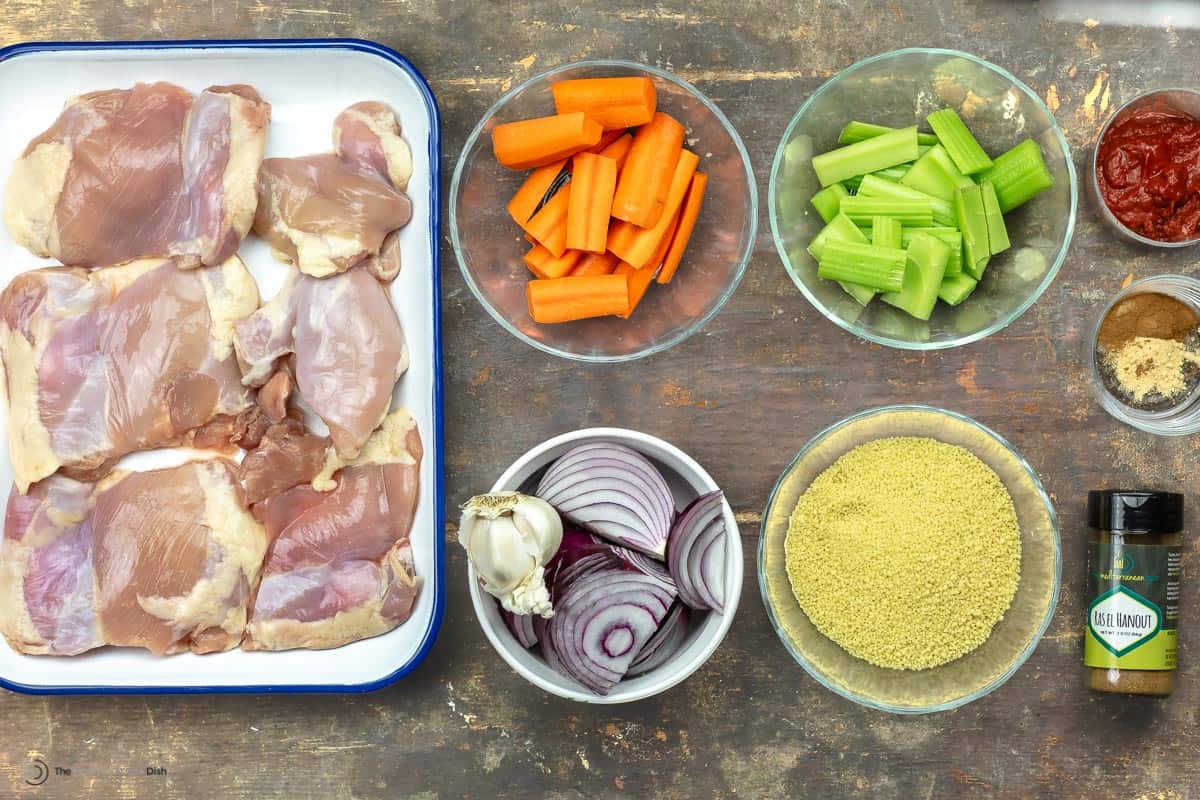 What you'll need for this couscous recipeThis Moroccan-inspired chicken dish is made with traditional Moroccan spices, chicken and couscous. For the chicken:
For the couscous:
How to make chicken couscousIn this recipe, you'll start by seasoning and baking the chicken and vegetables, then you'll add the cooked couscous on top when ready to serve. Here is how to make it (the print-friendly recipe is below):
 Serving suggestionsEnjoy your Moroccan-inspired chicken couscous fresh from the oven, just be sure to give the couscous a few minutes to soak up some of the pan juices. With chicken, couscous and veggies all in one dish, this is truly a complete meal. There's no need for side dishes or extras, though you can never go wrong starting with a big salad. Additional Recipe FAQs
Can I use chicken breasts instead of thighs in this recipe?
Yes, boneless chicken breasts will work here as well. However, remember to adjust cooking time as chicken breasts can dry out. Depending on the thickness of the chicken breasts, it can take about 18 to 20 minutes to bake. With chicken breasts especially, I like to start by baking covered with foil for 10 minutes, then finishing uncovered for another 8 minutes or so. I have a baked chicken breasts recipe that can be a good guide for you here (different flavors, of course)
Can I prep this chicken couscous in advance?
If you want to work in advance, you can season and marinate the chicken, keeping it in the fridge up to 1 night. You can also chop up the veggies and cook the couscous one day ahead, if you like.
Can I use pearl couscous instead?
Yes! Pearl couscous will work well here. The cooking method will vary as pearled couscous cooks much like pasta in boiling water for about 15 minutes or so. Learn more about pearl couscous here.
How long will this chicken and couscous recipe keep?
Leftover cooked chicken couscous can be stored in an airtight container in the fridge for 3 to 4 days. Reheat on the stovetop over medium heat just until the chicken has warmed through (you may add a little liquid if needed). More couscous recipes: Moroccan-Inspired Chicken Couscous
Easy chicken couscous dinner with baked chicken thighs, warm Moroccan spices and fluffy couscous! If you like, add a big salad to start the meal.
Servings 6 servings
Calories 492.6kcal
IngredientsFor the chicken
For the couscous
Instructions
VideoNotes
Nutrition
Calories: 492.6kcal | Carbohydrates: 31.6g | Protein: 23.5g | Saturated Fat: 7.7g | Monounsaturated Fat: 21.2g | Trans Fat: 0.1g | Cholesterol: 110.7mg | Sodium: 399.6mg | Potassium: 594mg | Fiber: 4g | Vitamin A: 6208IU | Vitamin C: 19.5mg | Calcium: 69.6mg | Iron: 2.6mg
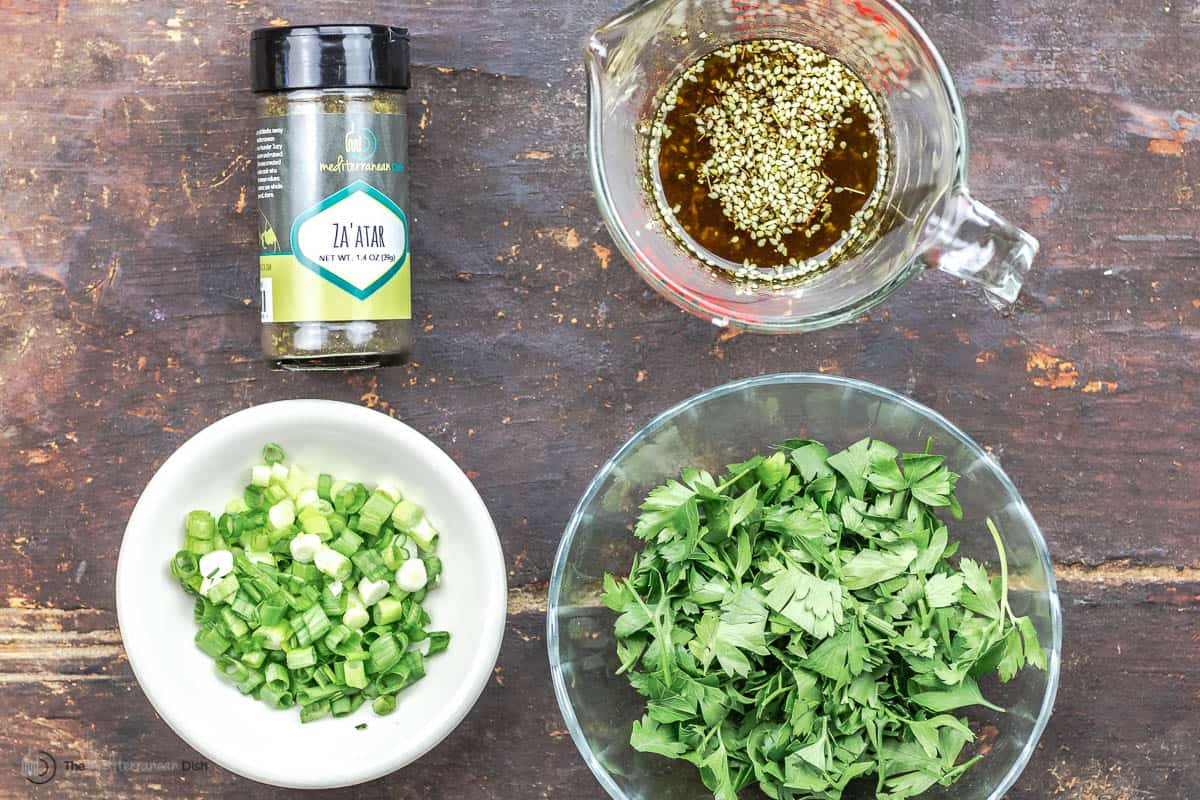
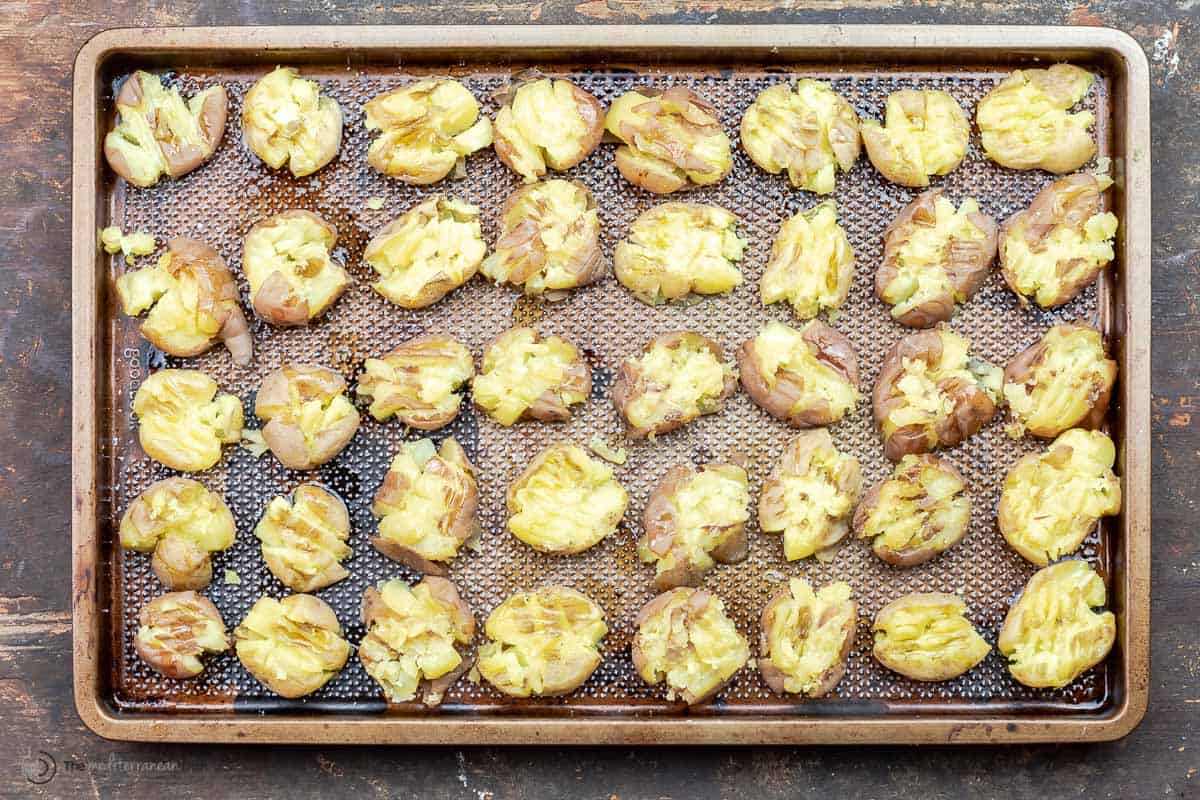
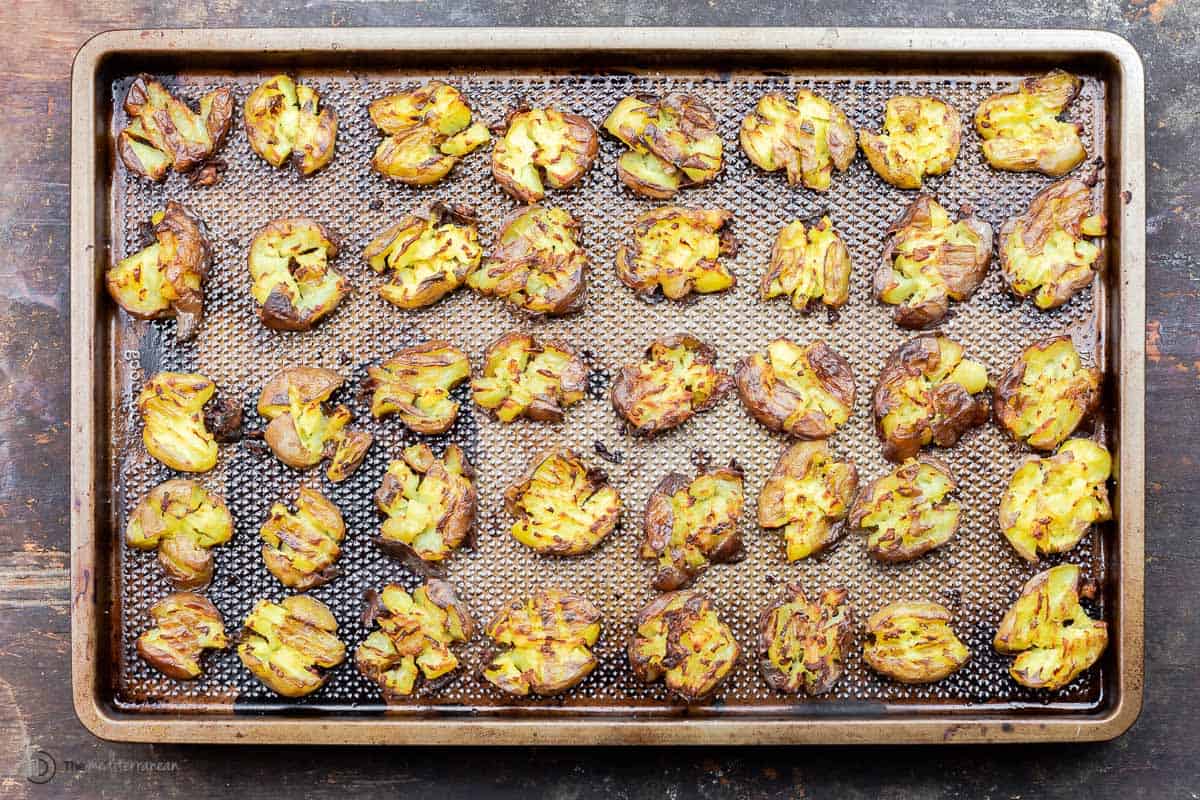
The post Moroccan-Inspired Chicken Couscous appeared first on The Mediterranean Dish. via The Mediterranean Dish https://www.themediterraneandish.com/chicken-couscous/ Crispy on the outside and fluffy and tender on the inside, these Crispy Smashed Potatoes, finished with a garlicy olive oil sauce, za'atar and fresh herbs, are a must-try! Great as a side or an appetizer served with a little tzatziki or spinach yogurt dip! 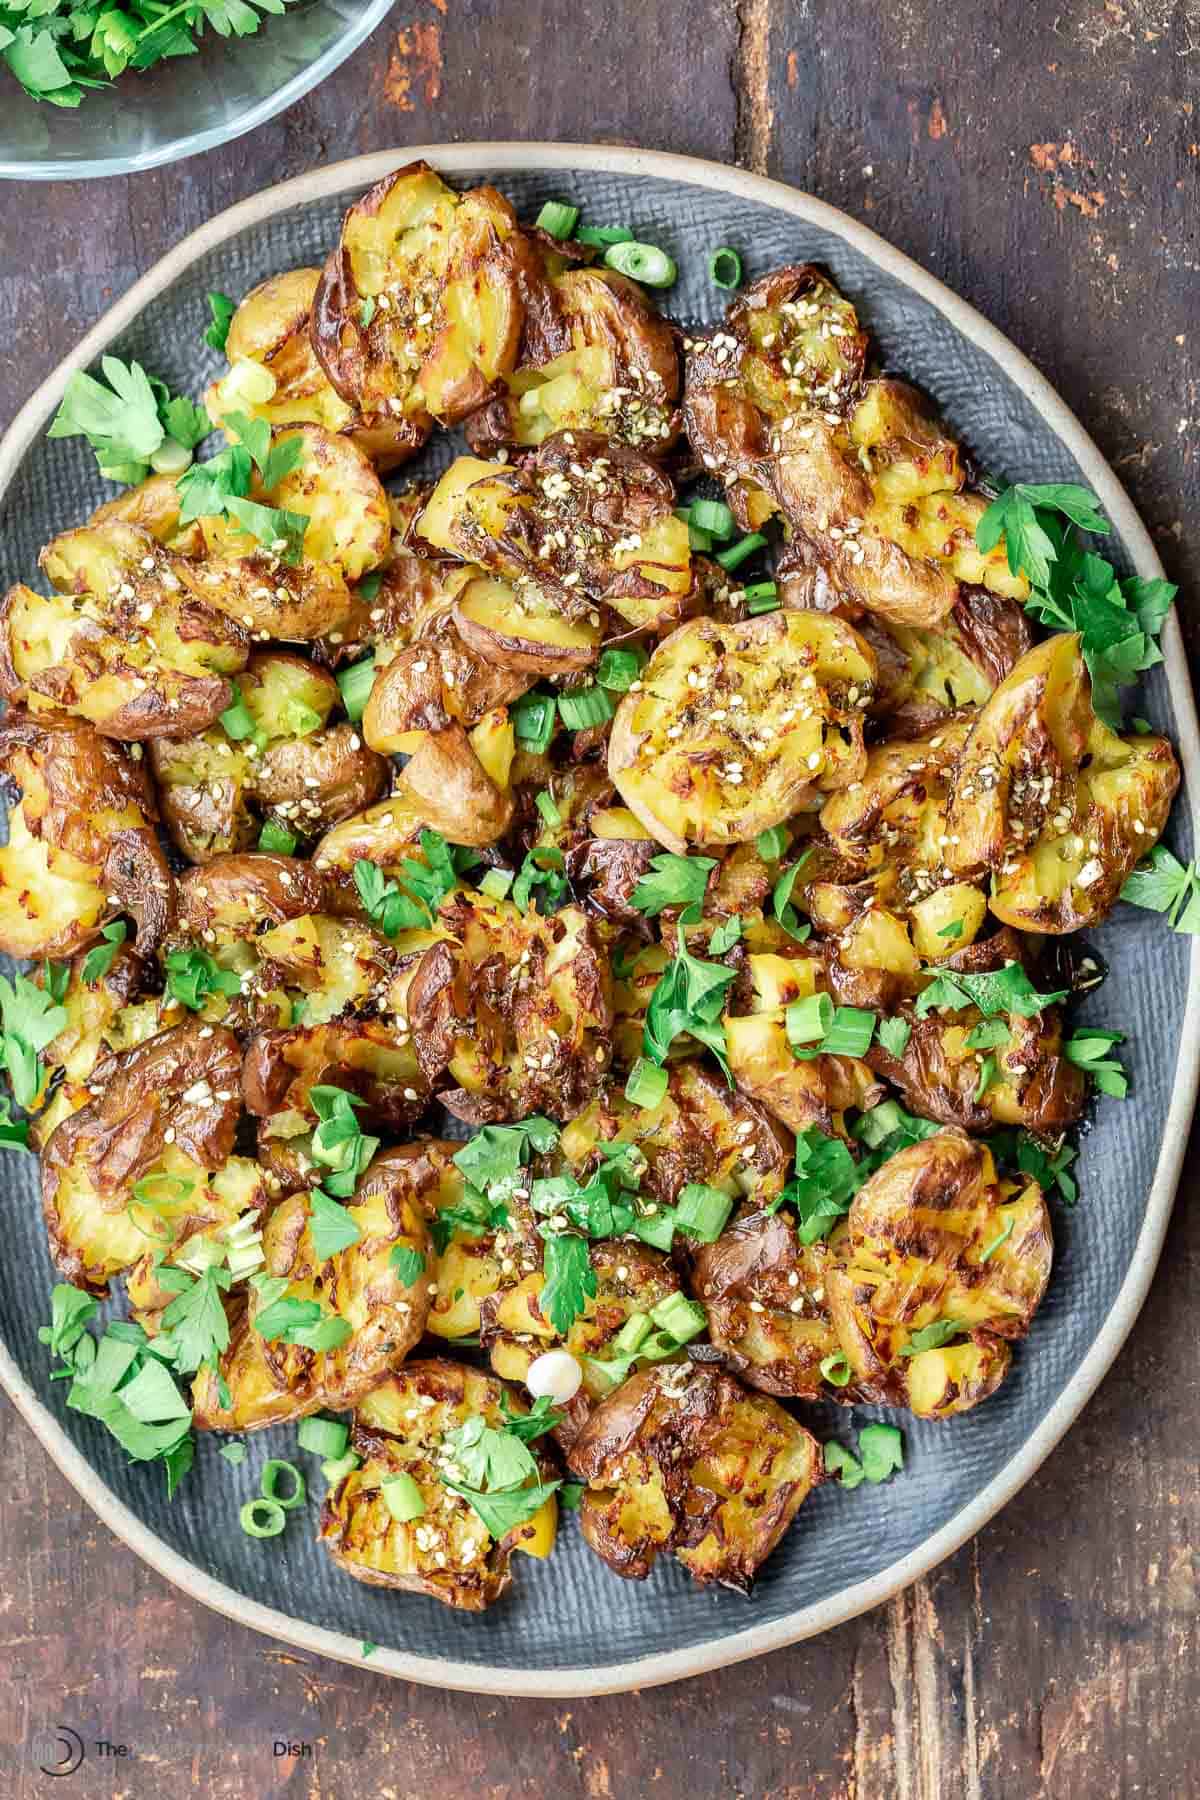 Baked smashed potatoes better than fries!If you ever find yourself craving the savory crispiness of French fries but want something that's not deep fried...or maybe you're just looking for a unique potato recipe that delivers on the comfort and wow factors at once? This smashed potato recipe is your answer! This smashed potato recipe is easy to make. Start by boiling baby potatoes until they are tender, allow them to steam dry, then gently smash them with the back of a fork and season with salt and a good drizzle of extra virgin olive oil and roast! Served immediately out of the oven, these potatoes are crispy on the inside and soft, fluffy on the inside--so delicious and comforting as the best French fries, sans all the frying! If you serve these smashed potatoes as is with just a dash of salt, they are great! But if you want to take them up a couple notches, hit them up with my sauce of olive oil fresh garlic, za'atar, and toasted sesame seeds. Finish with a sprinkle of fresh herbs. Smashed potatoes vs. mashed potatoesIf you've not made them before, you might wonder what is the difference between mashed and smashed potatoes? The cooking process for both starts with boiling your potatoes. But whereas mashed potatoes are soft potatoes that have been whipped with milk into a creamy consistency, but smashed potatoes are just mashed into patties and then roasted until crispy. There is also a difference in the type of potato selected--larger Yukon gold potatoes are great for mashing, but for this smashed potato recipe, I always use baby potatoes (smaller, golf ball-size potatoes). 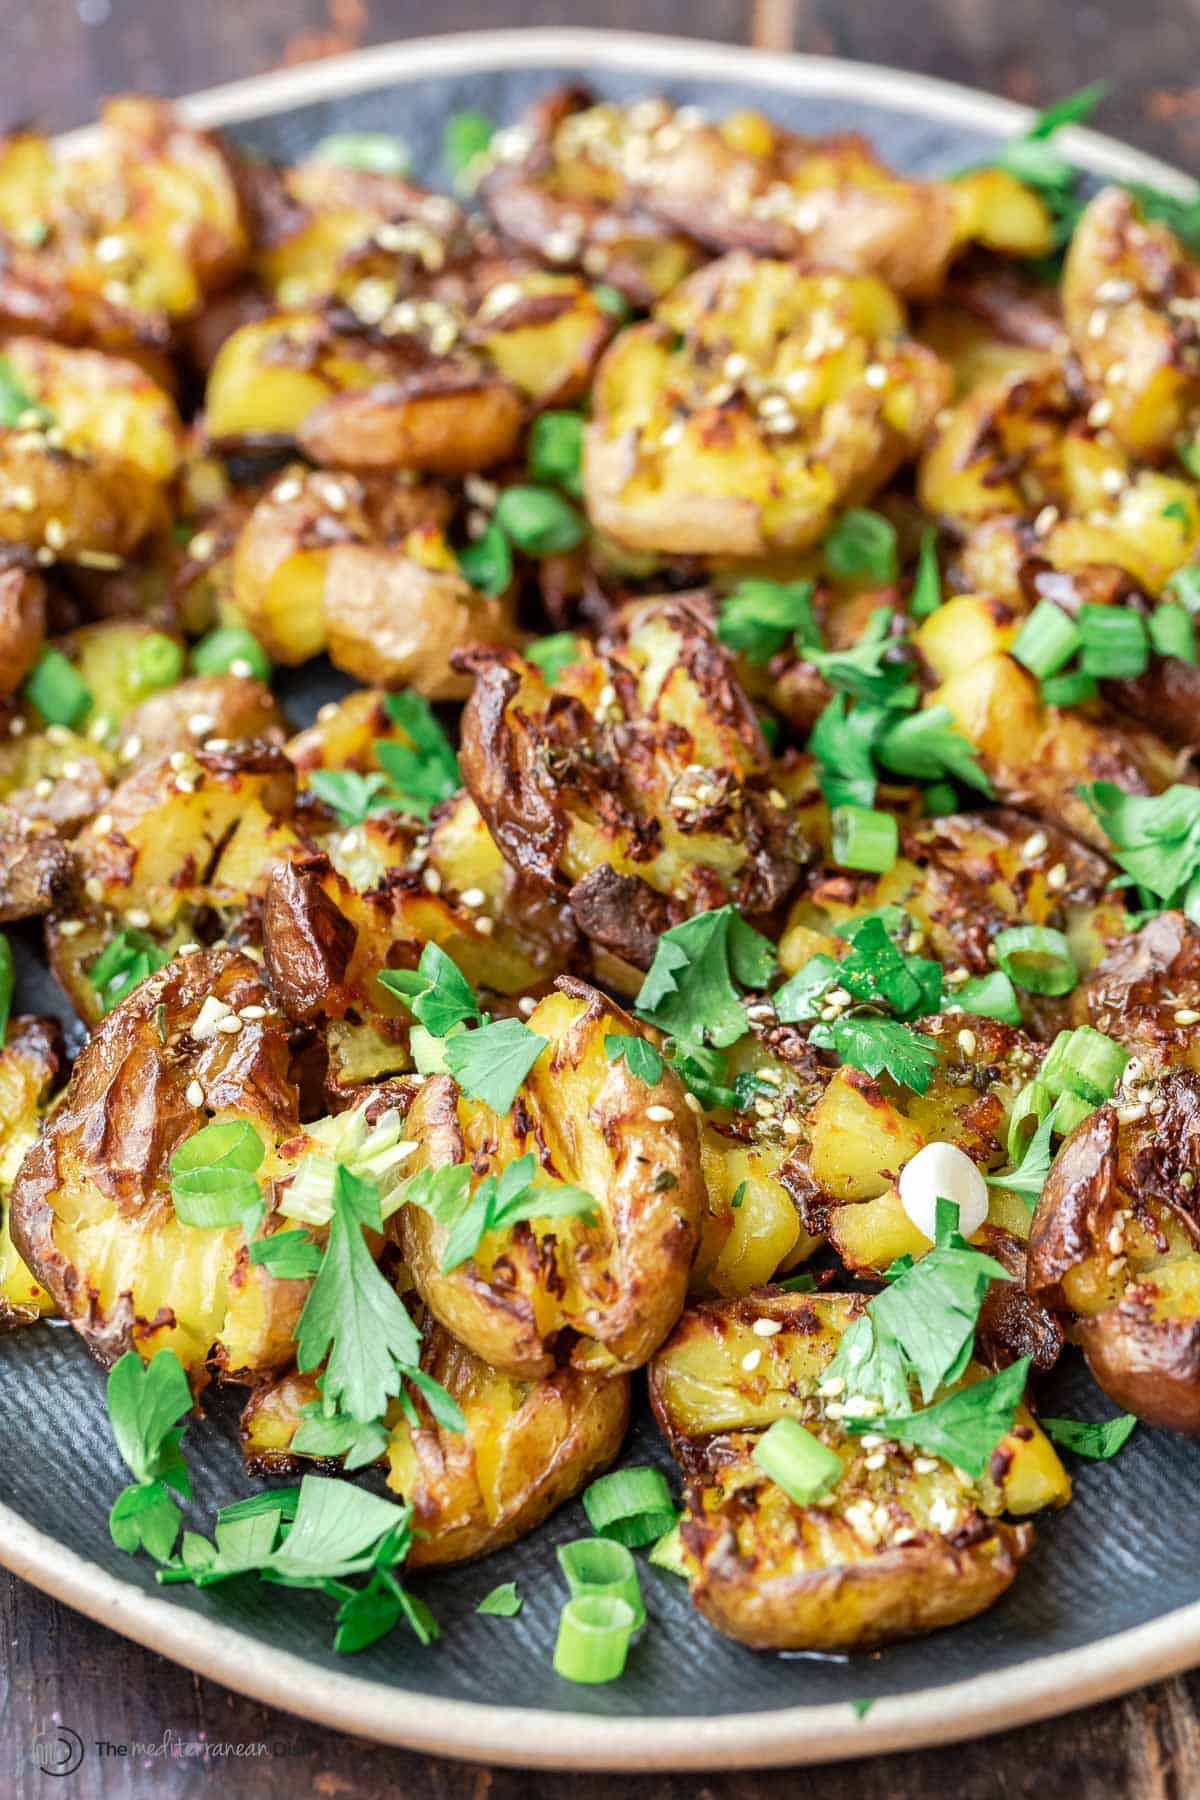 Secrets for the crispiest roast smashed potatoes!Before we get to the recipe, let's answer this one key question: how do you get perfectly crispy skin on your potatoes while also maintaining a soft and creamy flesh? Here are a few important tips:
Ingredients you'll need to make this potato recipe
Here is what you'll need to make it:
How to Make Smashed PotatoesKeeping the tips above in mind, here is how to make this smashed potato dish (friendly recipe with measurements is below):
Serving SuggestionsThese crispy smashed potatoes are a great side dish for everything from burgers to kebabs. They're a lot like french fries, so maybe a great replacement when you want something a little fancier and not deep-fried. You can also serve these smashed baby potatoes as an appetizer with a dipping sauce, like homemade Romesco sauce, toum, or even tahini!  Leftovers and storageWhile these smashed potatoes are definitely best enjoyed straight from the oven, leftovers can be stored in the fridge for up to 5 days. Reheat in the oven, keeping in mind that they may become crispier with the extra bake time. More Easy Potato Recipes:
Browse more sides and small plates. Browse all Mediterranean recipes. Visit Our Shop.  Crispy Smashed Potatoes with Garlic and Za'atar
Crisp on the outside and soft and fluffy on the inside, these smashed potatoes are best served immediately with a good drizzle of garlicy olive oil, za'atar and herbs! Serve as a side dish to a protein or as an appetizer with your favorite dipping sauce (I like tzatziki with these)
Servings 31 Baby Potatoes
Calories 39.4kcal
Ingredients
Instructions
VideoNotes
Nutrition
Serving: 1baby potato | Calories: 39.4kcal | Carbohydrates: 5.3g | Protein: 0.6g | Fat: 1.8g | Saturated Fat: 0.3g | Monounsaturated Fat: 1.3g | Sodium: 19.9mg | Potassium: 129.3mg | Fiber: 0.7g | Sugar: 0.3g | Vitamin A: 51.5IU | Vitamin C: 6.6mg | Calcium: 6.3mg | Iron: 0.4mg
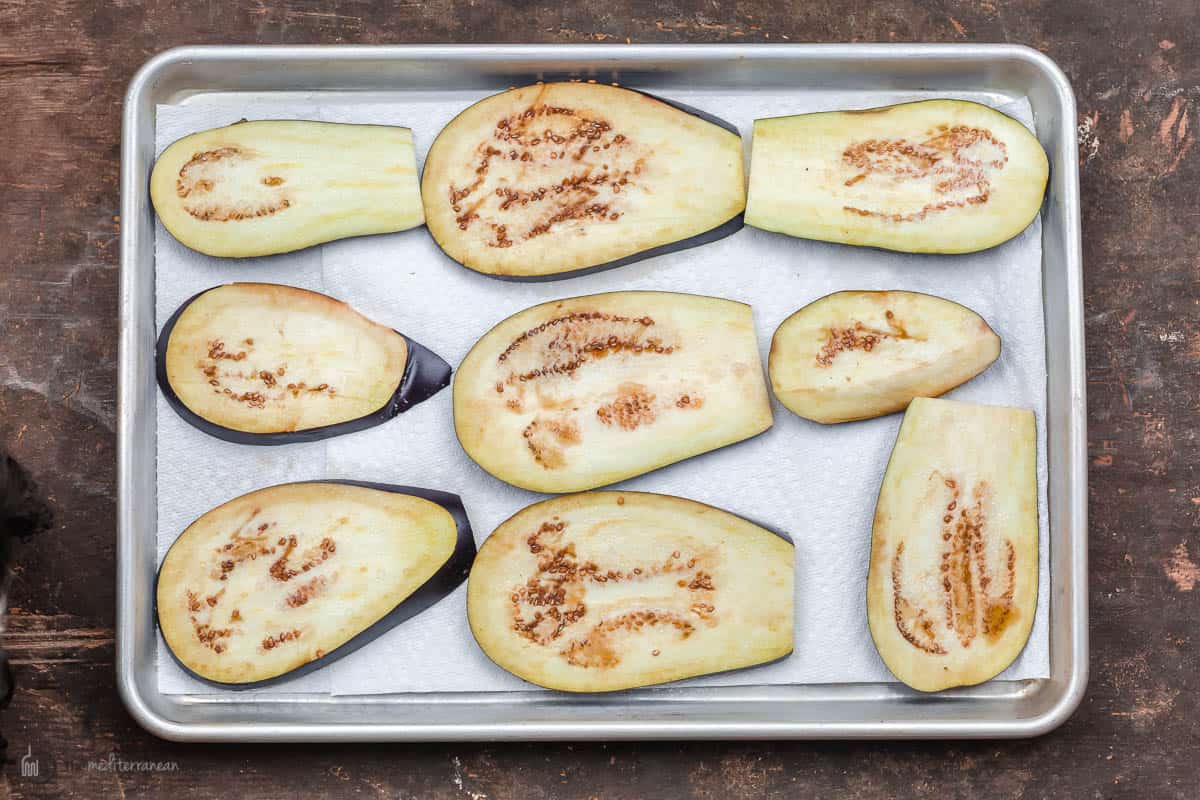
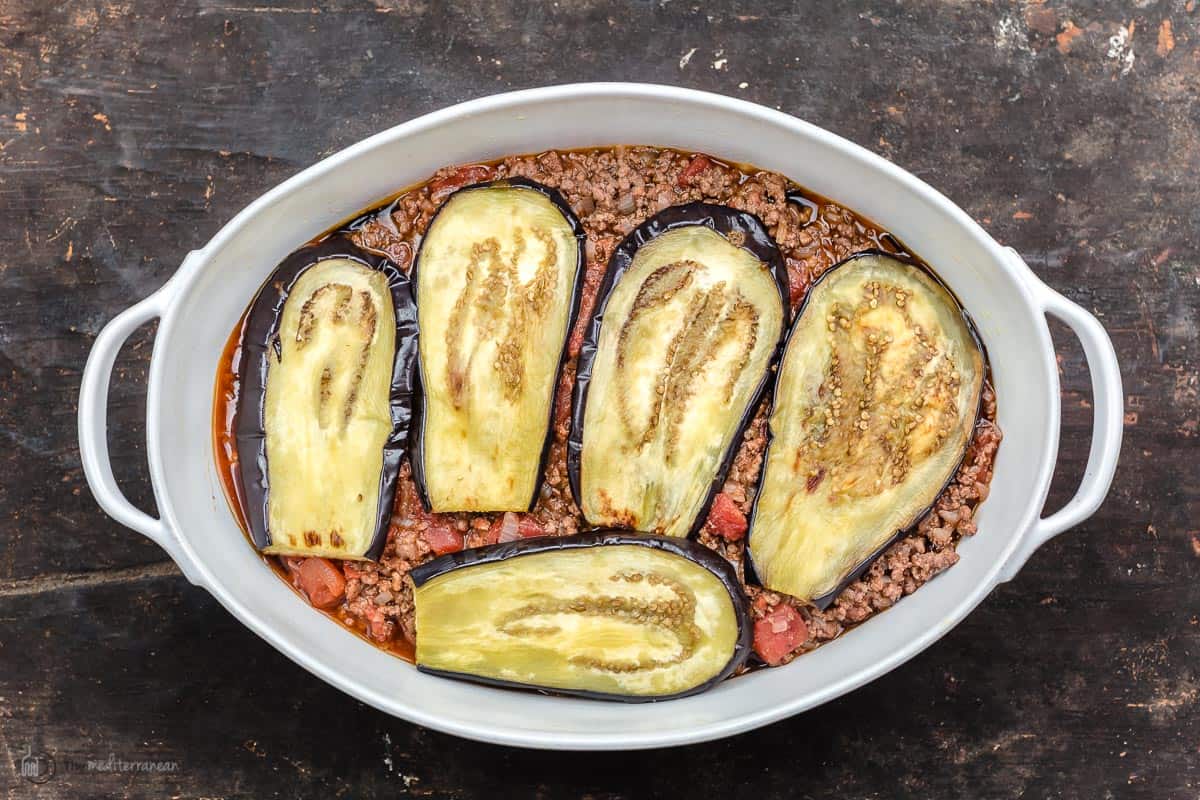
The post Crispy Smashed Potatoes with Garlic and Za'atar appeared first on The Mediterranean Dish. via The Mediterranean Dish https://www.themediterraneandish.com/crispy-smashed-potatoes/ Classic Greek moussaka with layers of tender roasted eggplant, perfectly seasoned meat sauce, and a creamy bechamel topping. The ultimate comfort food, Greek-style! Be sure to check out my how-to video and tips for how to make moussaka perfectly every time. 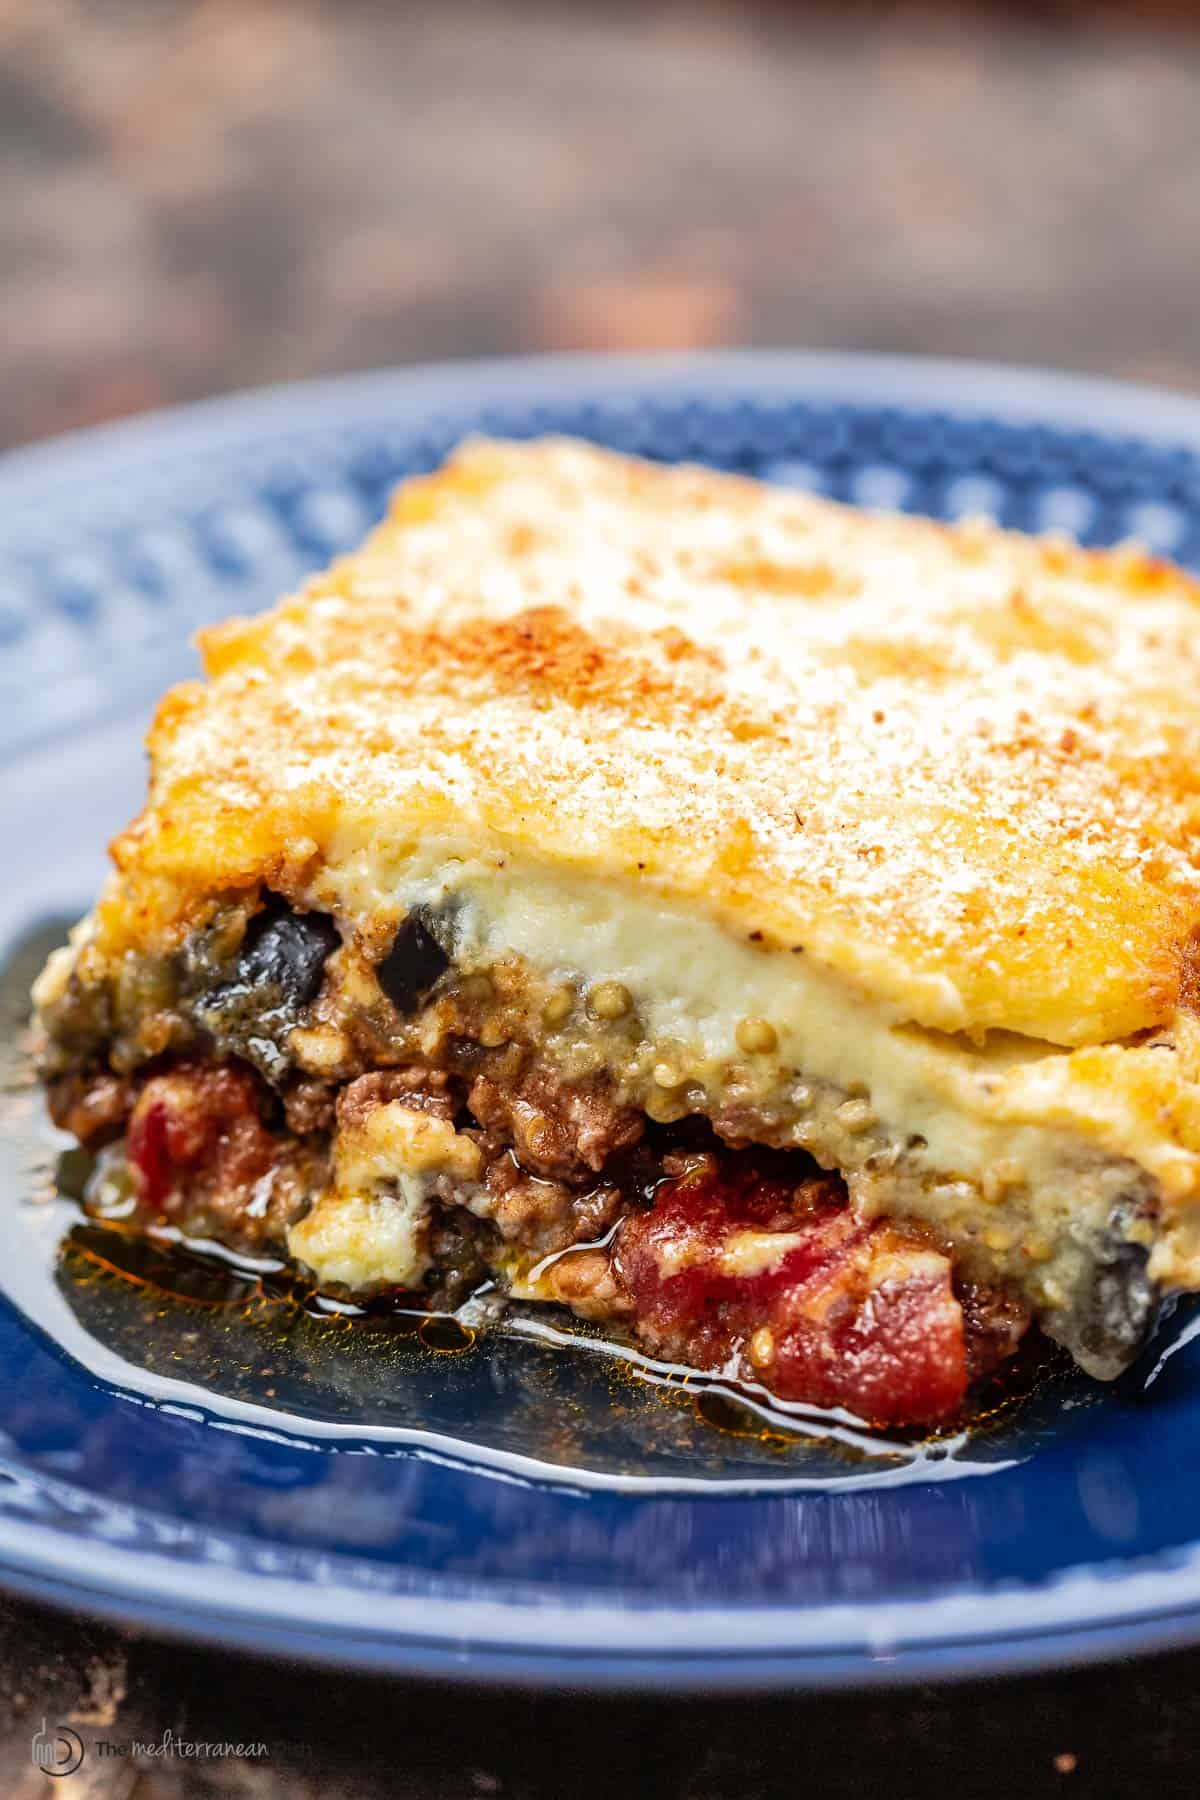 What is moussaka?The epitome of Greek comfort food, moussaka (pronounced moo-sa-ka’a) is a hearty eggplant casserole with a juicy, flavor-packed meat sauce nestled in, and finished with a topping of rich bechamel sauce. There are variations of eggplant moussaka, some using additional vegetable layers including potatoes or even zucchini squash. Other recipes, as they make in Egypt, ditch the bechamel topping, simply serving a deconstructed version with fried eggplant smothered in tomato sauce (it looks something like this fried eggplant dish). Today, we’re going to stick closer to classic moussaka with all the delicious layers involved. Even though Greek moussaka is not hard to make, it is a bit time consuming. The good news is, with a little planning, you can prepare it ahead of time. Be sure to read through for my tips. What you’ll need to make moussakaClassic moussaka has three key components: sliced eggplant, the meat sauce, and the bechamel sauce. Here are the ingredients you need to make each of the layers:
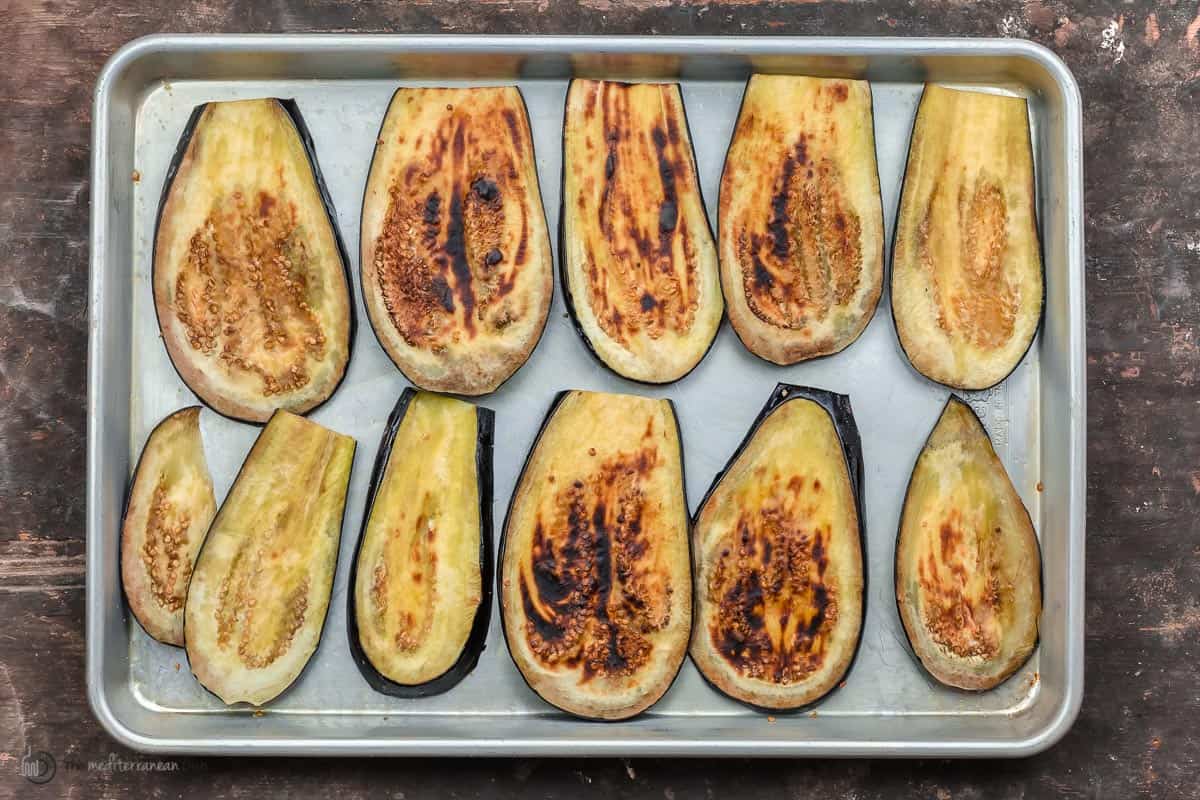
 How to prepare eggplant for moussaka?Because eggplant is one of the main ingredients in this recipe, preparing it properly is important.
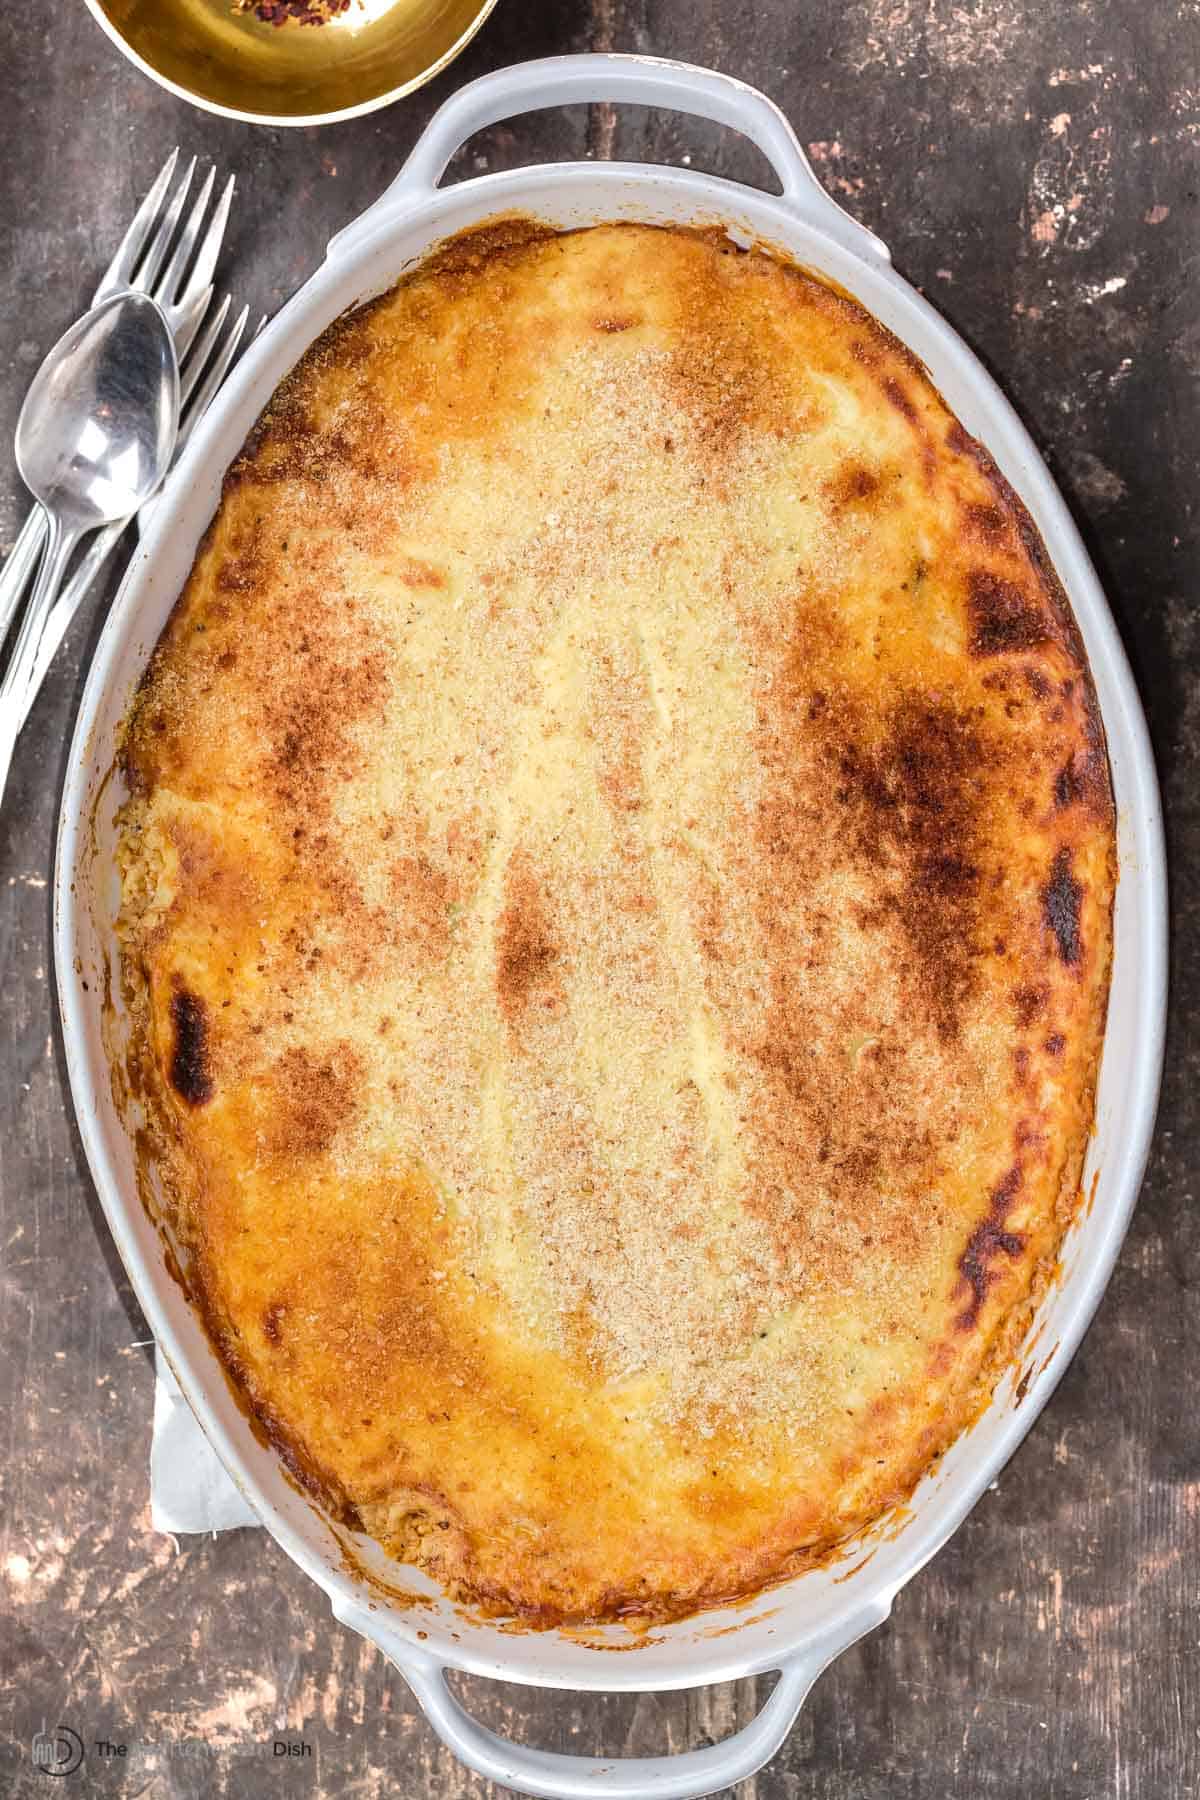
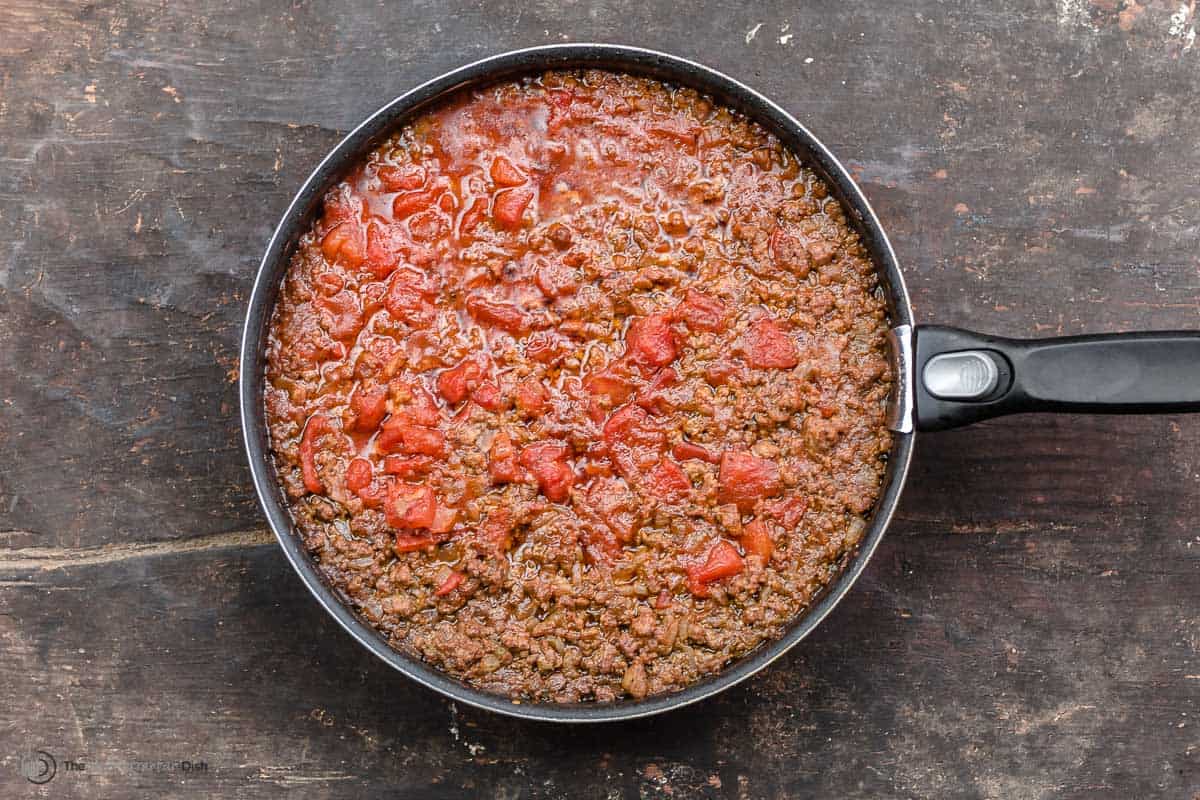
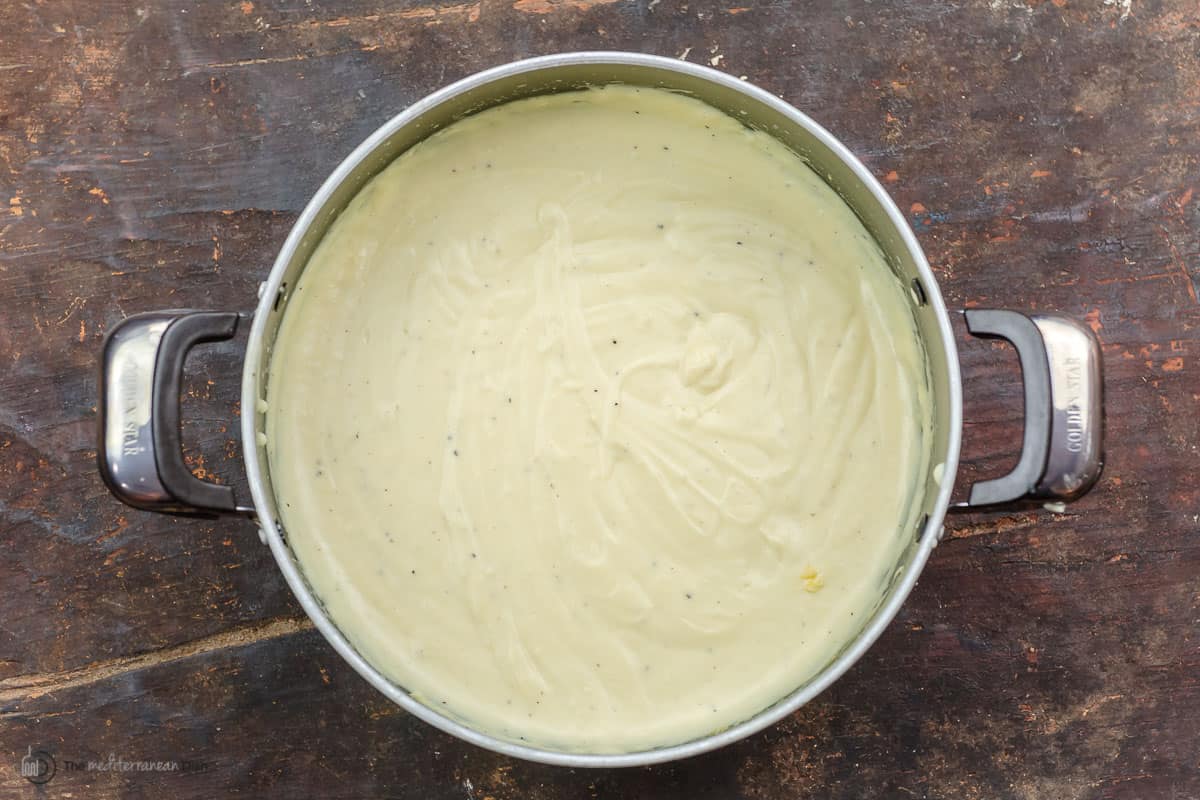
Should you salt eggplant for moussaka?This is a hotly debated topic among cooks, and many do not believe you need to salt eggplant. But there are two reasons I believe salting the eggplant helps. Salt helps to draw out excess moisture, so that when your moussaka bakes, it won’t be swimming in liquid. Salted eggplant also has a nice creamy texture, which works really well in moussaka. Secondly, eggplant can be quite bitter. Salt helps to remove that bitterness, making eggplant more palatable. To salt the eggplant, simply sprinkle salt onto the slices and allow it to sit for 30 minutes. 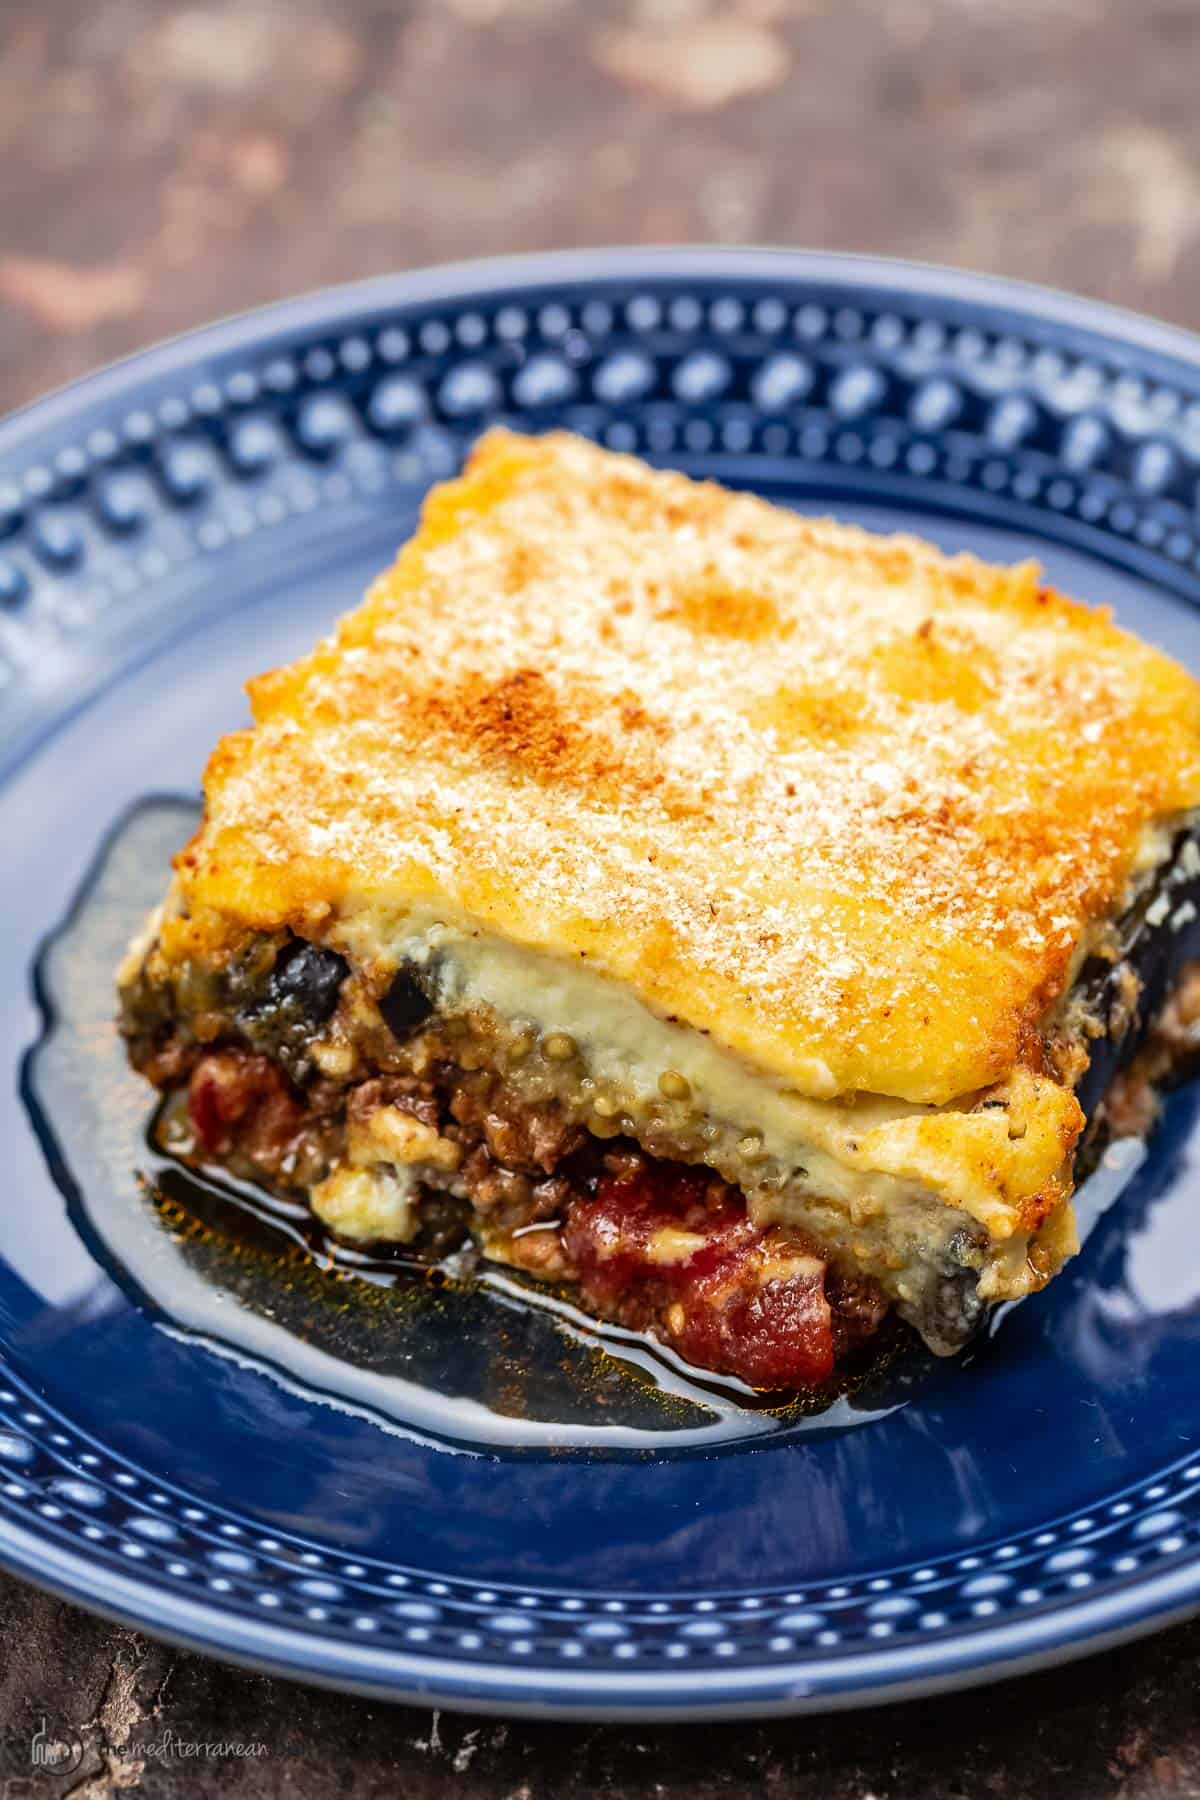 Moussaka meat sauceThe rich, thick meat sauce in moussaka is sure to be a hit in your home! You can use either ground lamb or beef, but I used lamb because it is such a flavorful type of meat. But I know lamb can be polarizing for this very reason, so beef would be a good substitute, and would still yield decadent results. The ground lamb is spiced with comforting, warming cinnamon, nutmeg, paprika, pepper, and dried oregano. For some delicious umami, I add a generous amount of canned tomatoes. This is followed by wine and beef broth – both powerhouses of flavor! A teaspoon of sugar helps to mellow out some of the acidity but still maintains the different levels of flavor in this traditional moussaka. Bechamel sauce with a twist!Traditional bechamel sauce (or white sauce) has three main ingredients: butter, flour, and milk. The result is a gorgeous creamy sauce, thick but still slightly runny. The bechamel sauce in moussaka differs in that it contains eggs, which, when baked, result in a sauce that sets pretty firmly. So when you cut your moussaka up into slices for serving, the bechamel sauce should not run. How to make moussaka
Make ahead tips for moussakaEggplant moussaka is not a difficult dish to make, but it is time consuming. You can save time by making the components in advance. Here are some tips for preparing moussaka in advance:
Vegetarian moussaka optionIf you’re looking to make a vegetarian version of this recipe, I’ve got you covered! Check out my Vegetarian Moussaka recipe. My veggie moussaka recipe is as hearty as this one, with just a couple of key differences. First, I replaced the meat sauce with an equally delicious lentil sauce. And I added layers of potatoes and zucchini for bulk. What to serve with itThe great thing about moussaka is that it is a complete meal. If you eat it by itself, it will be more than satisfying and bursting with flavor! But if you want a bit of crunch, you could serve it alongside a side salad, like my 3-Ingredient Mediterranean Salad. Additional recipe FAQs:
What is the difference between lasagna and moussaka?
The main difference between the two is that lasagna is made with layers of pasta, while moussaka is made with vegetable layers.
Can you freeze eggplant moussaka?
You can freeze eggplant moussaka. Once it cools, simply cut the moussaka into pieces and freeze them. This way, you can reheat individual slices at a time.
How long does cooked moussaka last in the fridge?
Greek moussaka will keep well in the fridge for about five days.
Can you make moussaka with potato?
Yes, you can use potato instead of eggplant. Cooking time for the potatoes to be tender will be different than eggplant. Other eggplant recipes to tryBrowse all Mediterranean recipes.  Moussaka: Eggplant Casserole
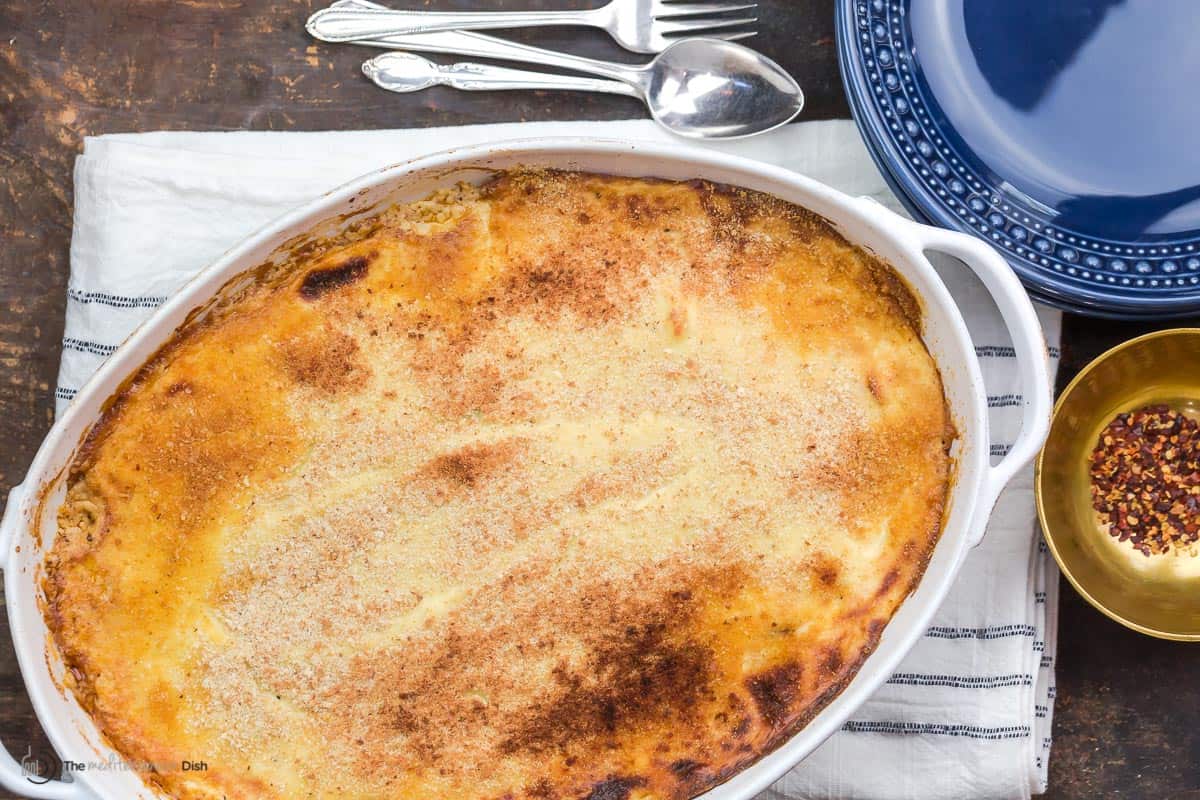
Greek Moussaka is an eggplant casserole with layers of roasted eggplant and spiced meat sauce, topped with creamy bechamel sauce. Once baked, be sure to allow the moussaka a few minutes to rest before cutting through, the casserole needs to settle so it does not fall apart when you slice into it. More tips in the post and recipe notes.
Servings 12 pieces
Calories 309.9kcal
Ingredients
For the meat sauceFor the bechamel
Instructions
Notes
Nutrition
Calories: 309.9kcal | Carbohydrates: 19.4g | Protein: 12.3g | Fat: 20g | Saturated Fat: 6.4g | Monounsaturated Fat: 10.5g | Trans Fat: 0.1g | Cholesterol: 61.2mg | Sodium: 259.4mg | Potassium: 510.7mg | Fiber: 3.5g | Vitamin A: 225.7IU | Vitamin C: 5.6mg | Calcium: 141mg | Iron: 2mg
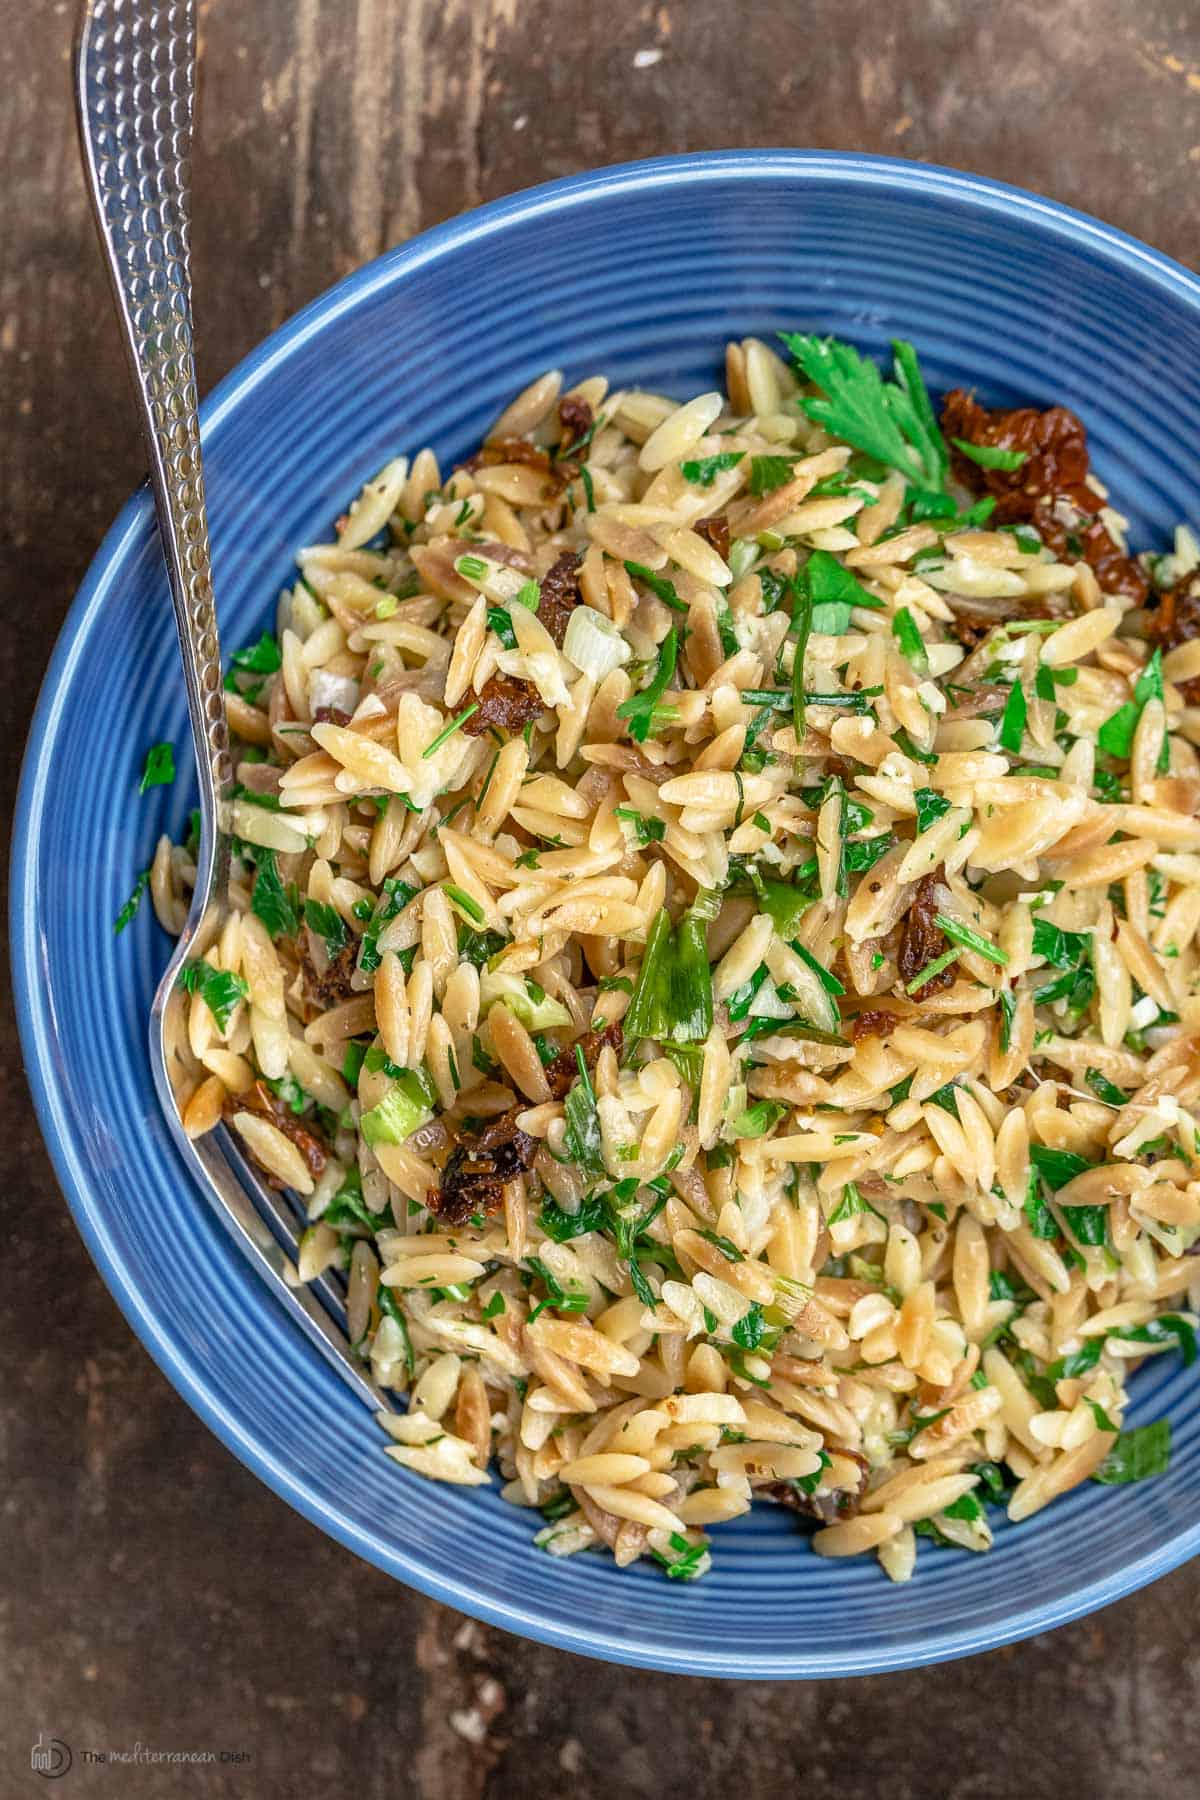
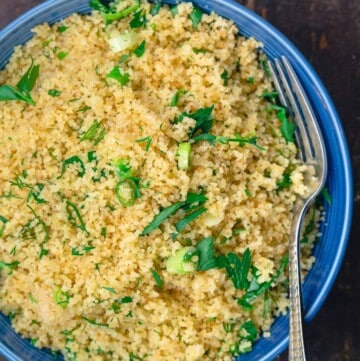
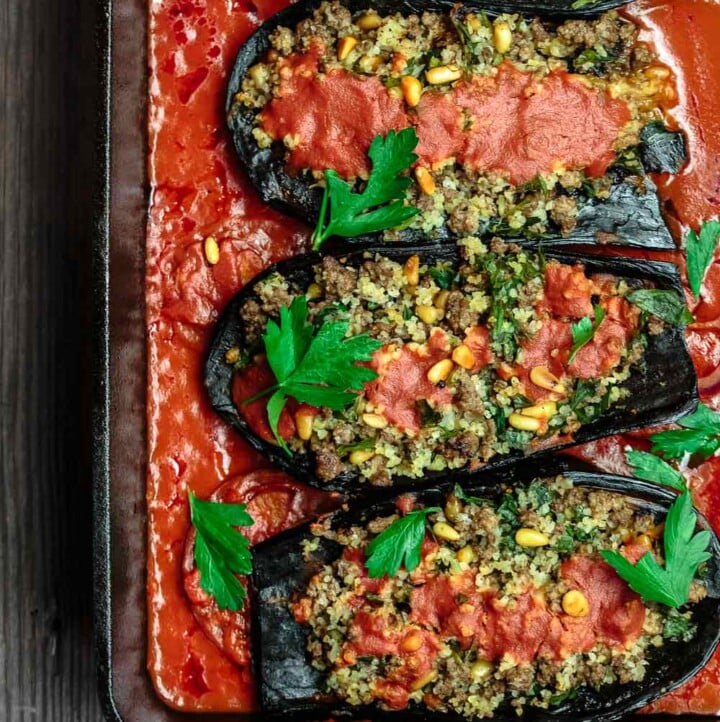
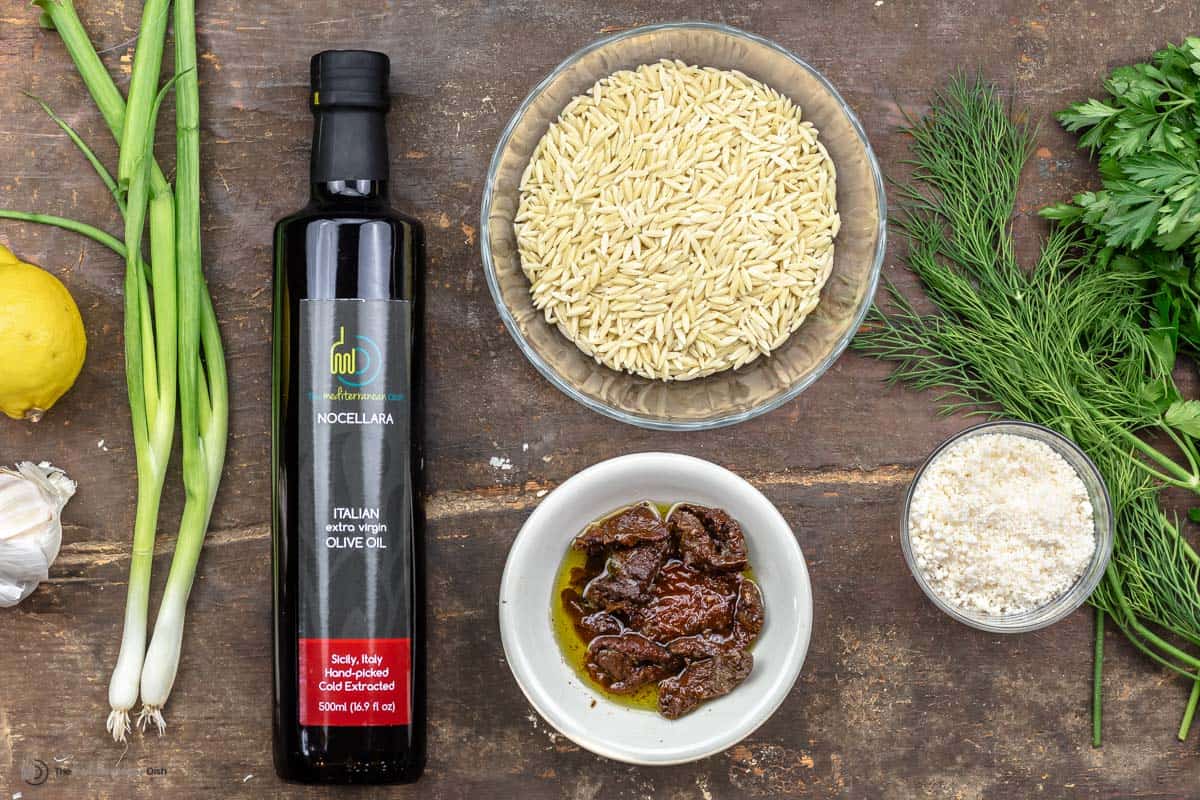
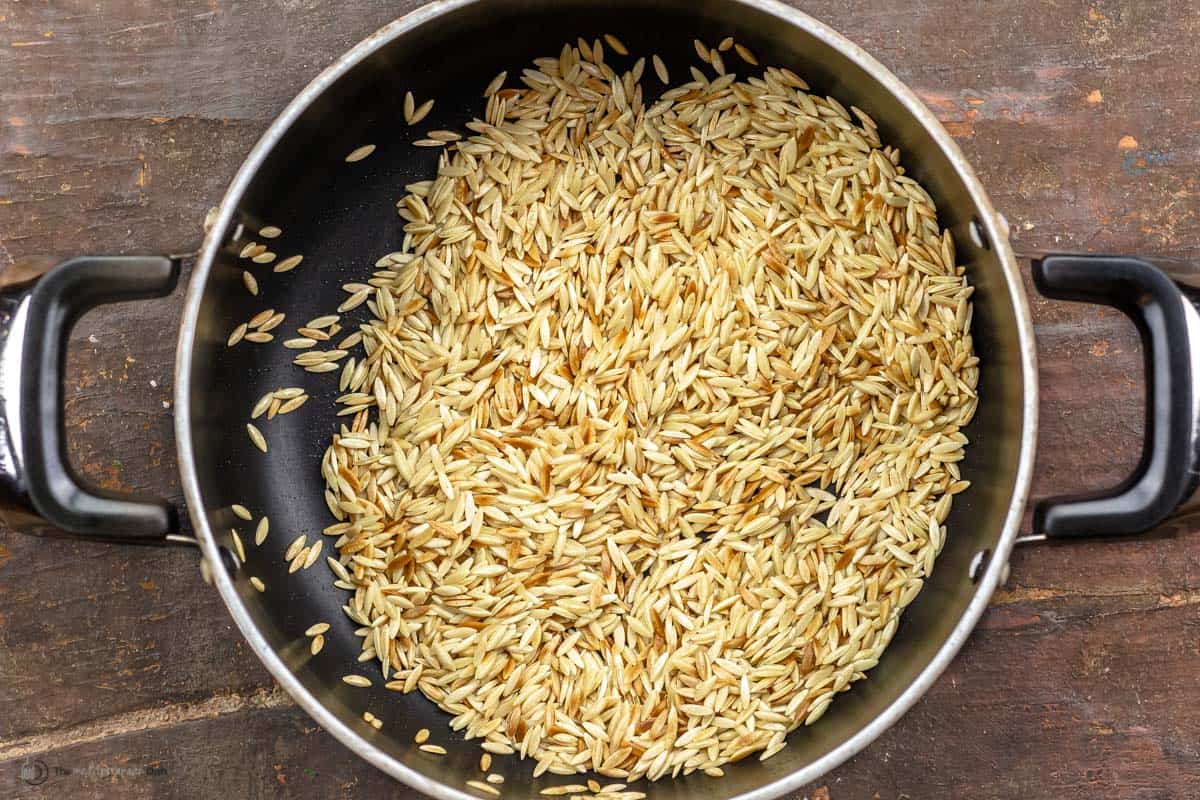
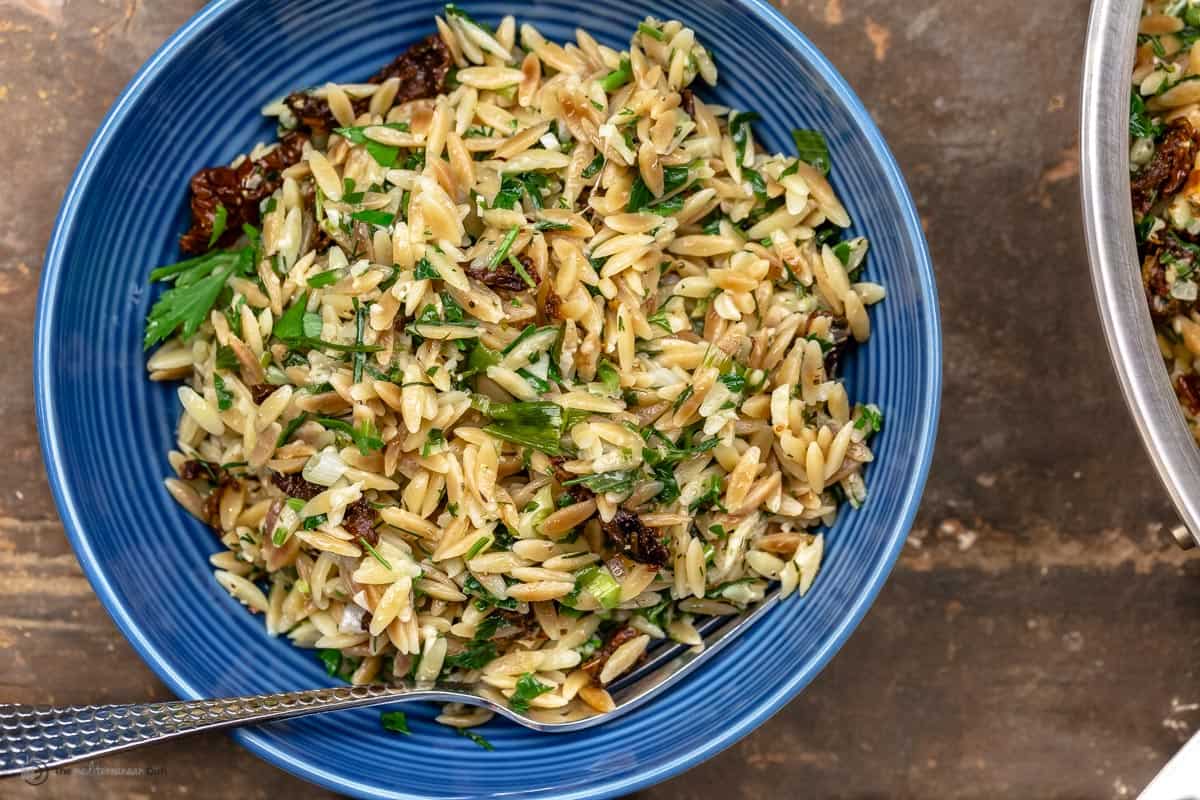
The post Greek Moussaka Recipe: Eggplant Casserole appeared first on The Mediterranean Dish. via The Mediterranean Dish https://www.themediterraneandish.com/moussaka-recipe-eggplant-casserole/ You can make this nutty, Mediterranean-style Toasted Orzo Pasta Recipe with Garlic, Parmesan and Sun-dried Tomatoes in just 15 minute! It will steal the show next to your favorite protein, and you can even serve it as a quick and easy vegetarian meal on its own. 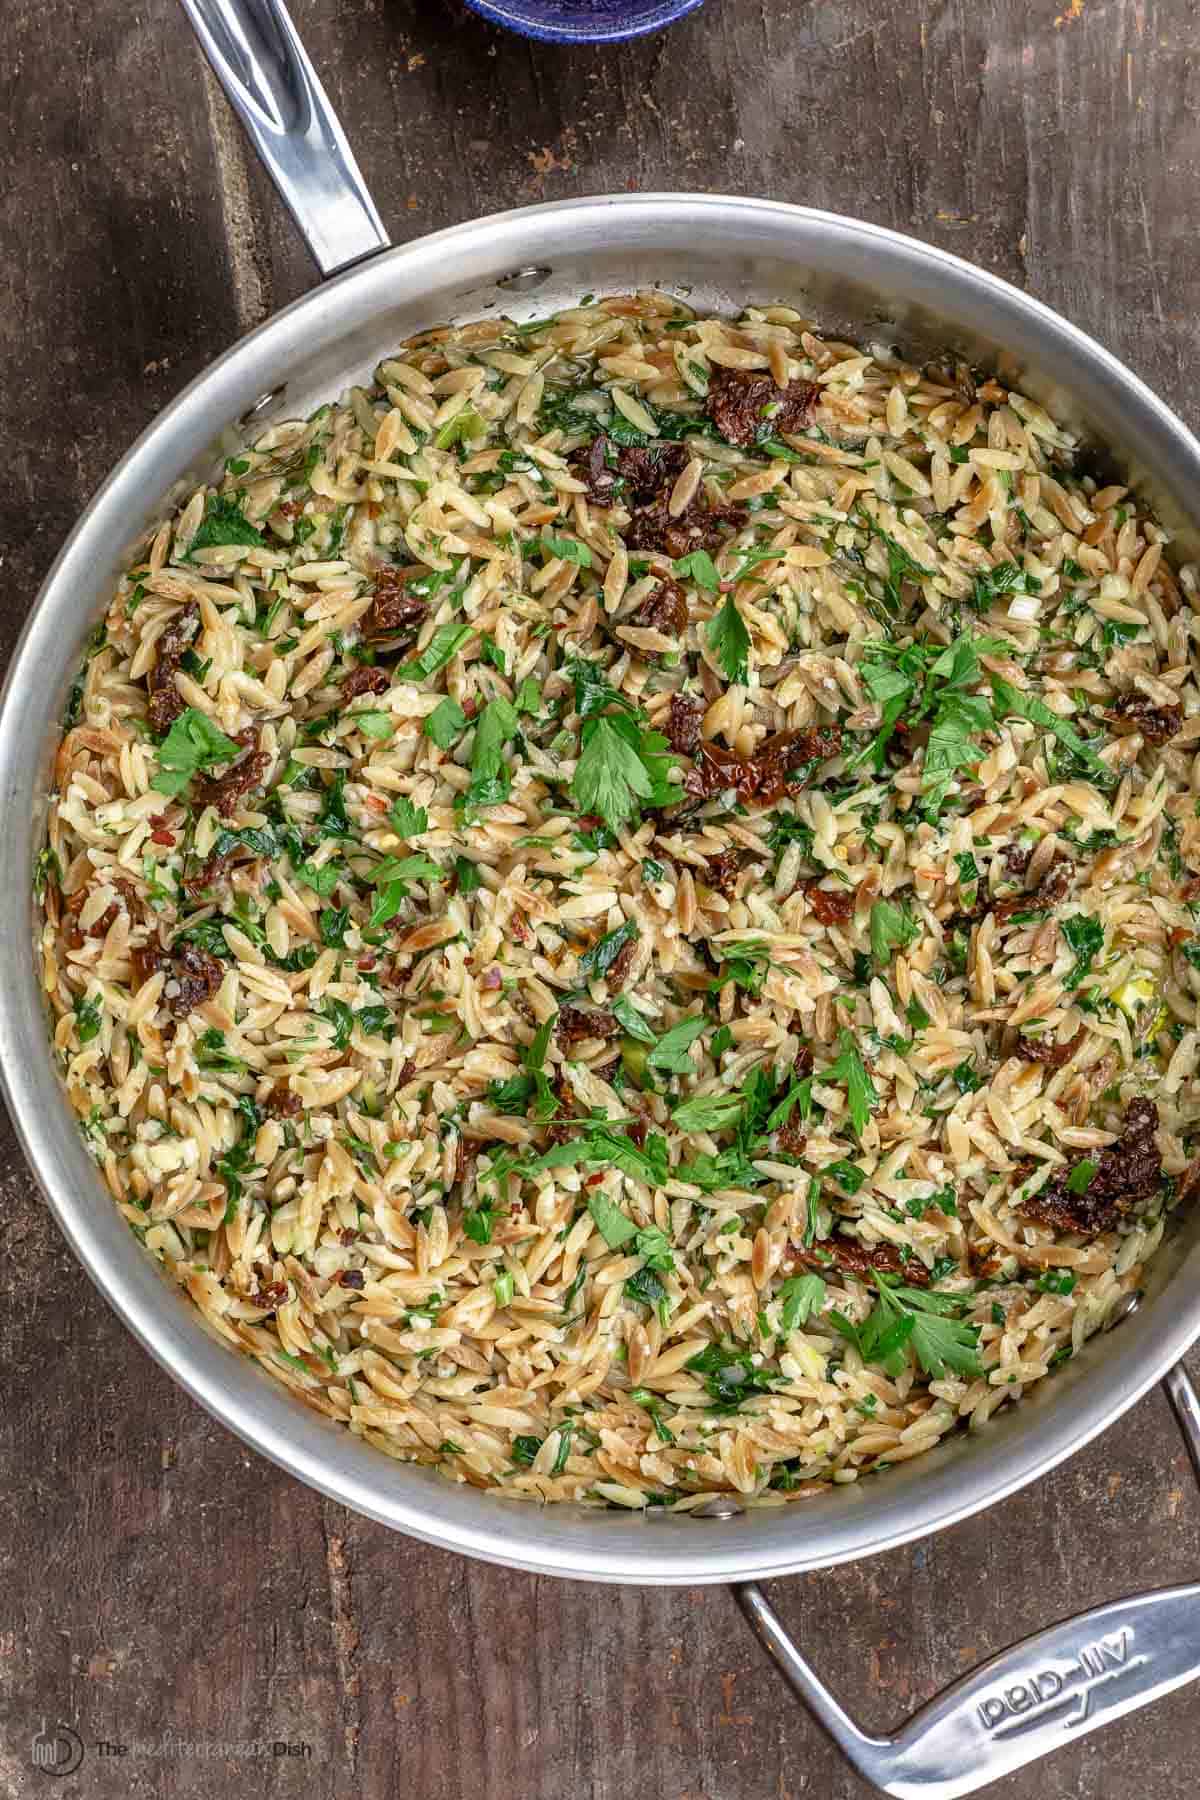 What is orzo?While orzo may be shaped like rice, it is a tiny pasta. It is most often made from wheat semolina flour or white flour but whole wheat and gluten-free orzo options are now widely available.I t cooks up quickly in just about 7 to 8 minutes, which makes it an ideal add-in for dishes as well as a quick and easy side dish. I love using orzo to add a little bulk and texture to one pot meals and dishes like shrimp soup or Greek youvetsi (lamb and orzo stew). It's also a great choice for pasta salads. The majority of people will cook orzo plain and serve it as aside. While there's nothing wrong with plain orzo, that's not what we're making today. Prepare to make an orzo pasta recipe that is way more than a little side--I call it my "kicked up" toasted orzo! Prepared Mediterranean style, this nutty orzo with garlic, fresh herbs, parmesan and sundried tomatoes is a meal in its own right! But sure, you can serve it as a side next to your favorite protein like lamb, baked chicken, or lemony cod. So many ways to use it even as a simple vegetarian meal. 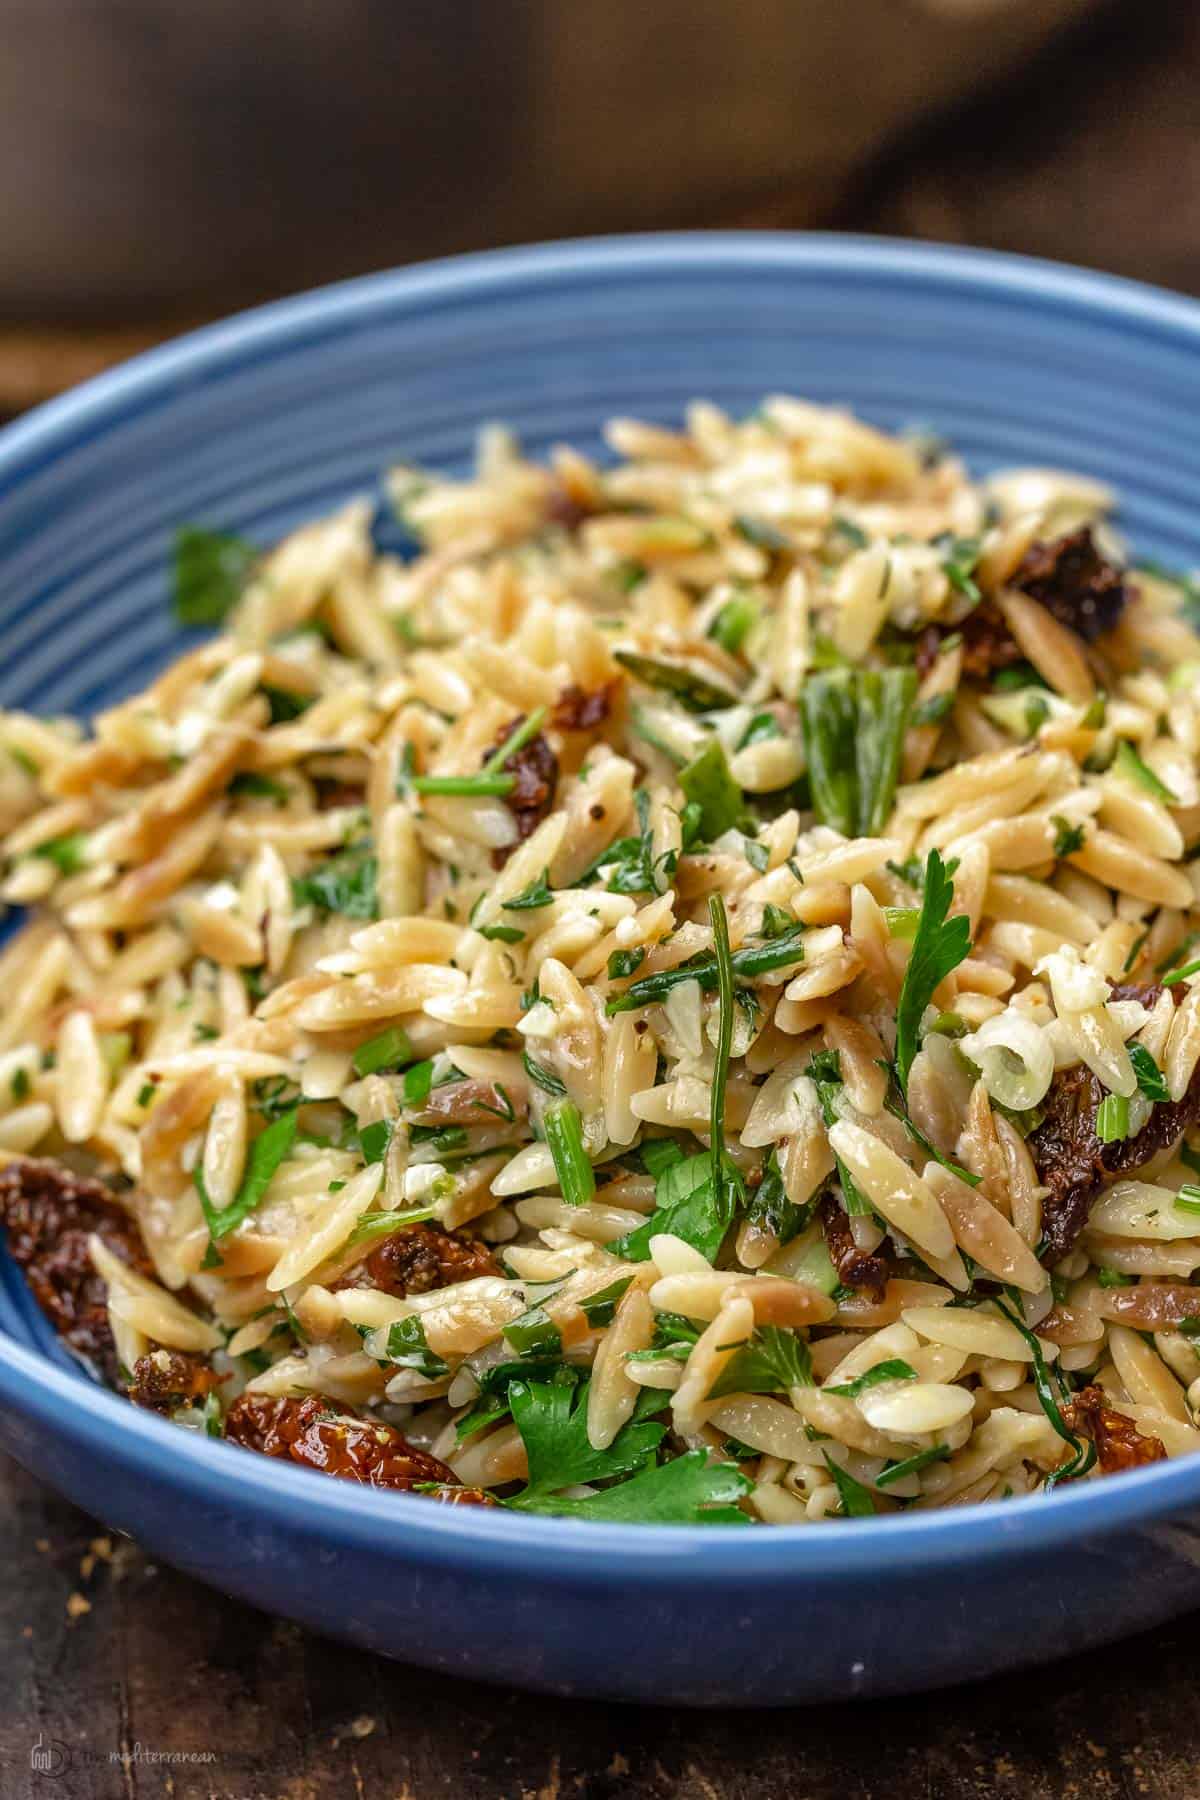 How to cook orzo?You cook orzo pasta just as you would any other pasta - in boiling, salted water (for 1 ½ cups of orzo, you'll need about 7 cups of boiling water). But first, for best flavor, toast your orzo in a little bit of extra virgin olive oil before you cook it in boiling water! Just warm up the oil and add the orzo, then toss it around until it turns golden brown). This short step enhances the flavor and gives the orzo a delicious and subtly nutty flavor. Once toasted, add the orzo to a pot of boiling water, seasoned with a good amount of salt and cook for about 7 to 8 minutes, until the pasta is chewy but still slightly firm--to al dante as they say. Before you drain your pasta, remember to keep a bit of the starchy water to use for your sauce. What you'll need to make this orzo pasta recipe
This Mediterranean-style toasted orzo pasta is made with just a few ingredients with bold flavors. Here is what you'll need to make it:
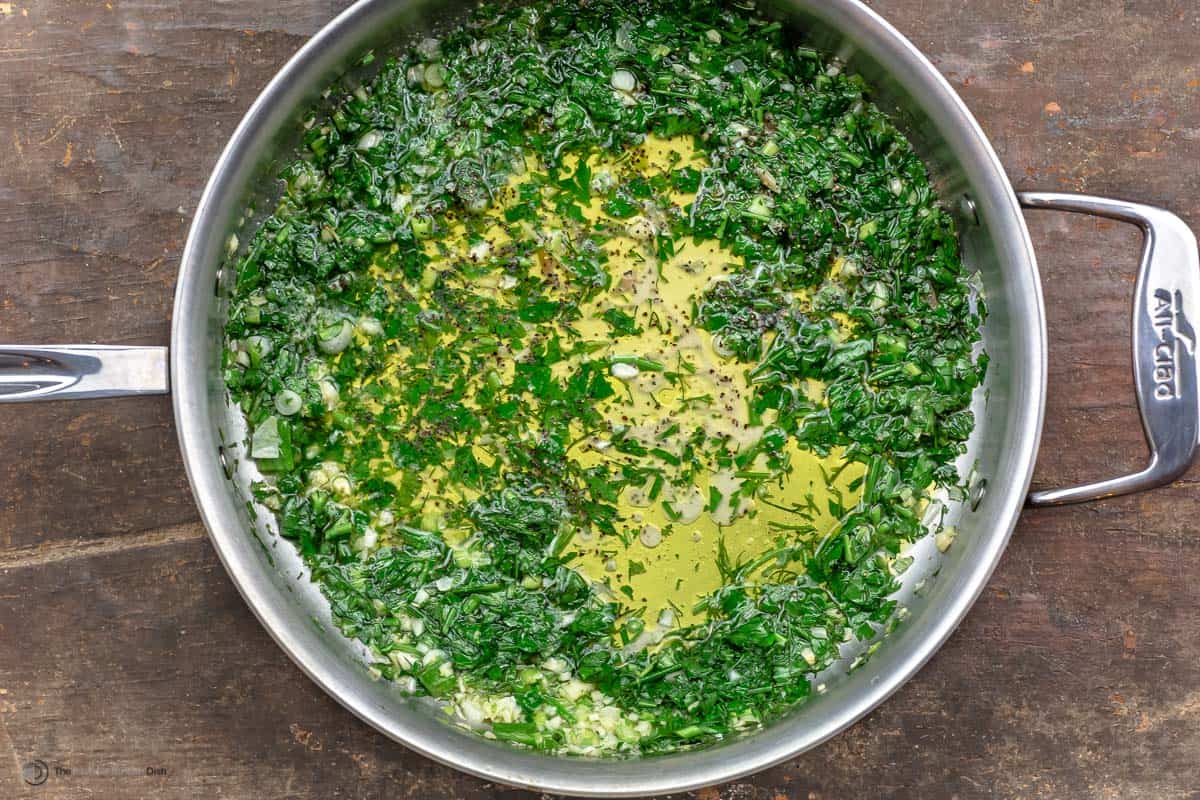
How to make Mediterranean-style toasted orzoHere is how to make this kicked-up orzo for the perfect side or little vegetarian meal:
Tips for successIf this is your first time cooking toasted orzo, here are a few things to keep in mind.
 Serve it withAs I mentioned above, while this toasted orzo pasta recipe was intended as a way to spruce up a plain side, you can easily turn it into a meal on its own! It would make a great vegetarian meal for sure. But, I do typically serve it as a side dish. One thing I love about orzo is that it can take the place of rice as a side dish and it goes with basically everything. This toasted orzo can be served with everything from baked chicken thighs to shrimp, or even with my favorite vegetable skewers to keep it all vegetarian! How to store leftoversLeftover orzo can be stored in the fridge for up to 3 days. Reheat on the stovetop for best results (or the microwave in a pinch) and note that you may need to add a splash of water to prevent it from drying out. More orzo recipes:Browse Italian Recipes. Browse more Mediterranean Recipes.  Mediterranean-Style Toasted Orzo with Parmesan and Sundried Tomatoes
Prepared Mediterranean-style, this nutty Toasted Orzo Pasta Recipe with Garlic, Parmesan and Sundried Tomatoes will steal the show next to your favorite protein. You can even serve it as a quick and easy vegetarian meal on its own!
Servings 4 people
Calories 280kcal
Ingredients
Instructions
VideoNotes
Nutrition
Calories: 280kcal | Carbohydrates: 46.4g | Protein: 13.2g | Fat: 4.7g | Saturated Fat: 2.3g | Cholesterol: 11mg | Sodium: 207.4mg | Potassium: 301.2mg | Fiber: 2.9g | Sugar: 2.1g | Vitamin A: 1828.5IU | Vitamin C: 33.3mg | Calcium: 193.7mg | Iron: 2.3mg
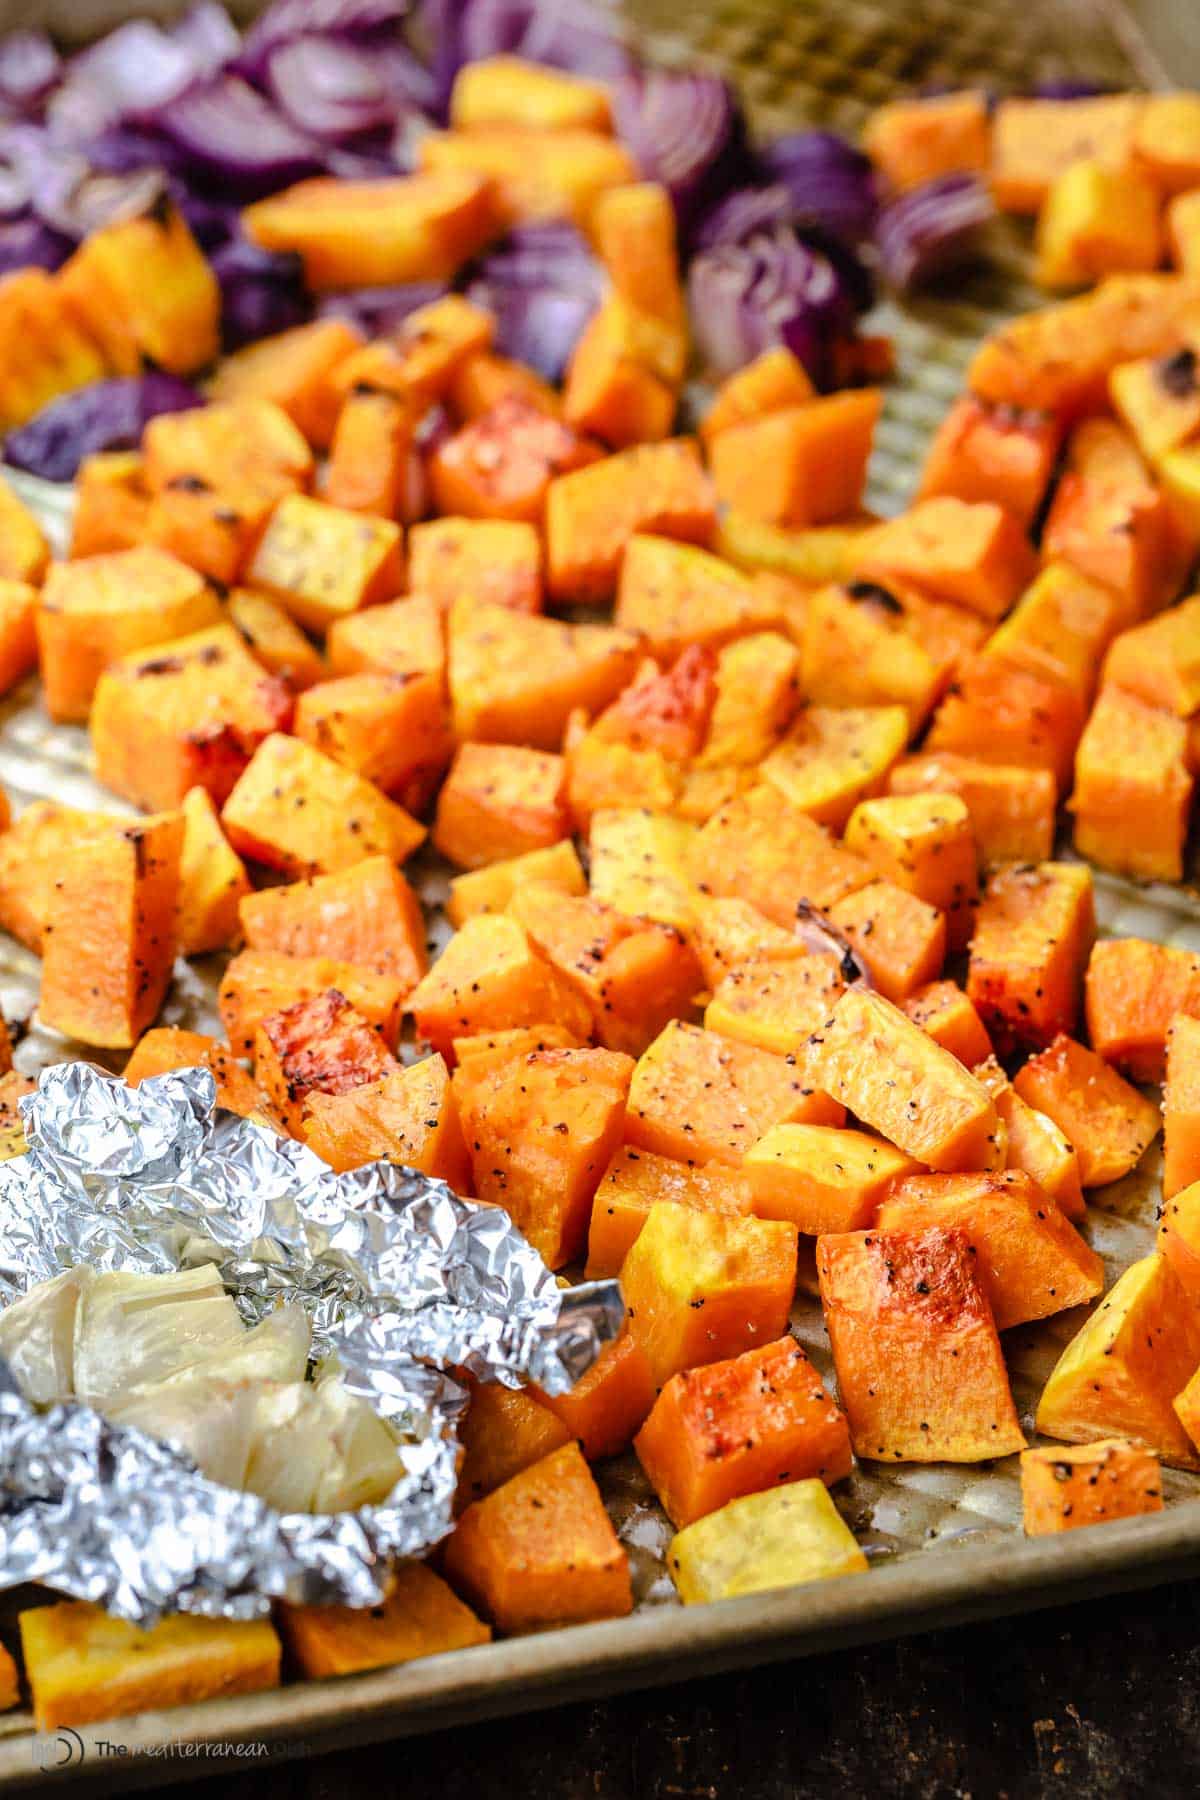
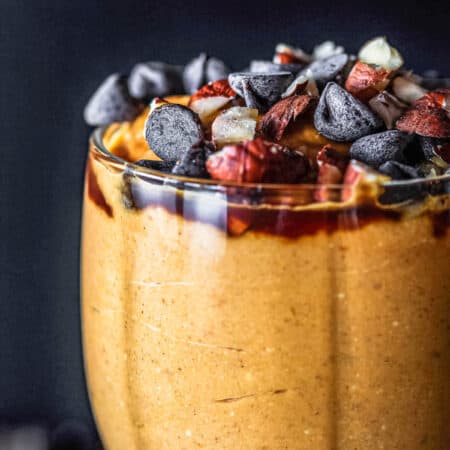
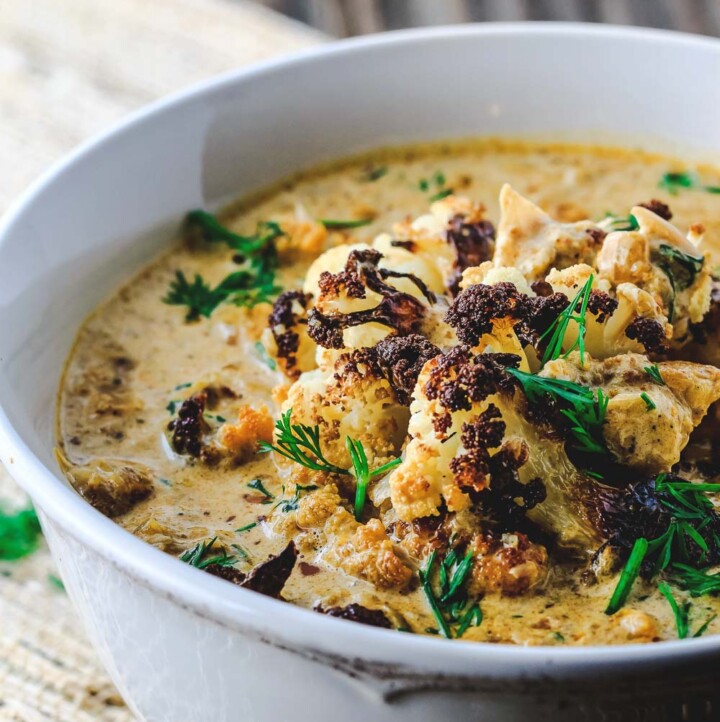
The post Toasted Orzo Pasta Recipe with Parmesan and Sun-dried Tomatoes appeared first on The Mediterranean Dish. via The Mediterranean Dish https://www.themediterraneandish.com/orzo-pasta-recipe/ Smooth, creamy Roasted Butternut Squash Soup, layered with subtly sweet and nutty flavors. It is so comforting, you won't believe it is vegan! Be sure to check out my tips for how to make butternut squash soup perfectly every time! 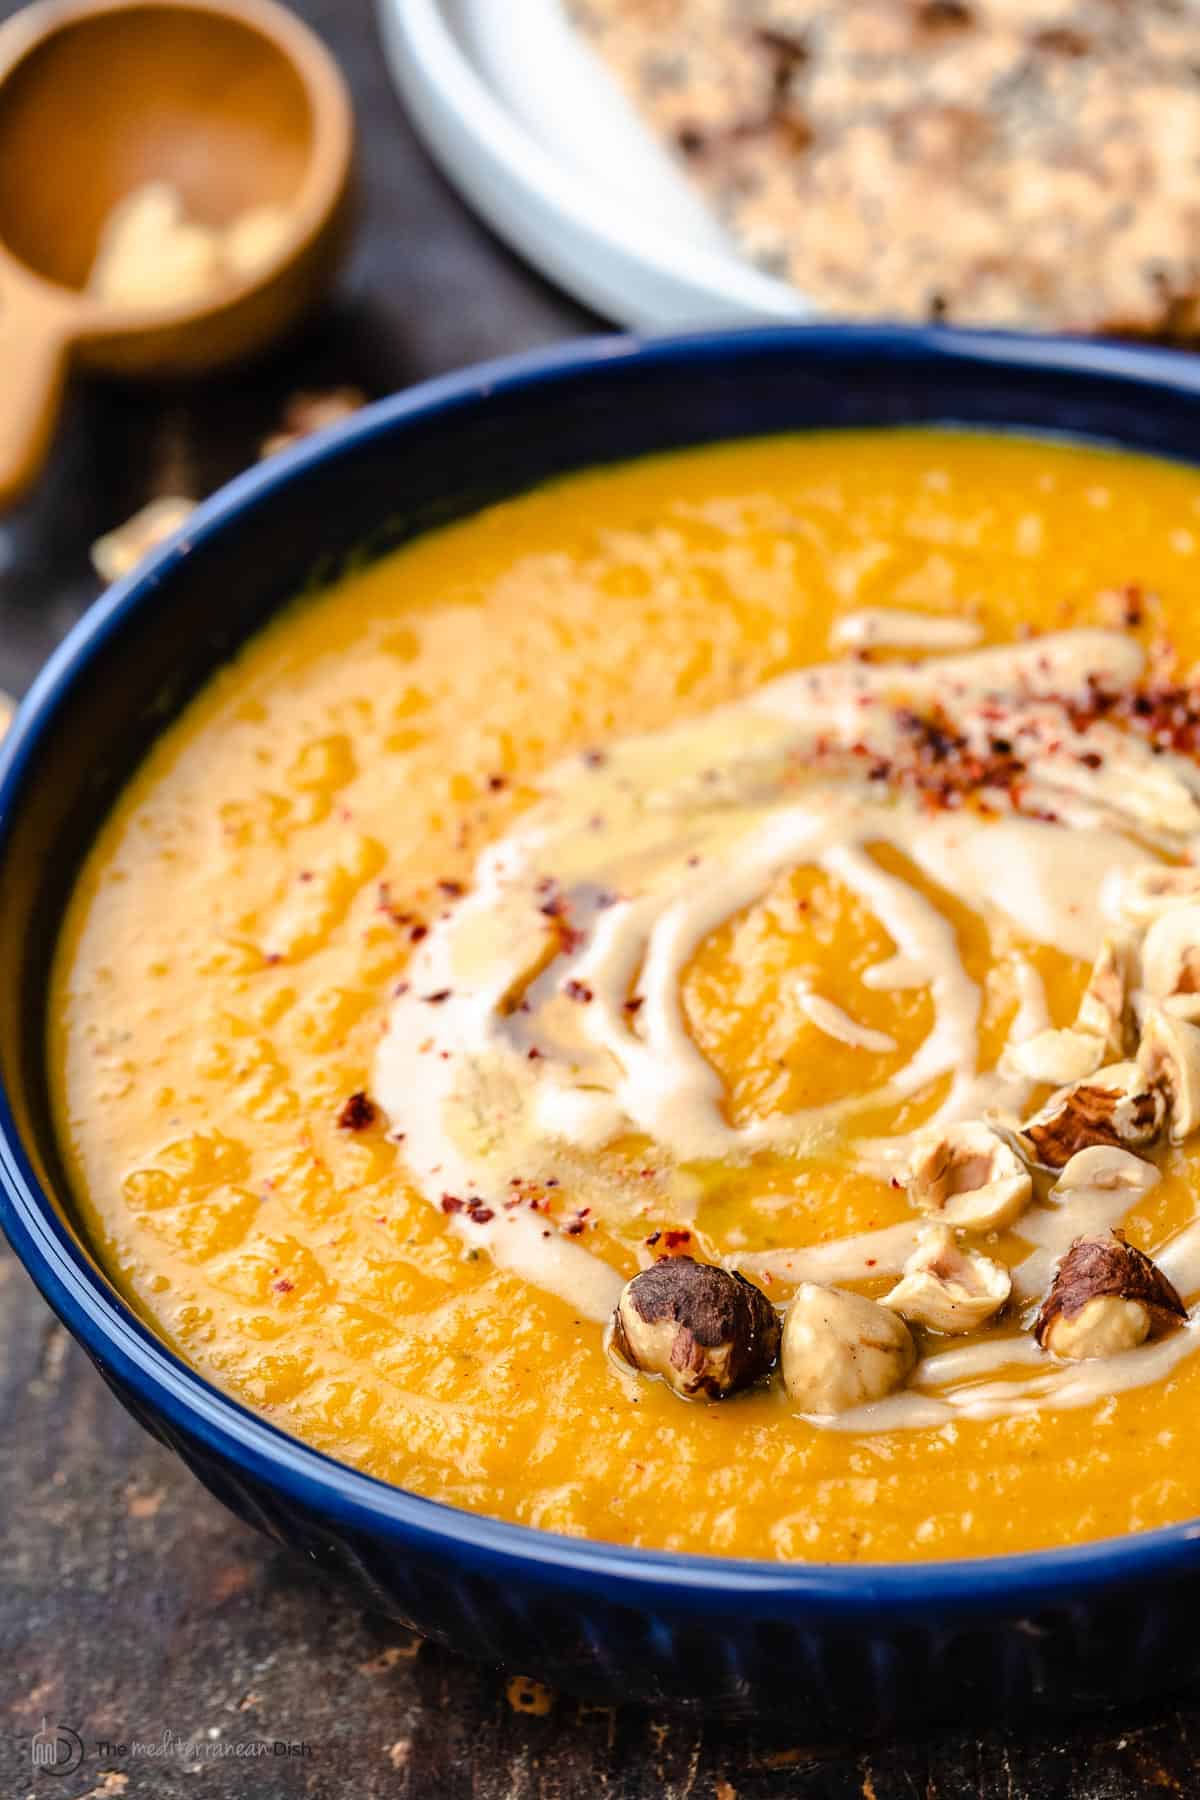 The secret to extra creamy vegan butternut squash soup!This roasted butternut squash soup takes on a tasty Mediterranean twist, and it is extra creamy and comforting, you won't even know it's vegan! This easy recipe builds flavor immediately by roasting the butternut squash with some red onions and garlic, coaxing out the veggies' natural sweetness. To season the soup, I use a blend of warm spices including nutmeg, cinnamon, Aleppo pepper, and a dash of turmeric. But there is one big secret ingredient that makes all the difference in this cozy soup: Tahini! That's right! A stir of rich, nutty tahini paste (made from roasted sesame seeds) adds heft, creaminess, and nutrition, taking your average butternut squash soup to a whole new level of delicious! I promise you it will not change the flavor but will certainly enhance it! I served this soup to a group of friends, with a garnish of chopped hazelnuts and more tahini that's been stirred with honey. Everyone loved it, and they were surprised that it was a truly vegan butternut squash soup. If there was ever a soup meant to be enjoying during the cool fall months, this is it! Grab yourself a butternut squash and some of my favorite tahini and make this ASAP! 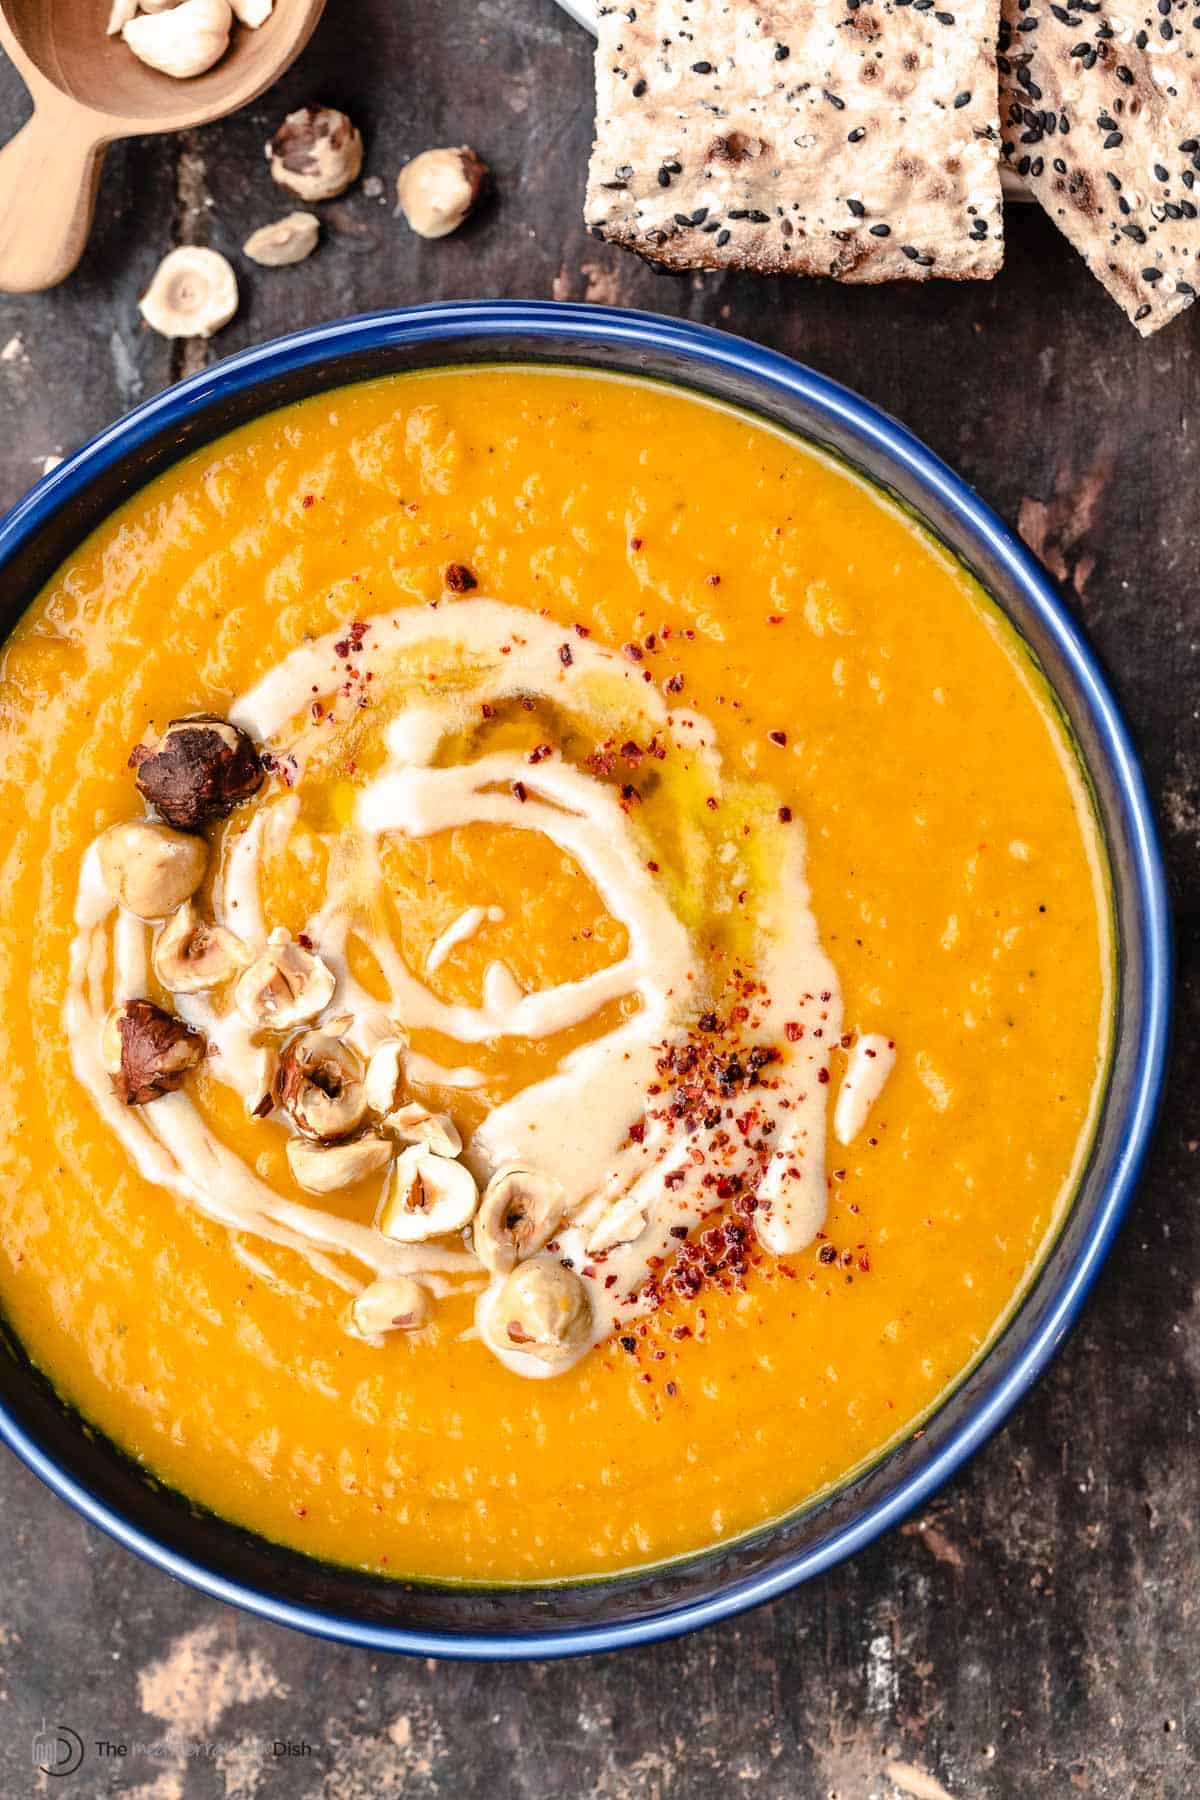 What you'll need to make this recipeThis vegan squash soup is made with just a handful of ingredients and a few warm spices.
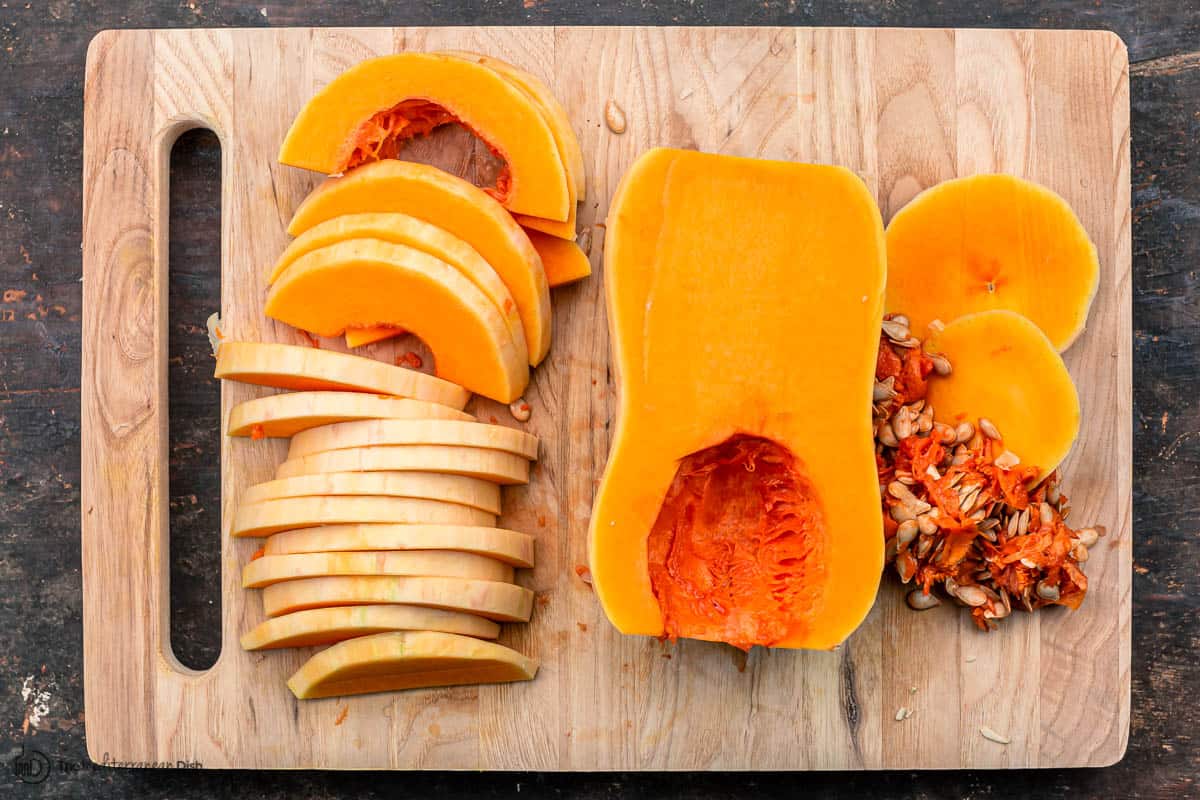
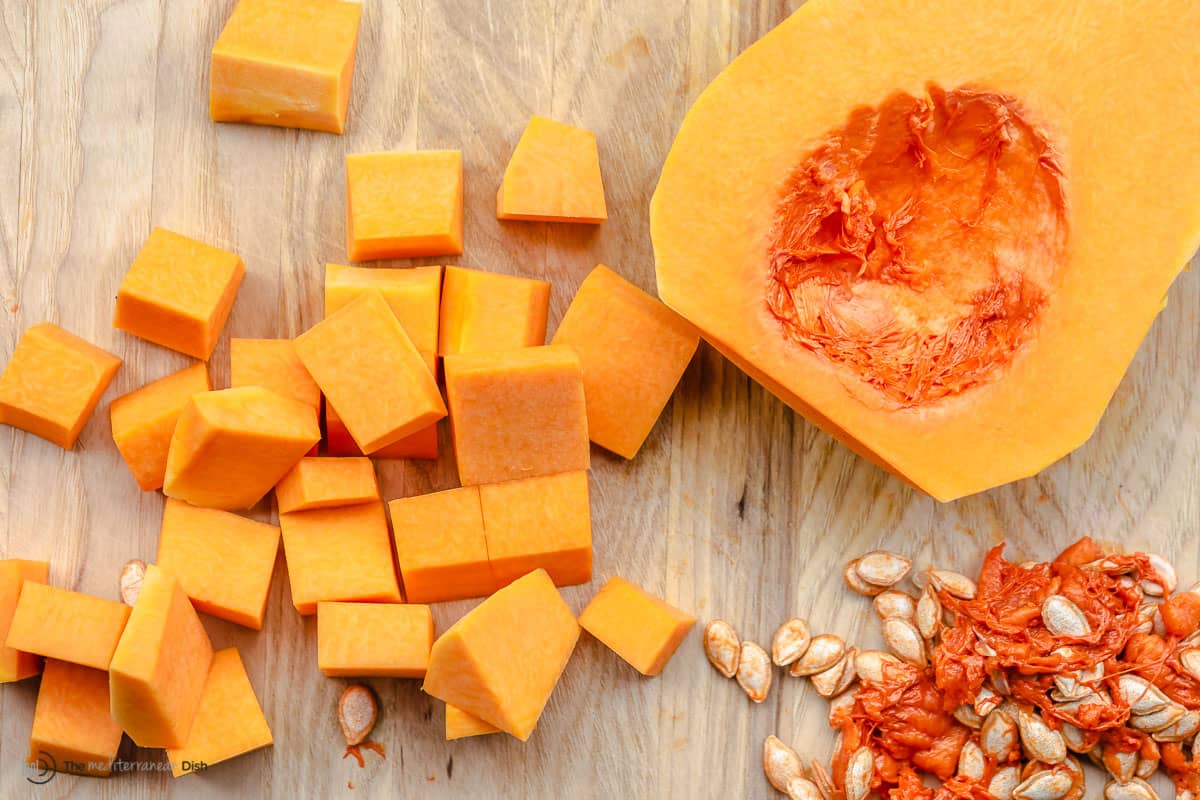
How to peel butternut squash?Peeling and preparing a whole butternut squash for roasting is easier than most people think, and it will give you far better results than the frozen stuff. Here is what you need to do:
How to cut butternut squash into cubes?
For this recipe, you'll need to cut the butternut squash into small chunks or 1-inch cubes. Once you peel the squash, here is what you do to cut it:
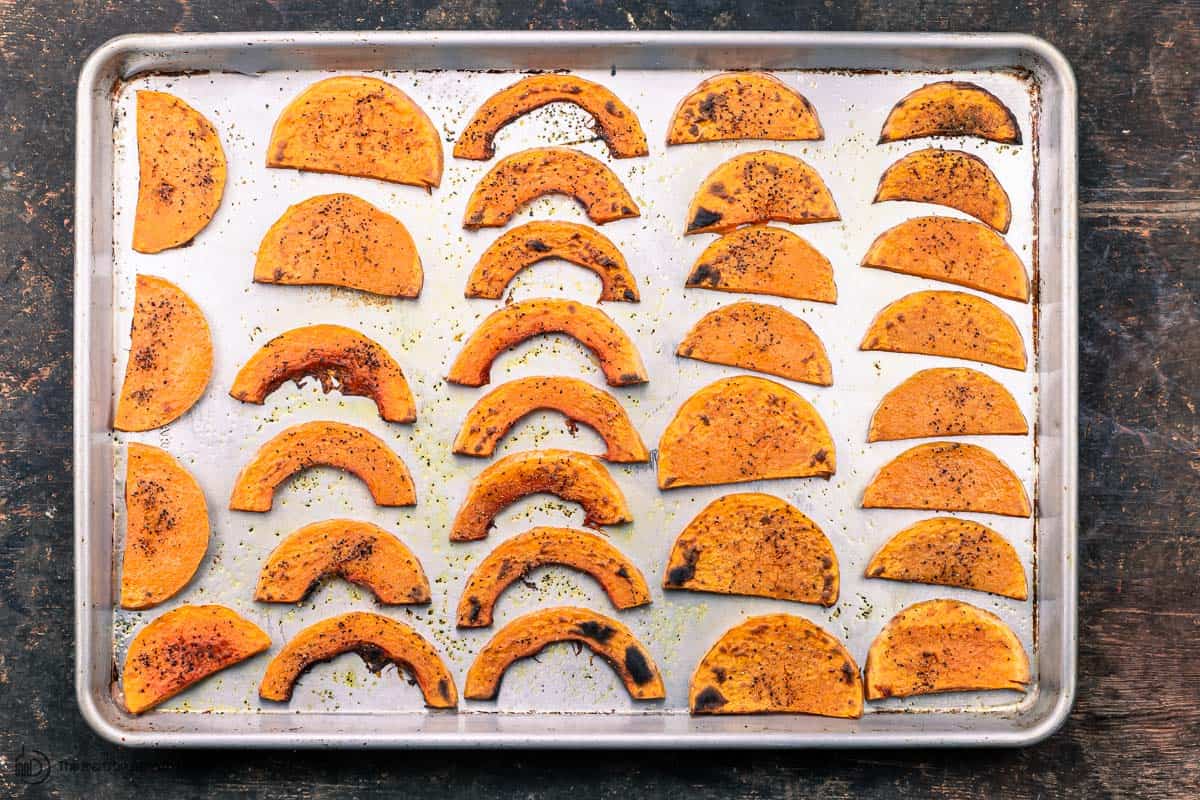
How to make roasted butternut squash soupOnce you prepared and cut your squash into cubes or 1-inch chunks, you're ready to make this easy vegan butternut squash soup. Here is how:
 Tips for successFor perfectly flavored, creamy butternut squash soup here are a few things to keep in mind.
What to serve with this soupWith the tahini-honey topping and crushed hazelnuts, I don't find the need to anything else to this deliciously creamy vegan soup. It's ready to go as a starter or a complete meal on its own. If you want to serve this roasted butternut squash soup with something more, you could always do some pita grilled cheese or a big salad! 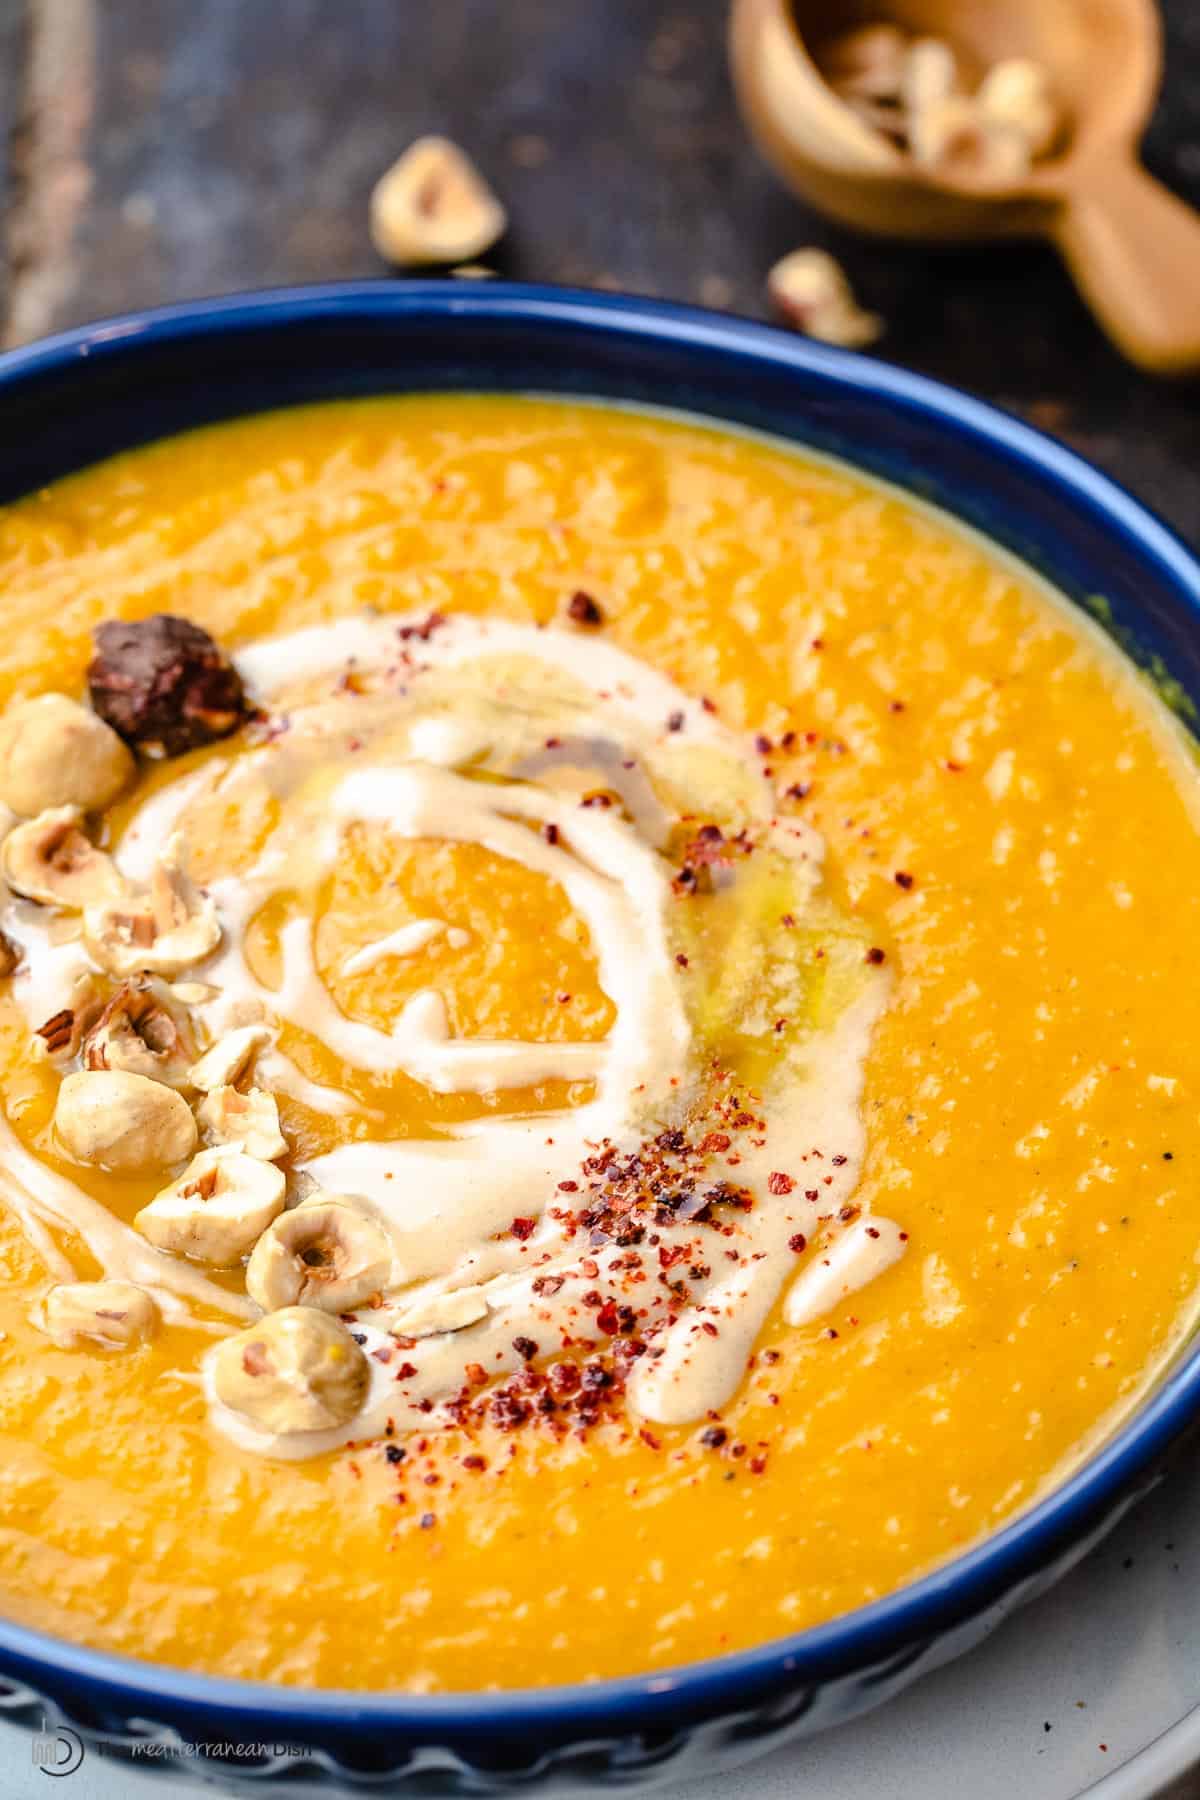 How to store leftoversLeftover vegan butternut squash soup will last in the fridge for up to 4 days. You can also freeze your butternut squash soup, for up to 3 months! Allow the soup to cool completely and then transfers to a freezer-safe containers. Thaw in the fridge and reheat on the stovetop over gentle medium-low heat (you'll need to add more broth as the soup will thicken as it is stored). More butternut squash recipesBrowse all Mediterranean recipes Visit Our Shop  Roasted Butternut Squash Soup
Made with rich nutty tahini and a few warm spices, this Roasted Butternut Squash Soup is all the comfort without the use of heavy cream! Smooth, creamy and a little nutty, you won't even know it's vegan!
Servings 6 servings
Calories 180.7kcal
Ingredients
Instructions
VideoNotes
Nutrition
Calories: 180.7kcal | Carbohydrates: 26.8g | Protein: 4.3g | Fat: 8.2g | Saturated Fat: 1.2g | Sodium: 208.4mg | Potassium: 560.4mg | Fiber: 3.9g | Sugar: 9.4g | Vitamin A: 13348.5IU | Vitamin C: 29.3mg | Calcium: 95mg | Iron: 1.8mg
The post Creamy Roasted Butternut Squash Soup (vegan) appeared first on The Mediterranean Dish. via The Mediterranean Dish https://www.themediterraneandish.com/vegan-butternut-squash-soup/ |
ABOUT MEHi, I am Daniel Jones from Overland Park, MO. I am a chef by profession, & also publish my recipe tips online on blogs and social media. Archives
April 2023
Categories |


 RSS Feed
