|
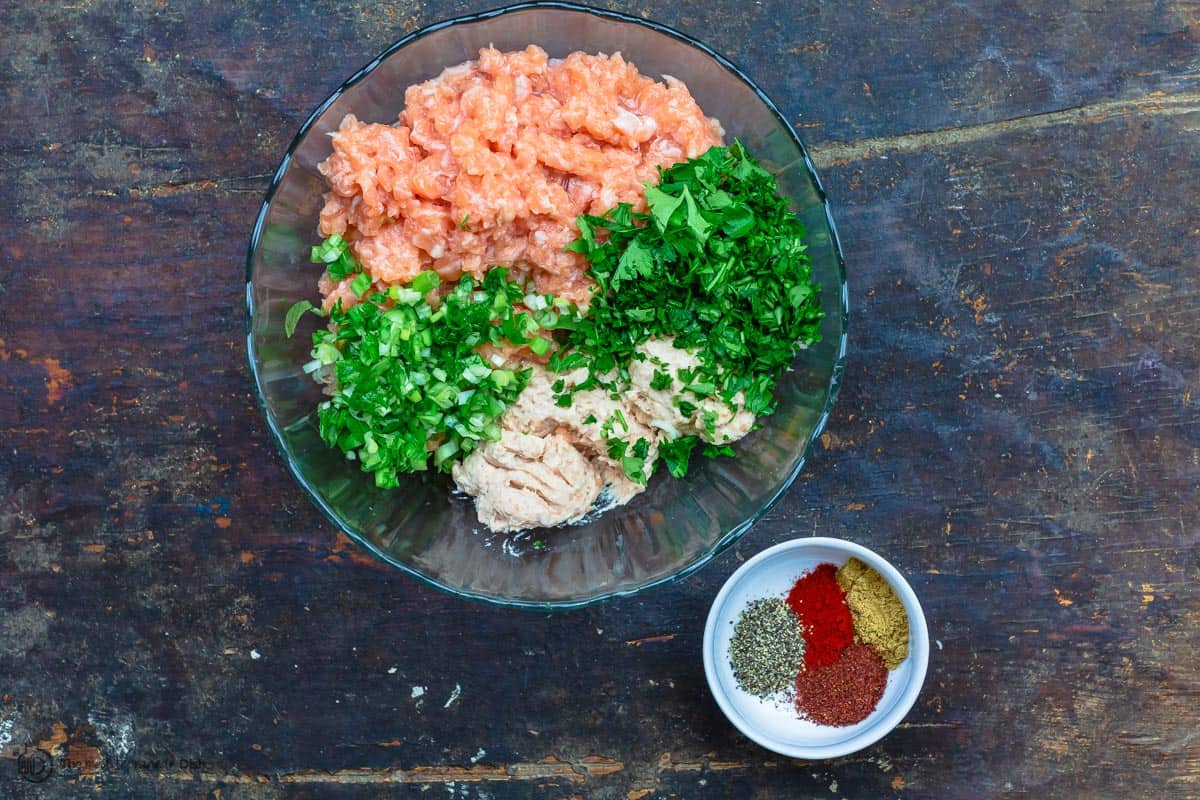
Never have a dry salmon burger again! Thanks to a few simple tips, you can make super JUICY, flavor-packed salmon burgers every single time! 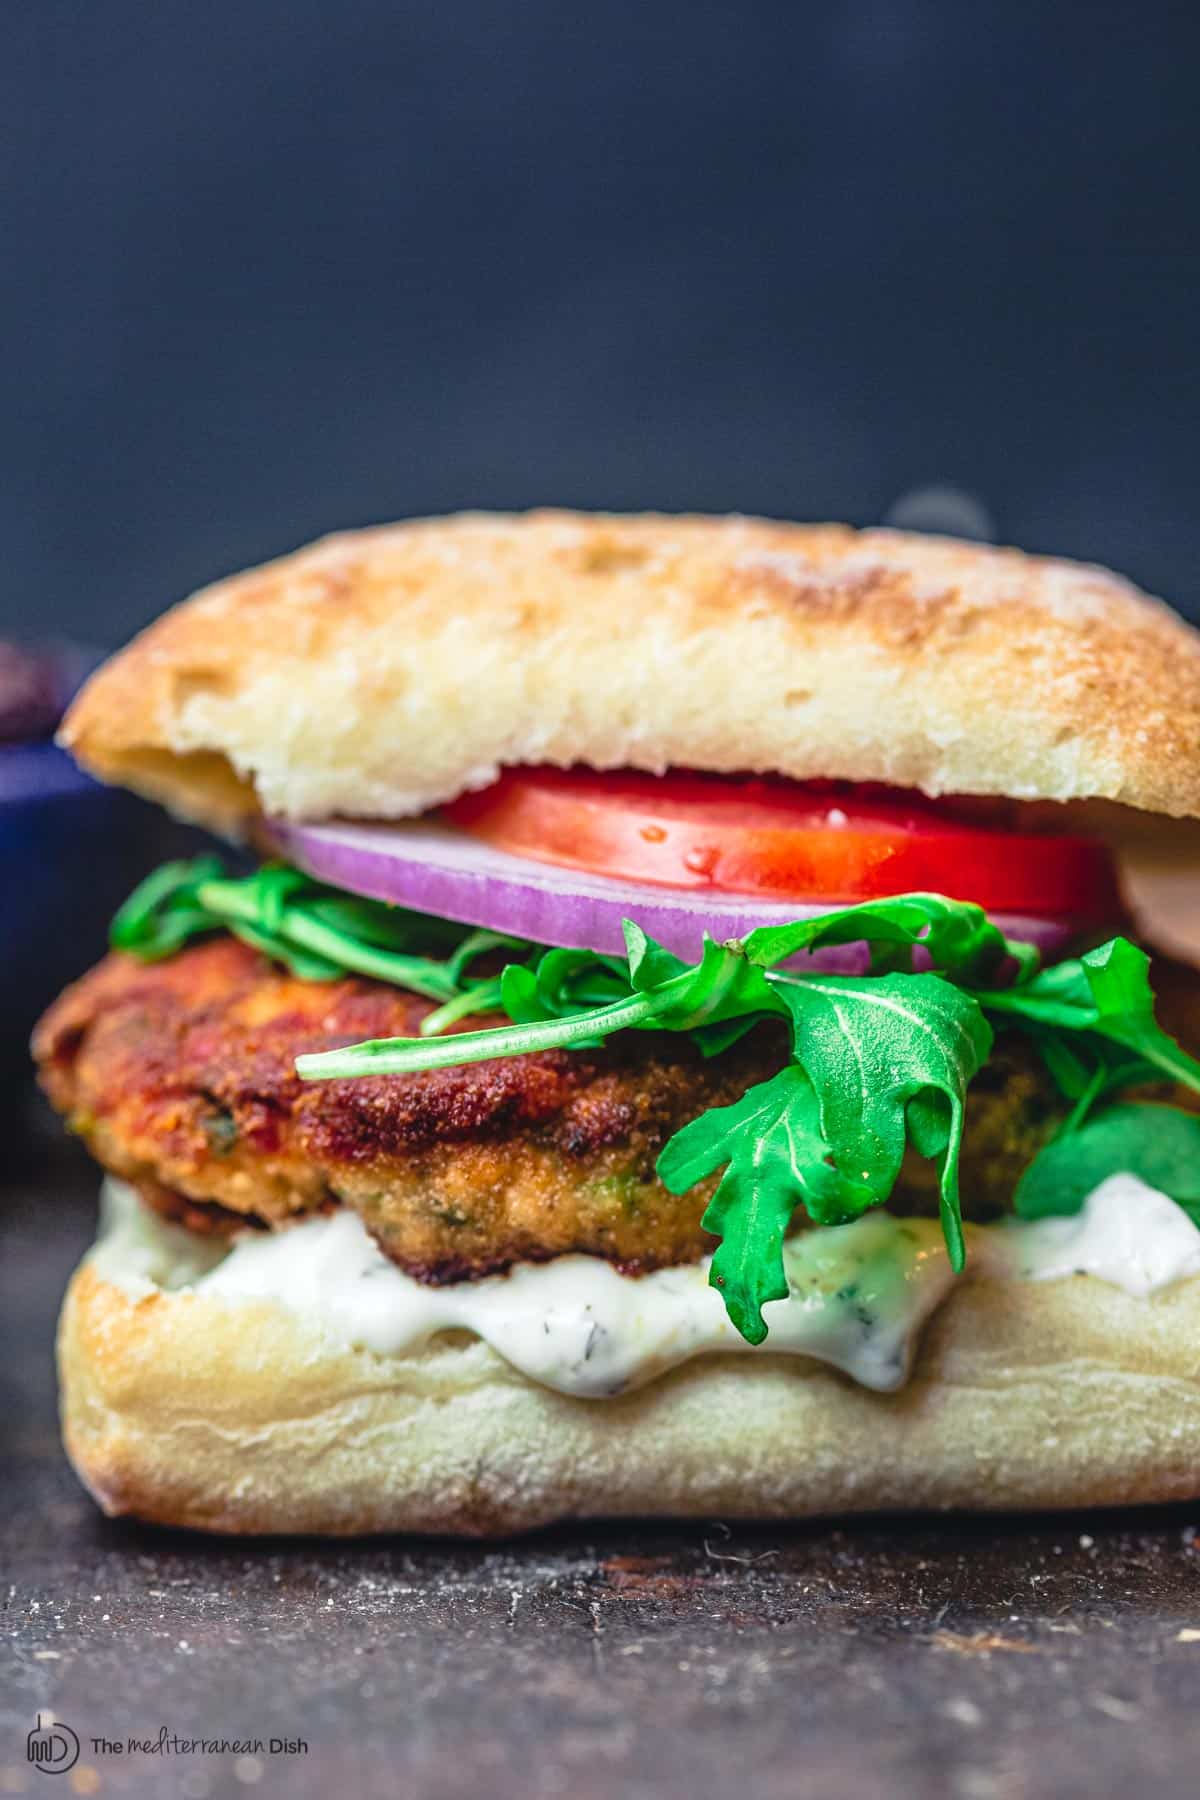 Fresh Salmon Patties, Mediterranean-Style!Salmon burgers are one of those items I avoid ordering at restaurants. Between dried out salmon discs that resemble hockey pucks, and flavorless, crumbly messes, my few experiences have been less than exciting. After some research and lots of testing, I learned a few techniques to create juicy salmon burgers every time! And as far as flavor, there is plenty of it in this salmon burger recipe! First, the salmon mixture is infused with a combination of minced green onions, fresh herbs, and spices (coriander, tangy sumac, and paprika). And once cooked, the burgers are immediately finished with a splash of fresh lemon juice. And if you're looking for a lower carb option, you can totally skip the bun, and serve the salmon burgers on top of the arugula and veggies with a dollop of tztaziki on top (my friend Lauren does that in our video below!) Let me share a few tips first. And be sure to review the steps and watch the video tutorial below. 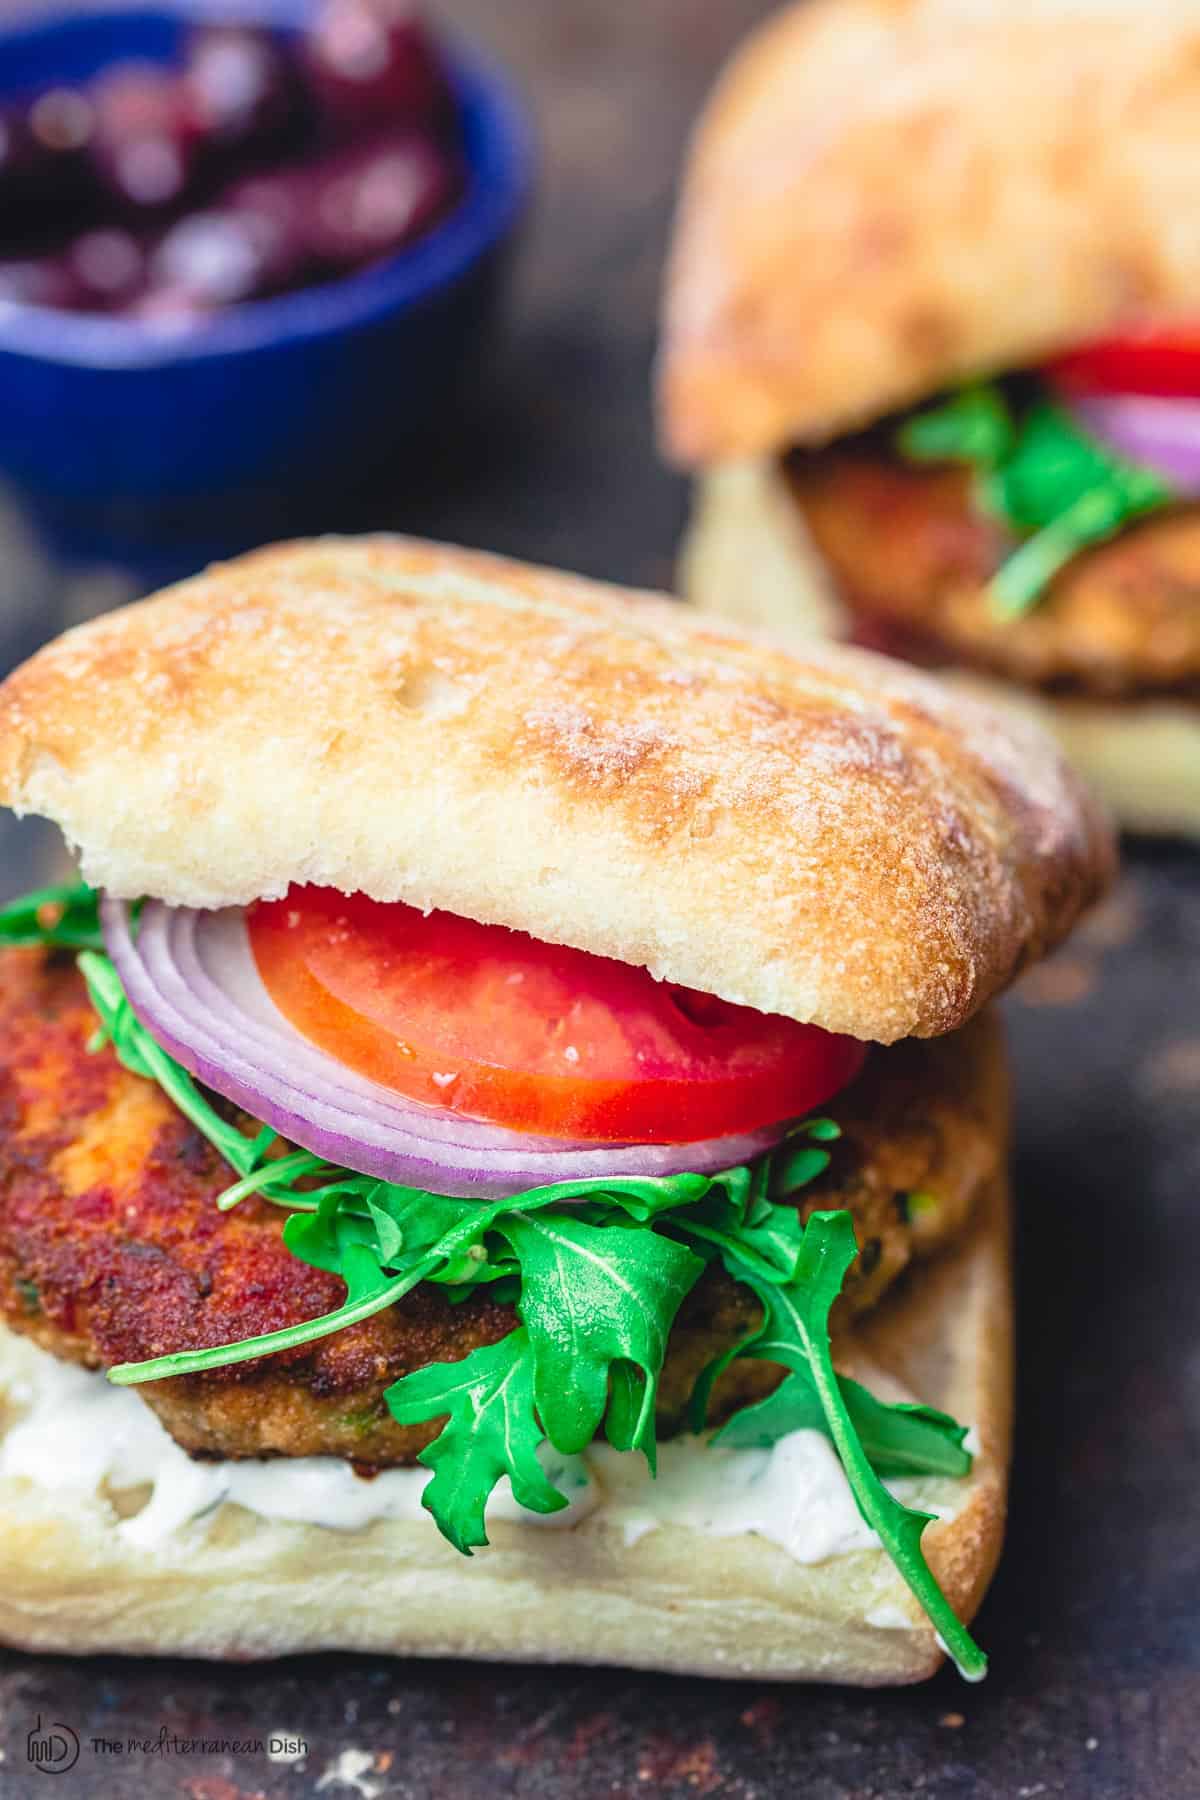 What are salmon burgers made of?As the name implies, salmon patties are made of boneless, skinless salmon fillets--fresh, never canned--plus any number of herbs and seasonings. For this recipe, you'll need 1 ½ pounds salmon fillets, Dijon mustard, minced green onions, chopped parsley, and a combination of Mediterranean spices including coriander, sumac, and sweet paprika. You'll need Italian breadcrumbs to coat the salmon burgers later on. And to cook, some good extra virgin olive oil. 5 Important Tips for Juicy Salmon Burgers from Scratch!
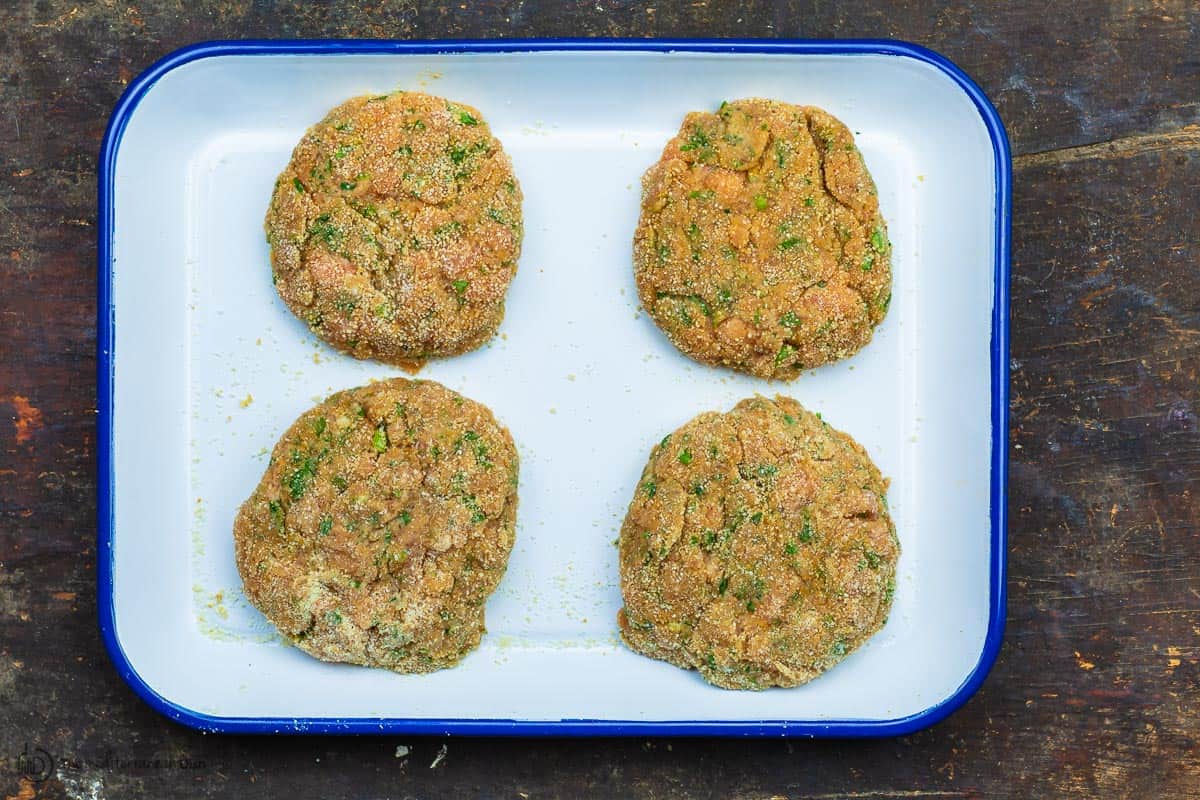
How to cook salmon burgers?The best way to cook salmon patties or burgers is by searing them in a skillet with a bit of extra virgin olive oil. They cook quickly, and they turn out juicy and delicious every time. Here is how to make this salmon burger recipe:
How do you know when salmon burgers are done?In your skillet over medium-high heat, salmon patties will cook in about 5 minutes or so, depending on how thick they are. Salmon burgers are done when you see a nice golden crust on the outside, and the inside should be pink. Your salmon is cooked when it flakes easily at the touch of a fork. And remember, it will continue to cook even after you pull it off the heat, so if your salmon patties are close but not quite cooked to your liking, you can cover them in the skillet briefly with a piece of foil and allow them a couple minutes to finish cooking. Serve them on a bun or not!To serve your salmon patties, you have some options:
More salmon recipes to tryBrowse our top Mediterranean diet recipes or all Mediterranean recipes.  Juicy Mediterranean-Style Salmon Burgers
Never have a dry salmon burger again! Thanks to a few simple tips, you can make super JUICY, flavor-packed salmon burgers every single time!My salmon burgers recipe takes on a bit of a Mediterranean twist--fresh herbs, spices and a splash of lemon juice. Serve it with arugula, tomatoes and homemade Tzatziki sauce!
Servings 4 people
Calories 137.1kcal
Ingredients
Salmon Burger Toppings
To serve
Instructions
VideoNotes
Nutrition
Calories: 137.1kcal | Carbohydrates: 4.2g | Protein: 1g | Fat: 13.9g | Saturated Fat: 1.9g | Sodium: 38mg | Potassium: 139.3mg | Fiber: 1.7g | Sugar: 0.9g | Vitamin A: 1395.8IU | Vitamin C: 34.4mg | Calcium: 34.5mg | Iron: 1.4mg
*This post originally appeared on The Mediterranean Dish in 2017 and has been recently updated with new information and media for readers' benefit. Enjoy! The post Juicy Mediterranean-Style Salmon Burgers appeared first on The Mediterranean Dish. via The Mediterranean Dish https://www.themediterraneandish.com/mediterranean-salmon-burger-recipe/
0 Comments
Simple pan fried halloumi in olive oil makes a great appetizer in 5 minutes or less! Expert tips for how to cook halloumi perfectly, and how to serve it for a fun and elevated appetizer! 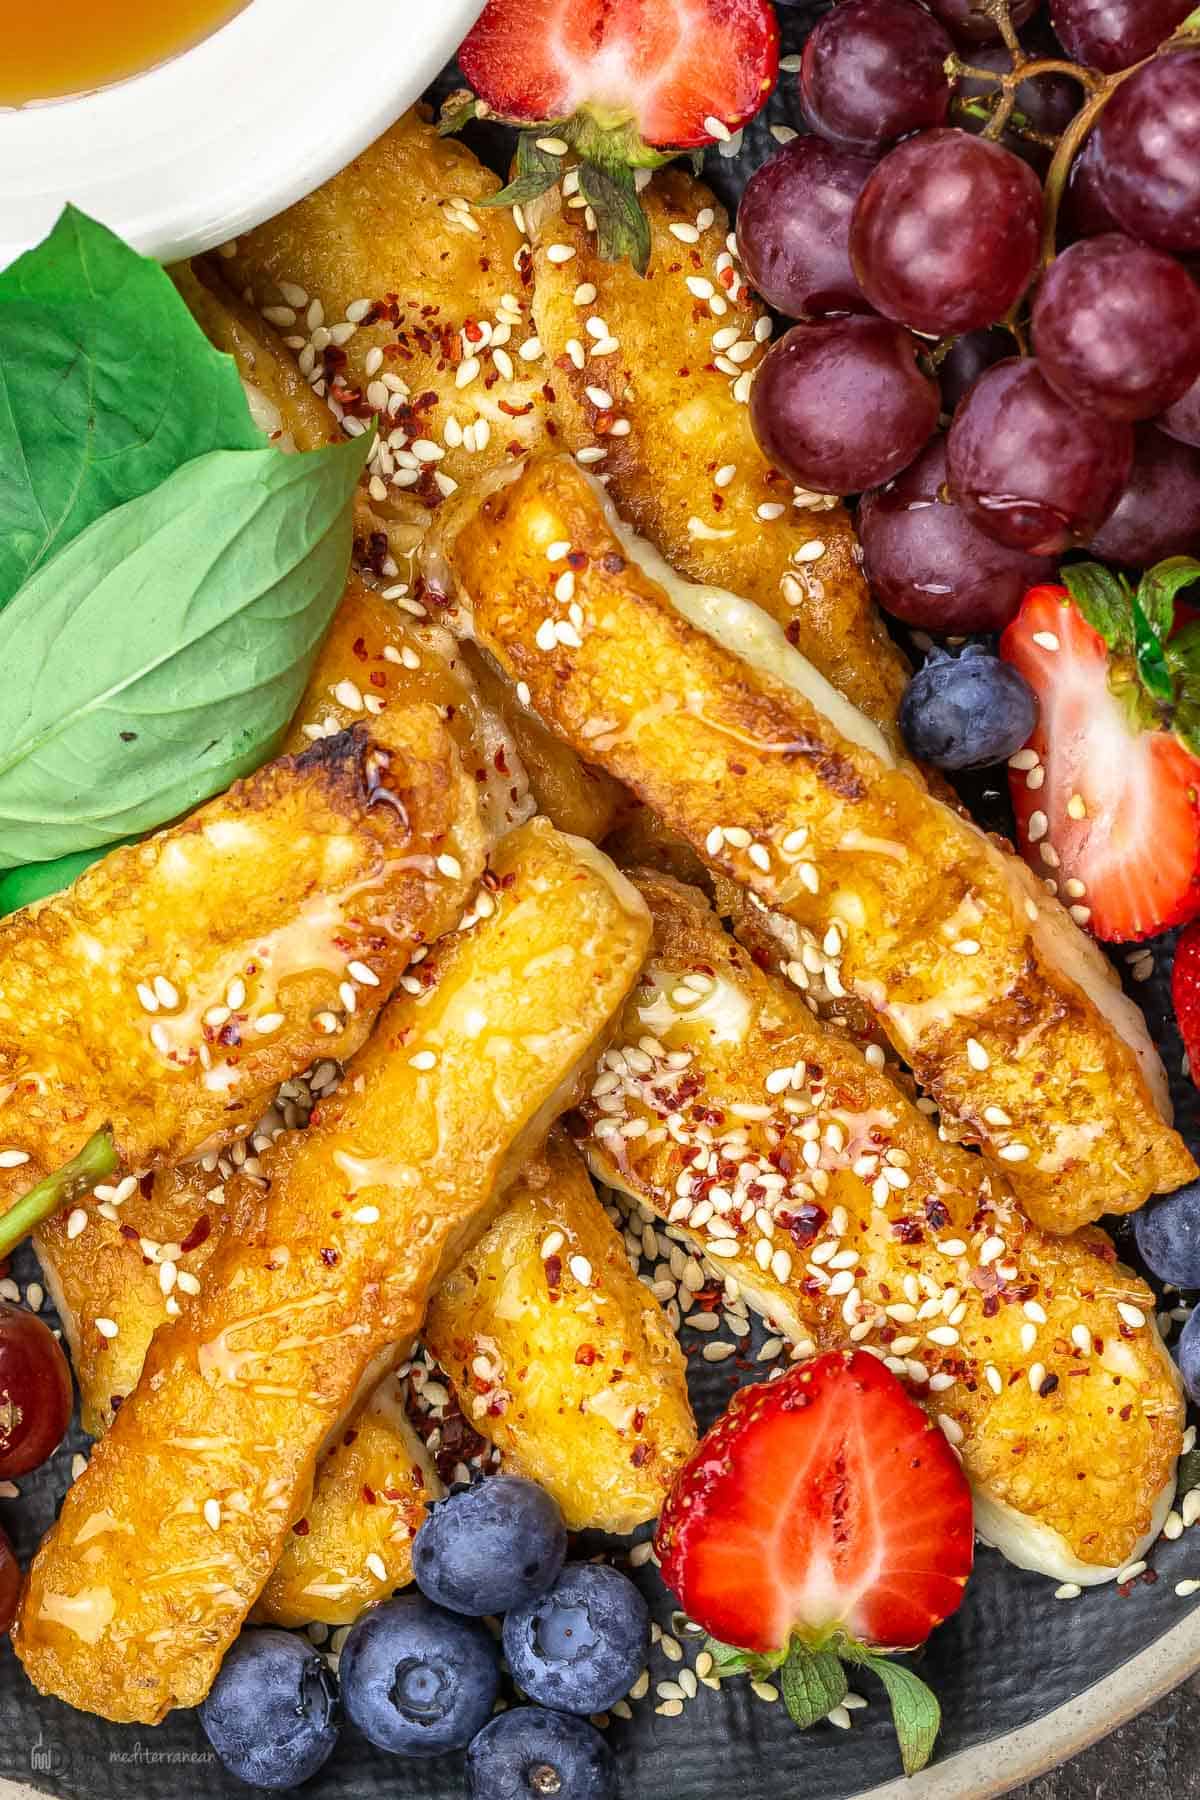 What is halloumi?Halloumi is a white, semi-hard, salty cheese, traditionally made from goat or sheep's milk or a combination of both. When eaten raw, halloumi, an unripened cheese, has a bit of rubbery, squeaky texture. But because of its high melting point, it is the perfect cheese for grilling or frying. And with a little bit of heat, halloumi becomes soft and savory--an indulgent treat everyone should try at least once in their life! Halloumi comes from the Mediterranean island of Cyprus, and it is popular in parts of the Eastern Mediterranean and the Middle East where, like labneh or baked feta, it is often served as mezze or as part of a savory Mediterranean breakfast. How to cook halloumiHalloumi can take heat, so it is a versatile cheese that can be cooked in different ways, including baked, grilled, or fried. Each method is fairly easy to follow:
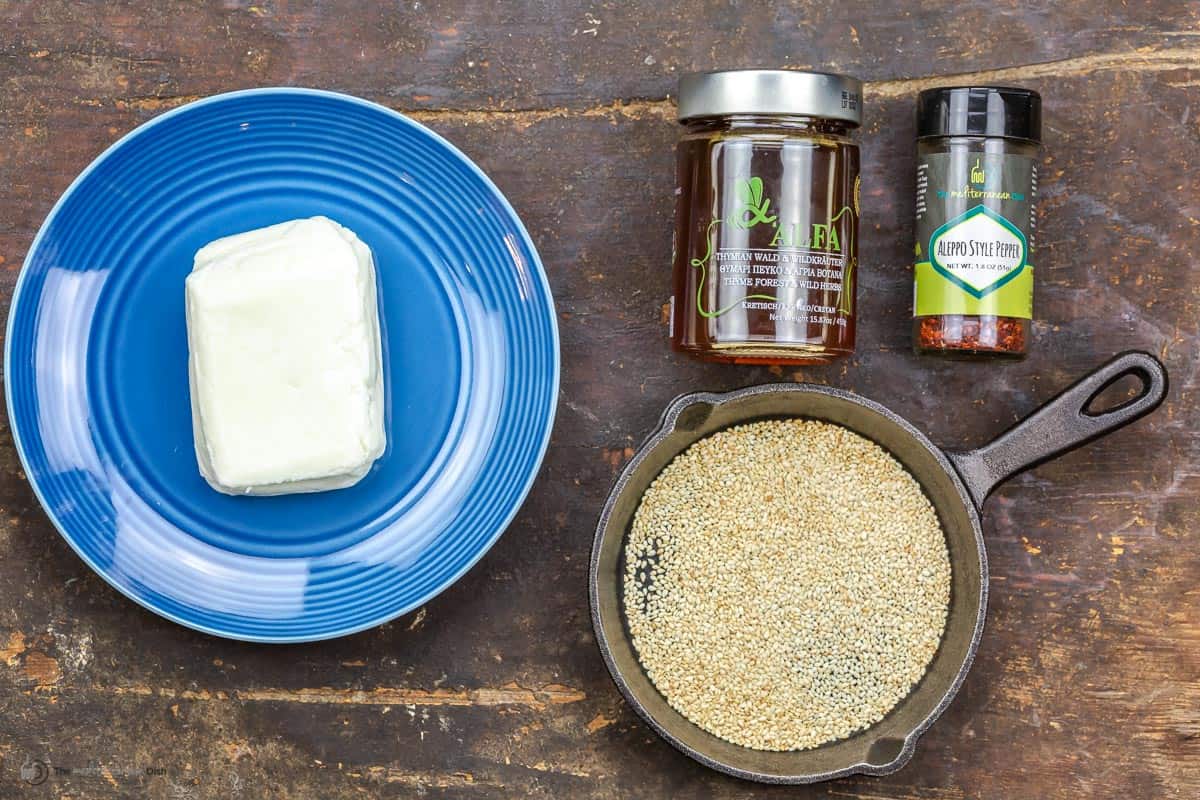 Sweet and salty halloumi fries!In today's recipe, I simply sliced my block of sturdy cheese into thick sticks or "fries," which are cooked briefly in extra virgin olive oil and finished with warmed honey and sesame seeds. You'll end up with the perfect sweet and salty snack in less than 5 minutes! Great as is or with fruit. Think of these halloumi fries as a bit of a Mediterranean twist on mozzarella sticks! But unlike other recipes, this method does not require panko or the use of any batter. Appropriately heated olive oil is all you need to help the cheese crisp on outside, creating a beautiful golden crust while also imparting flavor. What you'll need to make this recipeThese halloumi fries are made with just a few very simple ingredients! And really, beyond the cheese and the olive oil, the rest is optional. Here is what I use:
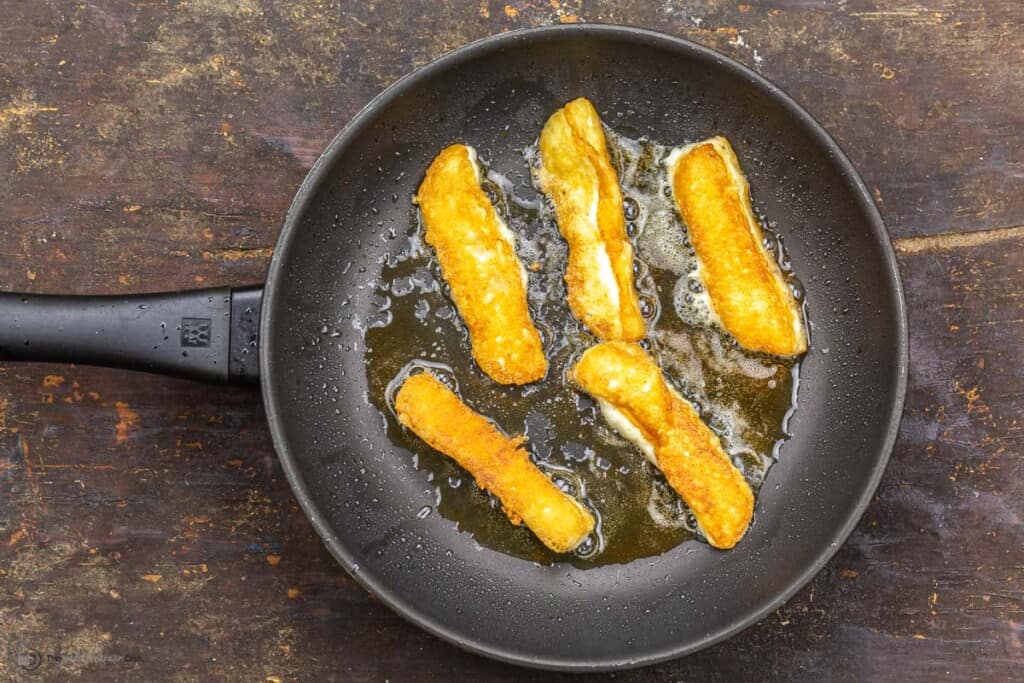 How to make fried halloumiLike I mentioned earlier, even though you do not need oil to cook or fry halloumi, given its fat content, I do love fried halloumi in a little bit of extra virgin olive oil. I think good EVOO enhances the flavor and takes this cheese to a new level of delicious! I love the beautiful golden crust that forms on the surface of the cheese.
Important tipsHere are some things you should know before cooking halloumi for the first time:
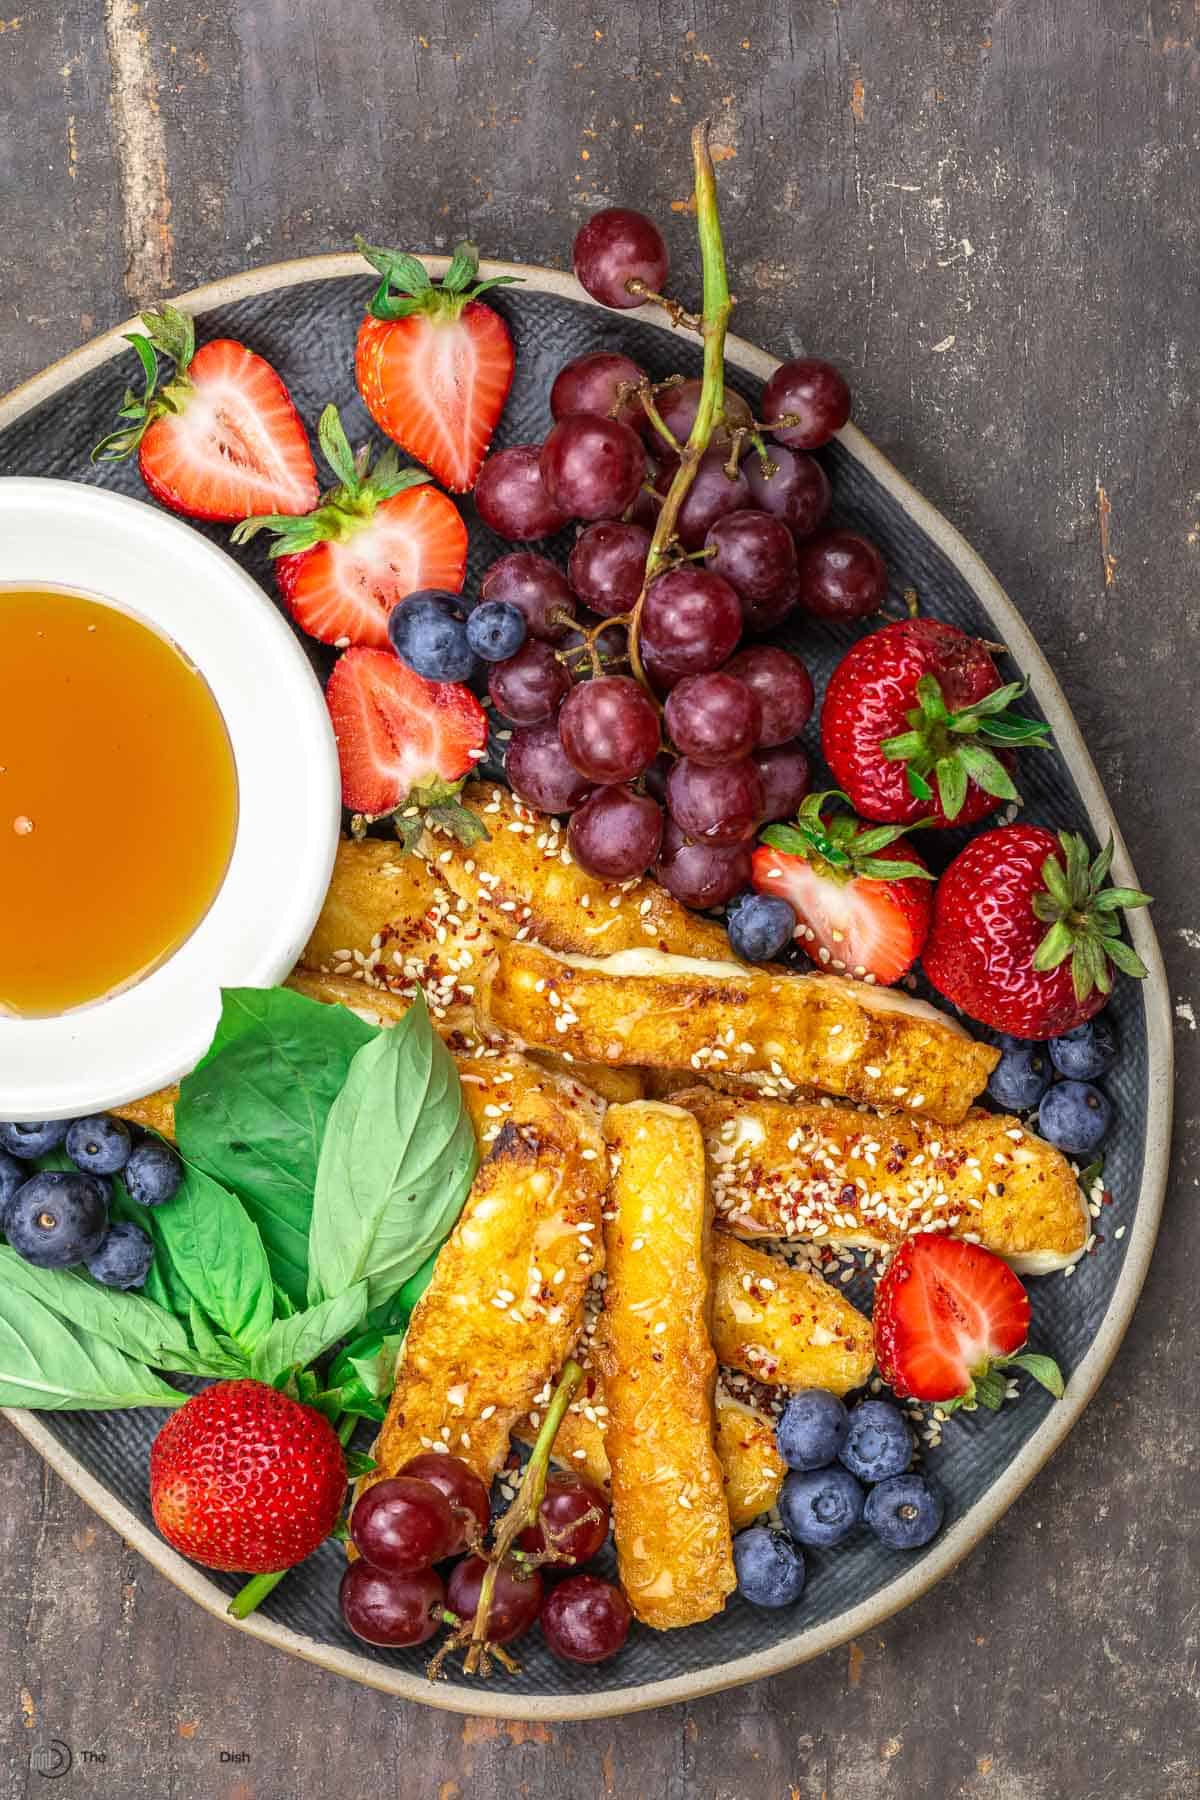 Ways to serve itThere are endless ways to serve this delicious cheese. You can serve it as is for a quick and indulgent appetizer or as part of your cheese plate or mezze platter. I am a fan of sweet and salty, so I'll always opt for a drizzle of honey on top of my halloumi fries and fresh fruit like grapes, berries, or figs next to it. You can also serve fried halloumi as part of a delicious salad like my earlier roasted asparagus and tomato salad. And as I mentioned earlier, in parts of the Middle East, it is not uncommon to see fried halloumi as part of a savory breakfast or brunch--seasoned with za'atar, and served with warm pita and fresh vegetables or even a tangy tomato and cucumber salad next to it. Leftovers?Halloumi fries are best enjoyed immediately. Unfortunately, this is a recipe where you don't really want leftovers, as halloumi turns rubbery after it cools. Reheating it typically does not yield good results. If you do end up with leftovers, try chopping it up and adding it to a salad to enjoy cold. You may also like these Mediterranean recipes:Browse all Mediterranean recipes. Visit Our Shop for quality Mediterranean ingredients.  Easy Fried Halloumi Recipe with Warmed Honey
Pan fried halloumi in olive oil makes a great appetizer in 5 minutes or less! Serve halloumi fries, drizzled with warmed honey and toasted sesame seed for a sweet and salty combo! Add your fruit of choice to serve along (I like grapes, figs, or berries). More serving ideas below
Servings 6 people
Calories 178.8kcal
Ingredients
Instructions
VideoNotes
Nutrition
Calories: 178.8kcal | Carbohydrates: 12.6g | Protein: 8.8g | Fat: 10.8g | Saturated Fat: 6.6g | Monounsaturated Fat: -4.1g | Sodium: 454.5mg | Potassium: 19.8mg | Fiber: 0.4g | Sugar: 11.8g | Vitamin A: 0.2IU | Vitamin C: 0.1mg | Calcium: 404.8mg | Iron: 0.5mg
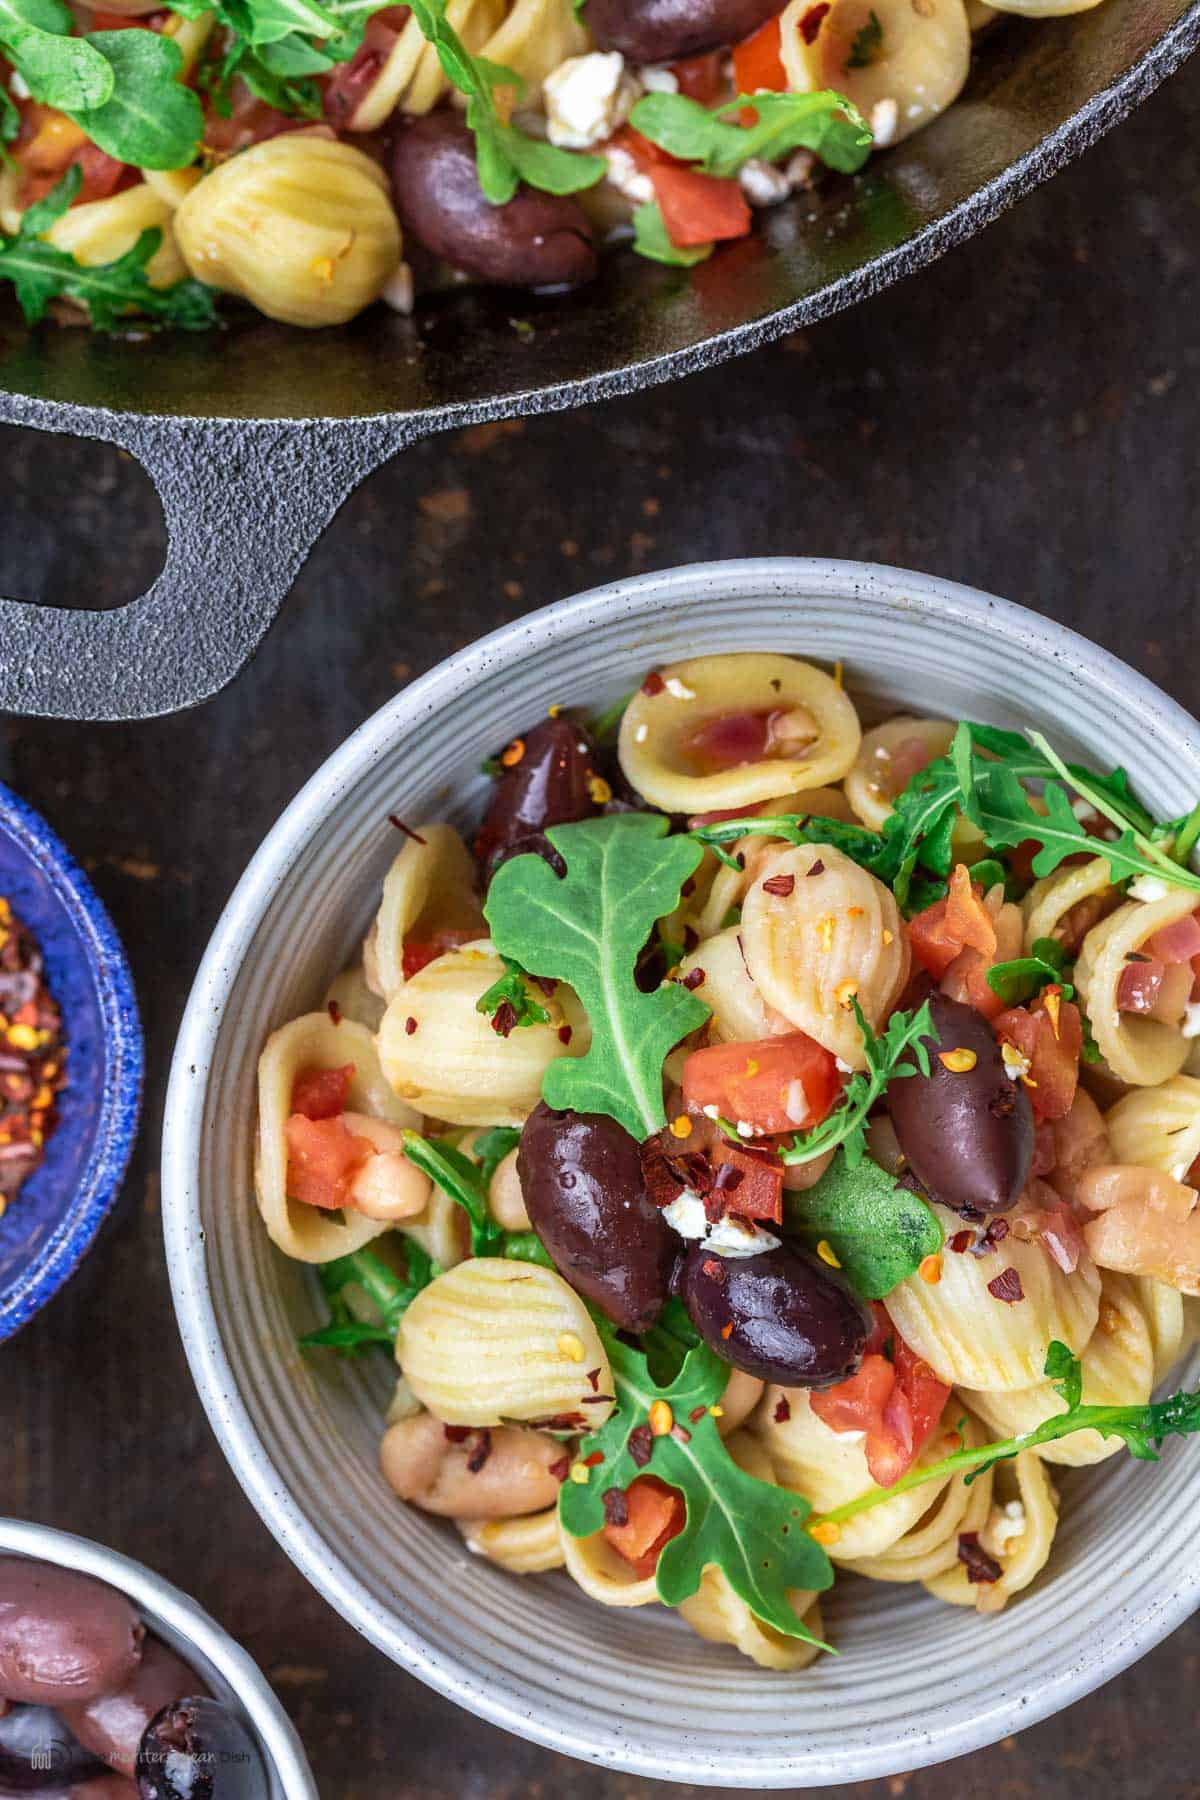
The post Easy Fried Halloumi Recipe with Warmed Honey appeared first on The Mediterranean Dish. via The Mediterranean Dish https://www.themediterraneandish.com/fried-halloumi-recipe/ This quick Mediterranean orecchiette pasta with simple pantry staples is the perfect dinner for busy nights! White beans add fiber and plant-based protein, making it extra satisfying, while tomatoes, garlic, herbs, and Pearls Kalamata Pitted Greek Olives, fill it with big flavor! This post is sponsored by Pearls Olives. All opinions are my own. 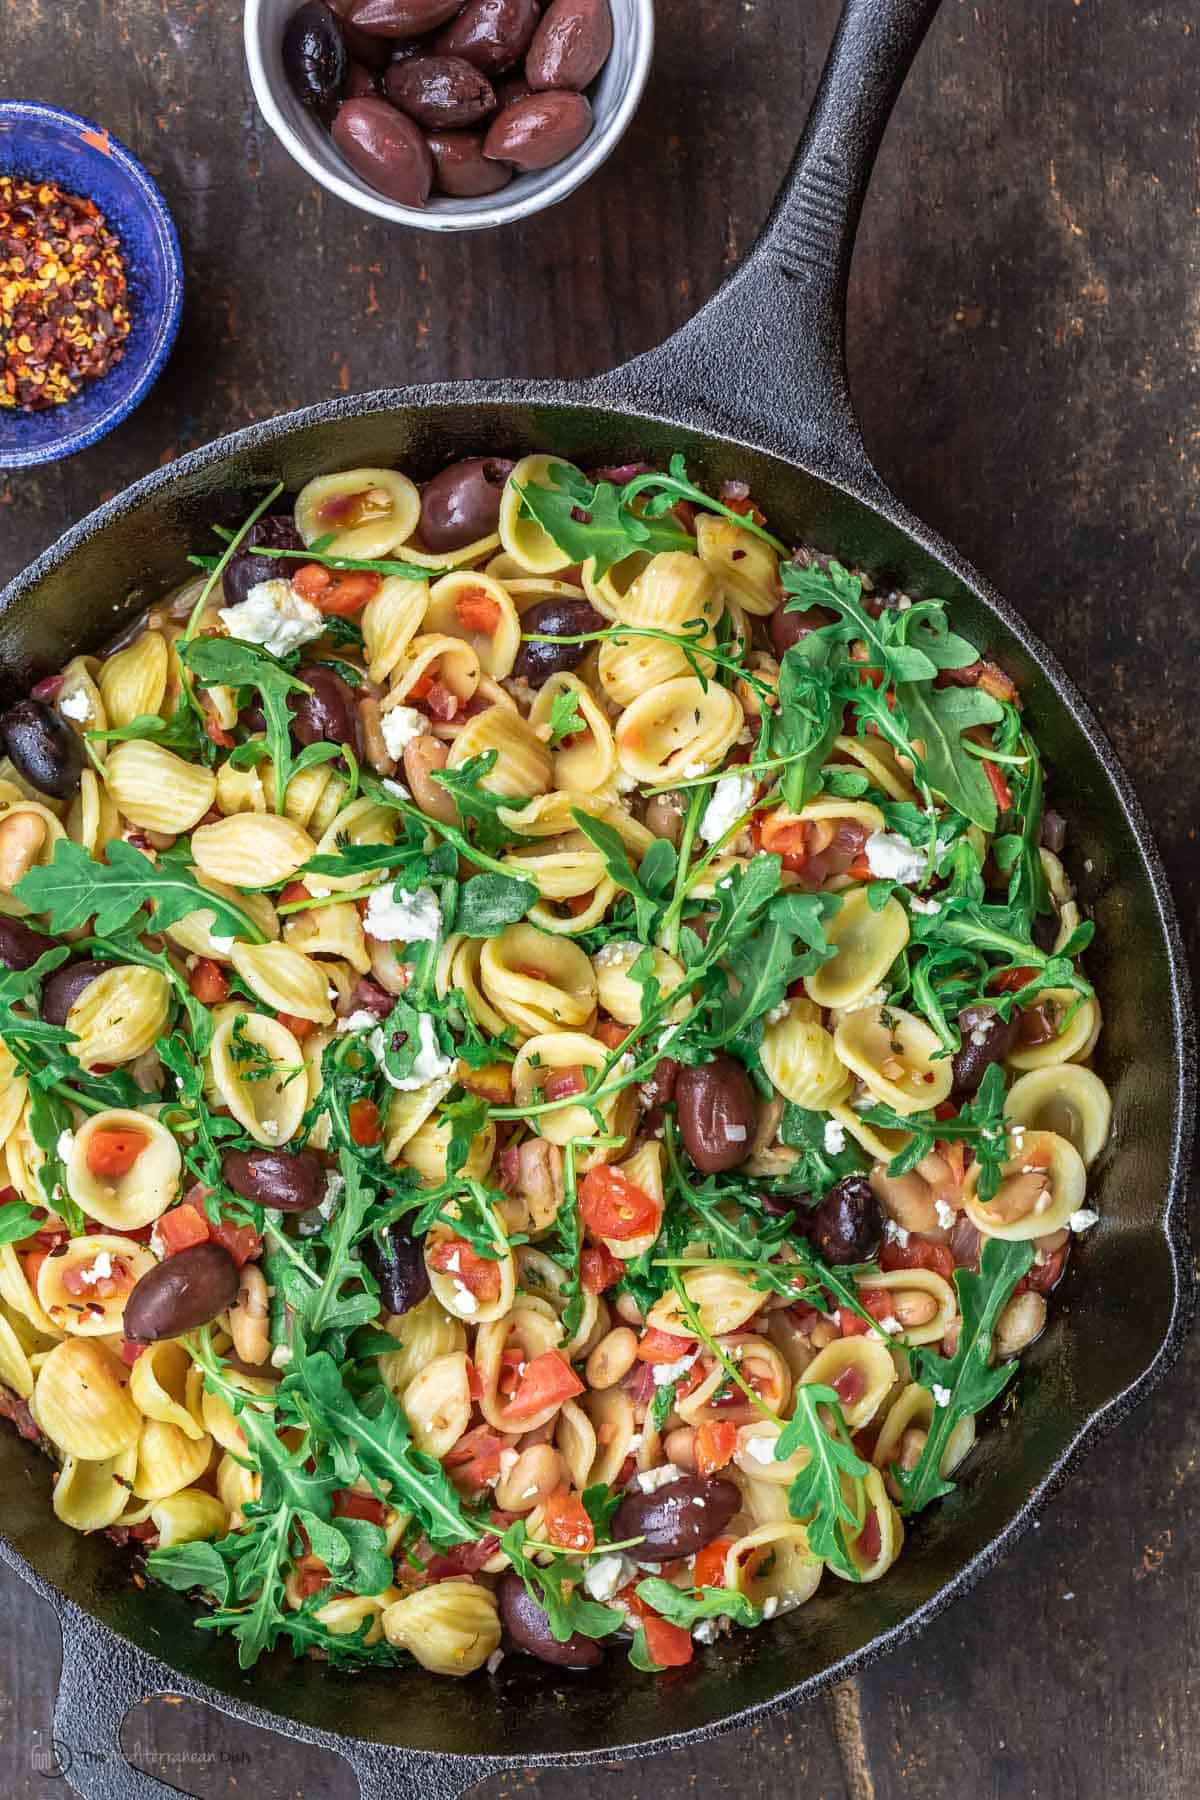 On busy weeknights, especially since we’re back to school now, I can always count on pasta for a quick and delicious dinner everyone will enjoy. To me, pasta dinners are also a great way to use what produce and pantry staples I have on hand to make things interesting without too much work. Enter today’s fun orecchiette recipe, loaded with fresh tomatoes, garlic, herbs, peppery arugula, white beans—for a little plant-based protein—and Pearls Kalamata Pitted Greek Olives, one of my favorite ways to add instant flavor! As much as I love a classic marinara sauce, there are enough layers in this white bean pasta that a lighter sauce with good olive oil and a splash of white wine is just right. 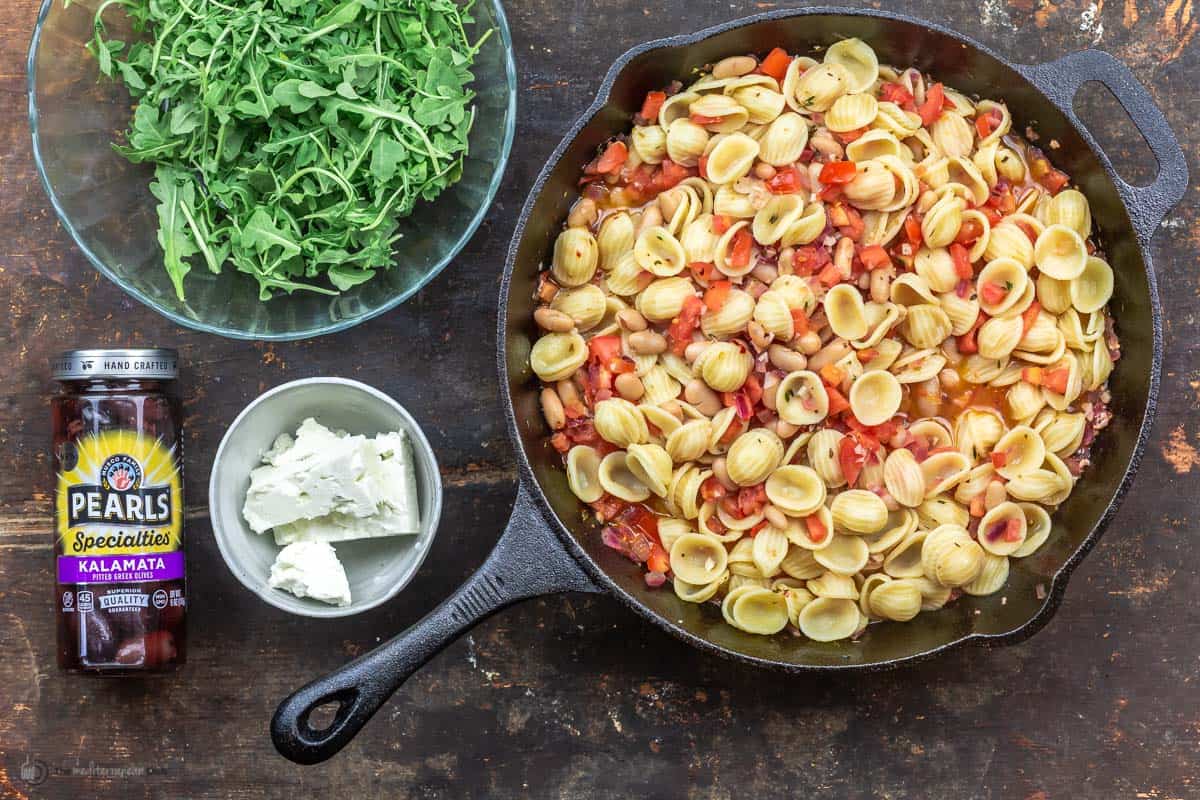 Orecchiette PastaOrecchiette--pronounced oh-reck-ee-ET-tay--translates to “little ears†in Italian. Not to be confused with shells, this round pasta that resembles a cup comes from southern Italy, and specifically Puglia, where it is often served with chunks of chopped greens or veggies. You'll often see orecchiette recipes with broccoli rabe, for example I find orecchiette’s fun shape perfect for this white bean pasta recipe because it will nicely catch the chunks of beans and tomatoes. But if you don’t have it, farfalle, penne, or another short pasta with some texture, are all good substitutions for orecchiette in this recipe. The draw is in the layers of flavors, and for me, an olive lover, Pearls Kalamata Pitted Greek Olives are key in this delicious pasta dinner. 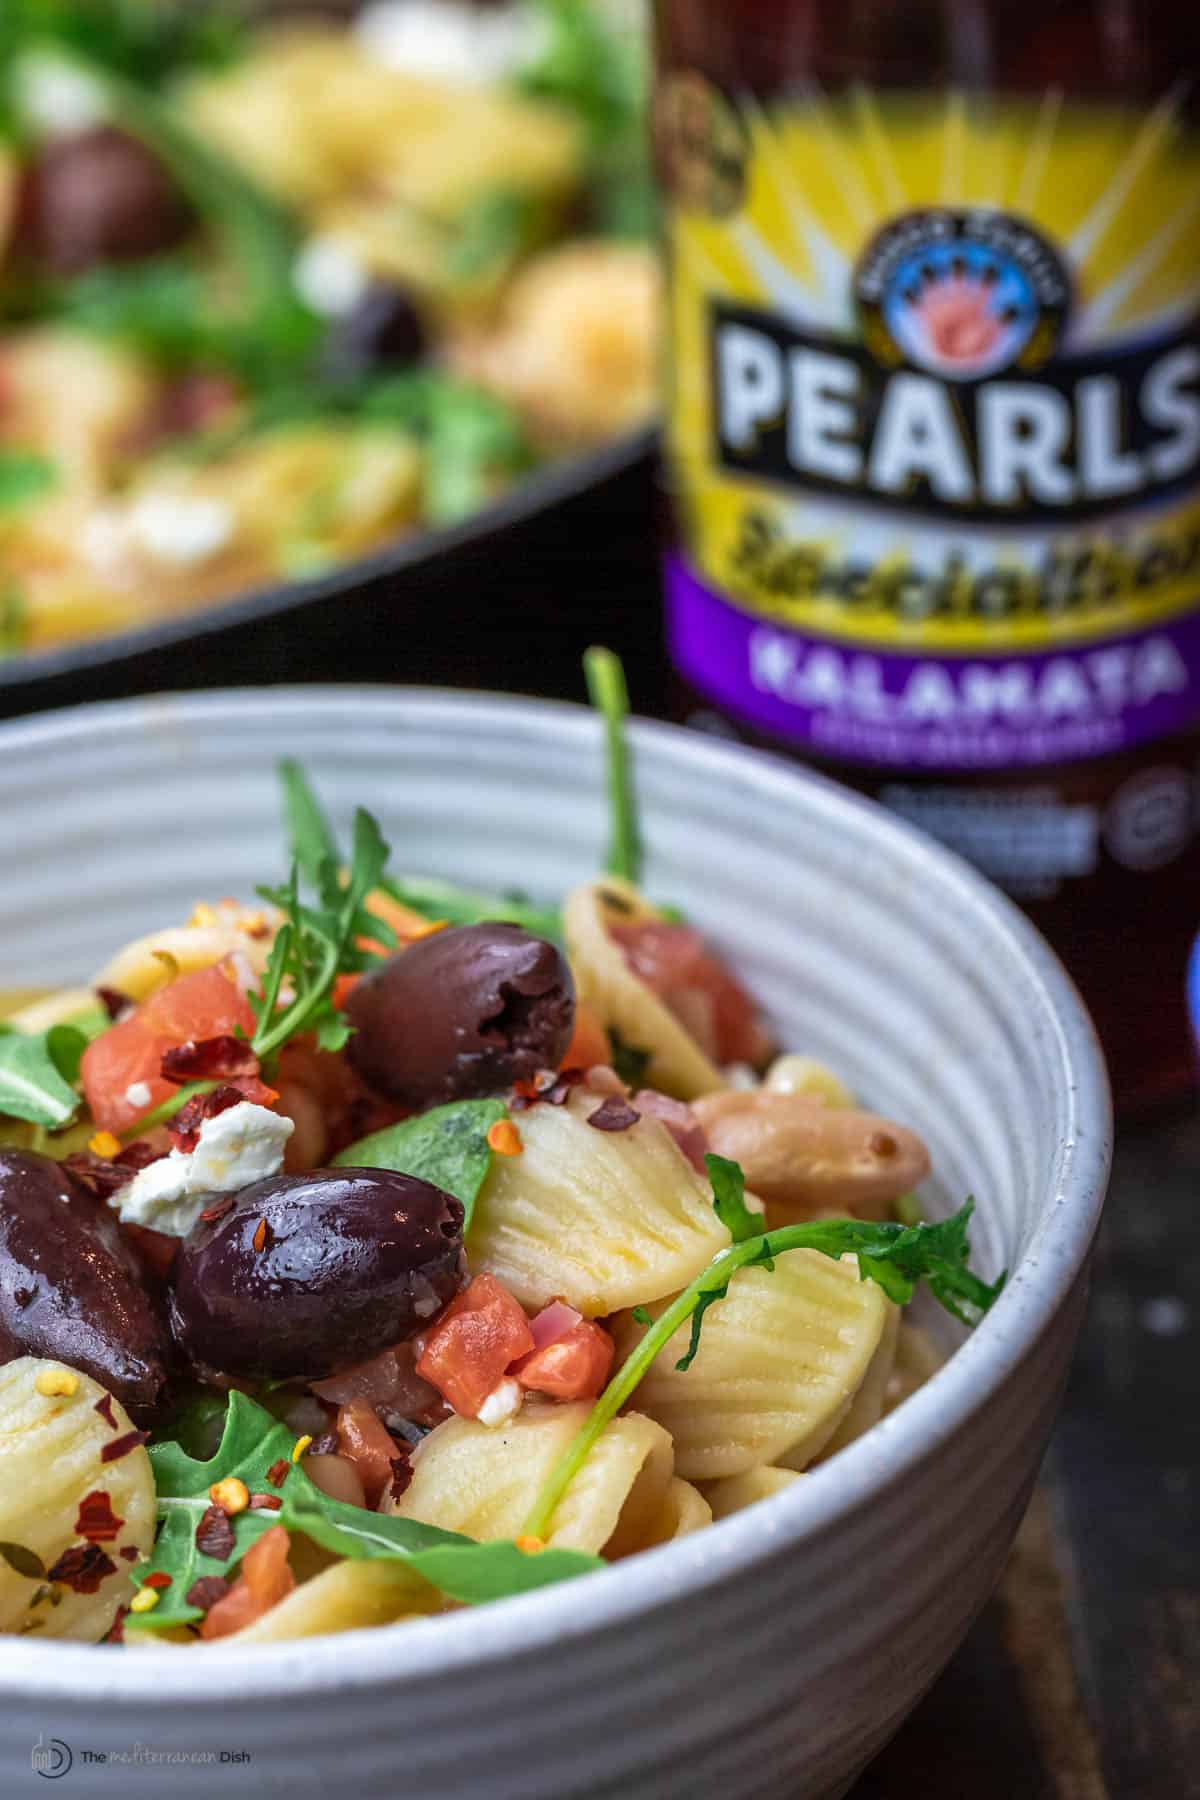 Pearls Kalamata OlivesI use Pearls Olives often to add flavor, especially on pizza and pasta dishes. And because they are 100% grown and packed in sunny California, picked at the peak of freshness, you can truly taste the difference. And I love the fact that Pearls takes care of the earth, running a 99% zero waste facility and recycling more than 2 billion gallons of water! For this particular recipe, their pitted Kalamata Pitted Greek Olives are the perfect match to the other Mediterranean flavors I use. These hand-picked, hand-crafted purple gems have a firm texture, and they burst with rich, fruity flavor, adding a little something special to this vegetarian orecchiette recipe. 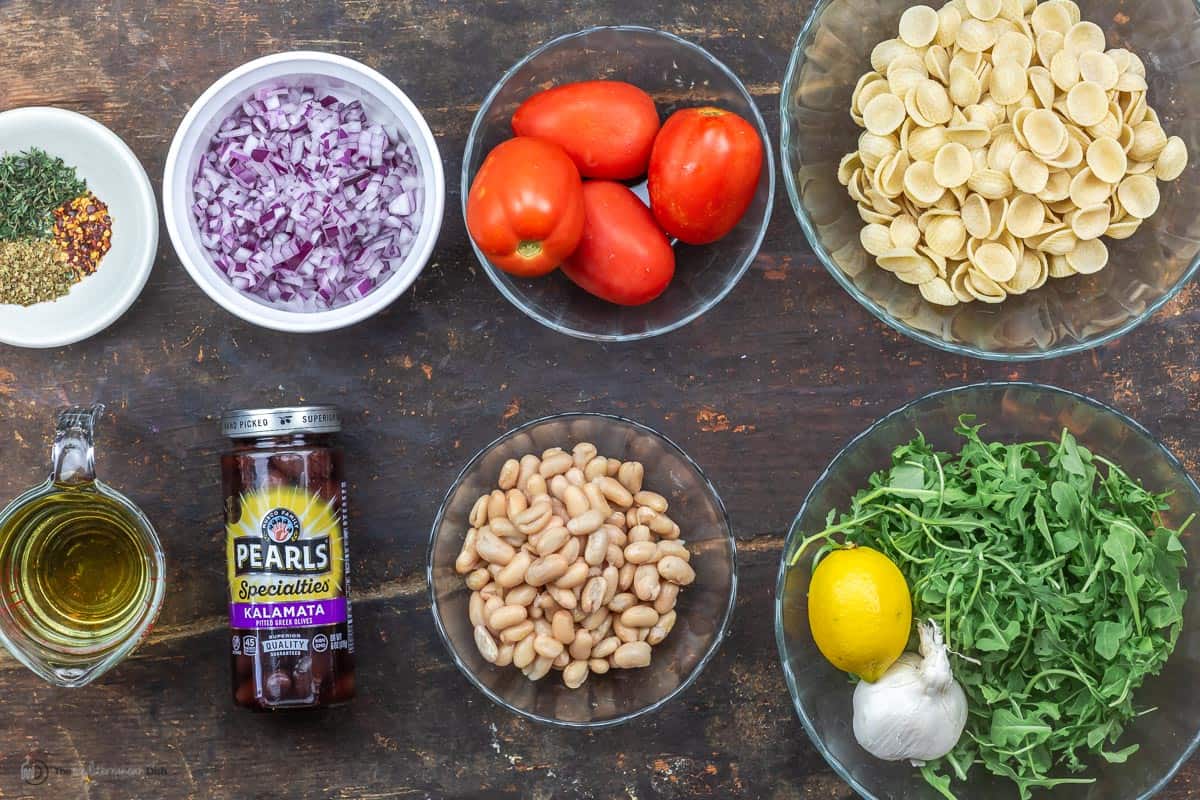 How to make this orecchiette recipeThis dish takes just a few simple steps, starting with cooking the pasta and creating the sauce, then tossing in the rest of the ingredients at different stages. Here is how:
 More pasta recipes to try:
Browse more Italian recipes. Browse all recipes here. Visit Our Shop to browse quality Mediterranean ingredients  Orecchiette with White Beans, Tomatoes, and Olives
This quick Mediterranean orecchiette pasta with simple pantry staples is the perfect dinner for busy nights! White beans add fiber and plant-based protein, making it extra satisfying, while tomatoes, garlic, herbs, and olives, fill it with big flavor!
Servings 4 people
Calories 395.3kcal
Ingredients
Instructions
Notes
Nutrition
Calories: 395.3kcal | Carbohydrates: 68.3g | Protein: 15.4g | Fat: 3.8g | Saturated Fat: 0.6g | Sodium: 524.3mg | Potassium: 419.9mg | Fiber: 9.6g | Sugar: 4.7g | Vitamin A: 986.5IU | Vitamin C: 15.2mg | Calcium: 143.5mg | Iron: 4.4mg
The post Orecchiette with White Beans, Tomatoes, and Olives appeared first on The Mediterranean Dish. via The Mediterranean Dish https://www.themediterraneandish.com/orecchiette-recipe/ Tender and perfectly charred, this Mediterranean Grilled Eggplant finished with a drizzle of olive oil infused with garlic and jalapeno. This eggplant recipe is great served as side, vegetarian main, or a warm and smoky appetizer with whipped feta and pita bread. 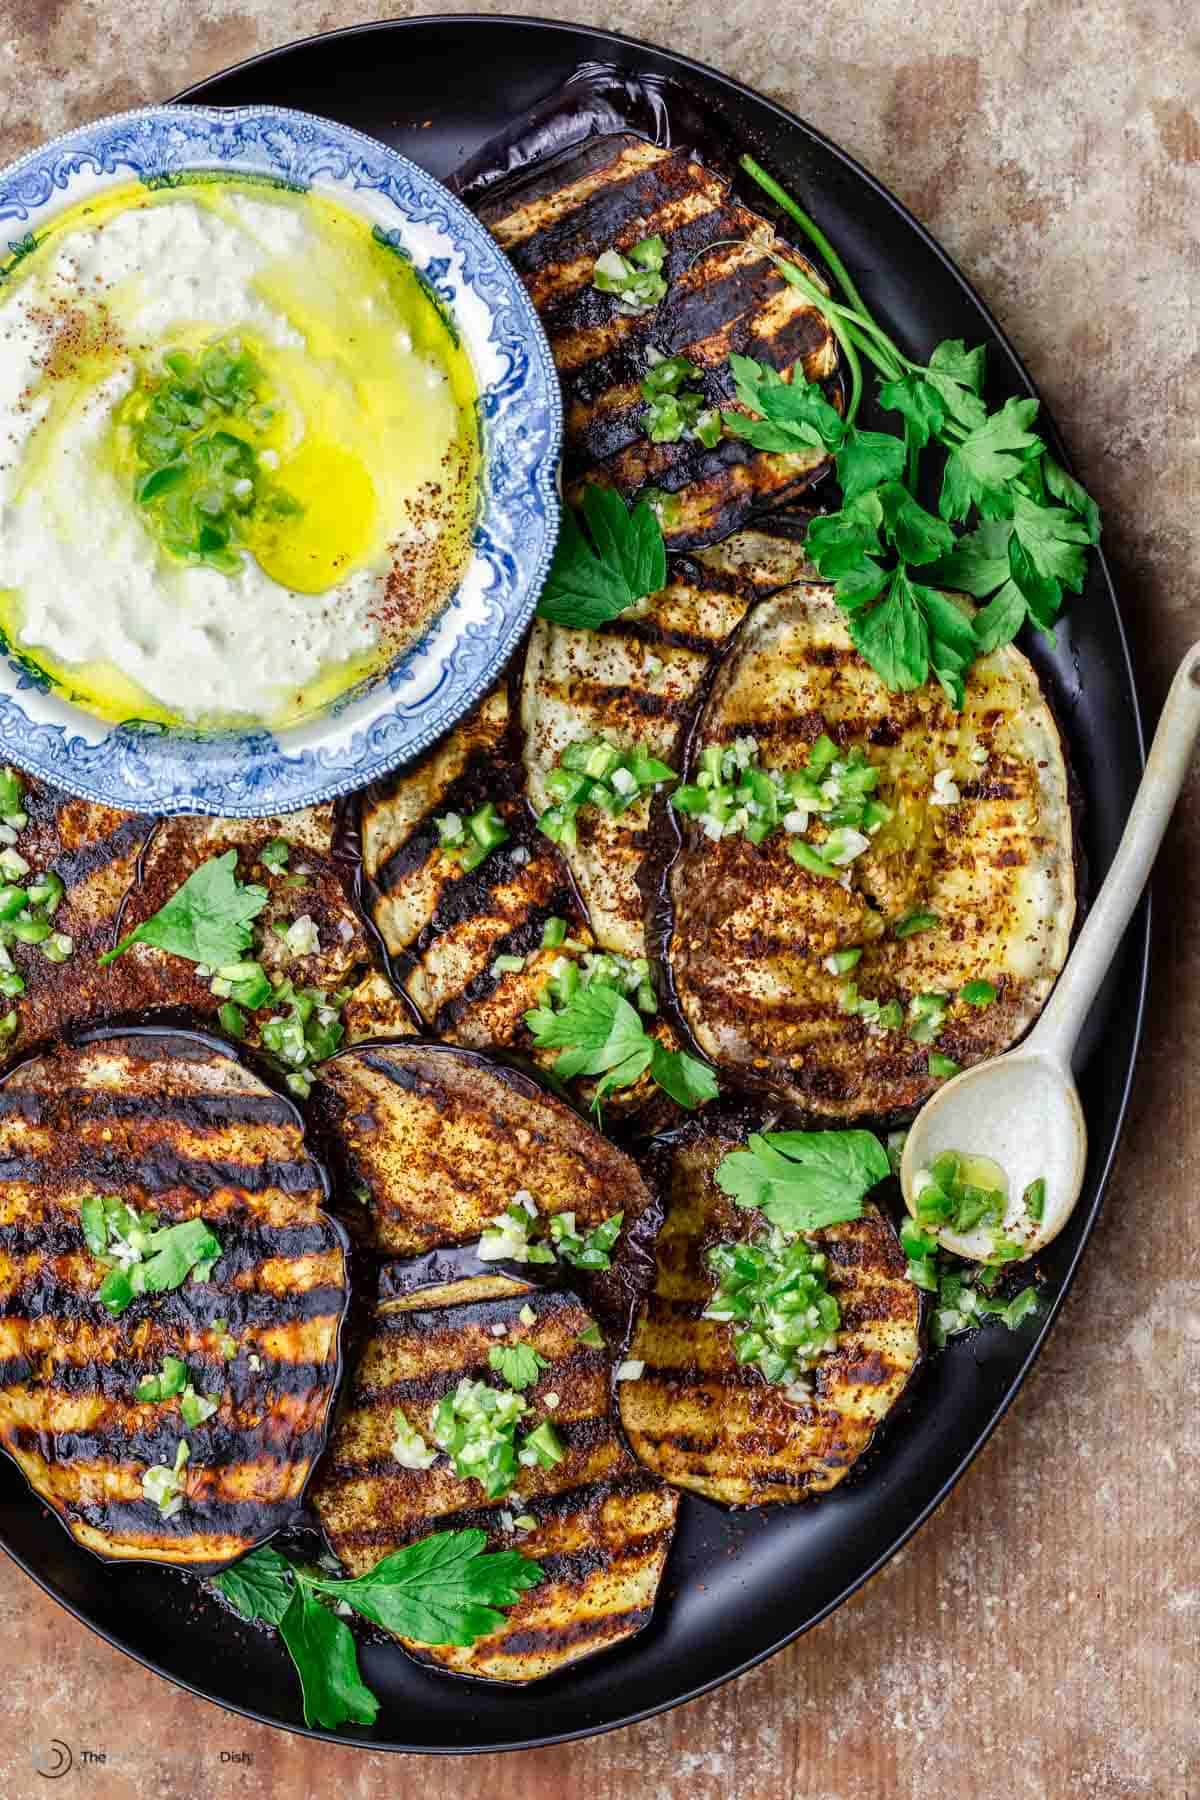 An easy grilled eggplant recipeMediterranean Grilled Eggplant is the perfect example of how easy eggplant can be to work with - despite the common belief that it is fussy, bitter, or complicated to work with. In reality, when eggplant is prepared properly it is tender and hearty that you can even use it in place of meat. I'm all about grilling vegetables, anything from vegetable kabobs to zucchini rounds. Grilling eggplant is no more difficult than grilling other vegetables, especially with this recipe. You do not have to peel eggplant before cooking, and you do not have to soak it either. But I'm a big fan of salting your eggplant (more on this later). From there, all it takes for the perfect, charred and smoky eggplant is a brush of good extra virgin olive oil and a hot grill or indoor griddle (I'm a fan of cast iron griddles and I use one in my video below)! The sky is the limit when it comes to adding flavor, but I like to top it with my garlicy, jalapeno infused olive oil sauce and serve it Mediterranean-style with my whipped feta and wedges of pita! 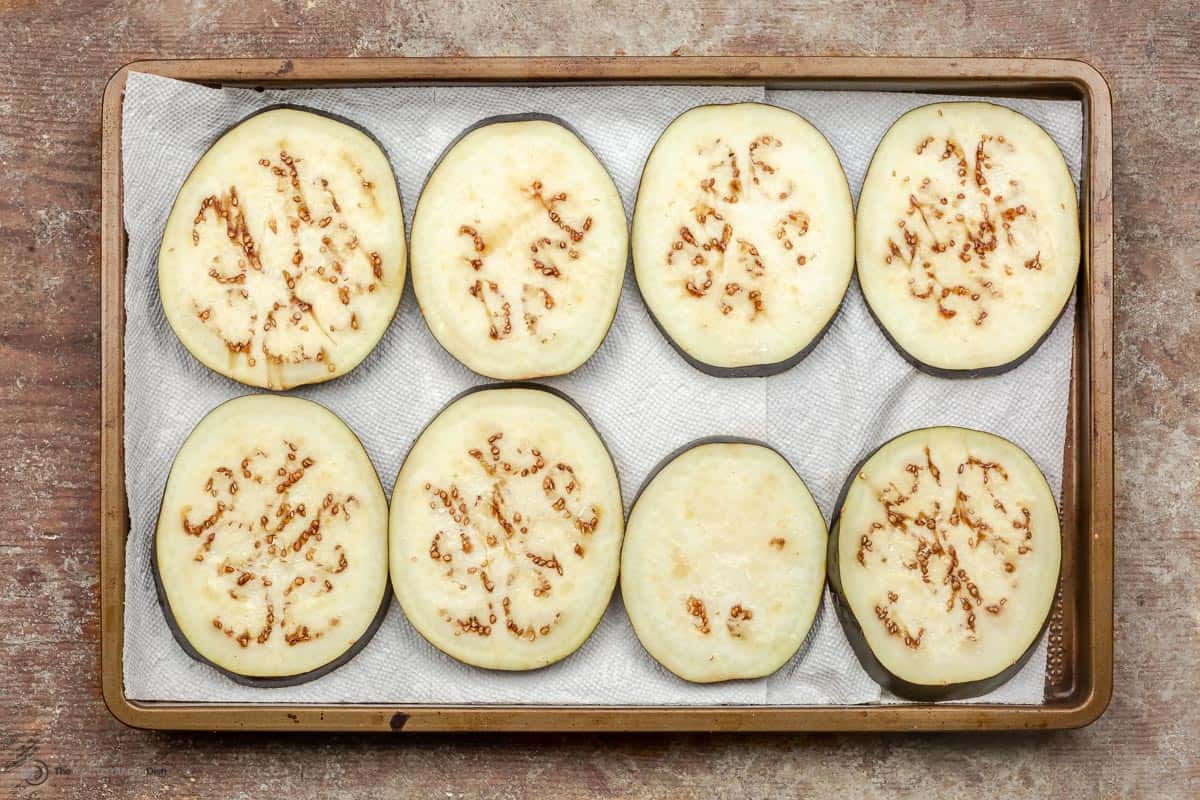 What kind of eggplant is best to use in this recipe?You can almost grill any kind of eggplant you find. Globe eggplants are the most readily available here in the US, and because they are large and hearty, they lend themselves well to slicing and grilling in this recipe. Rosa bianca eggplants--the ones with the beautiful purple and white markings--are smaller and tend to be less bitter or even white eggplant, and are also great for grilling. You may also be able to try Japanese eggplant or white eggplant, but their shapes are a little more tricky to work with in a grilled eggplant recipe like this one. 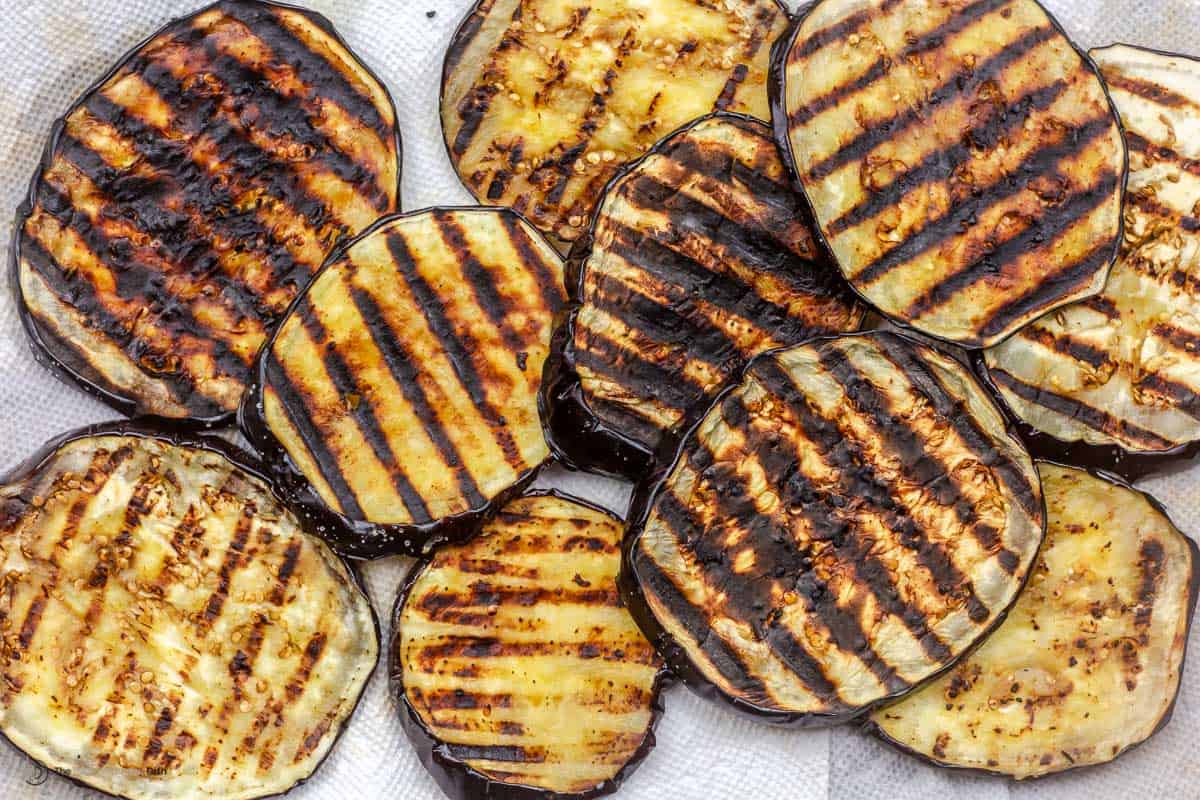 Should I salt eggplant before cooking it?Unless you're grilling eggplant whole to make Baba Ganoush or Melitzanosalata, two dips I love, you'll want to budget a few extra minutes to salt your eggplant. I do believe salt enhances the flavor and texture. Especially if you run into an older, bitter eggplant with too many seeds. Beads of water will surface when you salt your eggplant slices and allow them to sit for a few minutes. While drawing out moisture, salt helps the eggplant sweat out some bitterness and, at the same time, it breaks down the eggplant's spongy texture, resulting in a more velvety, tender grilled eggplant. It is an optional step and requires you to budget 20 to 30 extra minutes, but I do it almost every time I work with eggplant. Unless I'm grilling eggplant whole for something like an eggplant dip, whether I'm grilling, roasting, or making something more involved like eggplant parmesan or caponata. Do not peel eggplant before grillingEggplant skin is completely edible and has some nutrition benefits. And in this eggplant recipe, the skin will hold the thin eggplant slices so they won't fall apart while cooking. 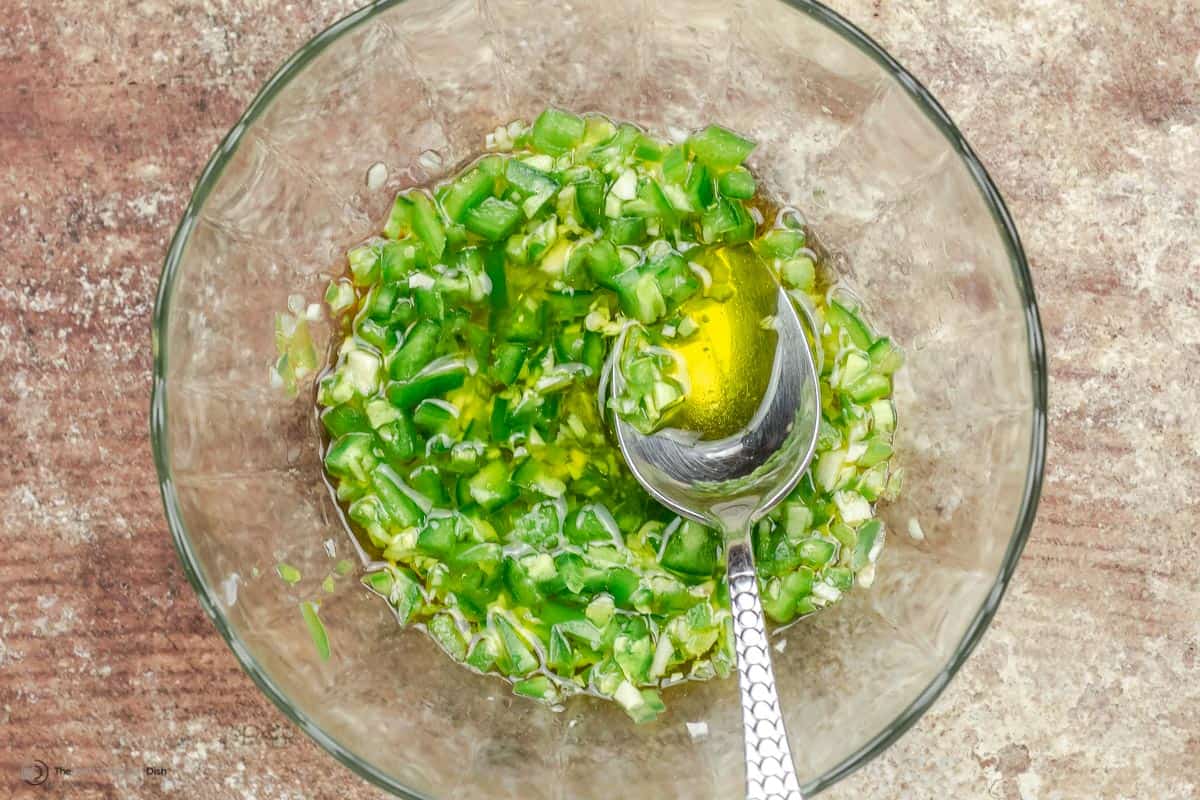 How to grill eggplant (step-by-step)Here are the basics of how to grill globe eggplant:
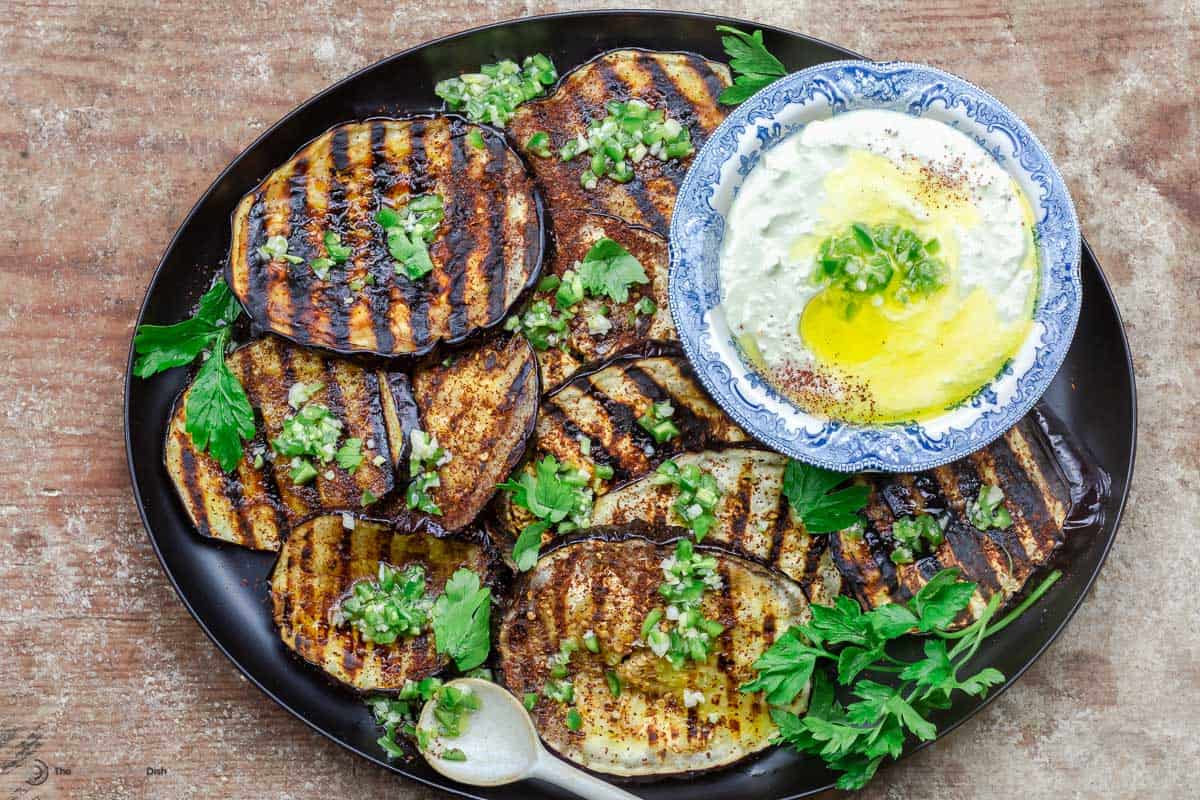 Flavor and serve grilled eggplant immediately!Given eggplant is hearty and neutral tasting, it will take to any number of flavor combination. I highly recommend season the eggplant hot off the grill. In this recipe, I made a quick sauce with good extra virgin olive oil infused with garlic and jalepeno peppers, which is a hit! To serve this Mediterranean eggplant recipe, add whipped feta and wedges of warmed pita bread. I love slathering the pita with a bit of whipped feta and then staking my seasoned eggplant on top. The best! Check out the video to see how I do it! How to store leftoversLeftover grilled eggplant should be stored in an airtight container in the fridge. Note that it's best when enjoyed fresh but it will last in the fridge for up 3 days. Reheating it will make the texture extra soft, so I recommend enjoying it cold instead. It adds fantastic to add to something like this chickpea salad. More eggplant recipes:
Browse top Mediterranean diet recipes. Browse all Mediterranean recipes.  Mediterranean Grilled Eggplant with Whipped Feta
Tender and perfectly charred, this Mediterranean Grilled Eggplant is finished with a drizzle of olive oil infused with garlic and jalapeno. It's a warm and smoky appetizer that's best served Mediterranean-style with whipped feta and pita.
Servings 6 servings
Calories 106kcal
Ingredients
Olive Oil, Garlic, and Jalapeno Sauce
To Serve (optional)
Instructions
VideoNotes
Nutrition
Calories: 106kcal | Carbohydrates: 6.6g | Protein: 1g | Saturated Fat: 1.3g | Polyunsaturated Fat: 1g | Monounsaturated Fat: 6.6g | Sodium: 2.3mg | Potassium: 209.5mg | Fiber: 2.9g | Sugar: 3.3g | Vitamin A: 46.8IU | Vitamin C: 14.3mg | Calcium: 13.7mg | Iron: 0.4mg
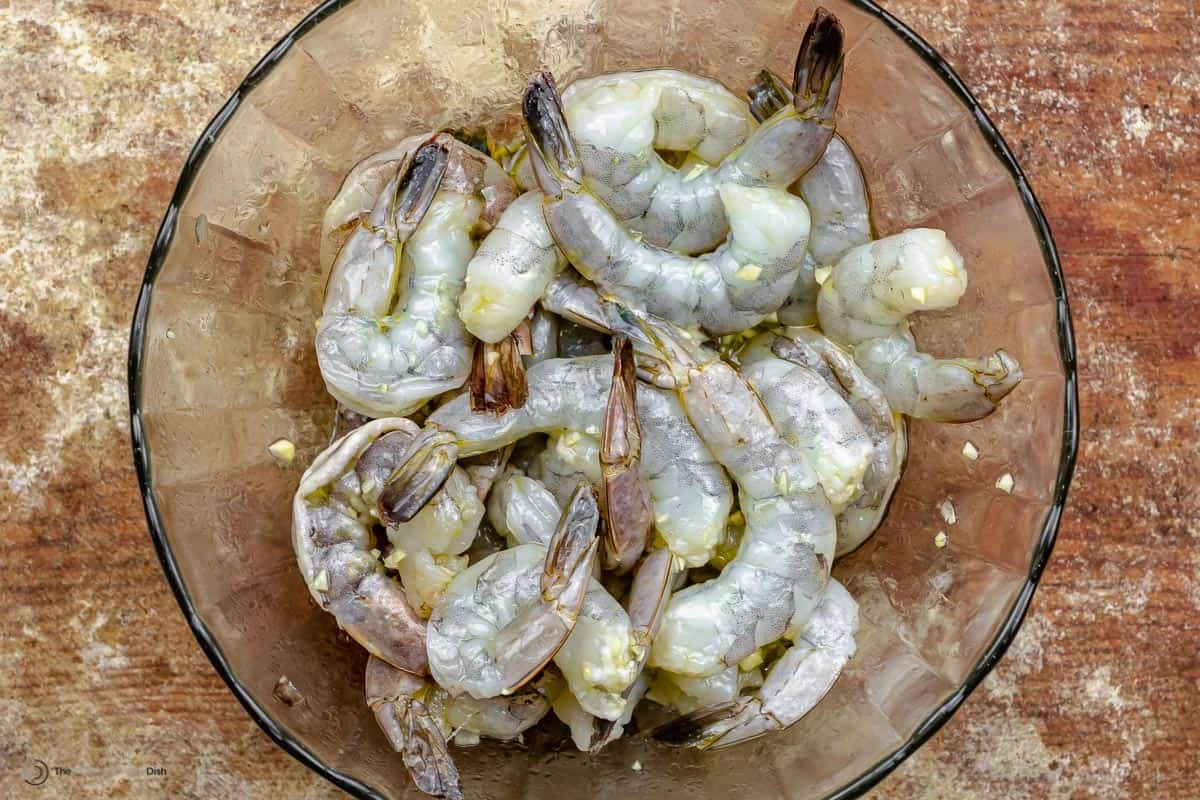
The post Mediterranean Grilled Eggplant with Whipped Feta appeared first on The Mediterranean Dish. via The Mediterranean Dish https://www.themediterraneandish.com/grilled-eggplant/ With just a few ingredients and simple tips, you can make a shrimp scampi recipe better than you'll have at the restaurant! Ready in 20 minutes. 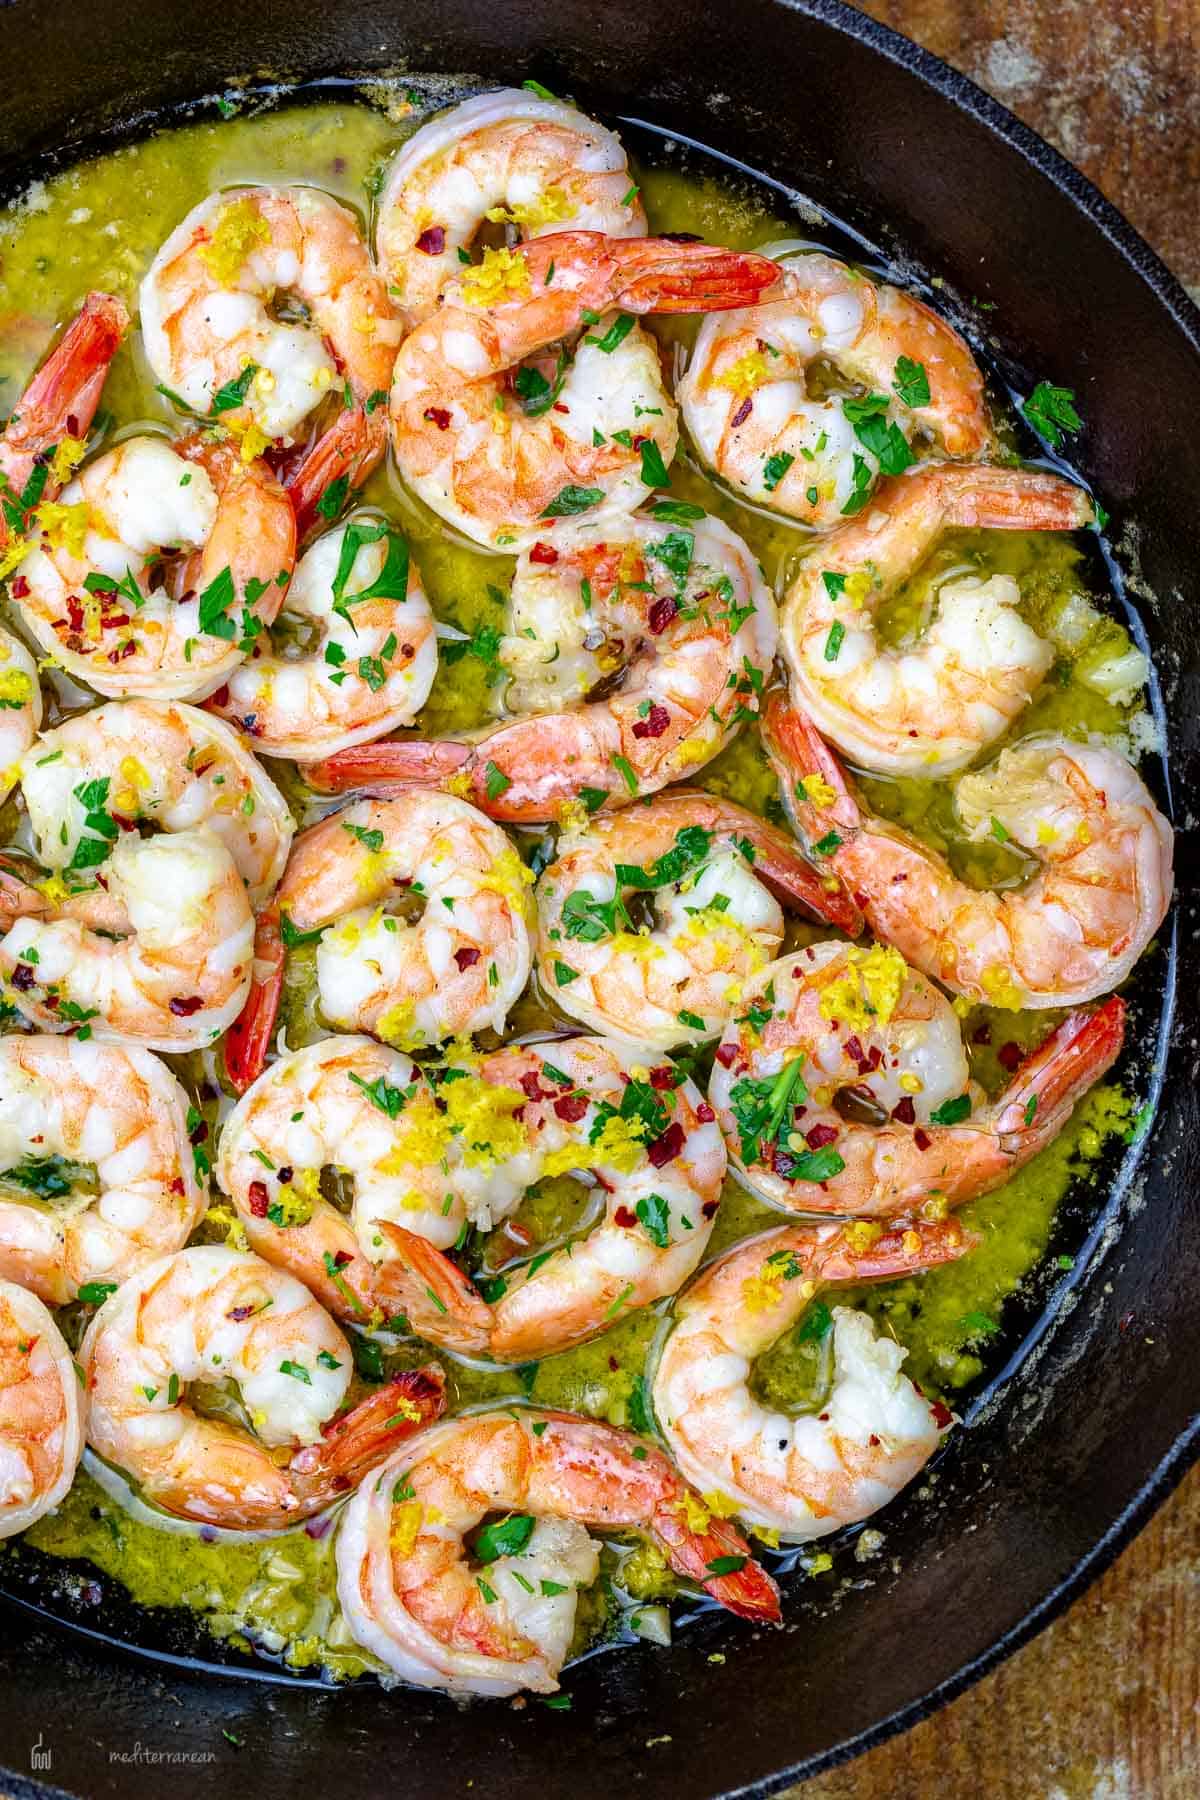 Another easy shrimp recipe!I think you've heard me say this a bunch of times already, but one of my freezer staples is a bag of wild-caught shrimp. Because shrimp thaw fast and cook even more quickly, they're easy to use in last-minute to top a big farro salad or to turn into a meal like a garlic shrimp with bell peppers or even a pan of shrimp and rice. Shrimp scampi is another recipe I love to make because it feels a bit fancy, but there really is no need to pay the high-ticket restaurant price. This easy shrimp scampi recipe comes together in 20 minutes and takes a few simple ingredients. And if you're a garlic lover, you might even double the sauce so you have plenty to toss this shrimp with your favorite. Shrimp scampi with angle hair or spaghetti is great, the garlicy flavor might remind you of spaghetti aglio e olio, but richer given the addition of butter and shrimp. But if you don't feel like pasta, then just grab your favorite crusty bread to dunk in the delicious scampi sauce! What is scampi?Traditionally, Italian cooks used small, lobster-like crustaceans called scampi, also known as Dublin Bay Prawns or Norway Lobsters, to make this dish. Now, it is more commonly made with shrimp--hence the name "shrimp scampi." Shrimp scampi is made with a simple sauce of garlic, butter, and white wine. For me, I like to use a bit of extra virgin olive oil to support the butter, I find that it gives the dish good flavor and helps reduce the butter intake. As with all beloved classics, this recipe has many variations and additions. Some may add a sprinkle of parmesan, and others may even thicken the sauce a bit with some cream or a dash of corn starch. I don't find that necessary.  What you'll need to make itThe components of this recipe are simple: shrimp and scampi sauce
Shrimp scampi without white wineScampi sauce typically calls for a dry white wine, but if you don't use wine in your cooking, you can easily make this garlic shrimp with broth instead (as long as you keep the citrus from the lemon juice). Basic low sodium chicken broth will work, but avoid beef broth as it will change the flavor. 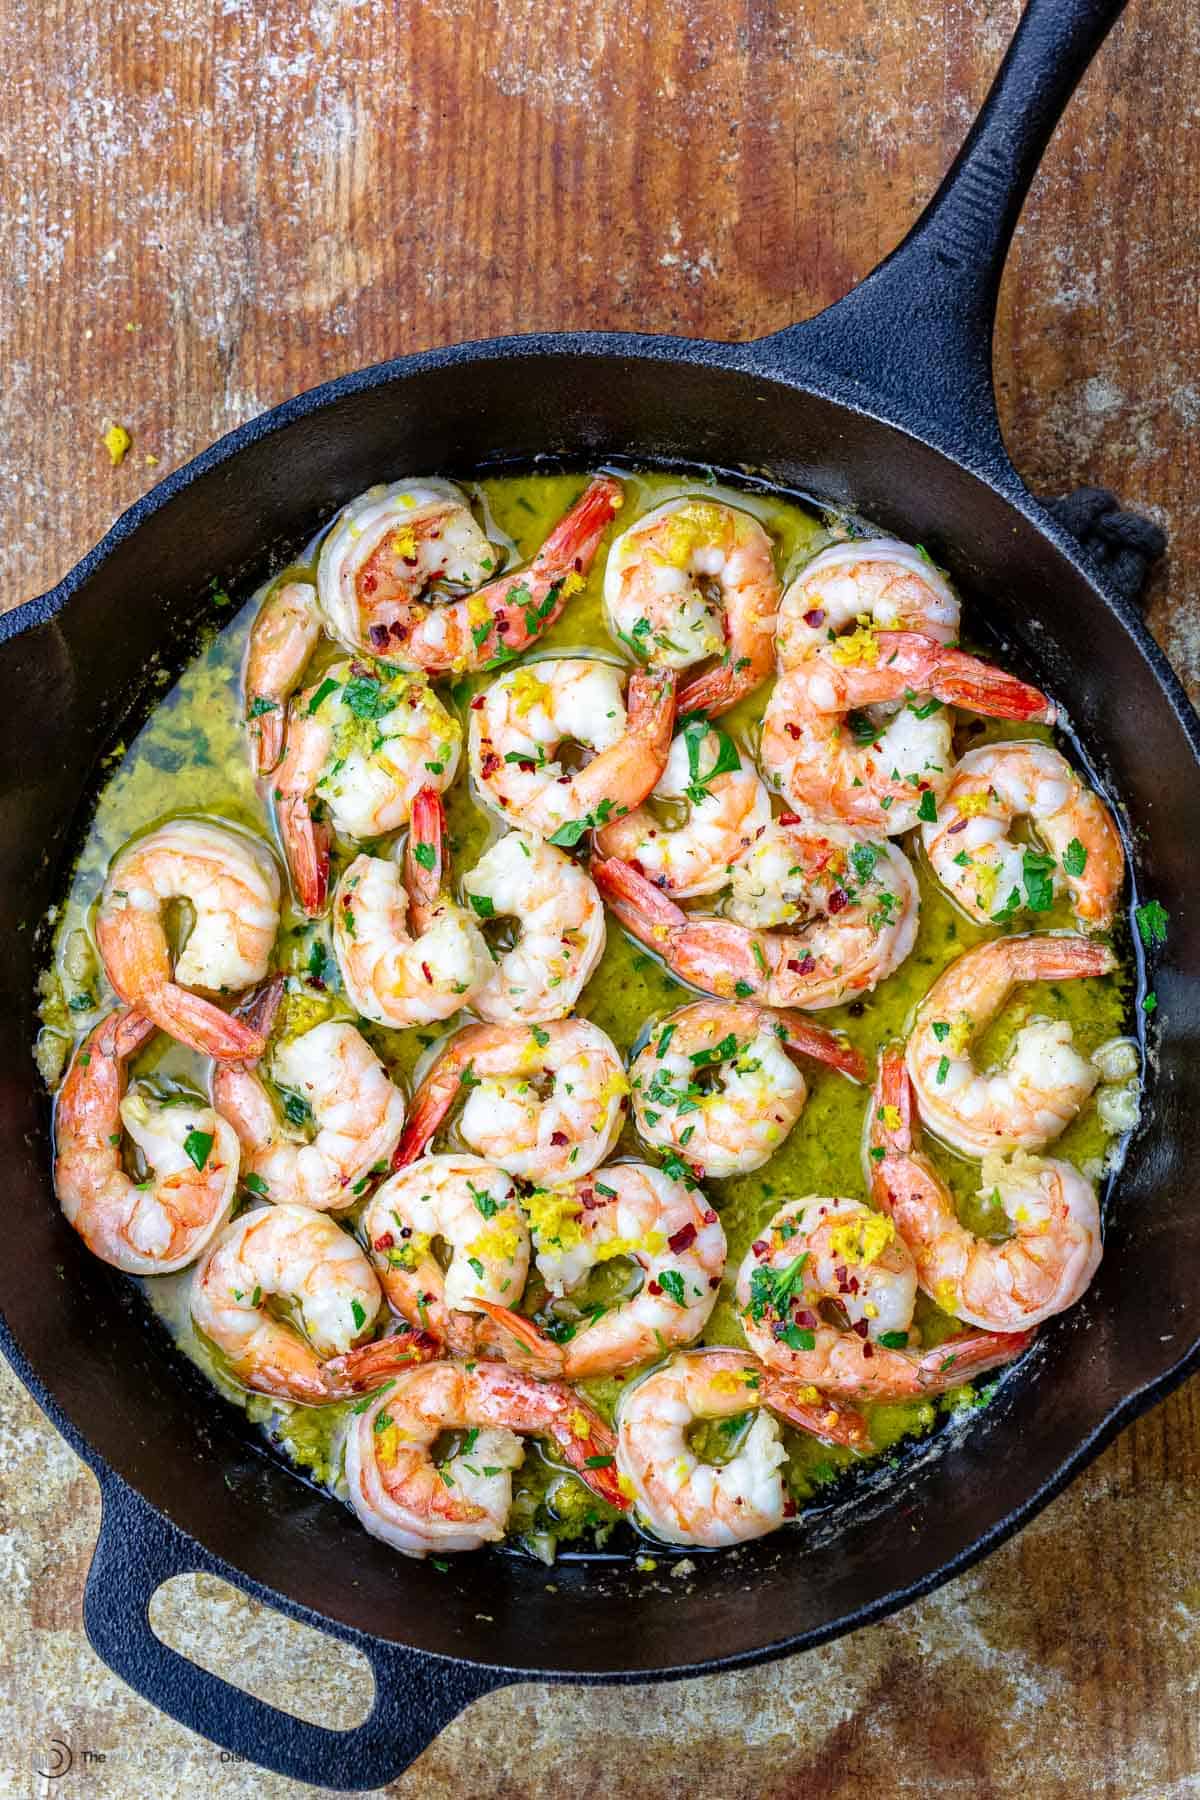 How to make shrimp scampiMaking a restaurant-quality dinner at home doesn't have to be hard. Garlic butter shrimp scampi comes together in under half an hour with just a few steps, and if you have a few extra minutes, don't skimp marinating the shrimp. Here's how it goes:
Tips for successFor perfectly cooked, juicy and flavorful shrimp scampi, keep these tips and suggestions in mind before, during and after cooking!
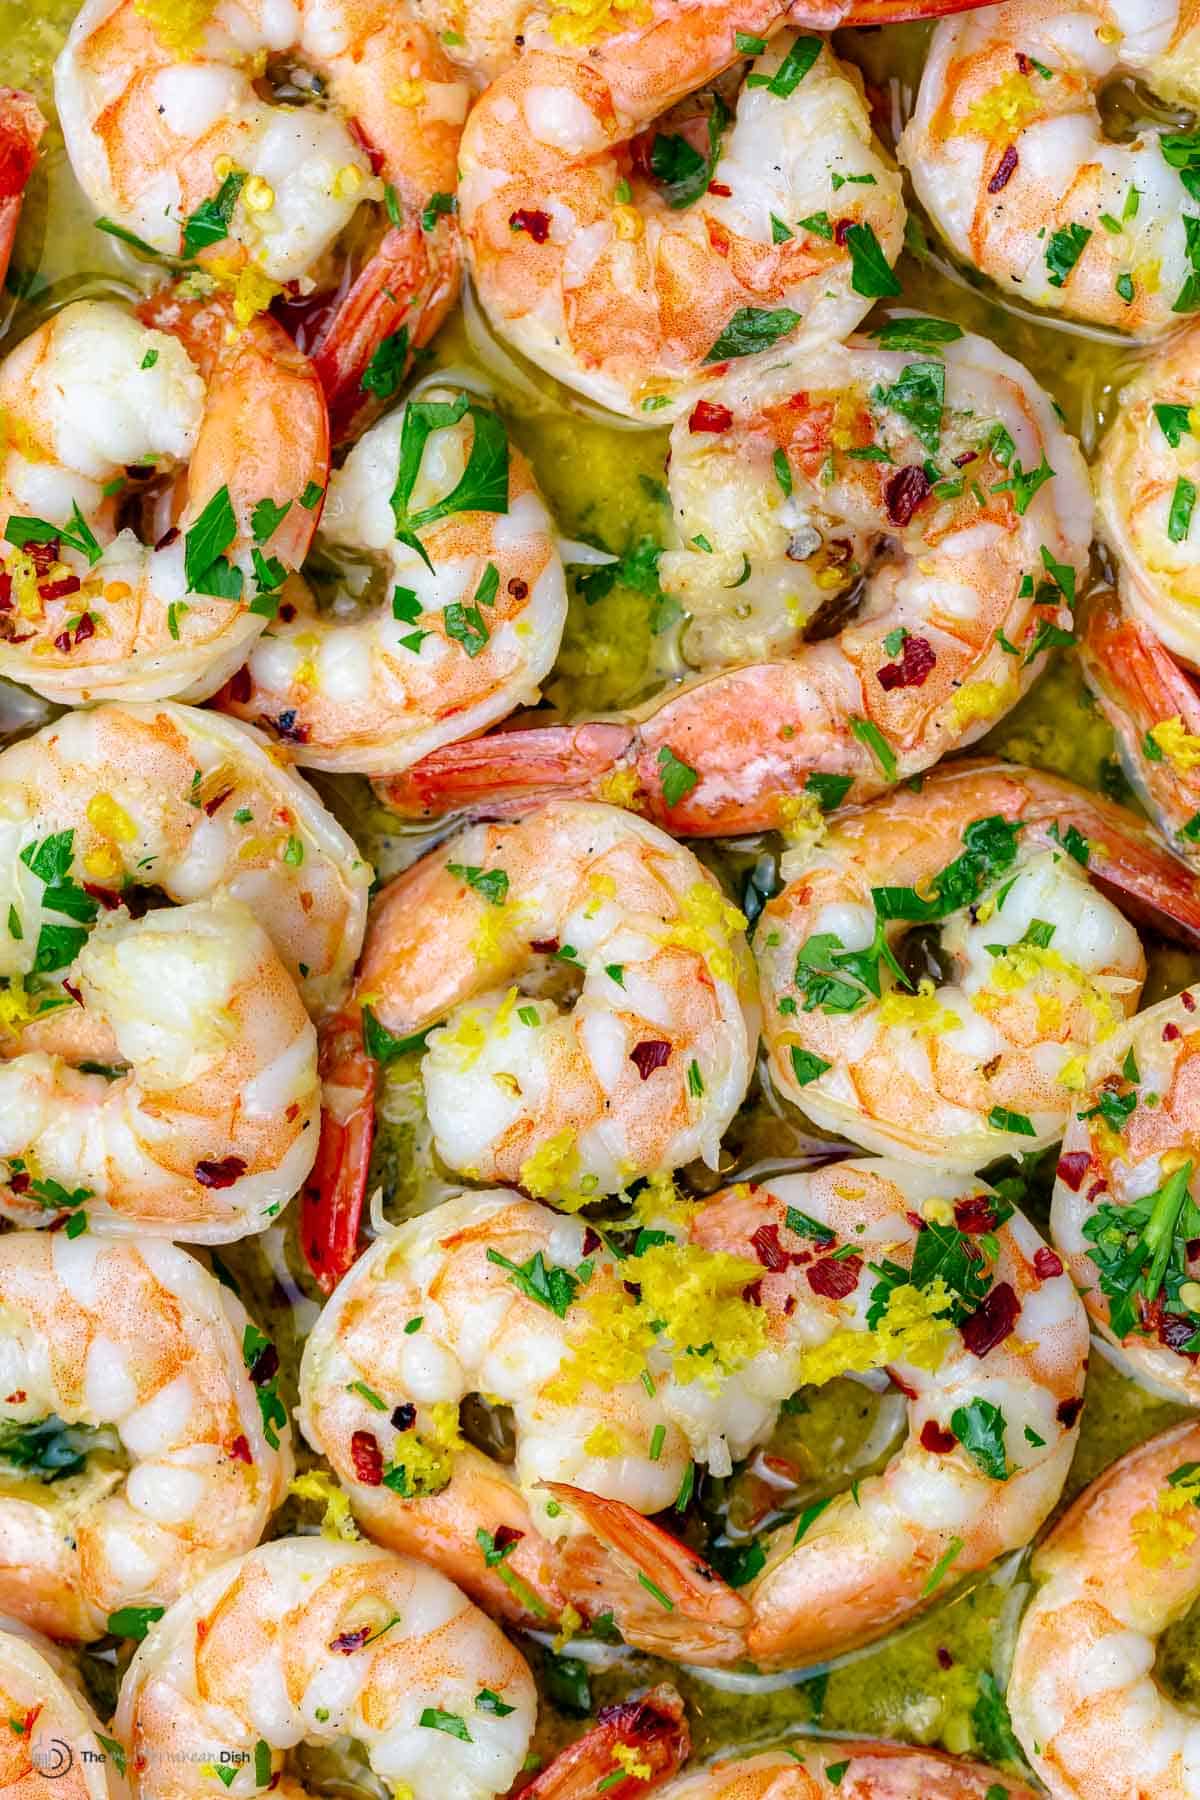 What's the best pasta to serve with shrimp scampi?Shrimp scampi is typically served over pasta. Any type of thin long noodles like spaghetti, angel hair, capellini or spaghettini are all good options. Their delicate thin strands pair well with the light garlic and butter sauce, as the sauce will coat the strands without weigh them down too much. If you love extra saucy pasta, double the sauce portion of the recipe. For a low-carb option, you can easily serve shrimp with garlic and butter over zucchini noodles or cauliflower rice. I also tend to pair dish with a bright and colorful side salad to balance out the meal. 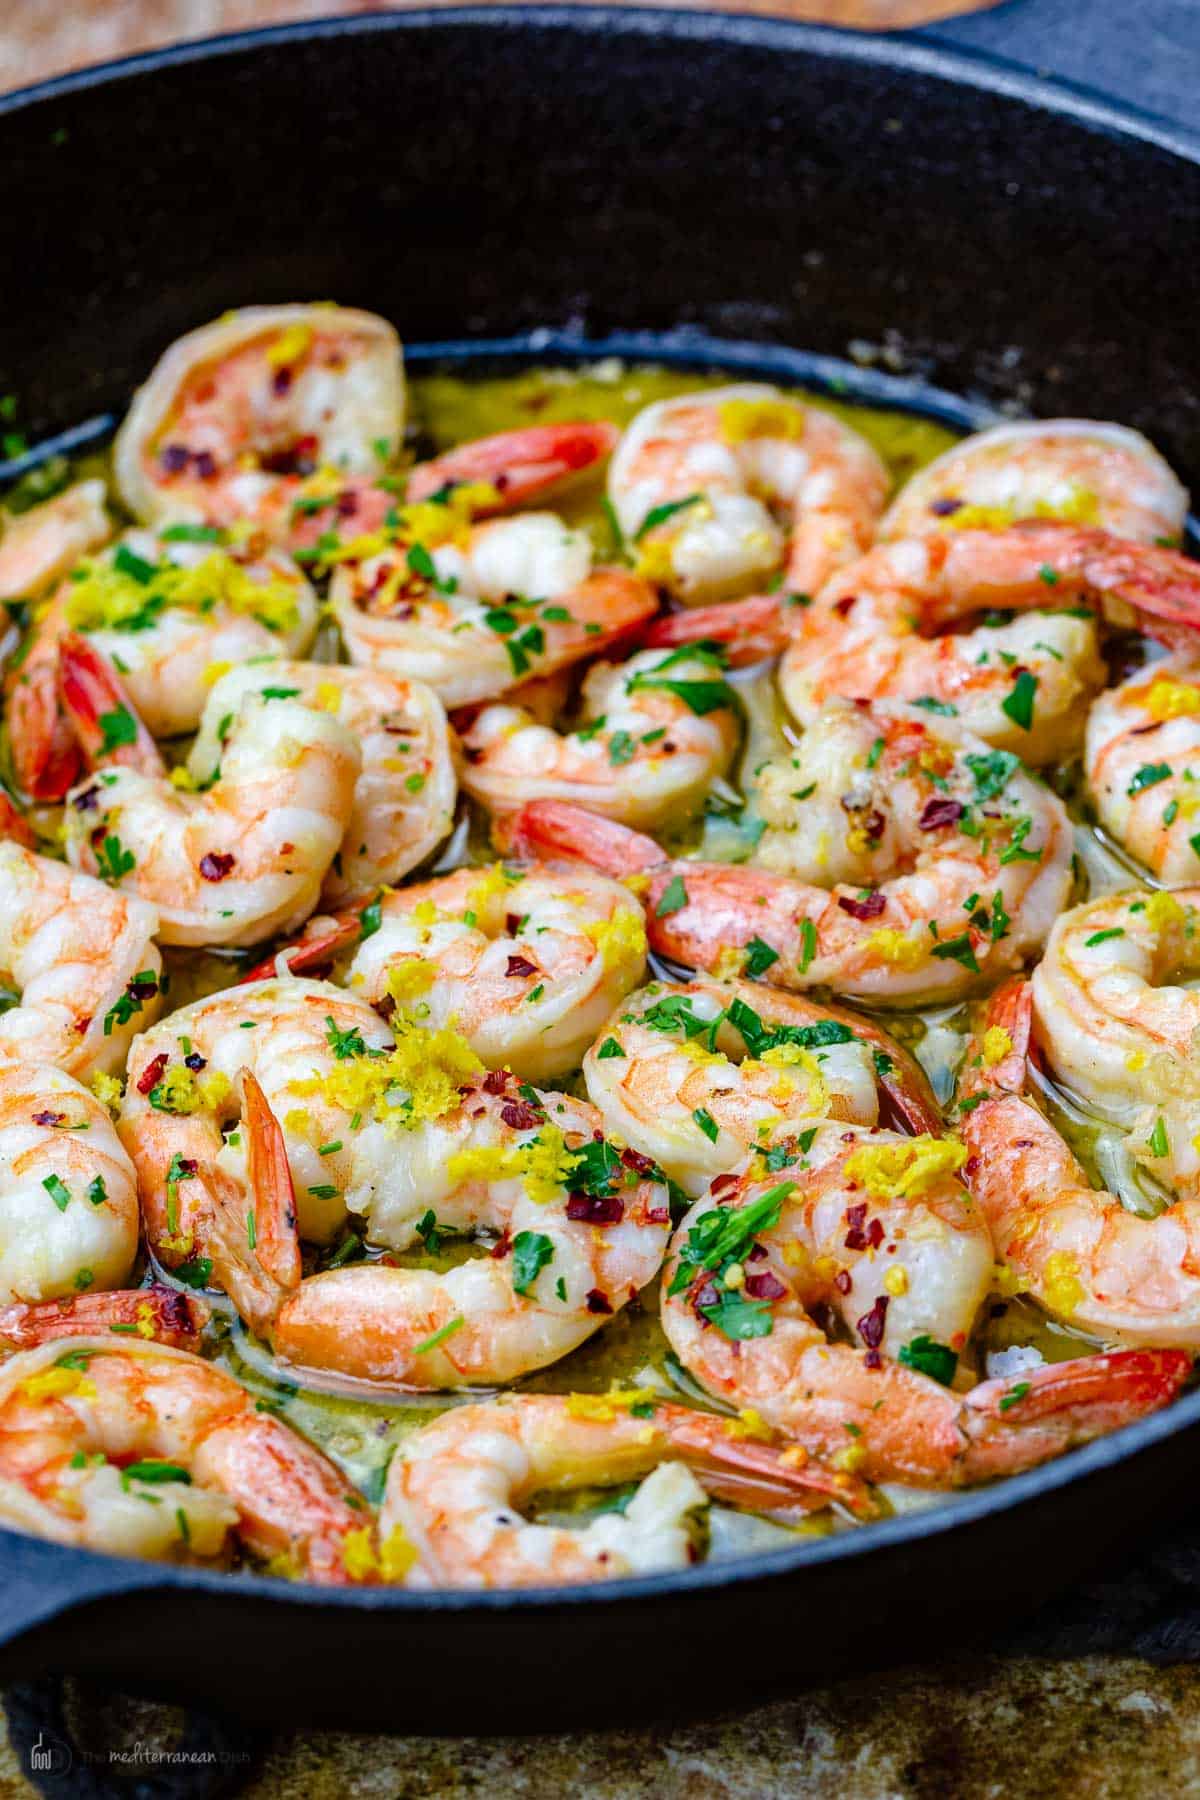 How to store leftoversShrimp scampi is best when served fresh but leftovers can be stored in an airtight container in the fridge for up to 3 days. For best results, reheat quickly on the stovetop and take care to not overcook the shrimp. Shrimp reheated in the microwave can be tough and rubbery. More easy shrimp recipes:
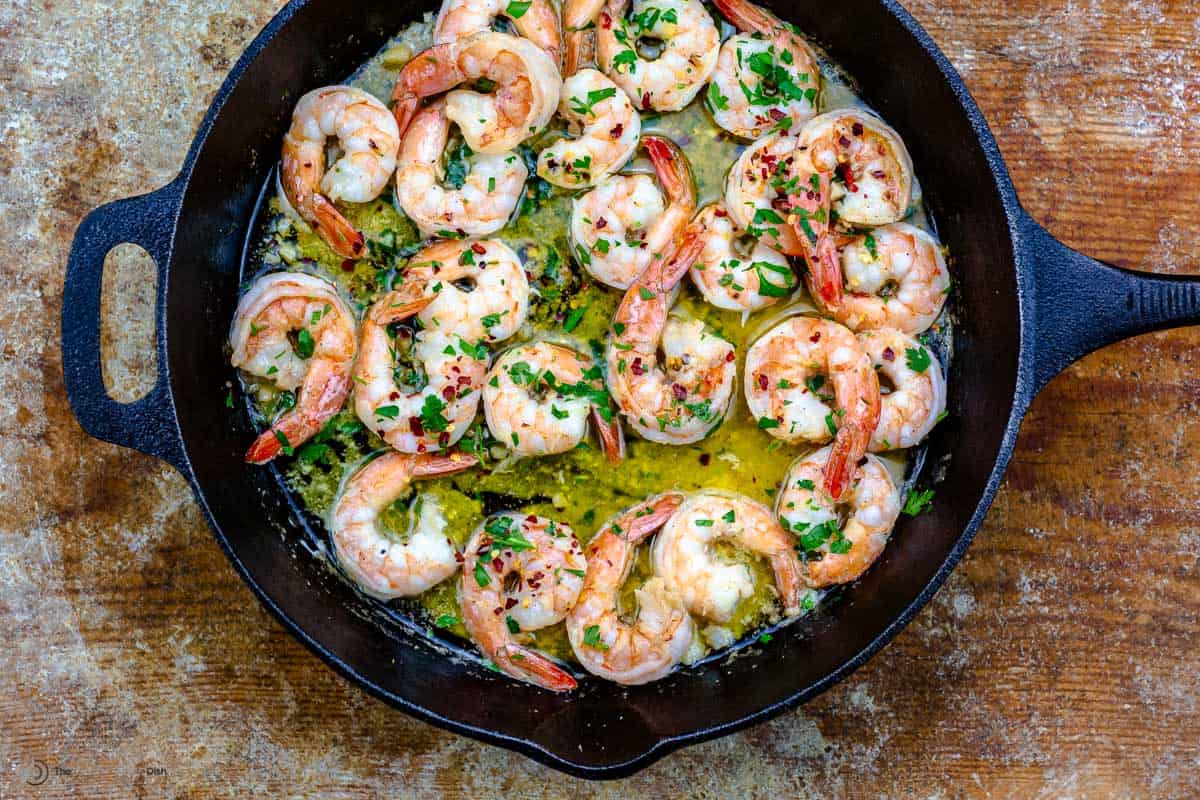
Browse more Italian recipes. Browse all recipes here. Visit Our Shop to browse quality Mediterranean ingredients.  Easy Shrimp Scampi Recipe
This easy shrimp scampi comes together in 20 minutes for the perfect fancy dinner at home! Make use of the delicious garlic scampi sauce, and serve it over your favorite pasta or even rice.
Servings 4 servings
Calories 186.9kcal
Ingredients
Instructions
VideoNotes
Nutrition
Calories: 186.9kcal | Carbohydrates: 1.8g | Protein: 0.4g | Saturated Fat: 6.9g | Trans Fat: 0.3g | Cholesterol: 22.6mg | Sodium: 8.8mg | Potassium: 51mg | Fiber: 0.3g | Sugar: 0.2g | Vitamin A: 652.7IU | Vitamin C: 5.9mg | Calcium: 15.4mg | Iron: 0.4mg
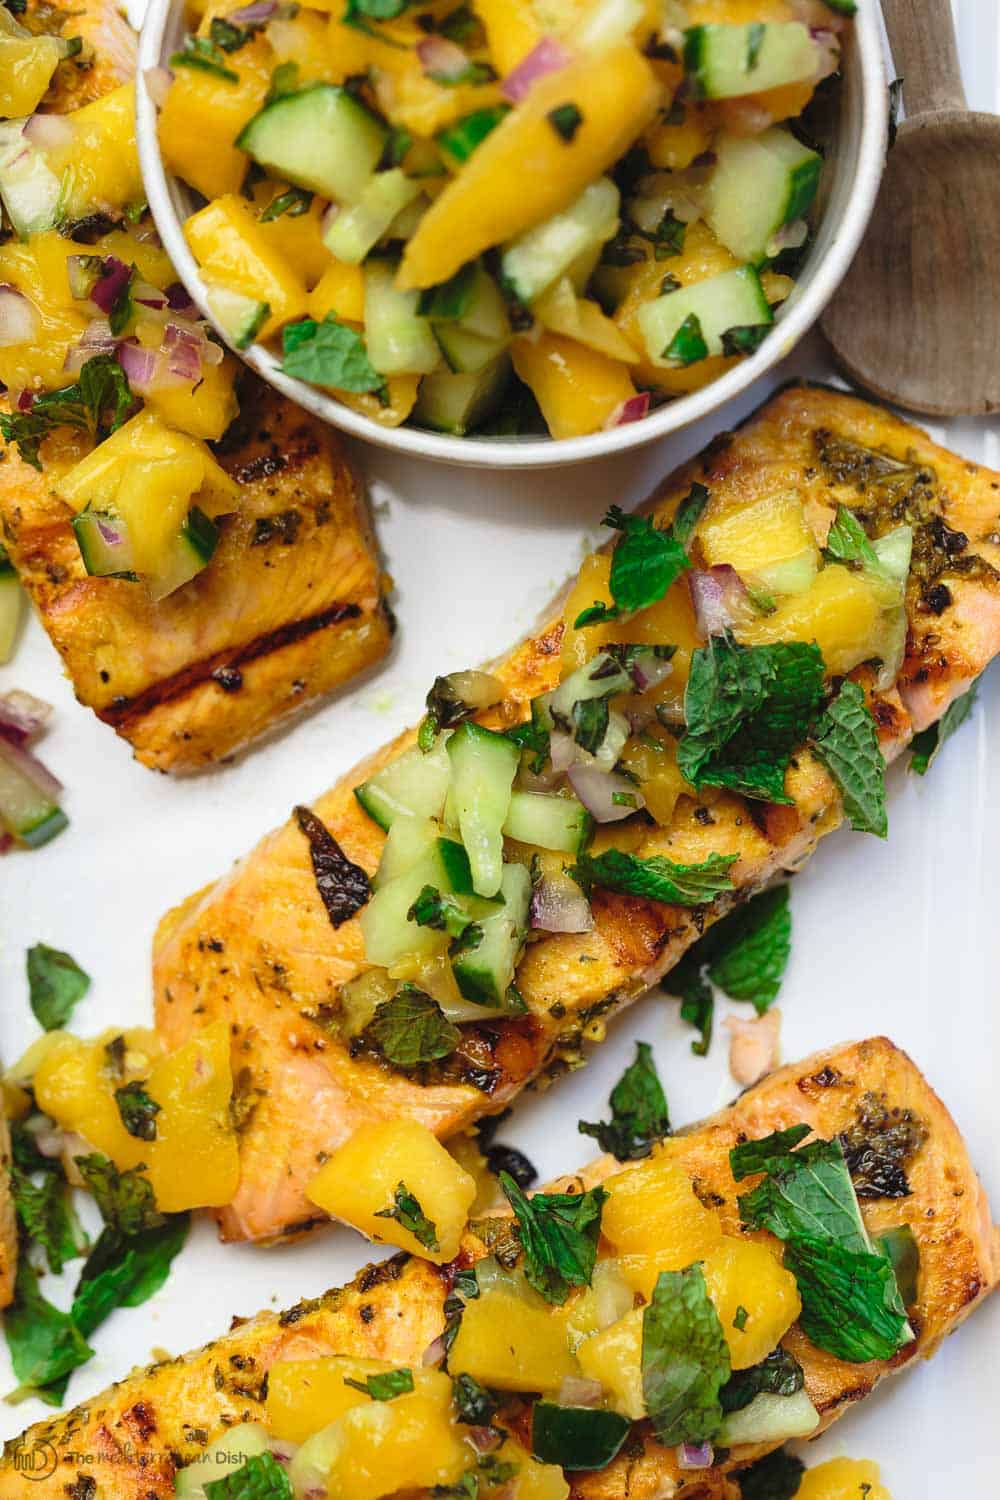
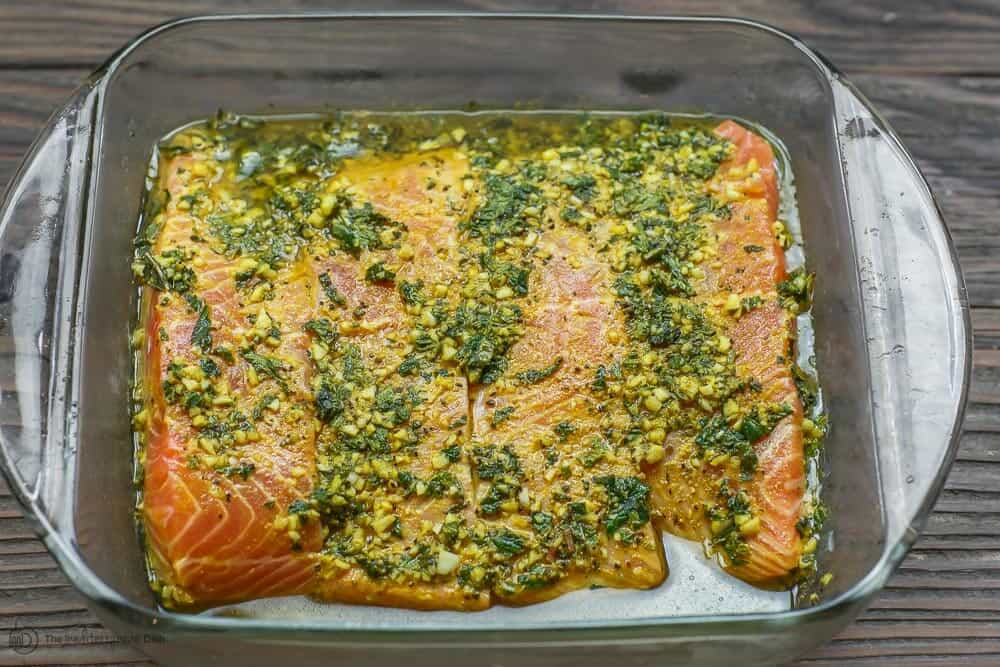
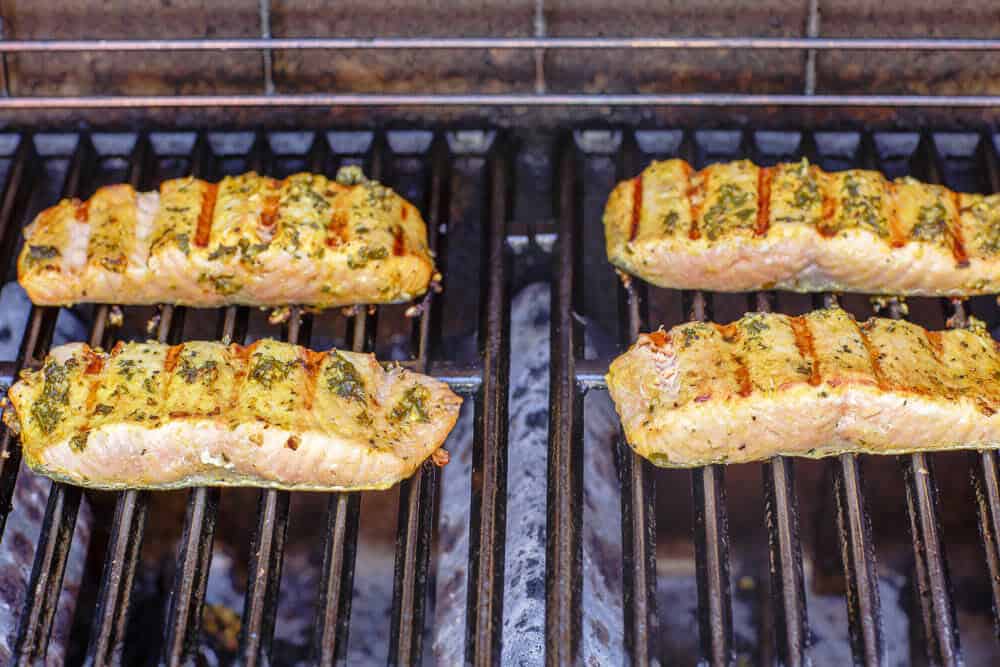
The post Easy Shrimp Scampi Recipe appeared first on The Mediterranean Dish. via The Mediterranean Dish https://www.themediterraneandish.com/shrimp-scampi/ Follow these tips for how to grill salmon perfectly every time! And between the marinade and the mint mango salsa on top, this grilled salmon recipe is next level delicious. 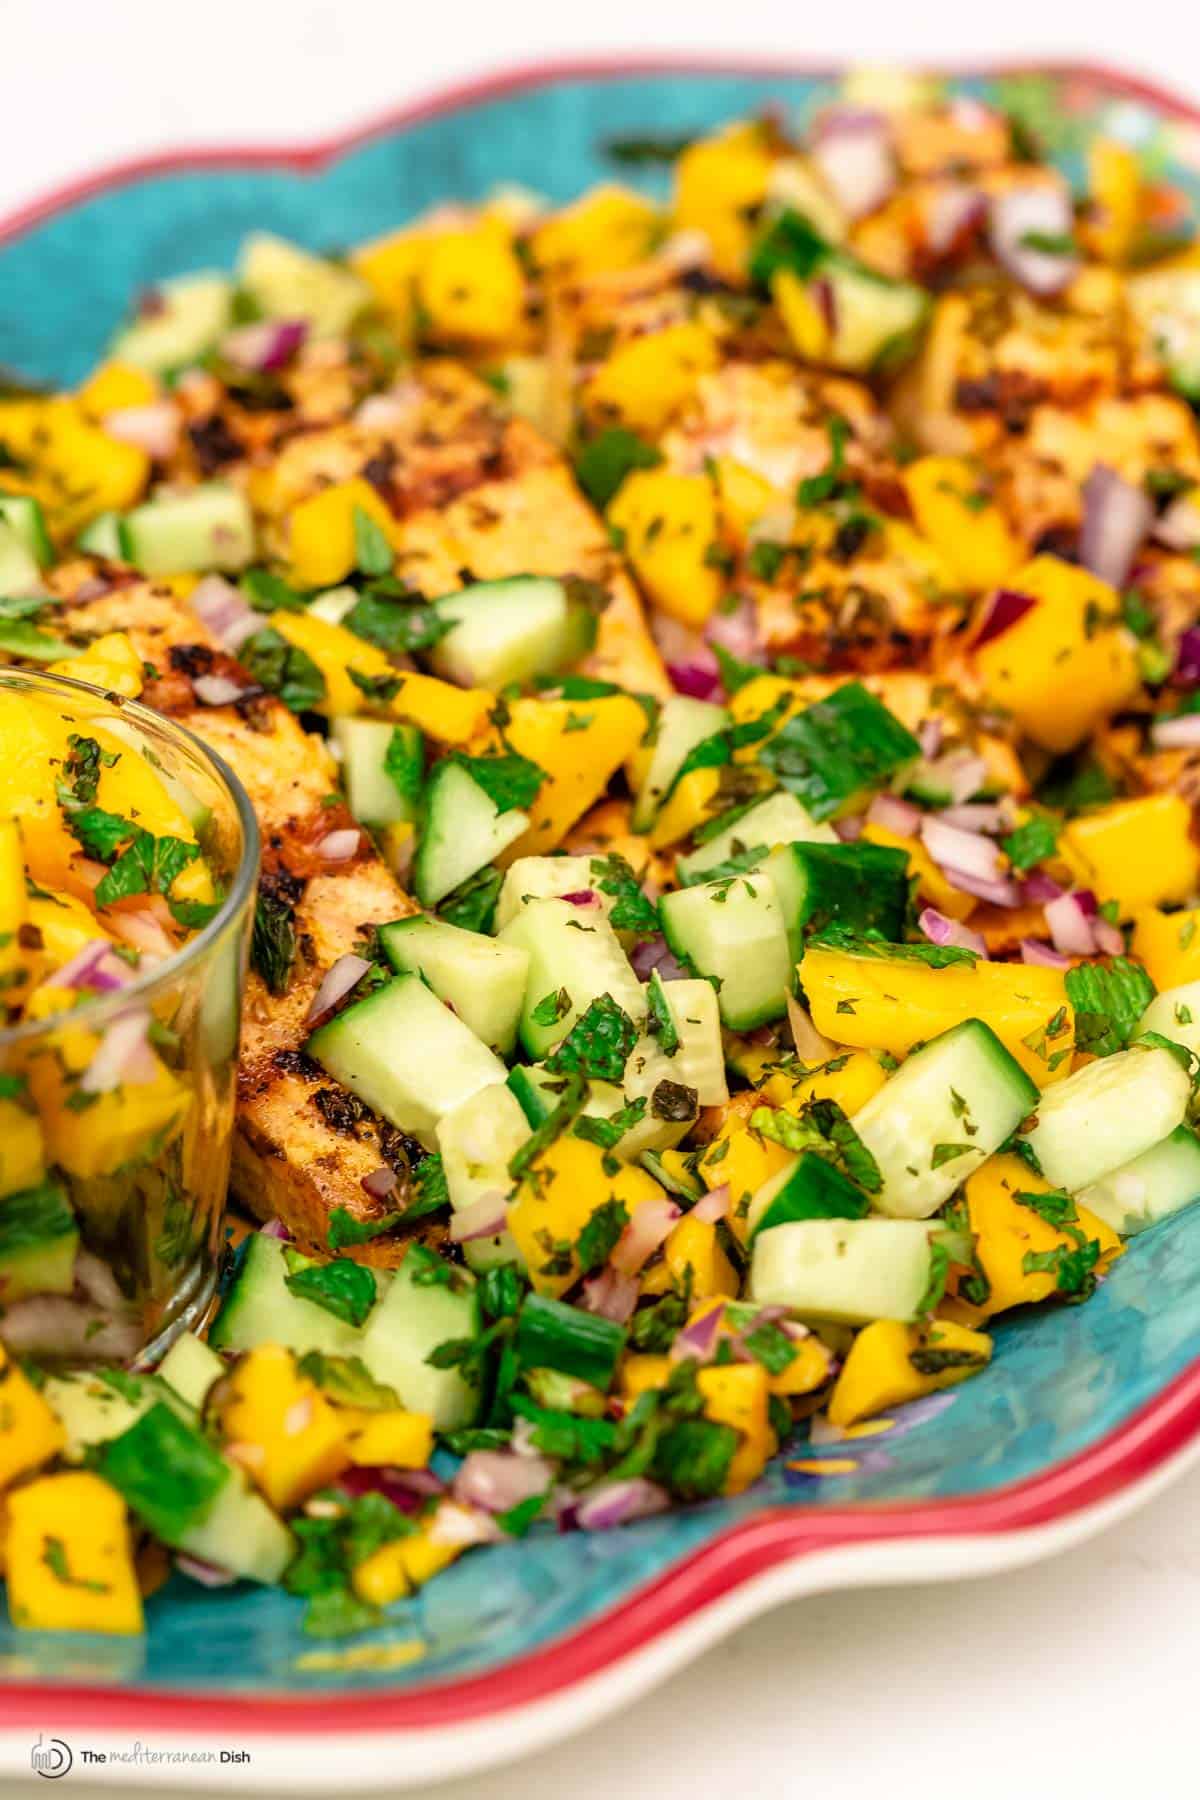 One of the perks of living in Atlanta is that you can use the grill pretty much any time of the year. But even if the weather isn't that great, I totally employ an indoor grill or griddle pan, no problem! And I get especially excited if I could fix my entire dinner right on the grill--usually some sort of a protein like chicken kabobs or Greek souvlaki + Mediterranean grilled vegetables or a simple grilled zucchini salad. We’ve been doing more and more fish on the grill lately, and we found that one of the easiest fish to grill is salmon! Today's grilled salmon recipe is another family favorite, and between the salmon marinade and the fresh mint-mango salsa, it is next-level delicious! I can’t take all the credit here. My husband is the grill expert in the family, and if you want to learn how to grill salmon perfectly, be sure to check out the tips below. 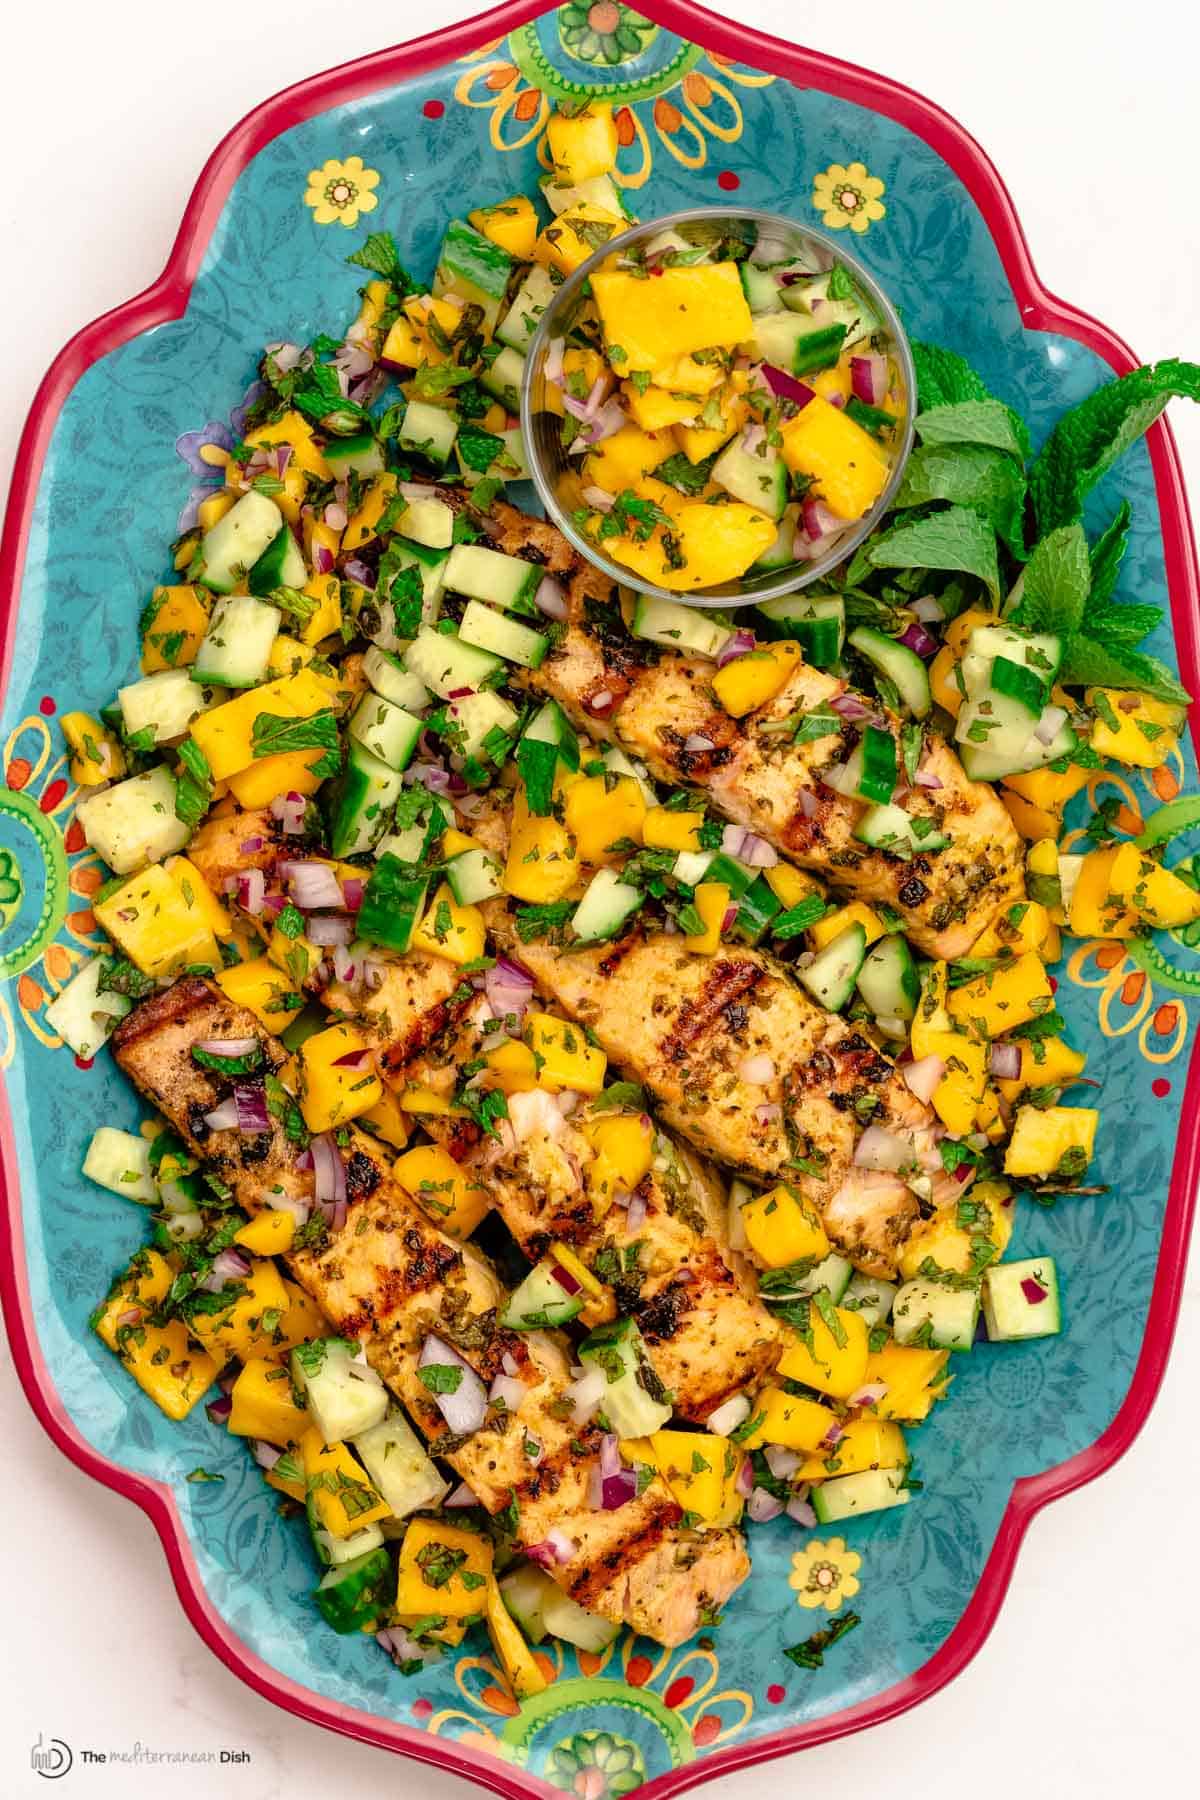 Don't skip the salmon marinade!No surprise, the salmon marinade here begins with three Mediterranean suspects: extra virgin olive oil, lemon juice, and garlic. To add brightness and impart more flavor, I like to mix in fresh herbs--in this case, mint--with favorite earthy spices like coriander and cumin. If time is of the essence, you can marinate the salmon for 20 minutes or so while you make the salsa and prepare the grill. But if you're not in a rush, for even more flavor, cover the salmon and let it marinate in the fridge for an hour or 2. I do not recommend marinating fish overnight though, but an hour or two for a hefty fish like salmon will add flavor and help it remain tender as it cooks over direct dry heat. How to Grill Salmon Perfectly Every Time!Aside from marinating the salmon, which will make it delicious and moist, here are a few more tips to keep in mind when cooking salmon on the grill:
 How long does salmon need to be on the grill?Salmon will cook quickly on the grill over direct heat, so you'll want to keep a close eye on it. The cooking time will vary depending on how thick your fish is and the temperature you used. In this recipe, the salmon took me about 8 minutes in total. First the salmon will cook 1 to 3 minutes, flesh side down over direct heat, then it will finish cooking on the other side over medium heat for about 3 to 5 minutes. How to make this grilled salmon recipe:This easy recipe begins with marinating the salmon and then cooking it on the grill for 6 to 8 minutes! To serve, you'll top the grilled fish with my delicious mango salsa! I've included some photos to show you the steps, and feel free to refer to the full printable recipe just below:
How do you know when it's ready?You'll know your salmon is ready when it changes color from translucent red to an opaque pink. After it has cooked for 6 to 8 minutes on the grill, you can check the salmon for doneness by poking it gently--in the thickest part--with a sharp knife. It should begin to flake easily when it's done. The internal temperature of cooked fish should be around 145 degrees F, but to be sure you don't overcook it, take the salmon fillets off the grill when the internal temperature reaches somewhere around 130 degrees F, then you can cover it for a couple minutes. It will continue to cook as it sits and the temp will rise. Serve it withWhen I first started putting ingredients together for this salmon recipe, I was planning to use my Mediterranean homeamde tomato salsa, but I had a couple of ripe mangoes and decided to put them to good use in a bright mint and mango salsa creation! Either salsa option is absolutely fine to use on top of these grilled salmon fillets. Not in the mood for salsa? You can do a number of other salads or sides to go along with this salmon. For salads and dips: Tabouli; Mediterranean Three Bean Salad; or this Mediterranean Mustard Potato Salad; Tzatziki; or Roasted Red Pepper Hummus For sides: Grilled Brussels Sprouts; Baked Zucchini with Thyme and Parmesan; Italian Roasted Vegetables; or Greek Lemon Rice 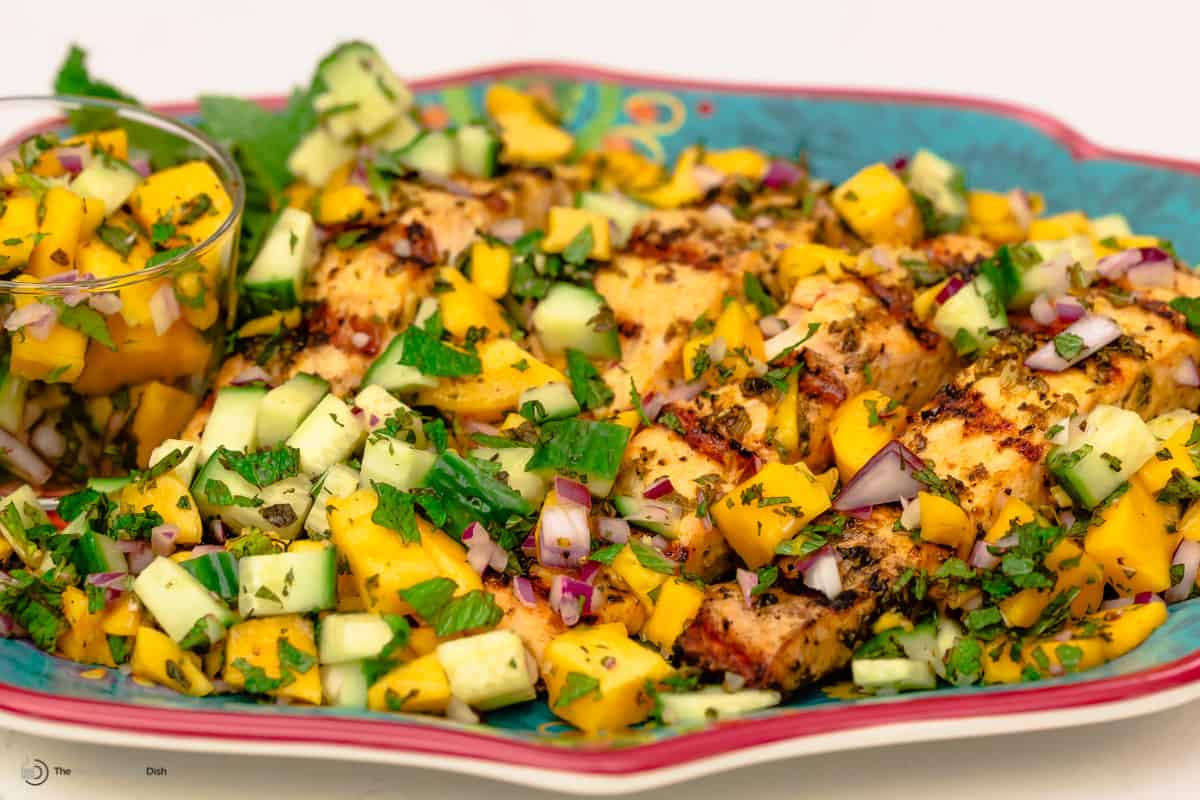 More salmon recipes to try:Browse top Mediterranean diet recipes. Browse all Mediterranean recipes. Visit Our Shop for Quality Mediterranean Products.  Grilled Salmon Recipe with Mint Mango Salsa
Healthy, bright and flavor-packed grilled salmon fillets with fresh mint and mango salsa! Be sure to grab my tips for how to grill salmon perfectly every time. Not in the mood for salsa? Check out all the other options for what to serve along.
Servings 4
Calories 235.6kcal
IngredientsFor Salmon
For Marinade
For Mint Mango Salsa
Instructions
VideoNotes
Nutrition
Calories: 235.6kcal | Carbohydrates: 18.5g | Protein: 1.5g | Saturated Fat: 2.6g | Polyunsaturated Fat: 2g | Monounsaturated Fat: 13.4g | Sodium: 5mg | Potassium: 249.1mg | Fiber: 2.7g | Sugar: 14.2g | Vitamin A: 1443.3IU | Vitamin C: 41.4mg | Calcium: 43.8mg | Iron: 1mg
*Note: This post originally appeared on The Mediterranean Dish in July of 2018 and has recently been updated with new information and media for readers' benefit. Enjoy! The post Grilled Salmon Recipe with Mango Salsa appeared first on The Mediterranean Dish. via The Mediterranean Dish https://www.themediterraneandish.com/grilled-salmon-recipe-mint-mango-salsa/ Juicy, charred, and a little smoky, this Grilled Watermelon with Chili and Honey-Lime Sauce is a quick and easy summer dish that will truly stand out! Serve it straight from the grill as an appetizer or side. And if you're into it, sprinkle a little feta on top! 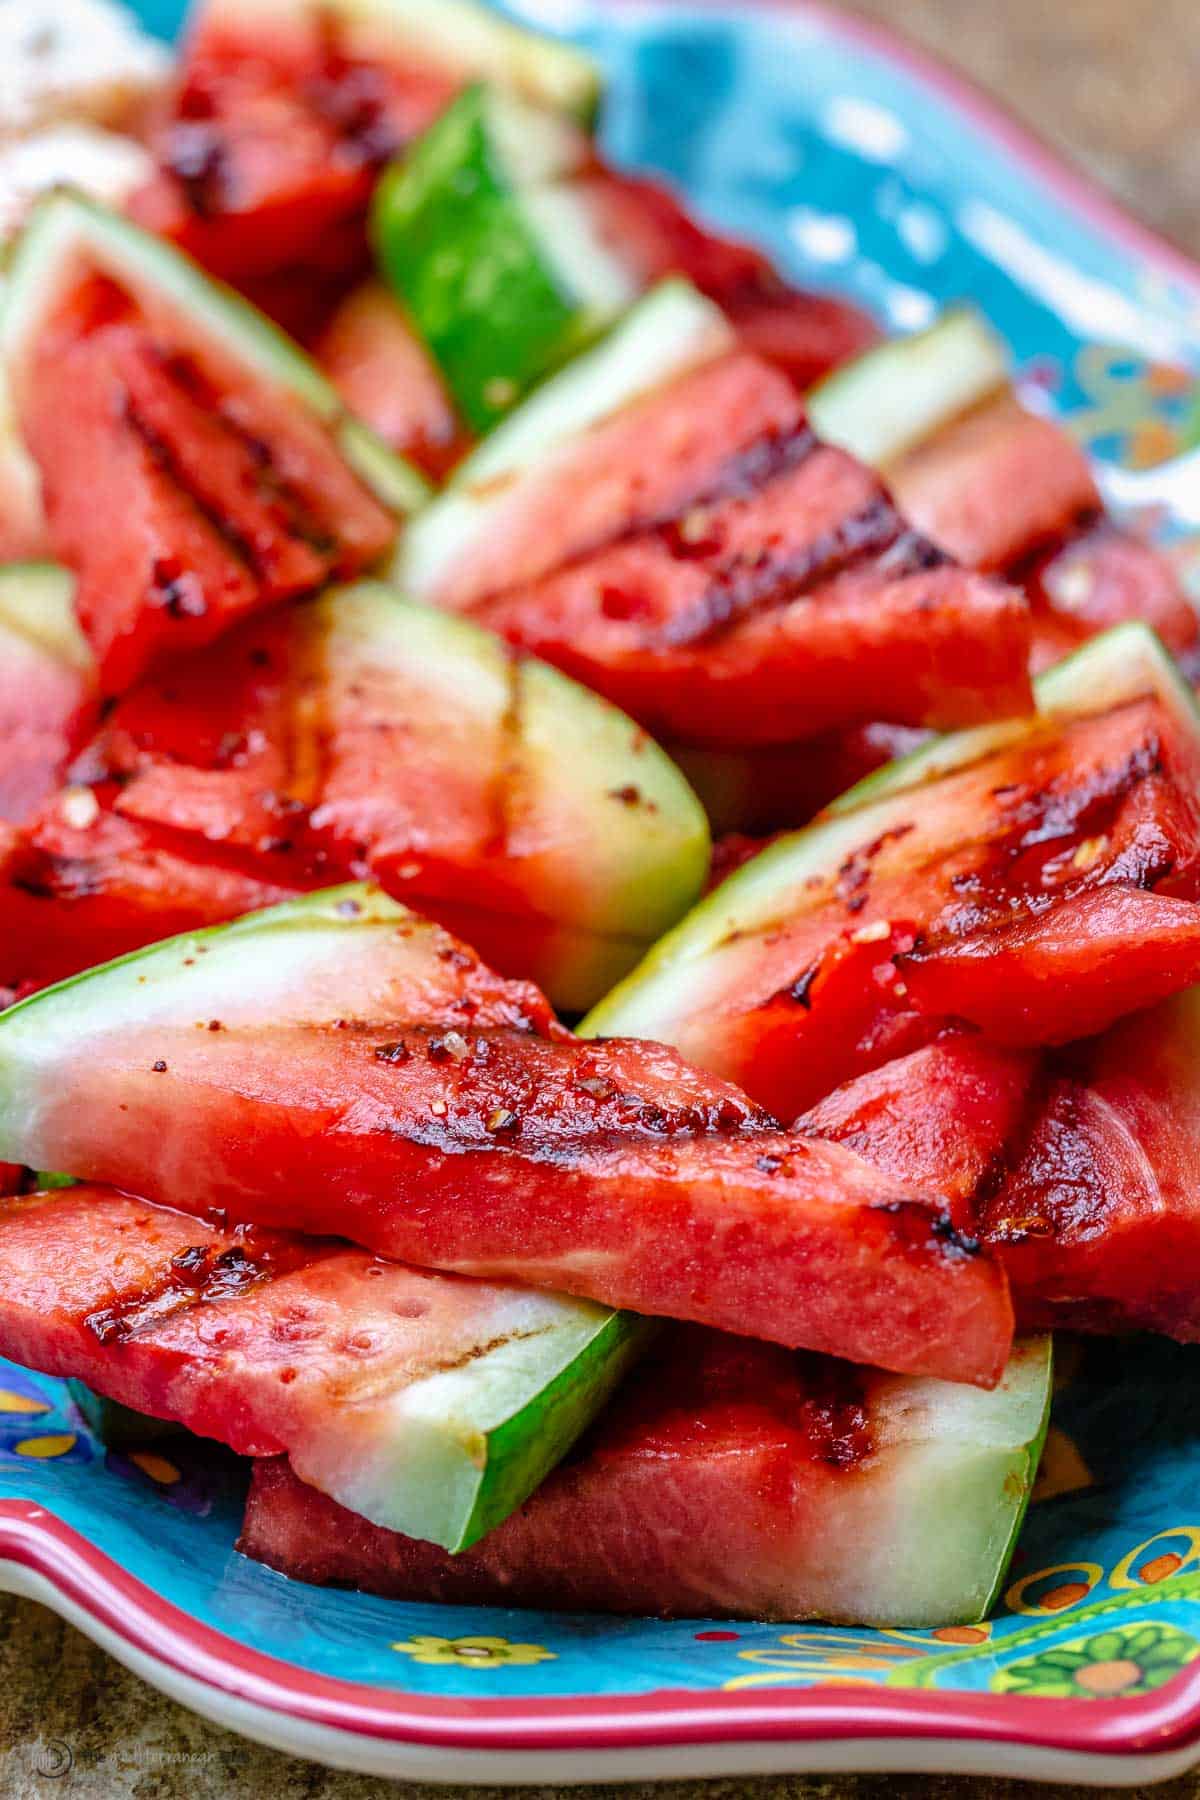 Cooked watermelon on the grill!I love fresh, cool watermelon especially in something like my Mediterranean watermelon salad with a bit of salty feta and all sorts of herbs. Grilled watermelon has become a bit of a trend over the past few summers, and I am glad I tried it! Grilling watermelon may sound odd, but don't dismiss the idea just yet! In addition to giving you some beautiful char marks, the grill will help caramelize the sweetness of watermelon, giving it a slightly smoky flavor. And as far as the texture, a grilled watermelon will remain juicy but will turn somewhat chewy in a satisfying way. Some even compare it to the texture of meat, and while I wouldn't say that, the texture change is definitely surprising! This is a fun dish that will stand out on its own, but to amp up the flavor, I like to finish my cooked watermelon with a lime and honey sauce that's flecked with chili flakes. 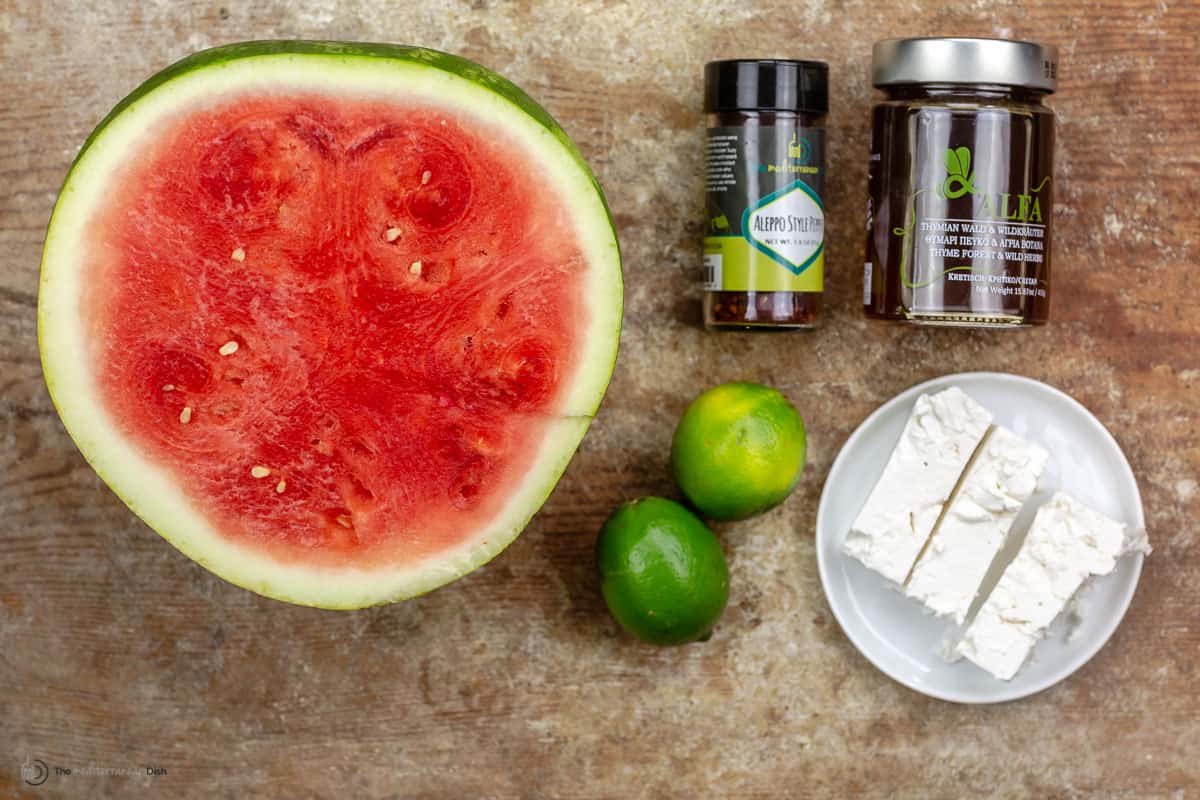 What you'll need to make this recipeAll you need is watermelon and a few ingredients to add flavor after grilling!
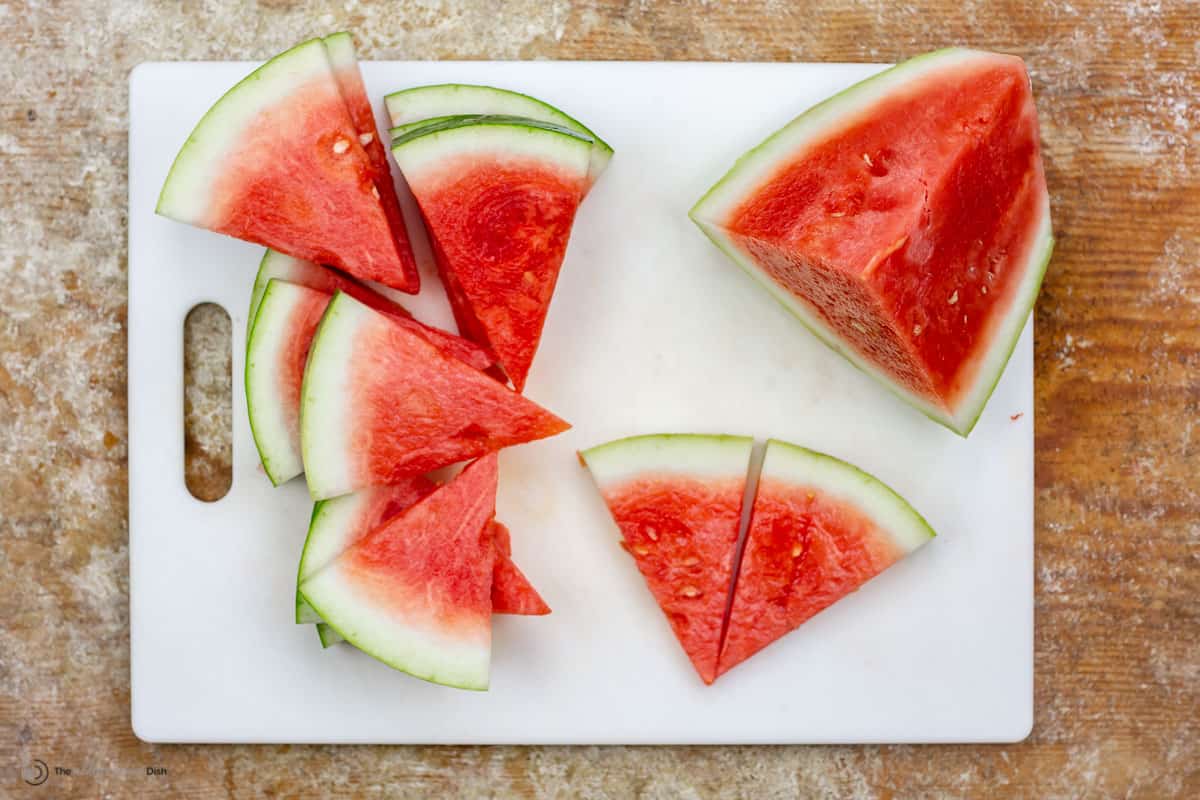 Cut the watermelon in wedges not steaks!For grilled watermelon, you want thick triangle slices with the rind on, this way the melon does not fall apart as it cooks. Here's how to easily cut a watermelon into triangles:
How to grill watermelon:Grilled watermelon is quick and easy to make. No outdoor grill? No problem! You can make this recipe on an indoor griddle or cast iron grill. Here is what you do:
A few tipsFirst time grilling watermelon? Here are some things to keep in mind:
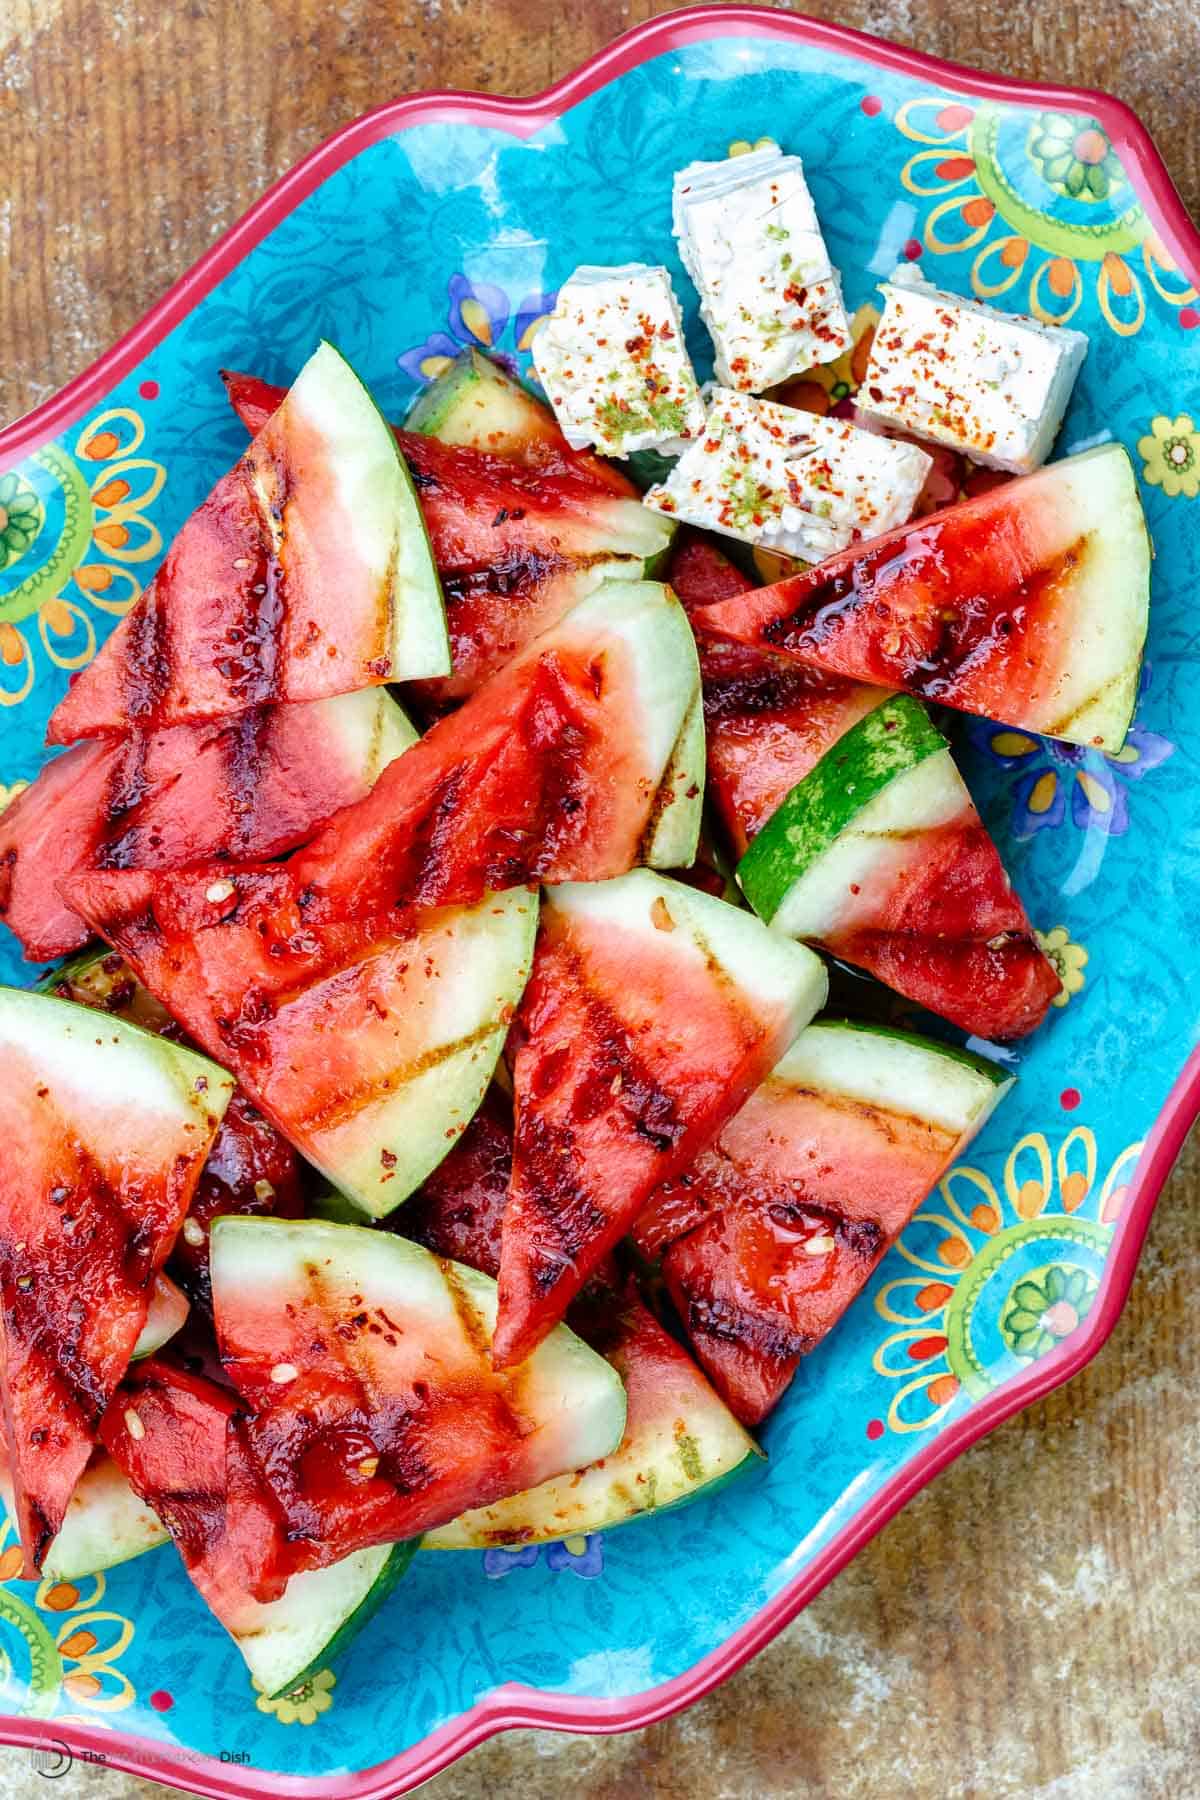 Ways to serve grilled watermelonThere are so many ways to serve grilled watermelon. It's delicious immediately off the grill on its own, but I highly recommend you make the honey-lime sauce to drizzle on top! The citrus and the sweet honey all enhance the taste of the smoky, warm watermelon. It's a true balance of flavor, with heat, sweet, and citrus all in one. I like to add a side of creamy feta, or if I have it ready, some whipped feta! Serve it as an appetizer or a side dish to things like grilled harissa chicken, souvlaki, beef shish kabobs, or even grilled fish! To serve this grilled watermelon recipe as a dessert, add a scoop of vanilla ice cream and a drizzle of some good honey (I love this Greek thyme honey), if you're looking for a dessert option. 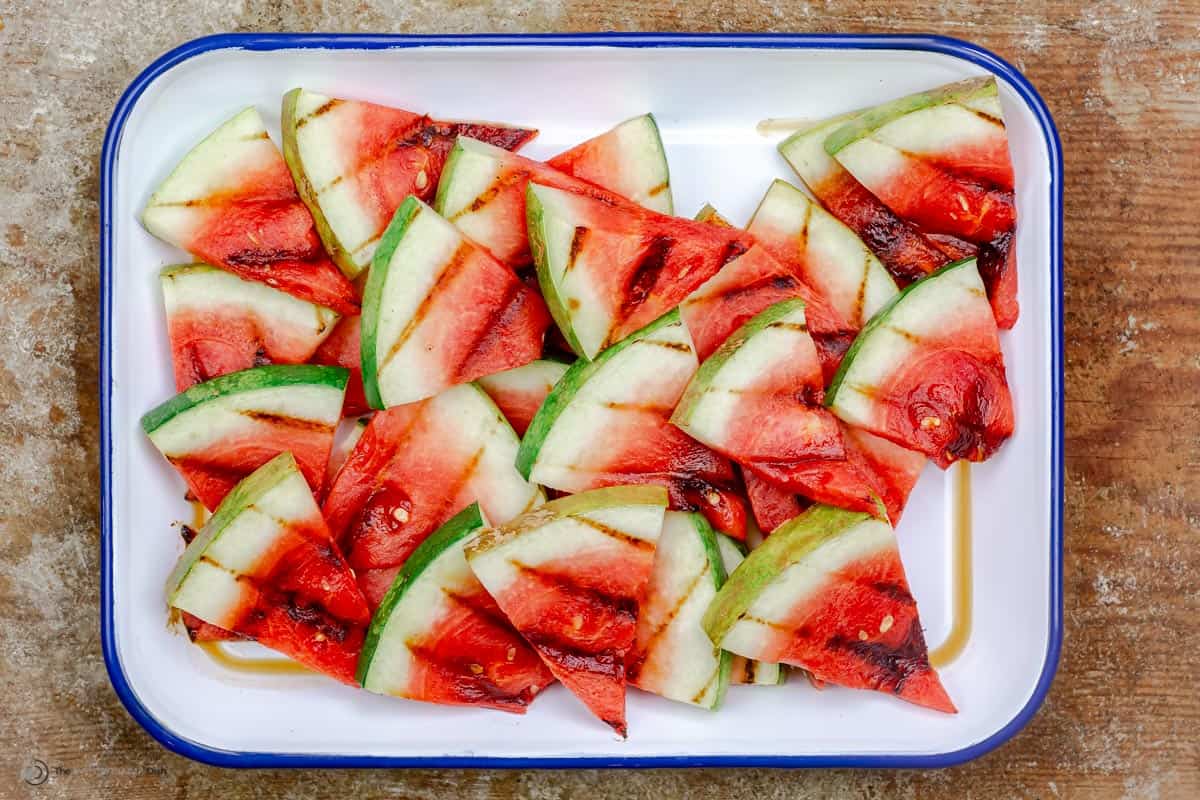 How to store leftoversGrilled watermelon slices should be enjoyed warm, straight from the grill. Any leftover fresh watermelon that hasn't been cooked should be tightly wrapped in plastic and put in the fridge. It will stay fresh for up to 5 days in the fridge. 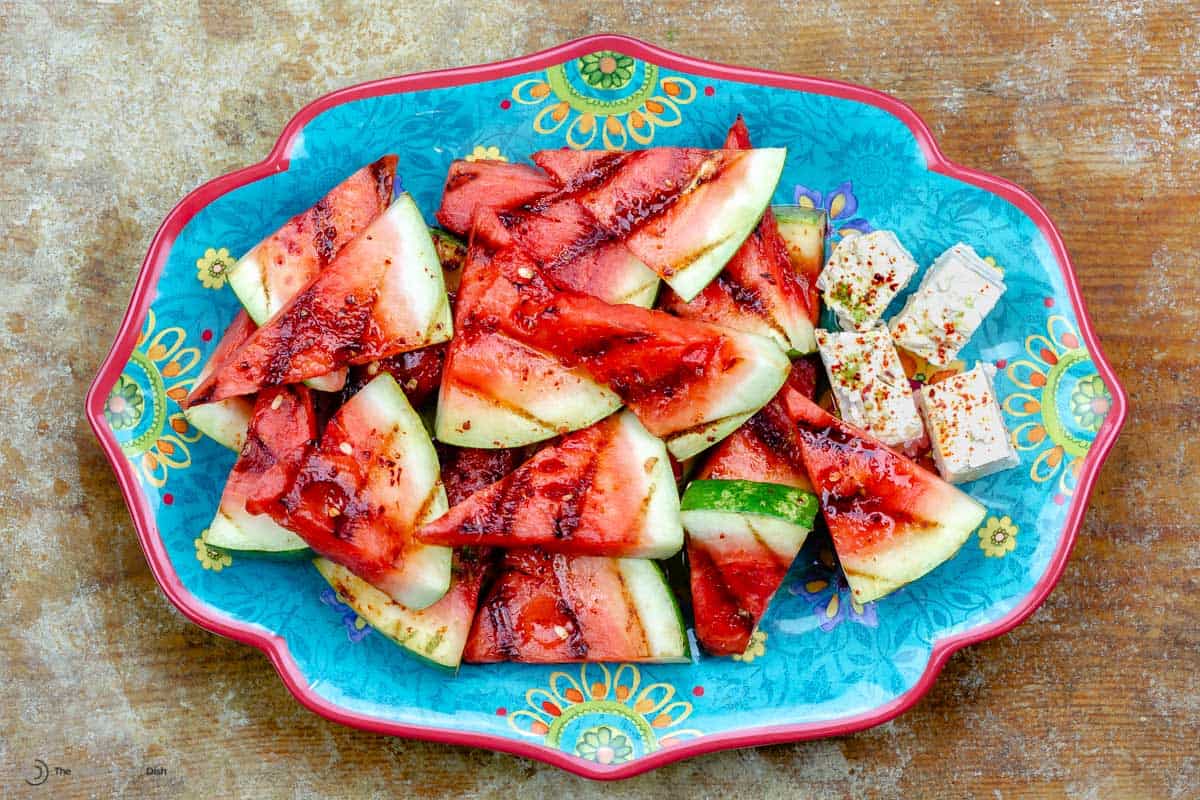 More easy vegetarian grilling recipes:
Browse top Mediterranean diet recipes. Browse all Mediterranean recipes. Visit Our Shop for Quality Mediterranean Products. 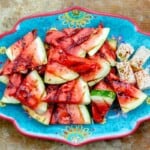 Grilled Watermelon with Chili and Honey-Lime Sauce
Juicy, charred, and a little smoky, this Grilled Watermelon with Chili and Honey-Lime Sauce is a quick and easy summer dish that will truly stand out! Serve it straight from the grill as an appetizer or side. And if you're into it, sprinkle a little feta on top!
Servings 6 servings
Calories 96.9kcal
Ingredients
Instructions
VideoNotes
Nutrition
Calories: 96.9kcal | Carbohydrates: 25.7g | Protein: 1g | Fat: 0.4g | Monounsaturated Fat: 0.1g | Sodium: 13.5mg | Potassium: 212.5mg | Fiber: 1.5g | Sugar: 21.4g | Vitamin A: 1069.1IU | Vitamin C: 18.8mg | Calcium: 21mg | Iron: 0.7mg
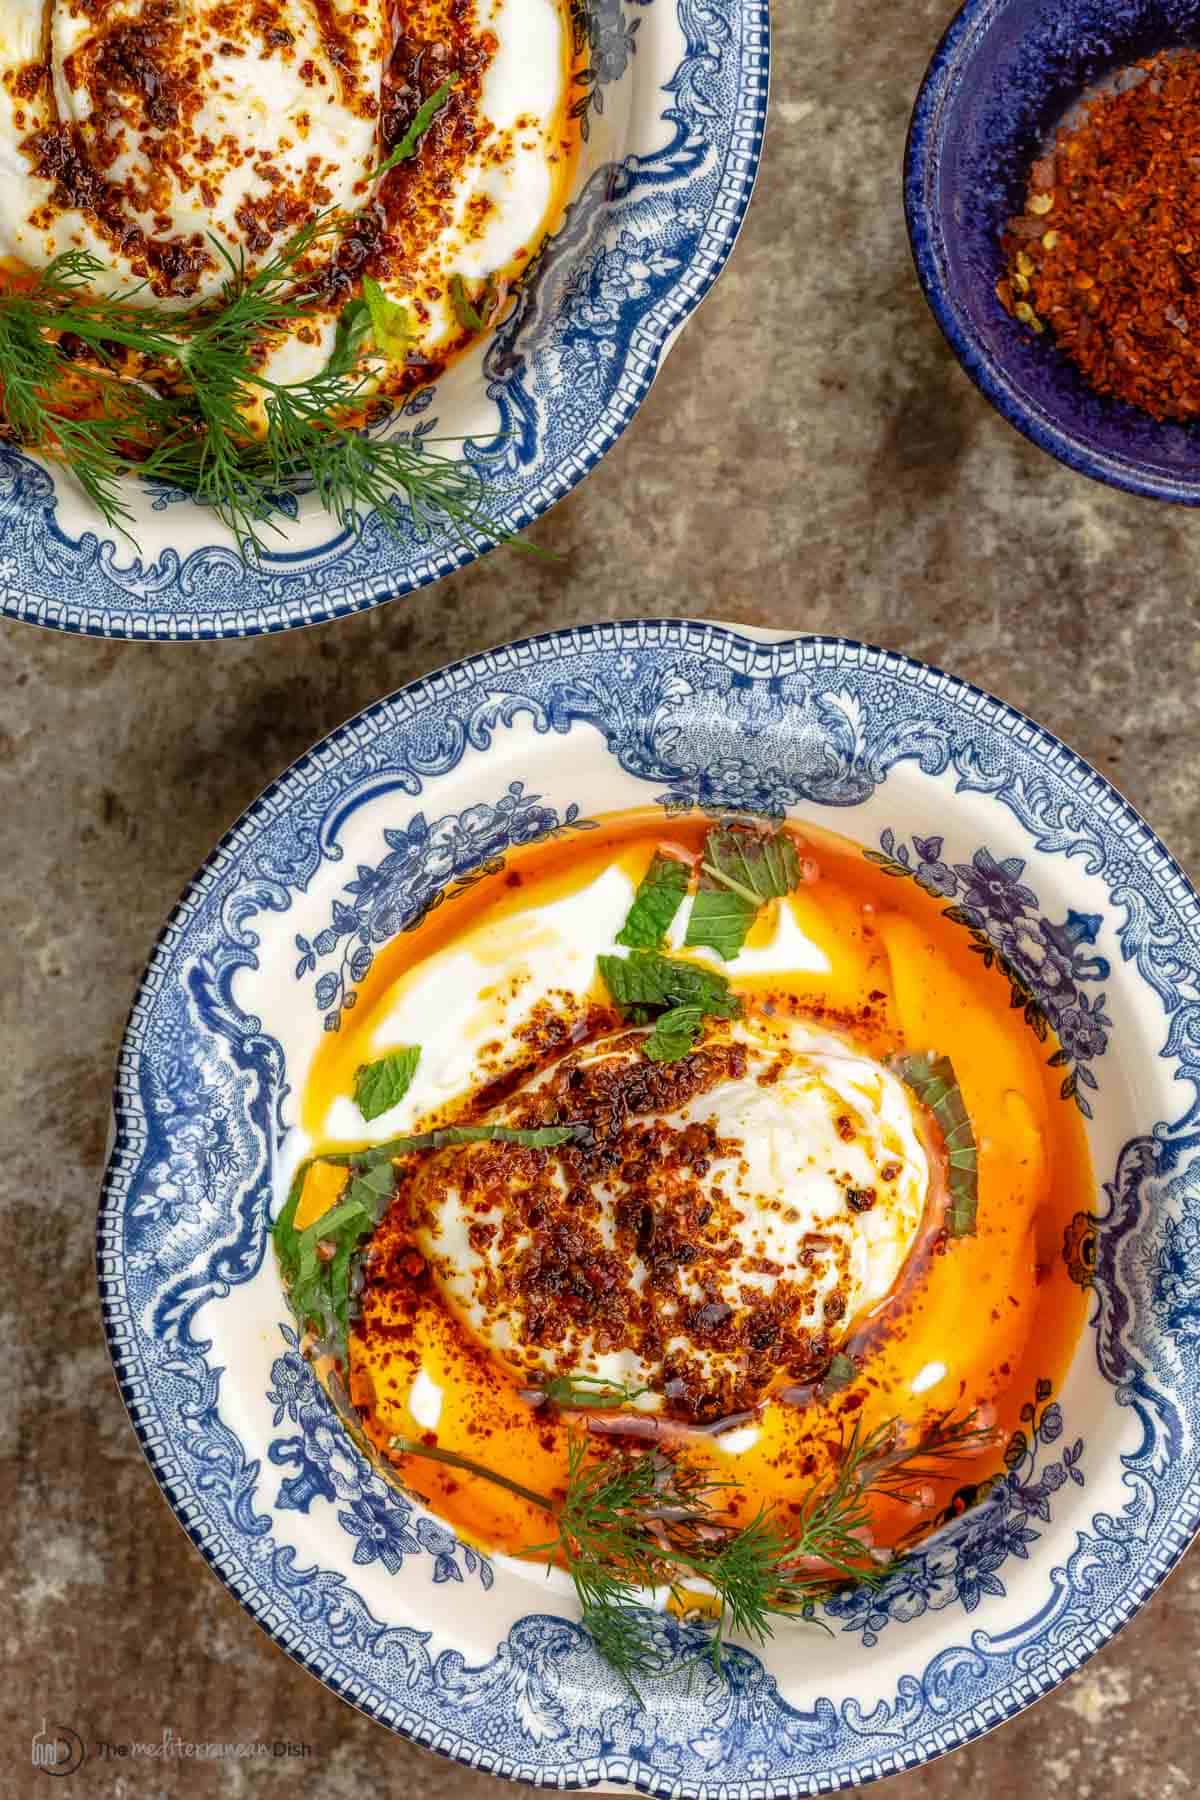
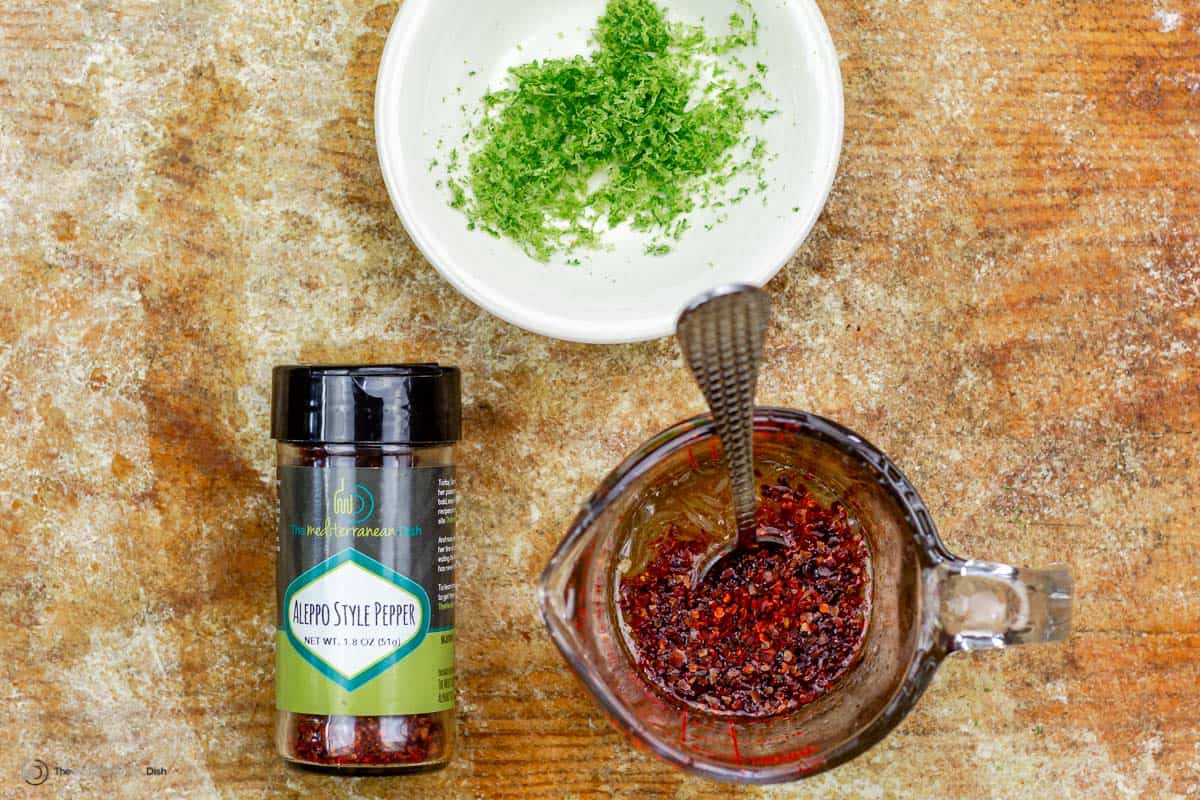
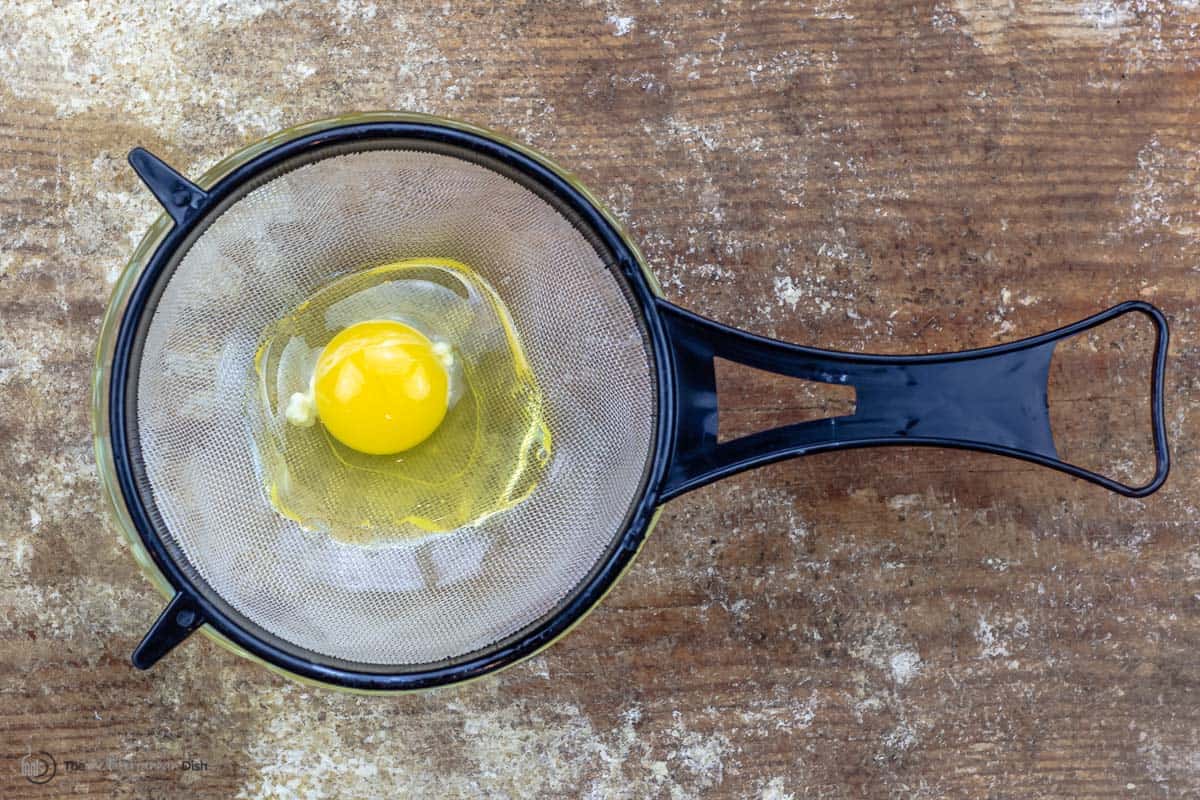
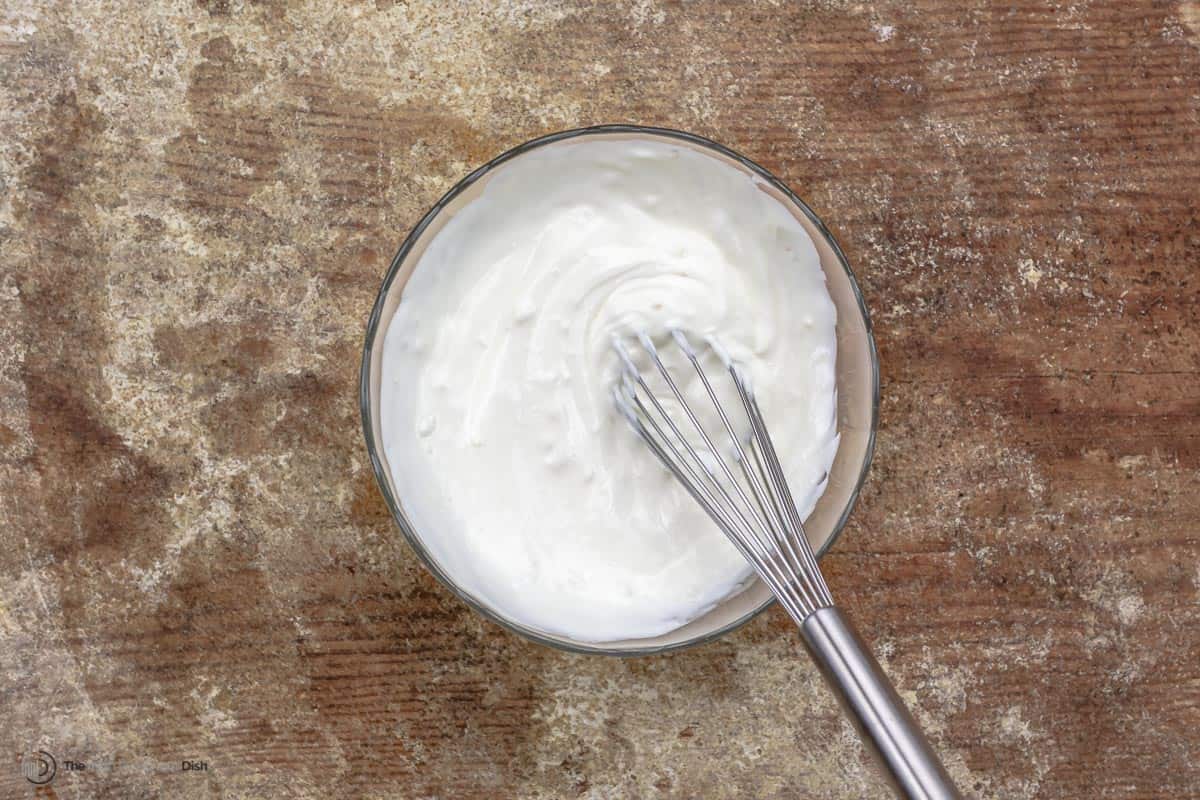
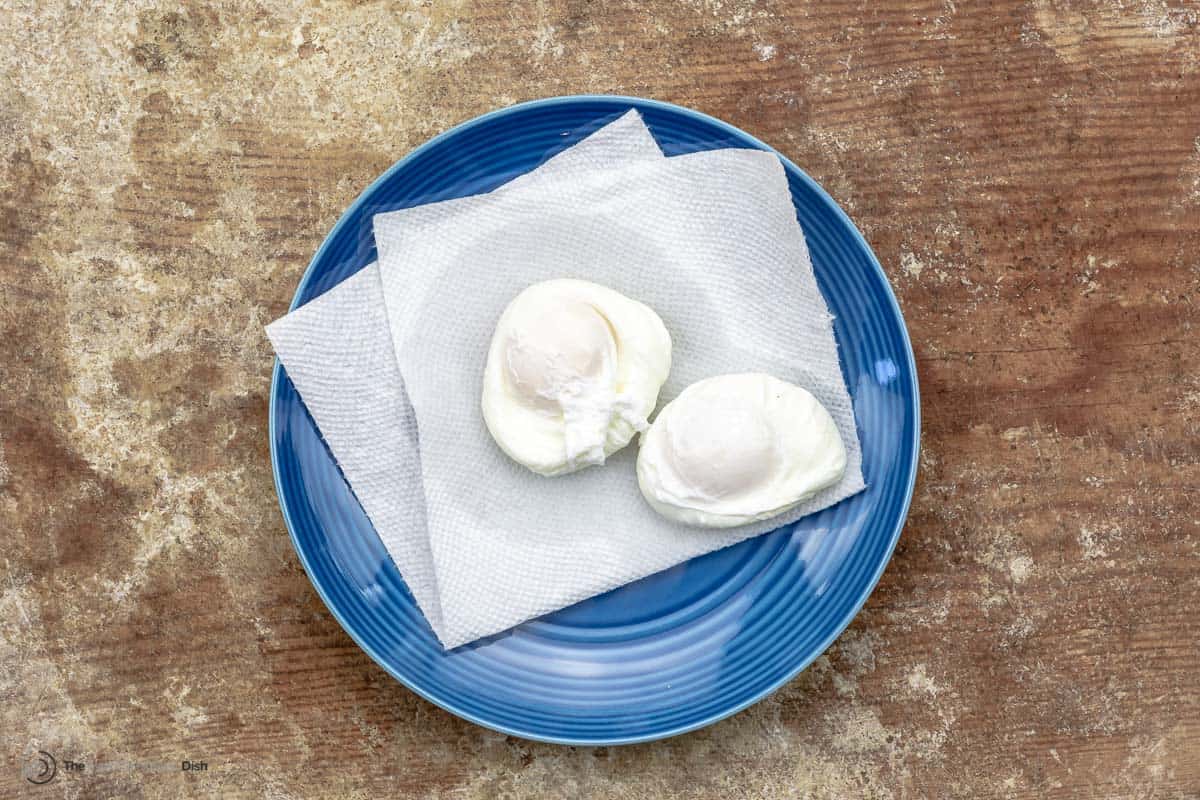
The post Grilled Watermelon with Chili and Honey-Lime Sauce appeared first on The Mediterranean Dish. via The Mediterranean Dish https://www.themediterraneandish.com/grilled-watermelon/ A simple savory breakfast, Cilbir (Turkish Eggs) is perfectly poached eggs, served over a delicious garlicky yogurt, and finished with a warm spicy butter or olive oil sauce with red pepper flakes. Enjoy with your favorite chunky bread! 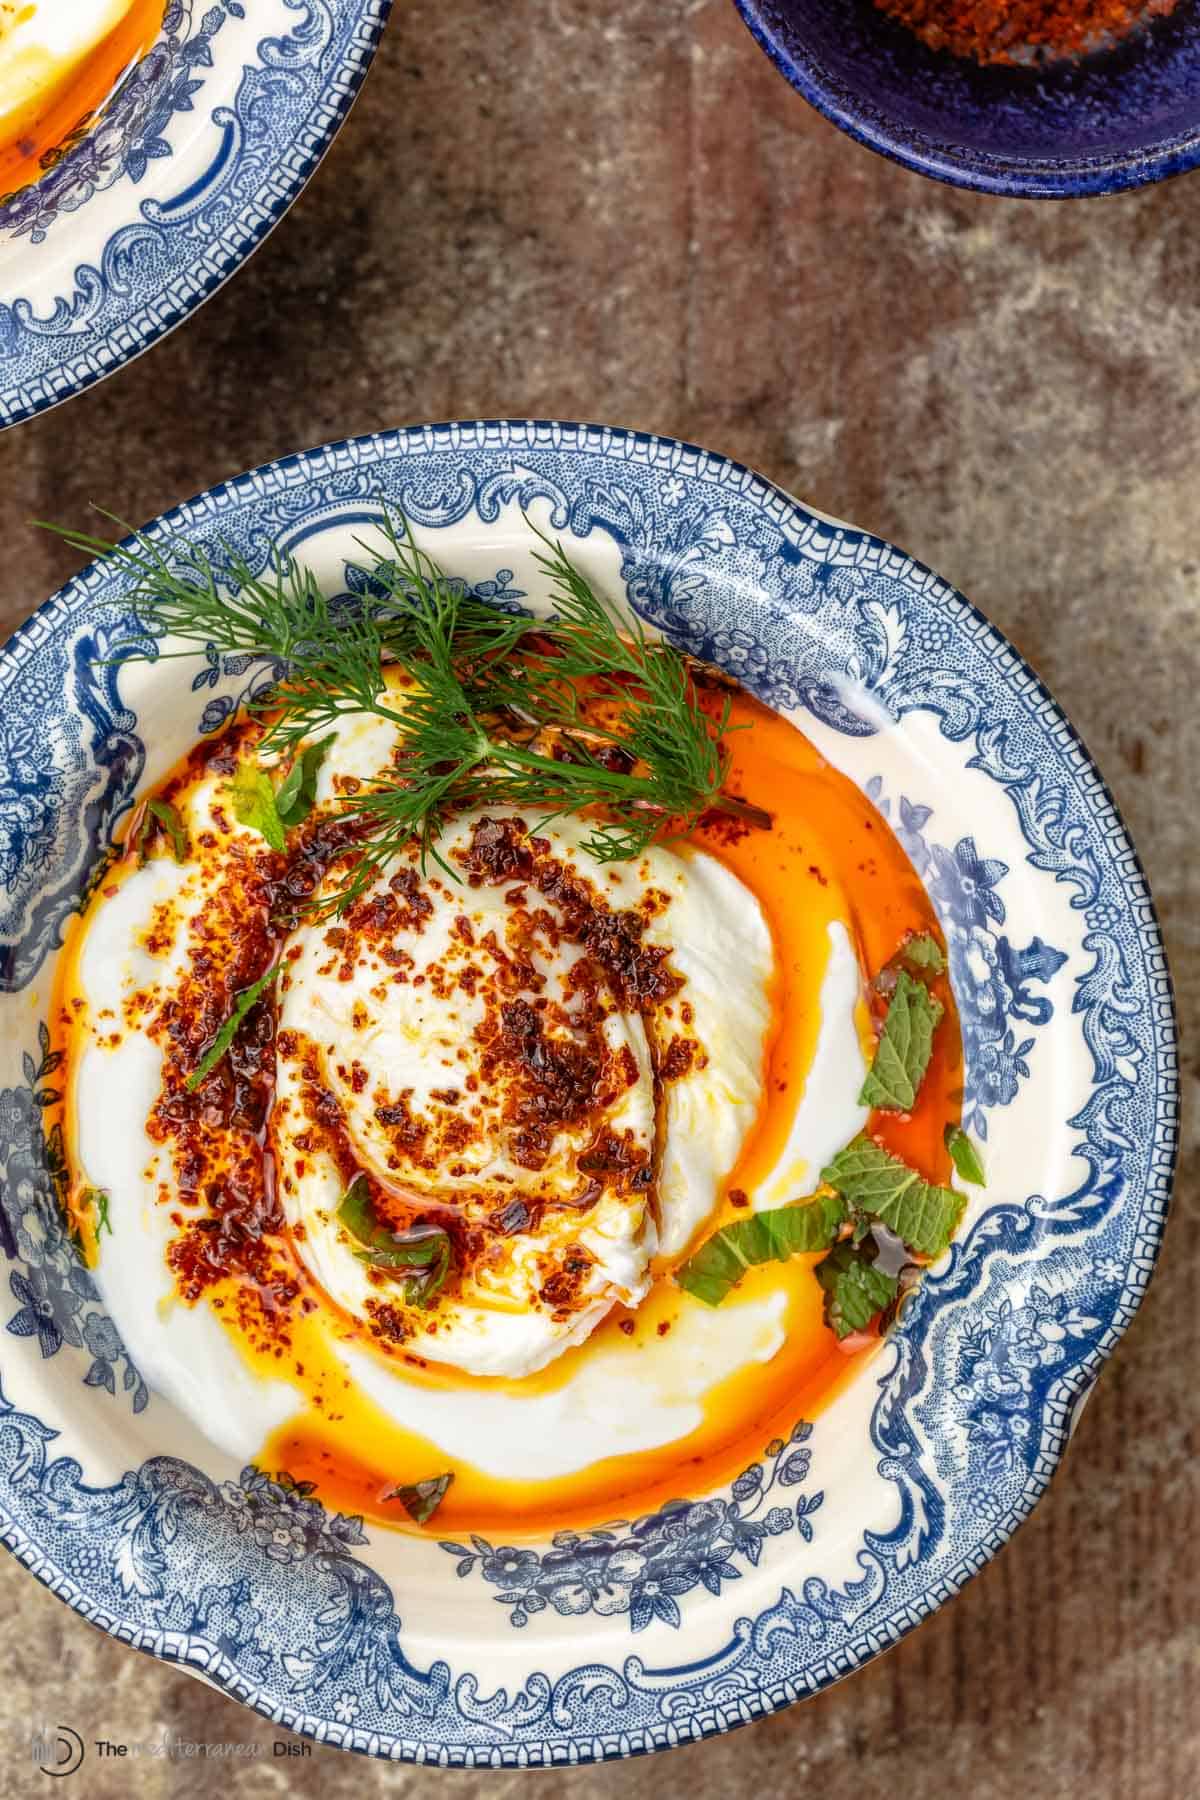 What is Çılbır?Turkish Çılbır, pronouned chil-bir, is basically poached eggs served over a bed of thick, garlicy yogurt and finished with a generous drizzle of warmed butter (or, in my case, a robust extra virgin olive oil) with a good dash of Aleppo pepper (or similar red pepper flakes). Most people's idea of yogurt for breakfast is something sweet like a parfait topped with fruit or a couple tablespoons of granola. But if you’re ready for something new, this savory yogurt breakfast from Turkey is so worth a try! I first encountered Çılbır in Izmir, Turkey back in 2006. I was impressed by how few ingredients make this perfectly decadent breakfast of poached eggs! For such a simple dish made of a few staples--eggs, yogurt, garlic, olive oil (or butter)--this savory Mediterranean diet-friendly breakfast is delicious and comforting in the best way. These Turkish eggs are best served immediately with some chunky rustic bread to wipe every last bit of the rich and silky yogurt! 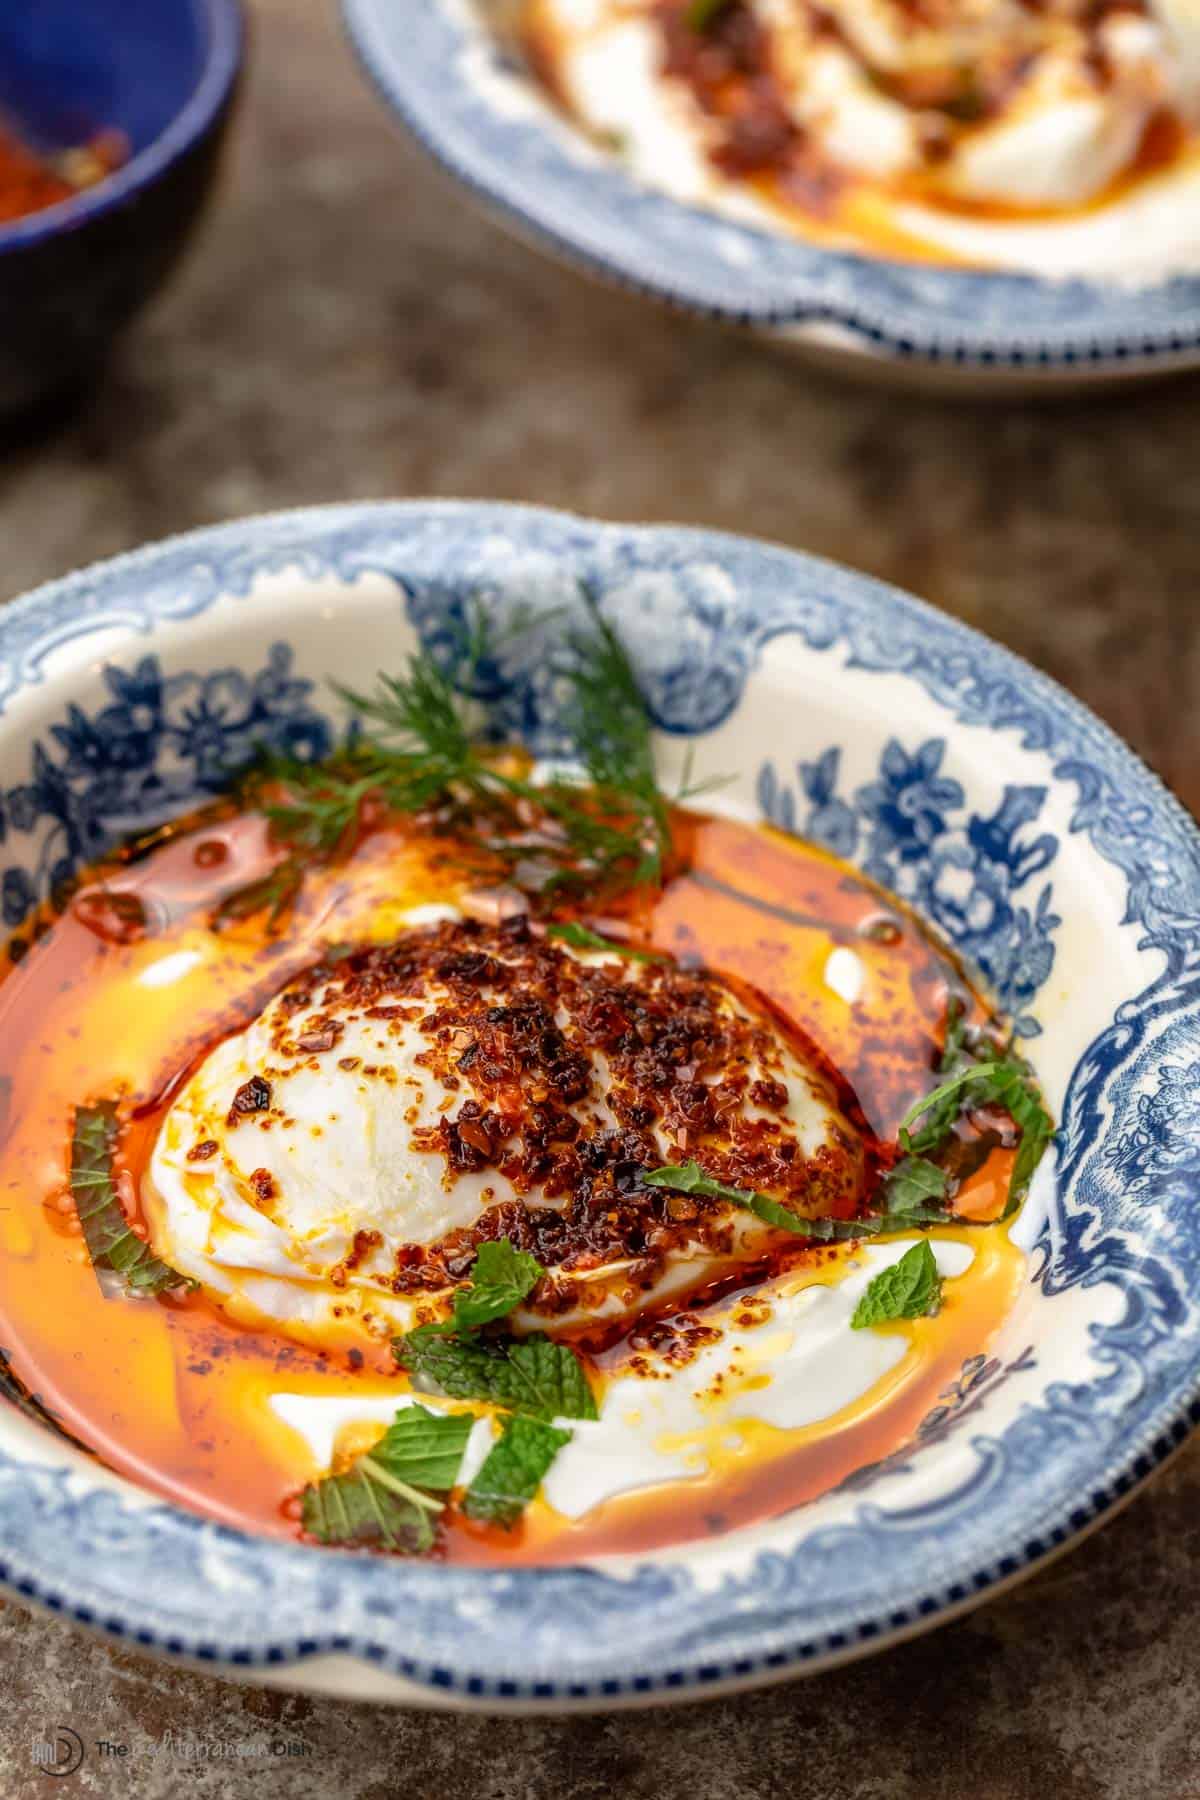 Since poached eggs are the star of this Turkish eggs breakfast, you'll want to poach your eggs perfectly so that you have firm whites encasing or covering a beautiful runny yolk on the inside. How to poach an egg?If you've never poached an egg before, no worries. It's simple but there are a few things to keep in mind. People have different ideas for how to make perfect poached eggs but I'll be sharing what's worked for me:
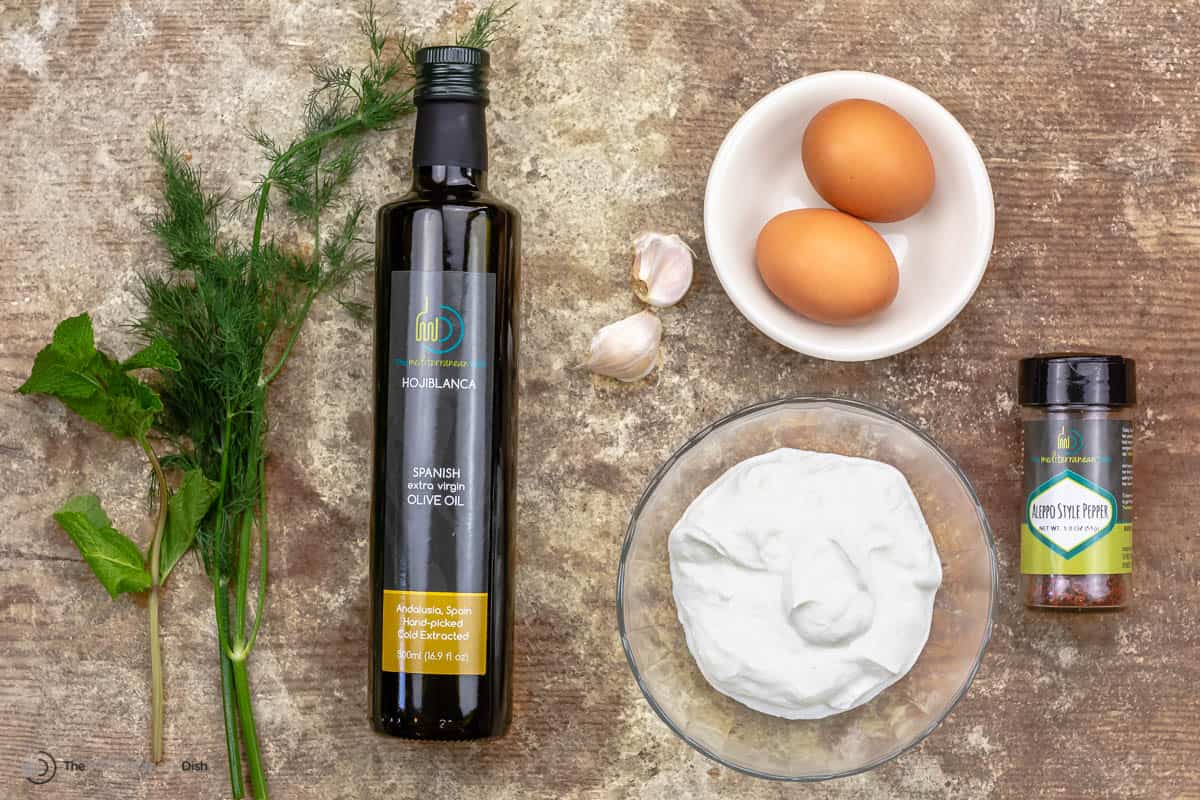 What you'll need to make Turkish eggsA handful of simple ingredients and seasonings is all you need to make !
How to make Turkish eggs (Çılbır)Though the final dish may look a little fancy, making this poached eggs and yogurt breakfast is surprisingly easy. Breakfast for two can be ready in just 10 minutes!
Tips for successIf this is your first time preparing this dish, here are a few tips to keep in mind:
 Serving suggestionsAs mentioned above, cilbir should be served immediately, when all ingredients are warm. Turkish eggs are traditionally served with rustic or crusty bread to scoop up the egg and every last bit of the olive oil and yogurt sauces. How to storeThere is really no good way to store leftovers for this recipe, so you want to make just as much as you will be eating. If you are just preparing breakfast for one, simply cut the recipe in half and only prepare one dish of the yogurt sauce. Poached eggs should not be refrigerated or frozen. More egg recipes:
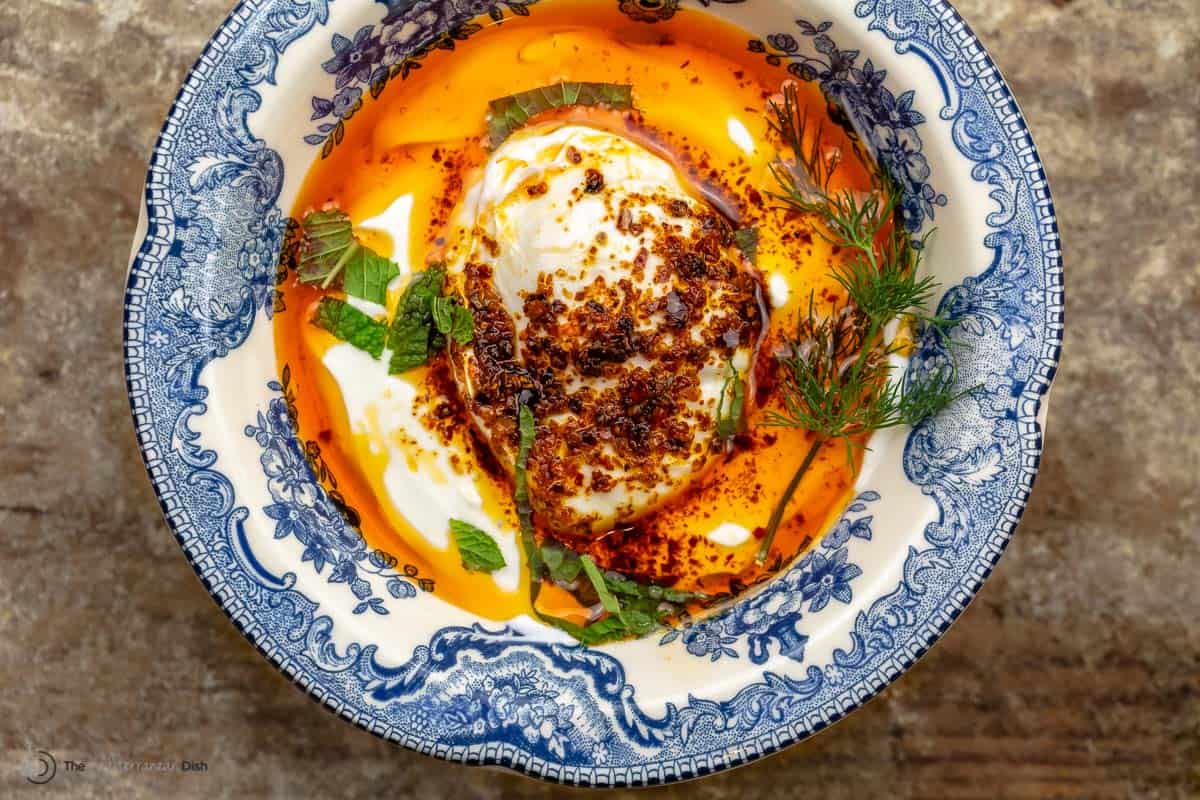
Browse top Mediterranean diet recipes. Browse all Mediterranean recipes. Visit Our Shop for Quality Mediterranean Products.  Cilbir: Turkish Eggs in Garlicky Yogurt Sauce
A simple savory breakfast, Cilbir (Turkish Eggs), is made of perfectly poached eggs that are served over garlicky yogurt and finished with a spicy olive oil or butter sauce with red pepper flakes. Enjoy with rustic toast for a complete, flavorful breakfast or brunch.
Servings 2 servings
Calories 343.8kcal
Ingredients
Instructions
Notes
Nutrition
Calories: 343.8kcal | Carbohydrates: 6.3g | Protein: 17.2g | Saturated Fat: 5.7g | Trans Fat: 0.1g | Cholesterol: 170.2mg | Sodium: 142.4mg | Potassium: 106.1mg | Fiber: 0.7g | Sugar: 3.8g | Vitamin A: 896.3IU | Vitamin C: 0.5mg | Calcium: 166.9mg | Iron: 1.3mg
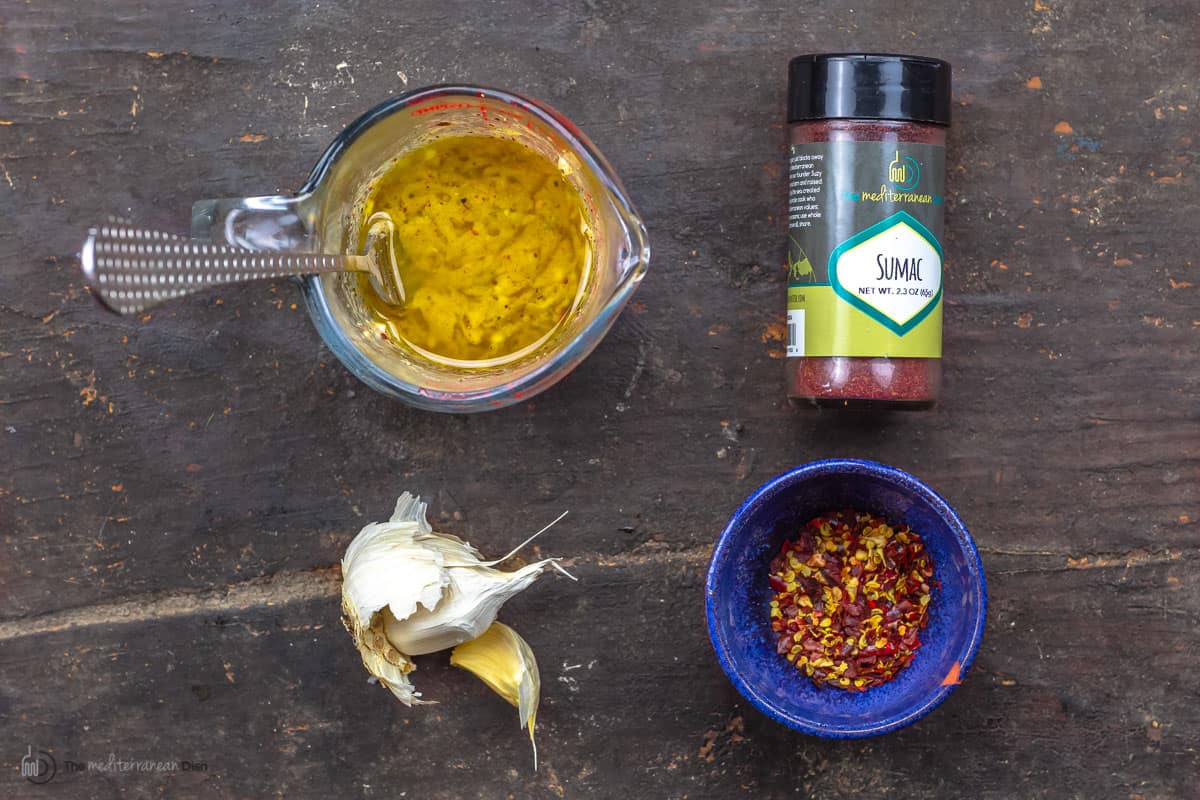
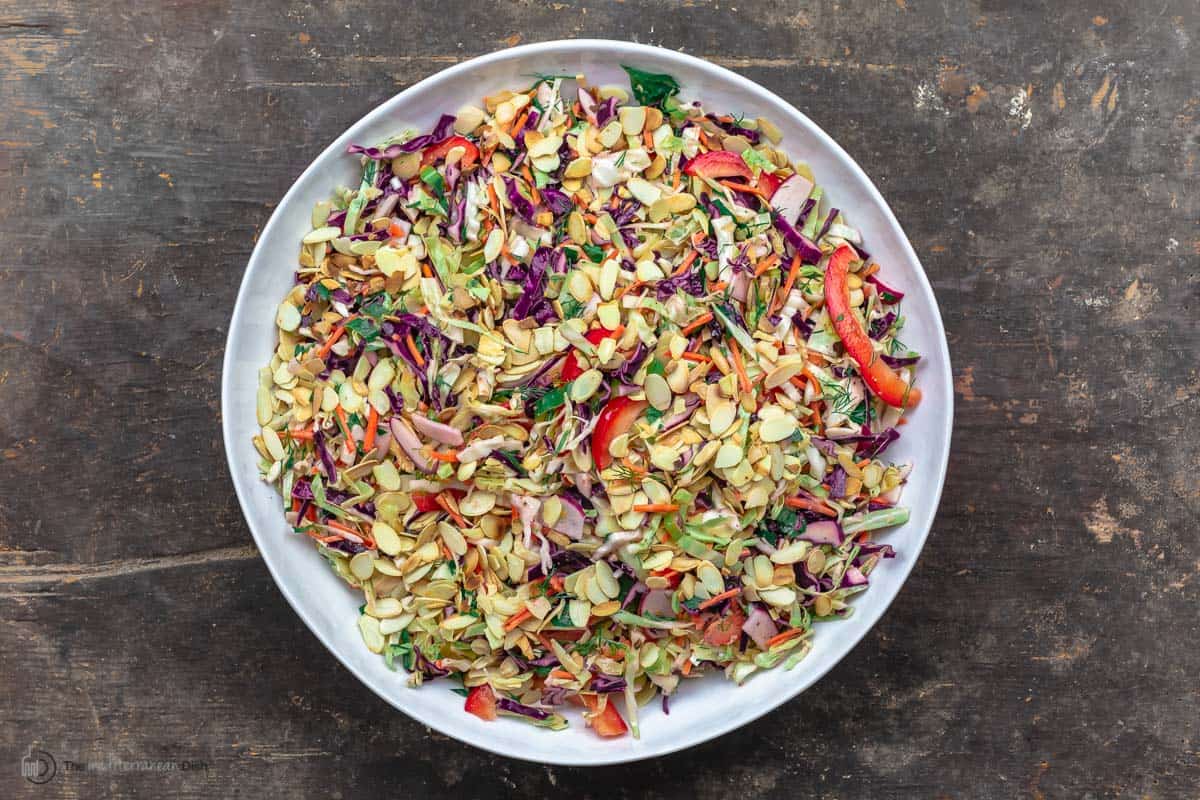
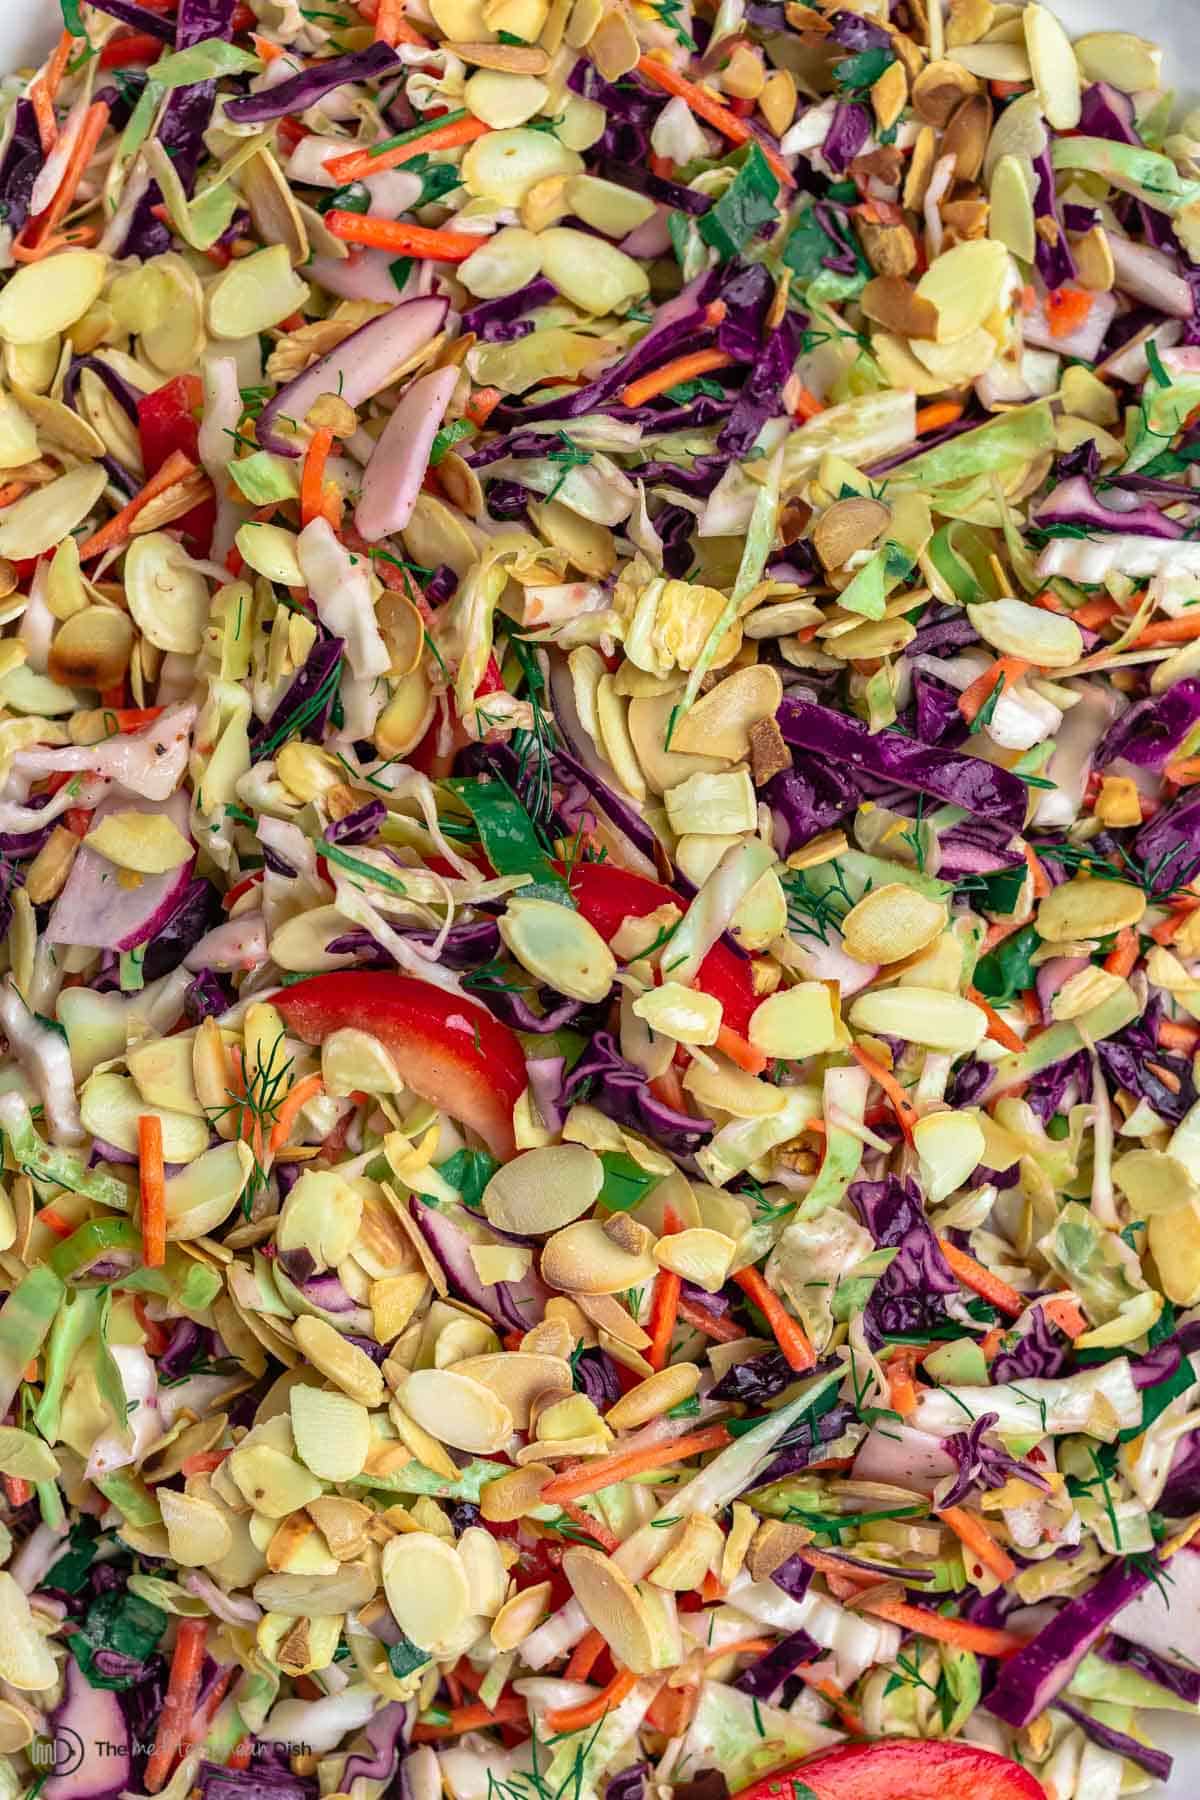
The post Çılbır: Turkish Poached Eggs appeared first on The Mediterranean Dish. via The Mediterranean Dish https://www.themediterraneandish.com/cilbir-turkish-poached-eggs/ You'll love this extra crunchy and bright Mediterranean Cabbage Salad, a no-mayo coleslaw with loads of fresh veggies, herbs, toasted almonds, and a zippy Dijon vinaigrette! This is the perfect make-ahead salad, and it comes together in 20 minutes! 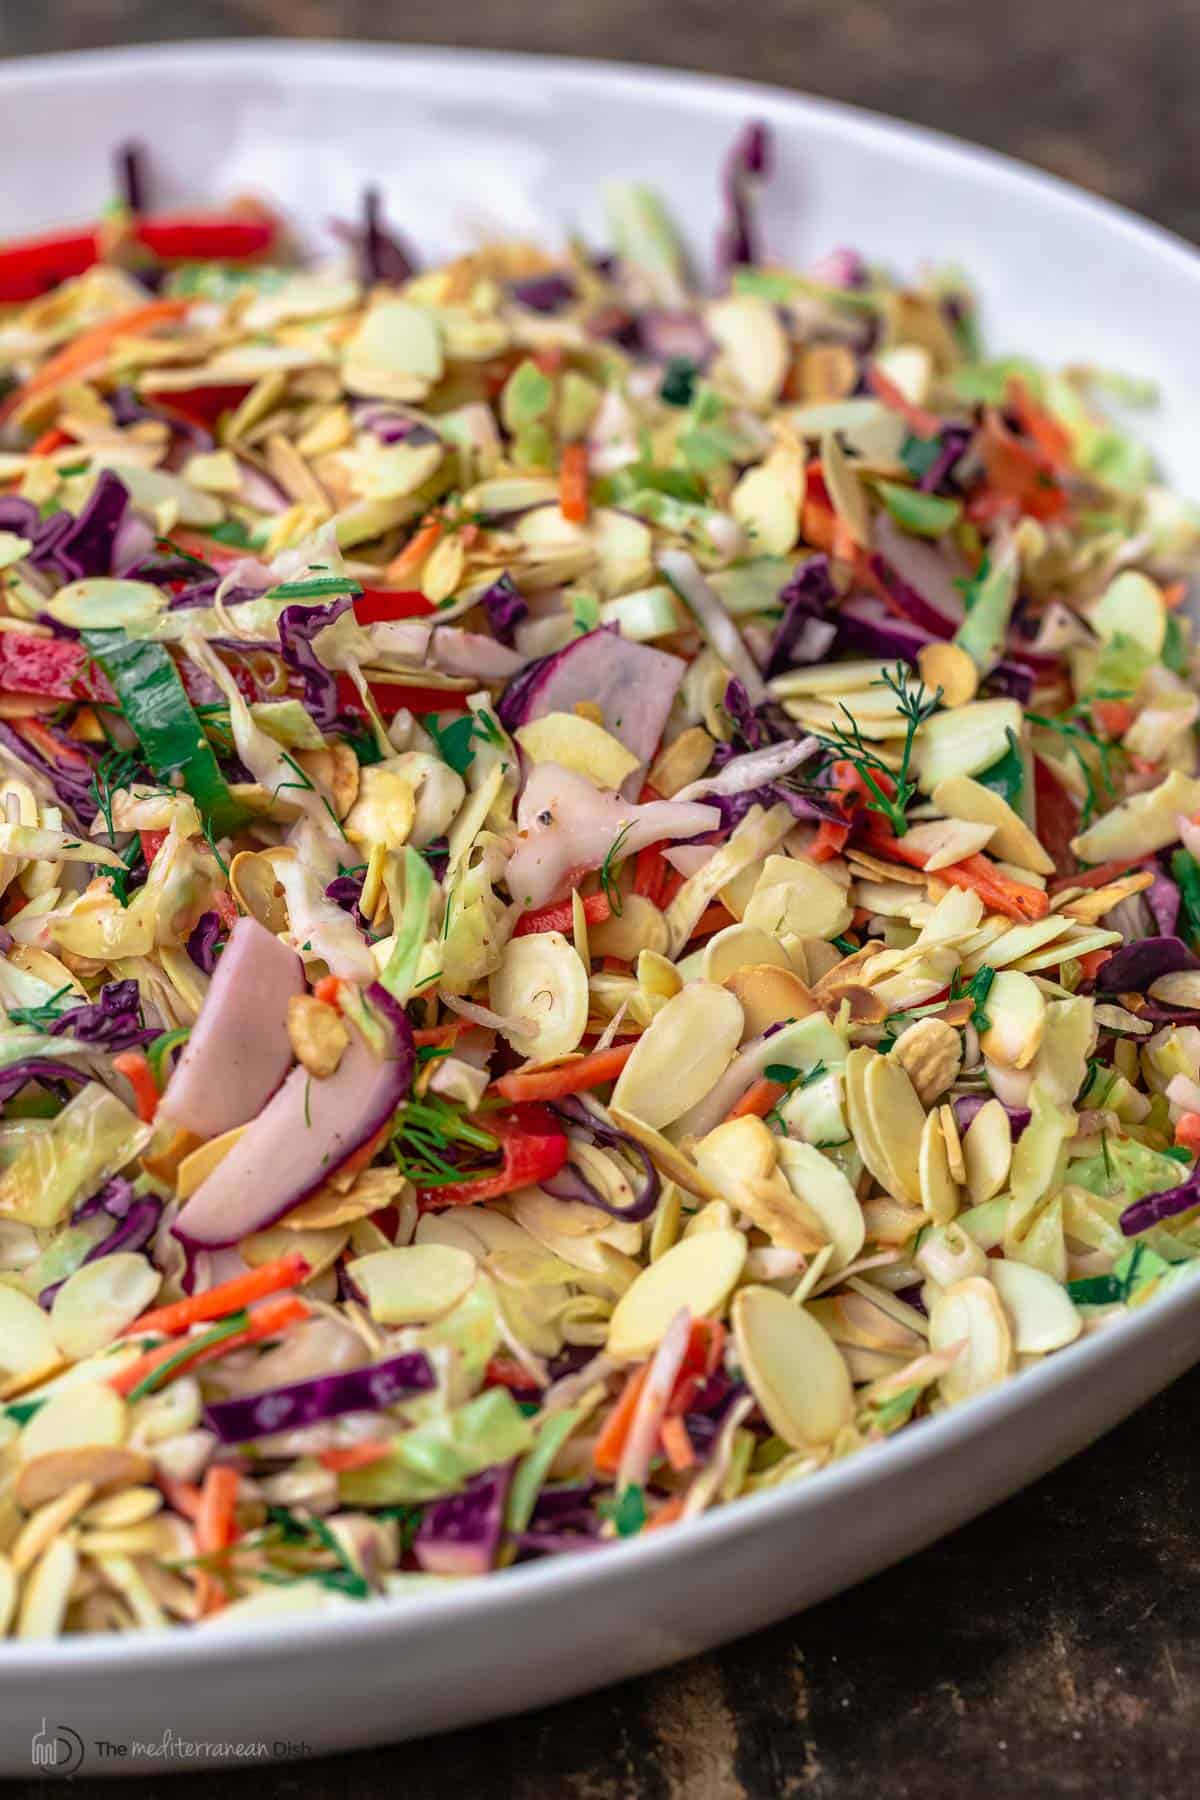 An easy coleslaw without mayoEveryone seems to have a favorite cabbage salad or coleslaw, and mine, no surprise here, takes on a bold Mediterranean twist with a few surprising elements I love! First off, in this no-mayo slaw, mayonnaise is traded for a bright vinaigrette that relies on Dijon mustard and good extra virgin olive oil (I like a robust peppery EVOO for this like Greek Early Harvest or Spanish Hojiblanca EVOO). Then, to add all sorts of bold colors and crunch, I throw in red bell peppers, carrots, radish, green onions, and loads of fresh herbs. Last but not least, toasted sliced almonds add a subtle nuttiness that takes it to next level delicious! This may have started as simply making an easy coleslaw without mayo, but the end result is far more. Sure, this crunchy cabbage salad makes a great side dish, and I've used it as a topping on salmon burgers and lamb burgers. And because it's the perfect make-ahead salad, I've enjoyed it for lunch several days in a row! 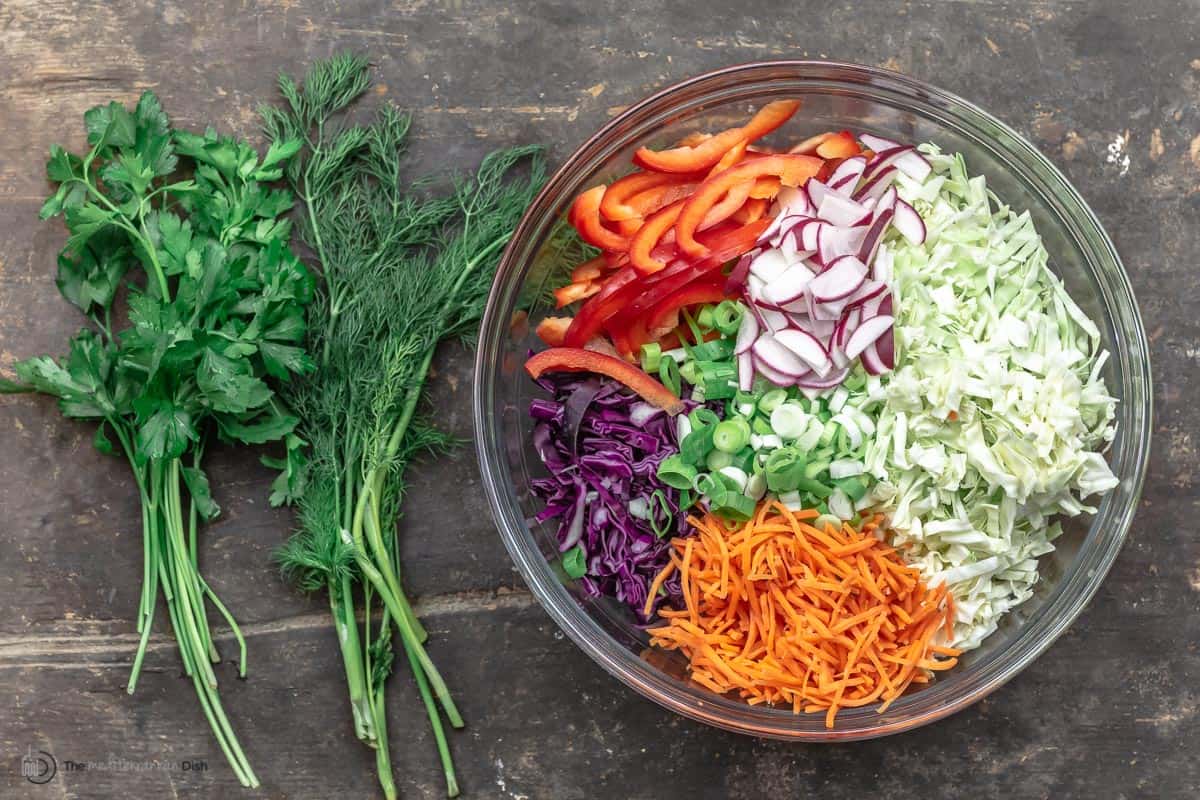 What you'll need to make itThis fresh cabbage salad is made with crisp, fresh vegetables and topped with an easy homemade mustard vinaigrette. For the cabbage salad dressing
 For the cabbage salad
 How to make Mediterranean cabbage saladThis no-mayo cabbage salad recipe is easy to make. It's a matter of whisking a simple dressing and chopping up the cabbage and veggies (and yes, you can save time by using a food processor to shred the cabbage)
Tips for successWith a salad this easy, there's only a few things to keep in mind when preparing it.
 Serve it withThere are so many ways to use this gorgeous healthy cabbage salad to elevate a meal. You can use it as a side next to things like baked cod, chicken drumsticks, or grilled lamb kabobs. Or use it as coleslaw to jazz up sandwiches from salmon burger to chicken gyro wraps, if you like. And let's not forget about the dijon vinaigrette - once you try it on this coleslaw without mayo, you'll be looking for more reasons to make it! You can serve this easy mustard vinaigrette over any salad. It makes a great replacement to a typical vinaigrette or Italian dressing. Try it over a big salad of leafy greens and your favorite vegetables! How to store leftoversThe great thing about a cabbage salad, especially one without mayo, is that it can be even better the next day, making it ideal for lunch throughout the week. Just store it in the fridge for up to 4 days, in a covered container. More easy salad recipes:
Browse top Mediterranean diet recipes. Browse all Mediterranean recipes. Visit Our Shop for Quality Mediterranean Products.  Mediterranean Cabbage Salad (No Mayo Coleslaw)
You'll love this extra crunchy and bright Mediterranean Cabbage Salad, a no-mayo coleslaw with loads of fresh veggies, herbs, toasted almonds, and a zippy Dijon vinaigrette! This is the perfect make-ahead salad, and it comes together in 20 minutes!
Servings 8 servings
Calories 200.3kcal
IngredientsFor the mustard vinaigrette
For the cabbage salad
Instructions
VideoNotes
Nutrition
Calories: 200.3kcal | Carbohydrates: 11.9g | Protein: 4.7g | Saturated Fat: 1.8g | Trans Fat: 0.1g | Sodium: 79mg | Potassium: 389.1mg | Fiber: 4.5g | Sugar: 4.5g | Vitamin A: 4359IU | Vitamin C: 63.9mg | Calcium: 90.9mg | Iron: 1.8mg
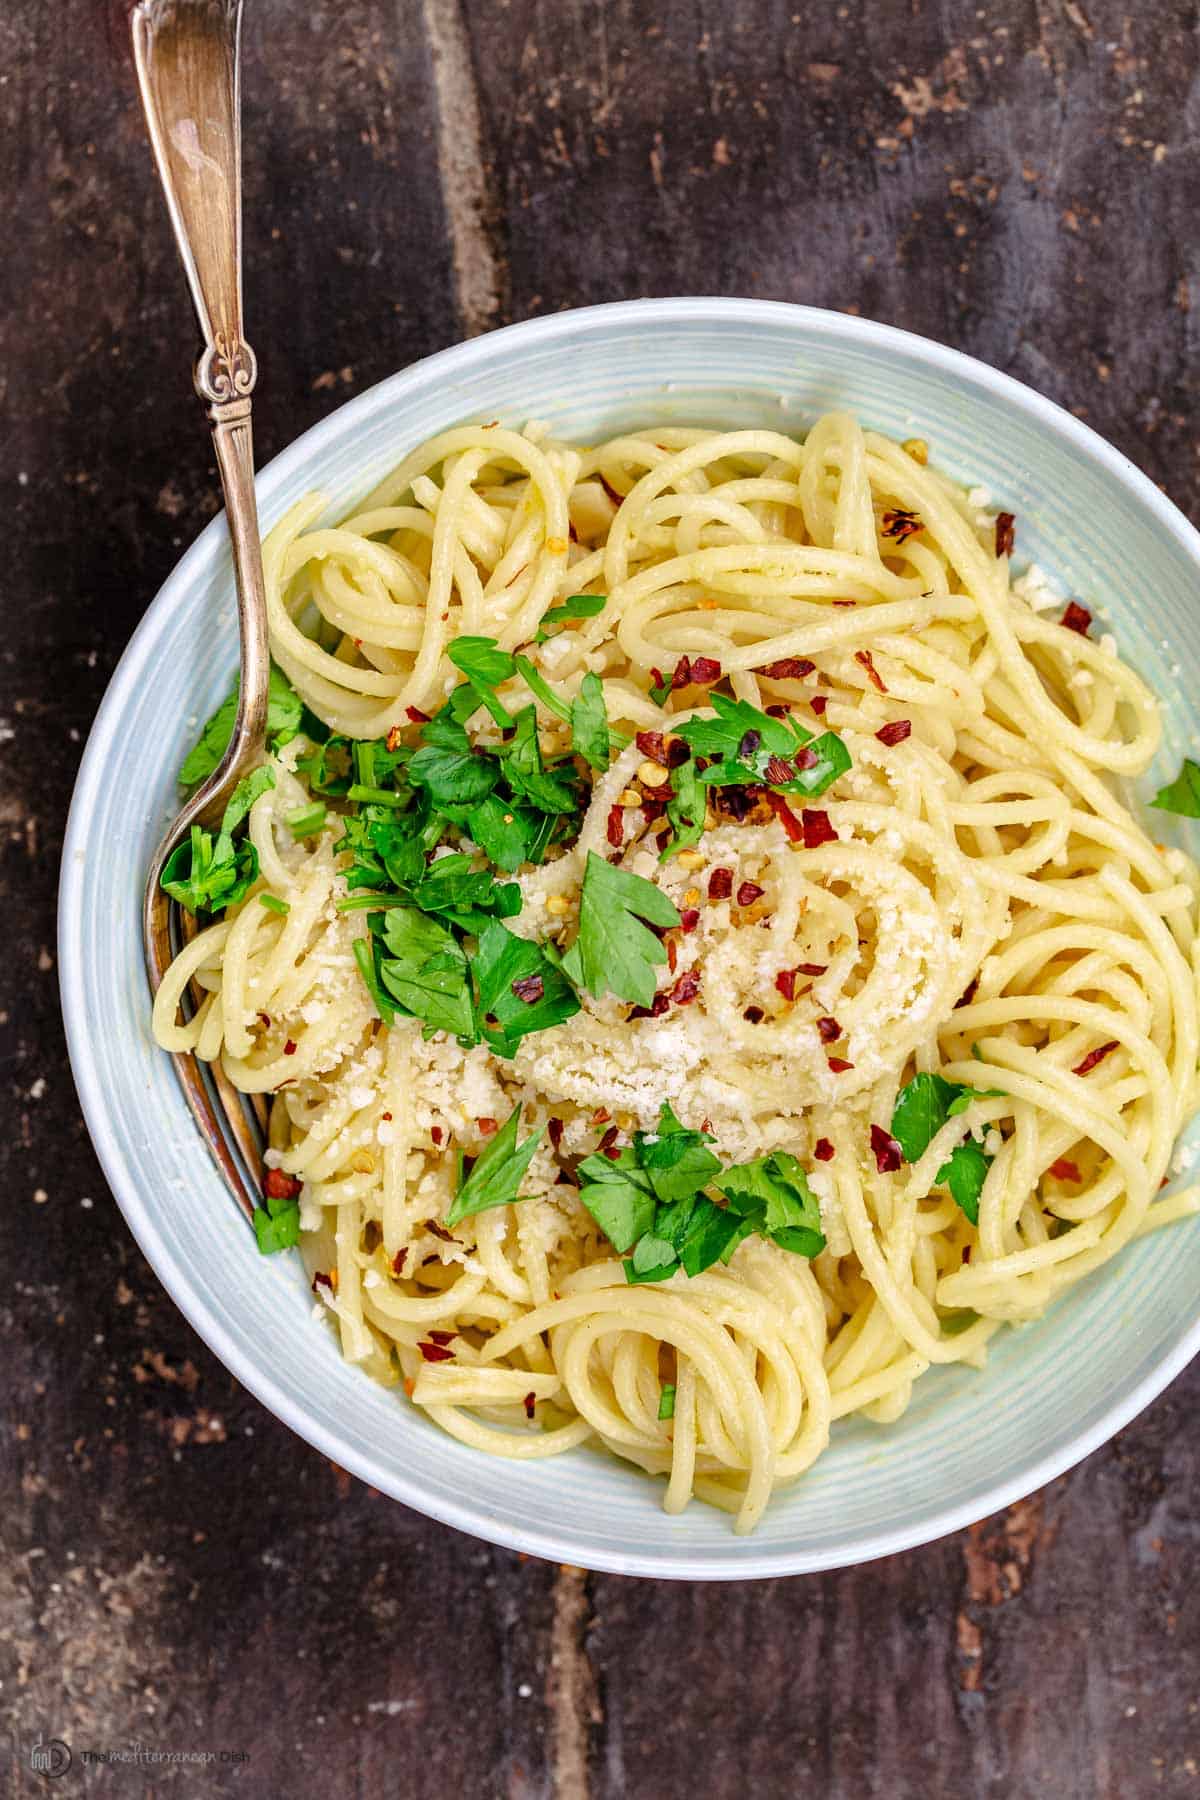
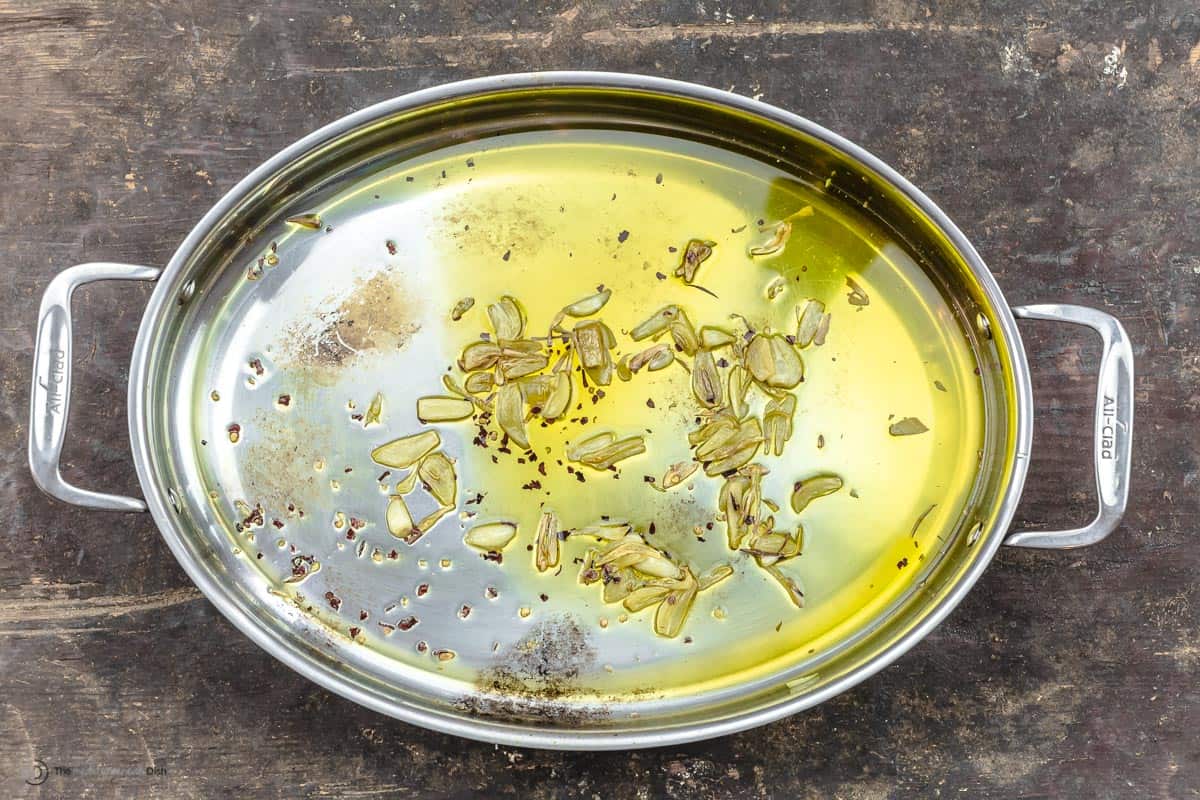
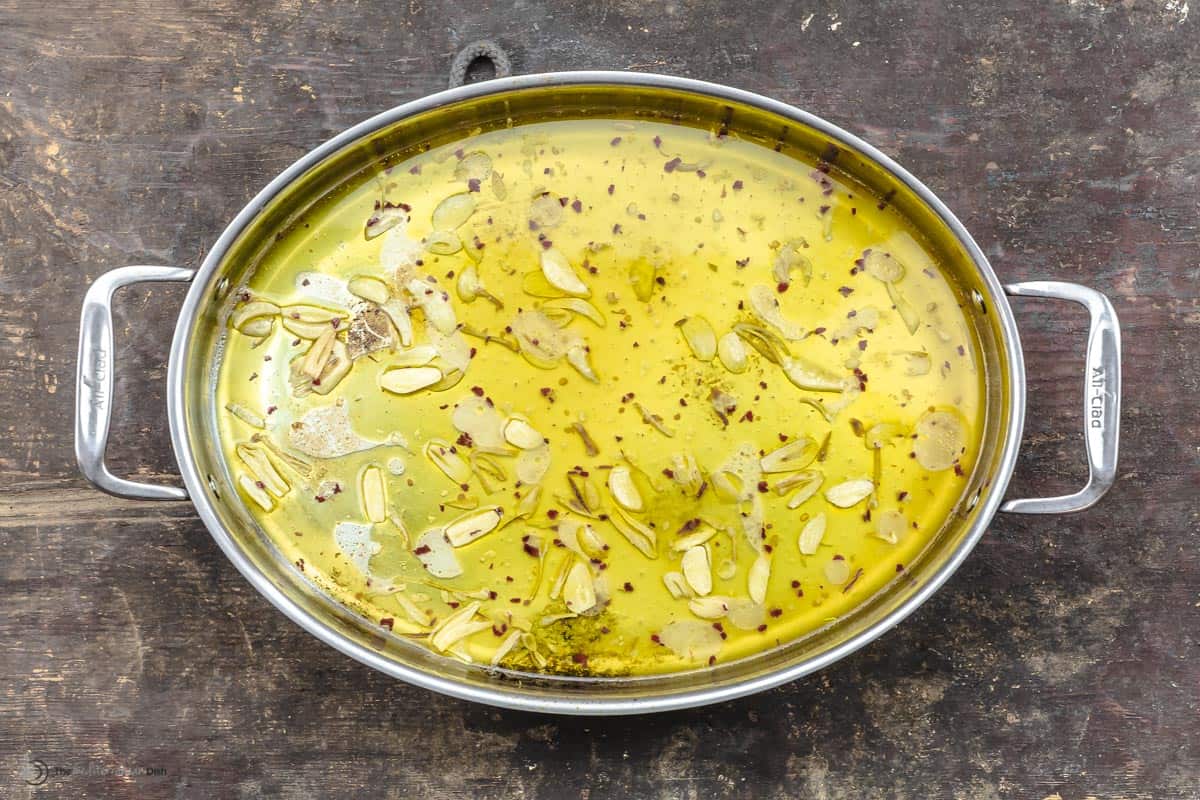
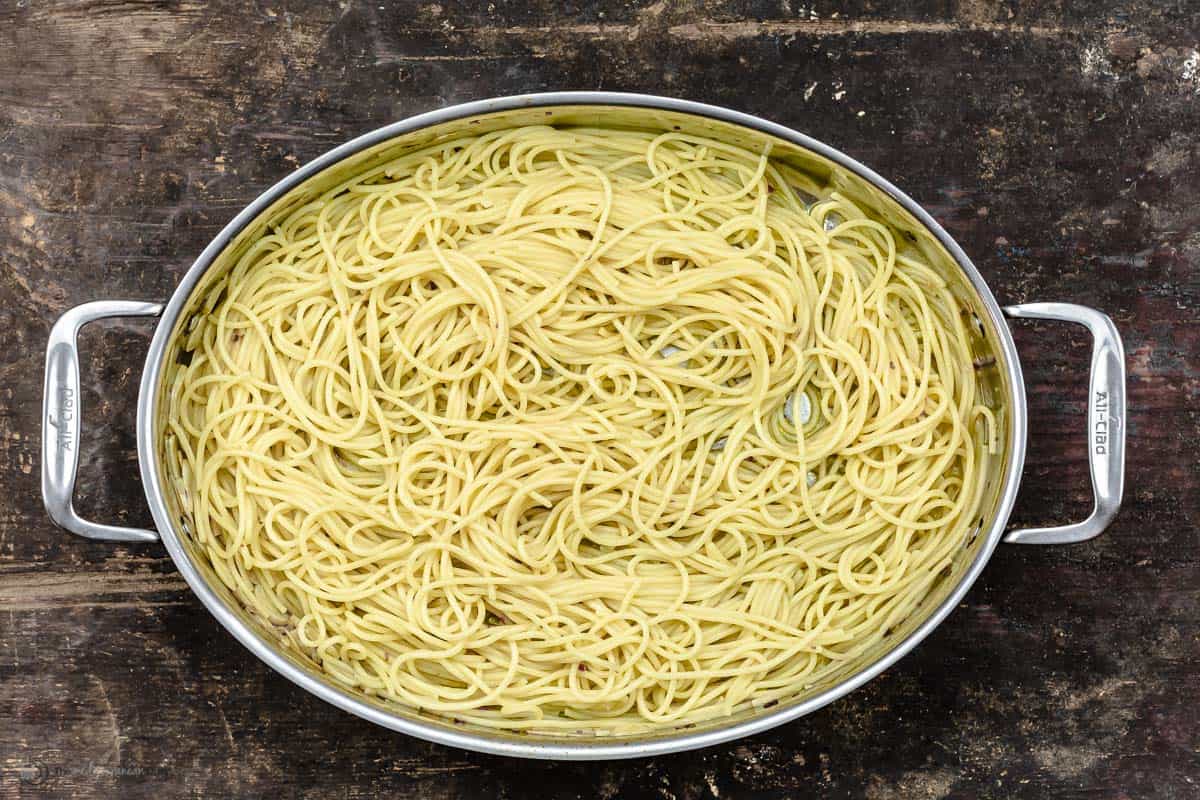
The post Mediterranean Cabbage Salad (No Mayo) appeared first on The Mediterranean Dish. via The Mediterranean Dish https://www.themediterraneandish.com/mediterranean-cabbage-salad/ This simple Spaghetti Aglio e Olio, a classic Italian pasta with garlic and olive oil, takes only 5 ingredients and less than 20 minutes to make! But don't miss my tips for the BEST aglio e olio recipe you'll try! s 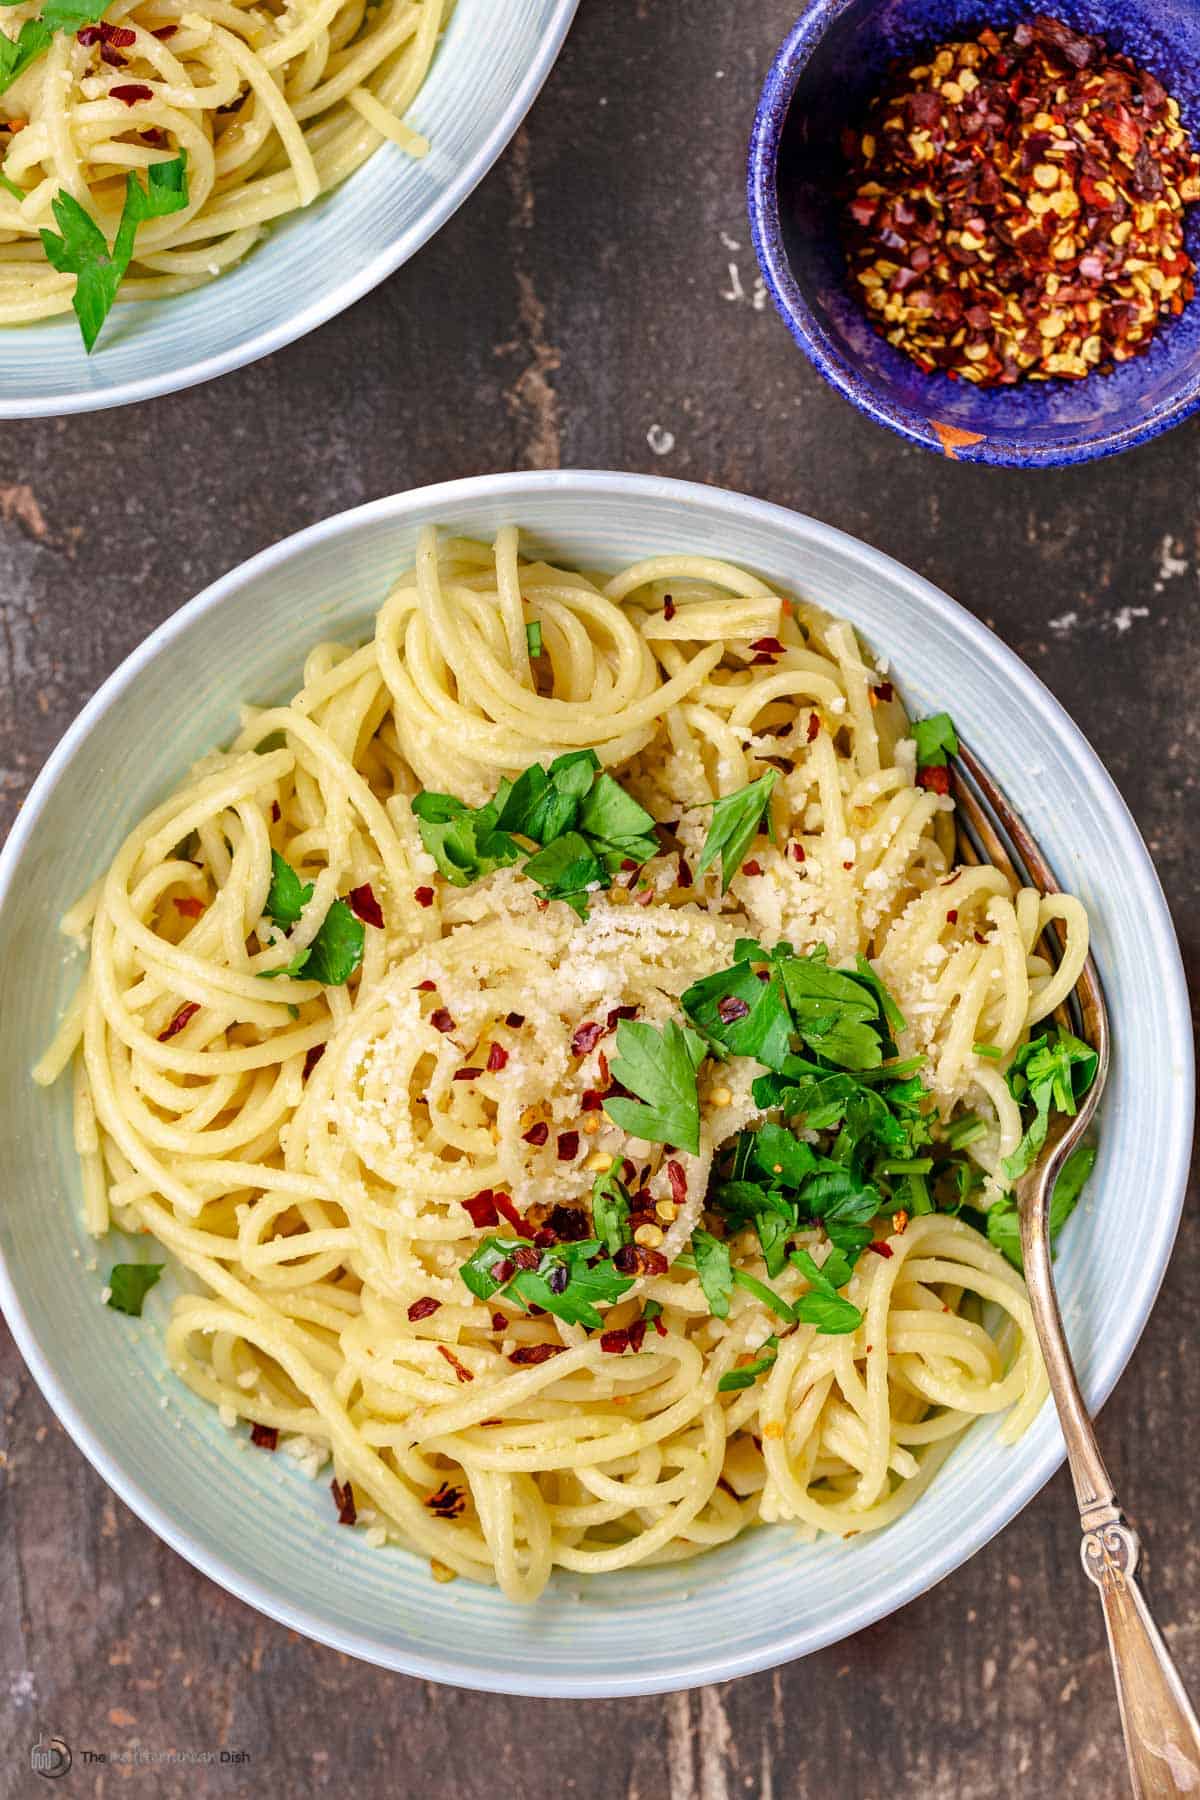 Aglio e OlioAglio e Olio, pronounced ah-li-oh eh oh-li-oh, translates to "garlic and olive oil." Spaghetti aglio e olio is a traditional Italian dish that originated somewhere in the South of Italy likely in the area of Naples. It is basically spaghetti with garlic and olive oil, and it's considered somewhat of a lower-budget version of pasta with mussels! It takes very few ingredients to make traditional pasta aglio e olio--thin pasta of your choice, garlic, olive oil, and red pepper flakes. The original recipe doesn't even include cheese! I did take the liberty of adding some freshly grated parmesan for extra flavor and texture, as well as parsley for a pop of color. The secret to a creamy Spaghetti Aglio e Olio!The secret to the creamy texture of this pasta dish is using a good extra virgin olive oil and the starchy water the pasta was boiled in. A little bit of the starchy pasta water makes acts as a binder and a thickener, and with the olive oil, creates a silky, rich sauce with very little effort and without the use of heavy cream! Aglio e olio is a recipe you want to have on hand for last-minute dinners and busy weeknight you can make from pantry staples. As long as you have a bag of pasta, extra virgin olive oil and garlic on hand, there's no forethought required1 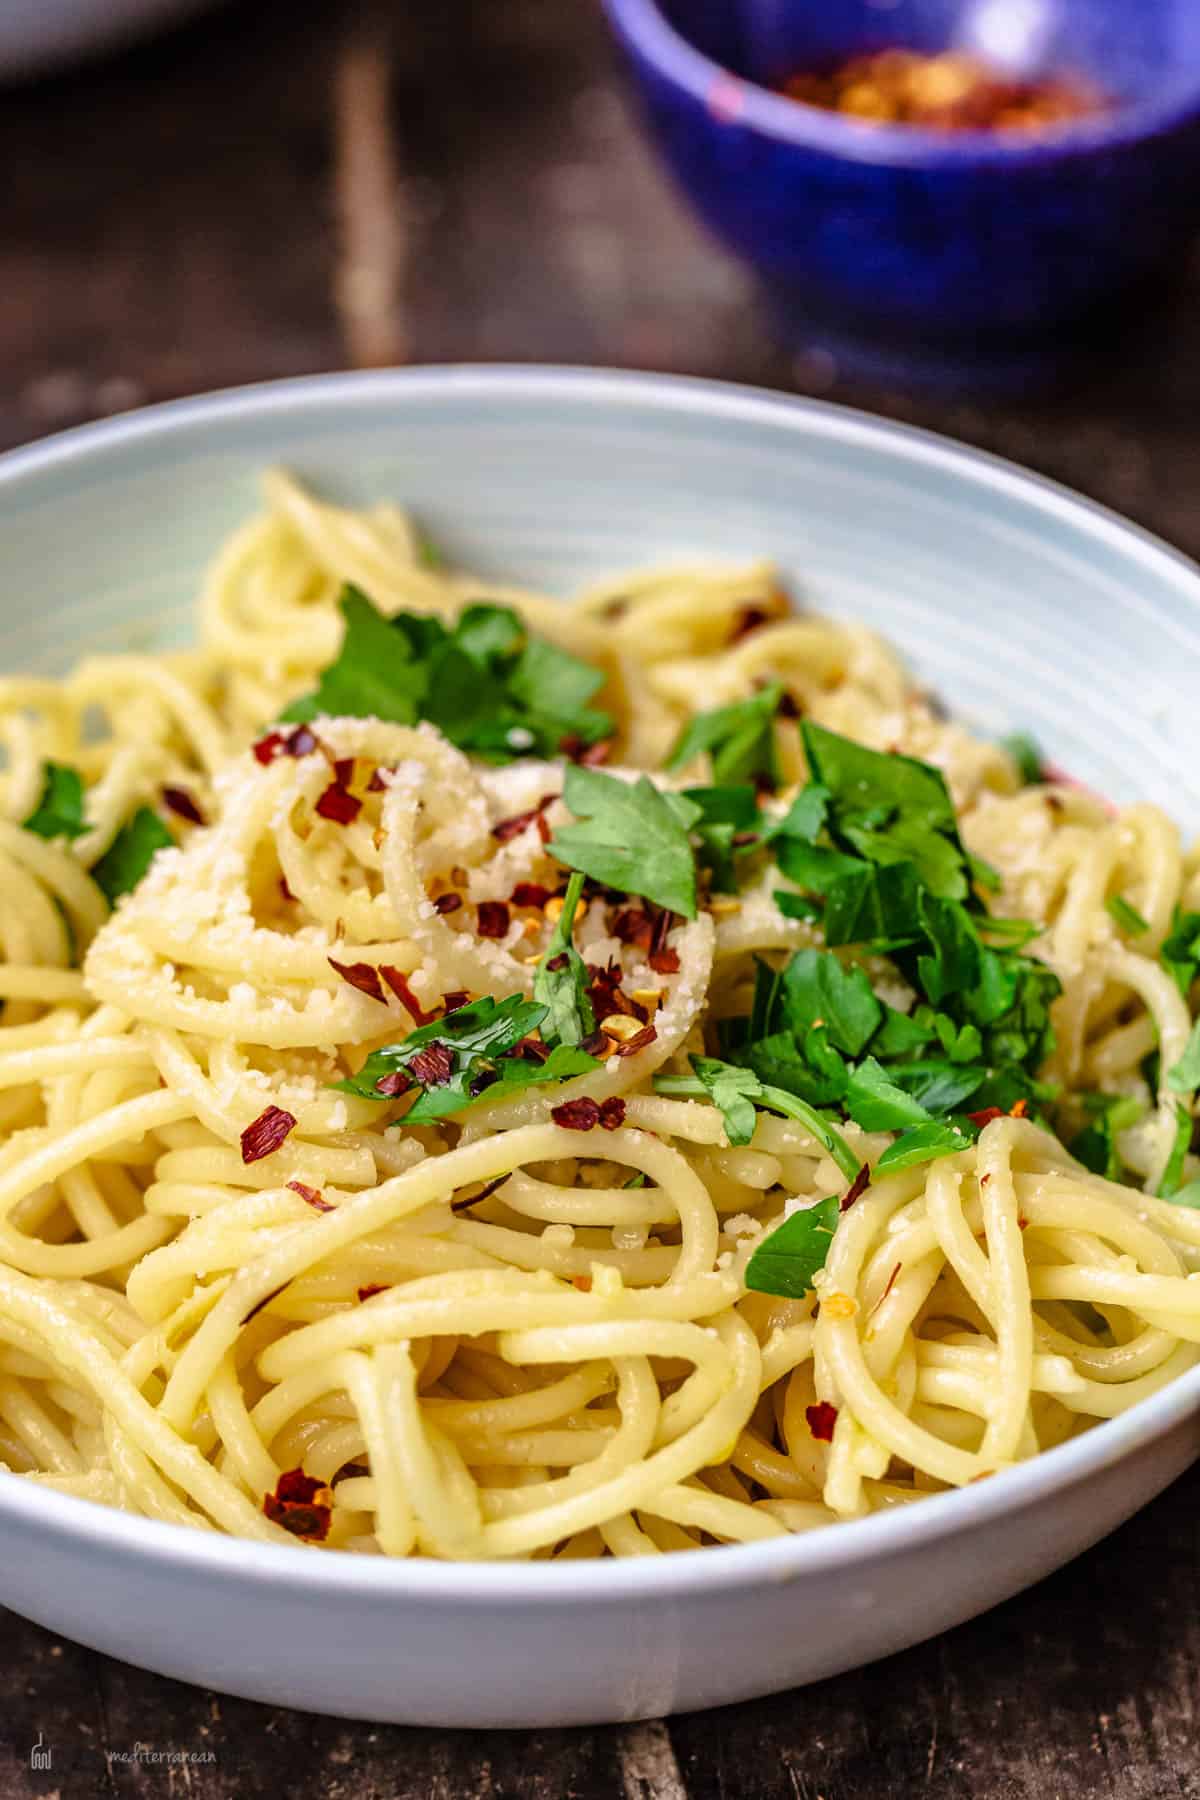 Ingredients you need to make Pasta Aglio e OlioThere are just a handful of very basic ingredients in this Italian classic. If you have pasta, olive oil and garlic, you can make this recipe!
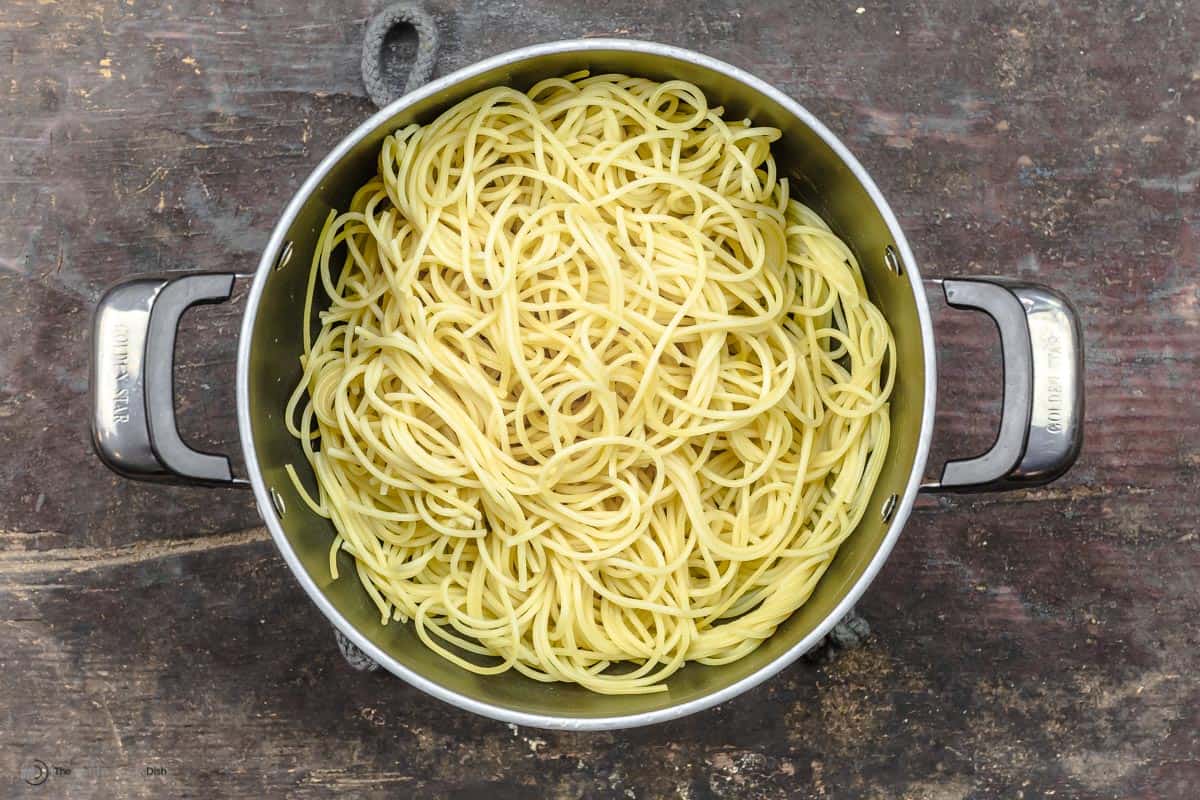
How to make Spaghetti Aglio e Olio:This easy garlic pasta recipe comes together quickly, in under 30 minutes! Perfect for dinner in a pinch.
Tips for SuccessWhile this olive oil pasta recipe is super easy to make, there are a few simple tips to keep in mind. With these, you'll end up with the perfect aglio e olio pasta every time!
 VariationsThis easy aglio e olio recipe can be the start of many delicious variations. If you enjoy anchovies, you can chop some up and add them here. If you have some roasted tomatoes or sauteed asparagus to use up, you can add them in--not traditional at all, but a fun twist anyway. And check out my earlier olive oil pasta recipe which is another take on this same idea. Serve it withSpaghetti aglio e olio is typically served as a main course. I usually start with a big salad, like Tomato Panzanella Salad, Balela Salad or a simple Tomato and Cucumber Salad. Some freshly baked bread or focaccia can also be served with it, perfect for enjoying every last drop of the sauce. If you want to serve this as a side dish, it would pair well with simple proteins like: Chicken Schnitzel, Italian-style baked chicken breasts or salmon. You can slice the chicken or fish and serve it on top of the pasta. 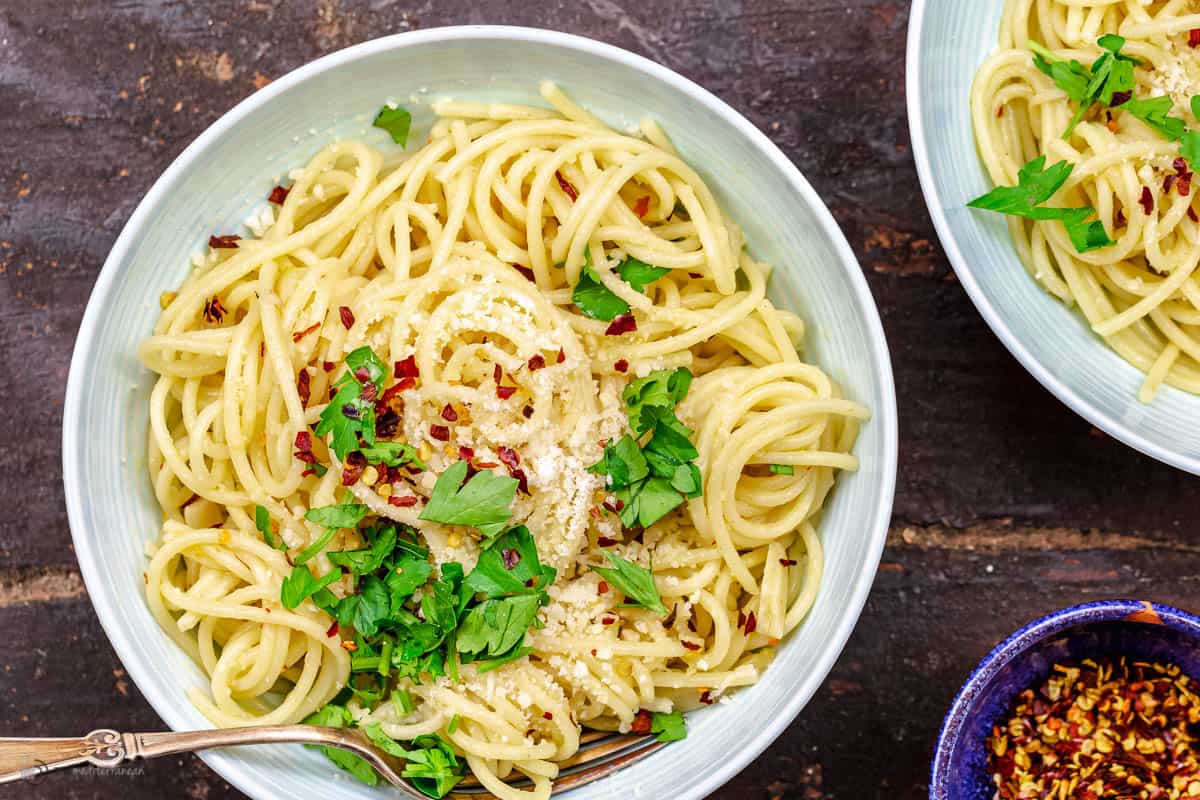 How to store leftoversAglio e olio is best served immediately, as the oil will separate as it cools. However, any leftovers can be stored in the fridge for up to 3 days. For best results, reheat on the stovetop, tossing frequently. In a pinch, you can reheat in the microwave as well. I recommend adding a splash of water when reheating to prevent the pasta from drying out. More easy pasta dishes:
Browse more Italian recipes. Browse all Mediterranean Recipes.  Spaghetti Aglio e Olio
This simple Spaghetti Aglio e Olio, a classic Italian pasta with garlic and olive oil, takes only 5 ingredients and less than 20 minutes to make! Add your favorite salad for an easy weeknight dinner.
Servings 6 servings (up to)
Calories 399.8kcal
Ingredients
Instructions
VideoNotes
Nutrition
Calories: 399.8kcal | Carbohydrates: 44g | Protein: 9.8g | Saturated Fat: 3.6g | Cholesterol: 4.9mg | Sodium: 92.1mg | Potassium: 152.9mg | Fiber: 2g | Sugar: 1.6g | Vitamin A: 97.8IU | Vitamin C: 1.3mg | Calcium: 81.5mg | Iron: 1mg
The post Spaghetti Aglio e Olio appeared first on The Mediterranean Dish. via The Mediterranean Dish https://www.themediterraneandish.com/spaghetti-aglio-e-olio/ |
ABOUT MEHi, I am Daniel Jones from Overland Park, MO. I am a chef by profession, & also publish my recipe tips online on blogs and social media. Archives
April 2023
Categories |


 RSS Feed
