|
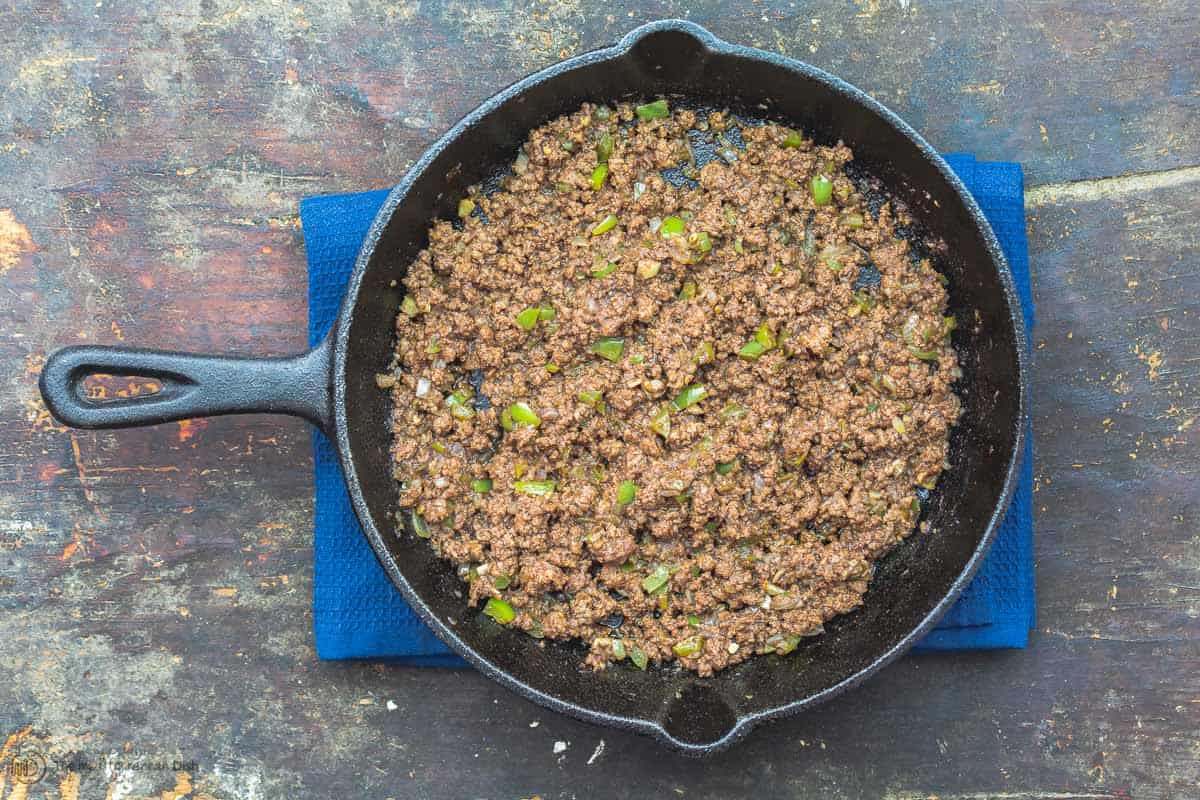
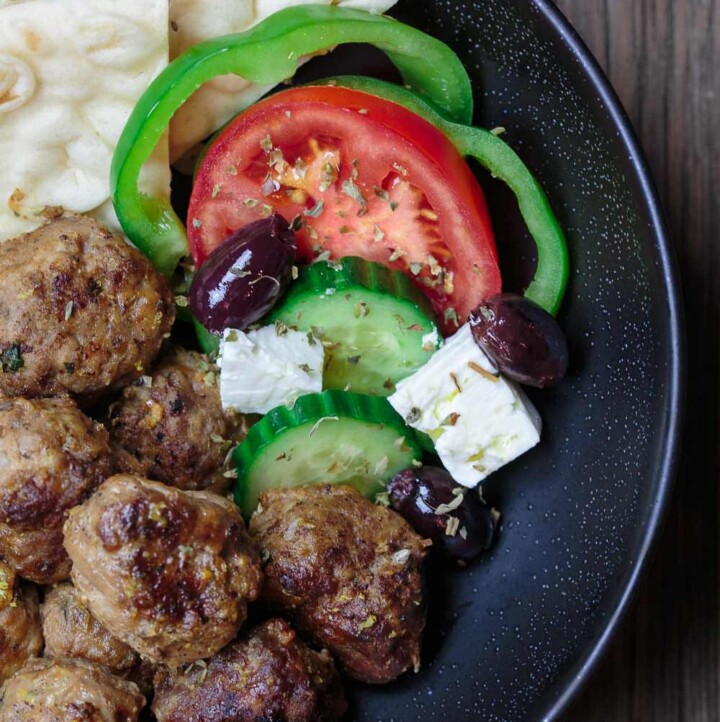
Middle Eastern ground beef pita sandwiches are a fun, tasty, and easy way to use up ground beef sitting in your fridge or freezer. Consider it a fuss-free (and weeknight-friendly) spin on my kofta kebab recipe. All you need is 20 minutes and dinner is ready! 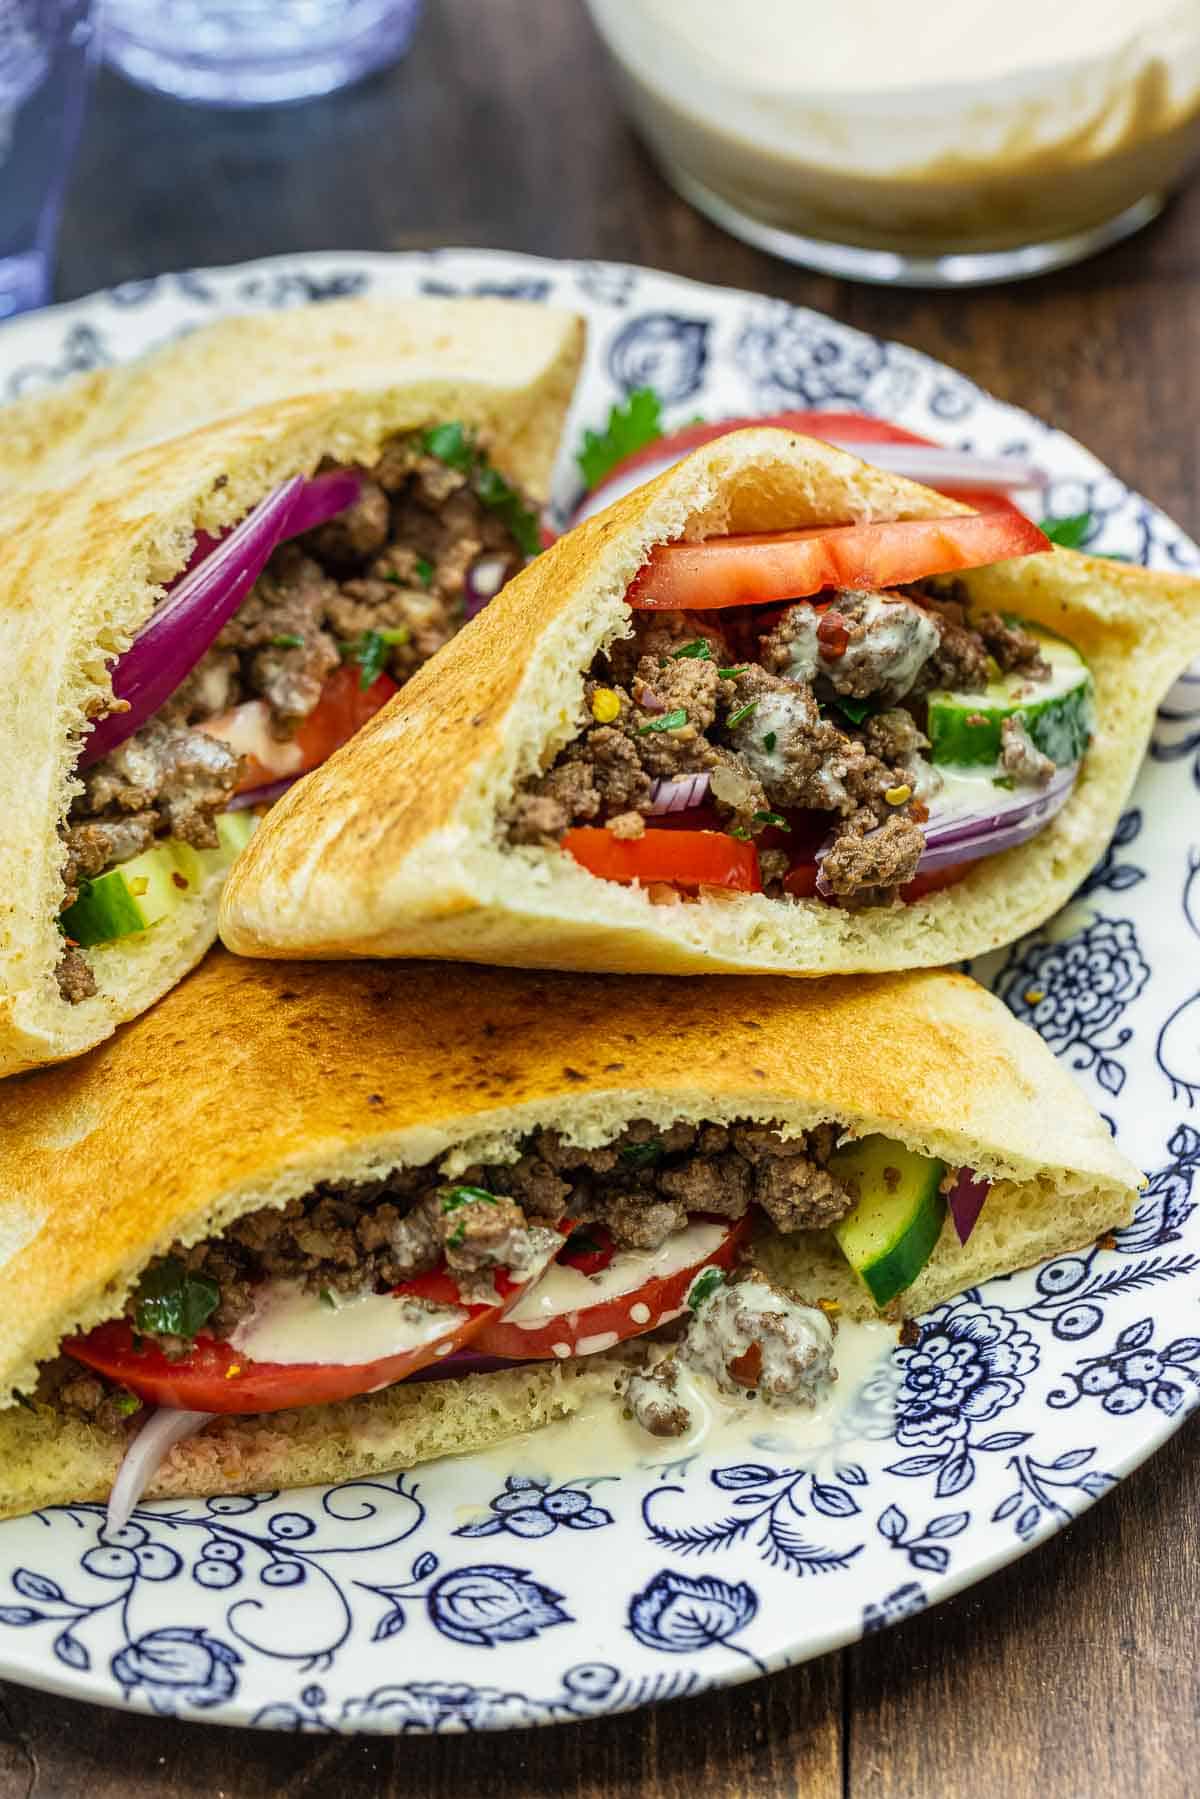 Skip the usual meatballs, burgers, or casseroles tonight and make ground beef pita sandwiches instead! Consider this recipe a time-saving twist on kofta—all of the incredible Middle Eastern flavors you love and none of the fuss. I season ground beef the same way I season my kofta kebabs—with onions, garlic, and a good dose of allspice and cardamom, but rather than shape it onto skewers to grill I just cook it in a skillet. While the beef is cooking I wash and slice cucumbers and tomatoes then I prepare my favorite sauces like tahini, hummus, or tzatziki. If you don’t have time for homemade, then skip that step and pick up your favorite brand at the supermarket. When everything is ready, stuff it inside a homemade or store-bought pita and enjoy. Think of these pita sandwiches as free-form or deconstructed kofta sandwiches! They have all the flavors you love in kofta with less work. You don't have to stick with cucumbers and tomatoes either. Feel free to use up what you have in your garden—add some lettuce, spicy arugula, sliced radish, even peppers. Anything goes! In this post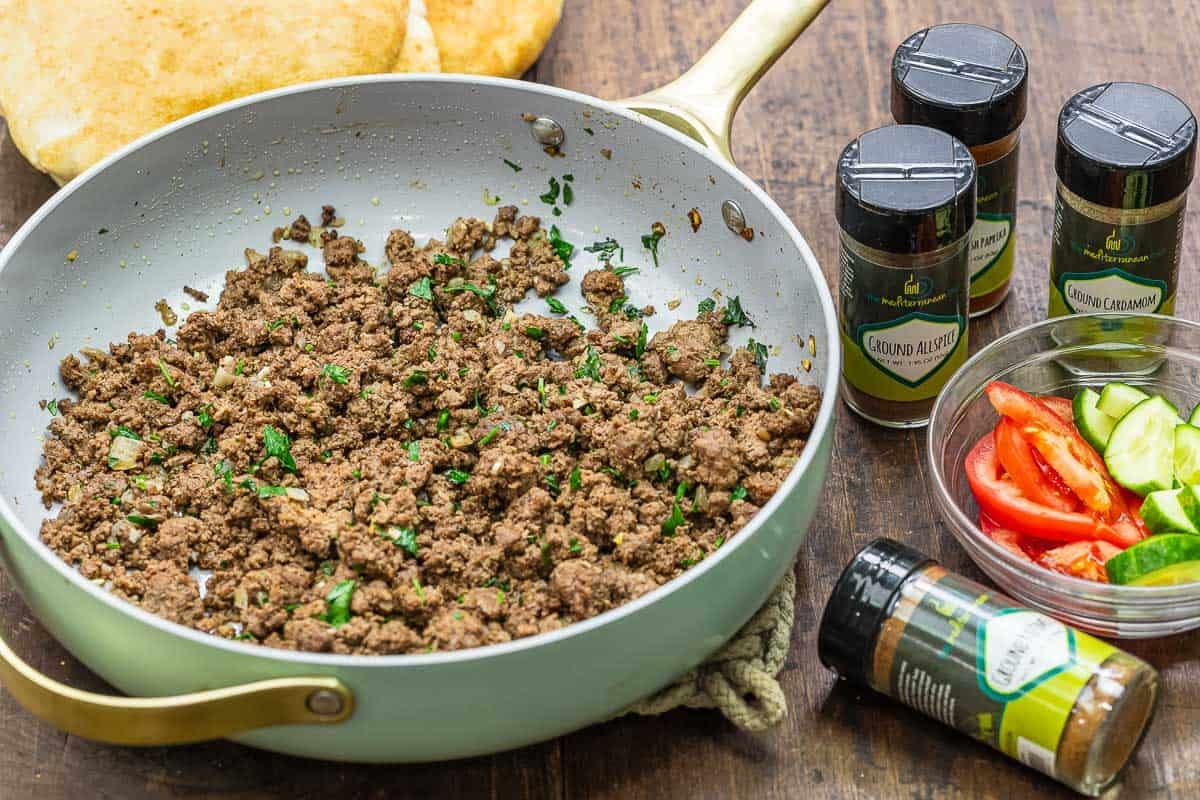 Ingredients for a ground beef sandwich
Best ground beef for this recipeGround beef is sold in various percentages of lean meat and fat. You might see packages labeled “80% lean,†“90% lean,†or “93% lean.†These numbers indicate that 80, 90, or 93 percent of the package of ground beef is lean meat, while the rest is fat. In this ground beef pita sandwich recipe, I’d recommend using either 80% or 90% lean ground beef. Fat infuses dishes with moisture and flavor. If you go too lean you could end up with dry meat by the time it’s done cooking. Keep in mind that we drain the beef once it is browned anyway, so the dish itself is not fatty. You’ll end up with moist, flavor-packed ground beef with ever so slightly crisp edges. 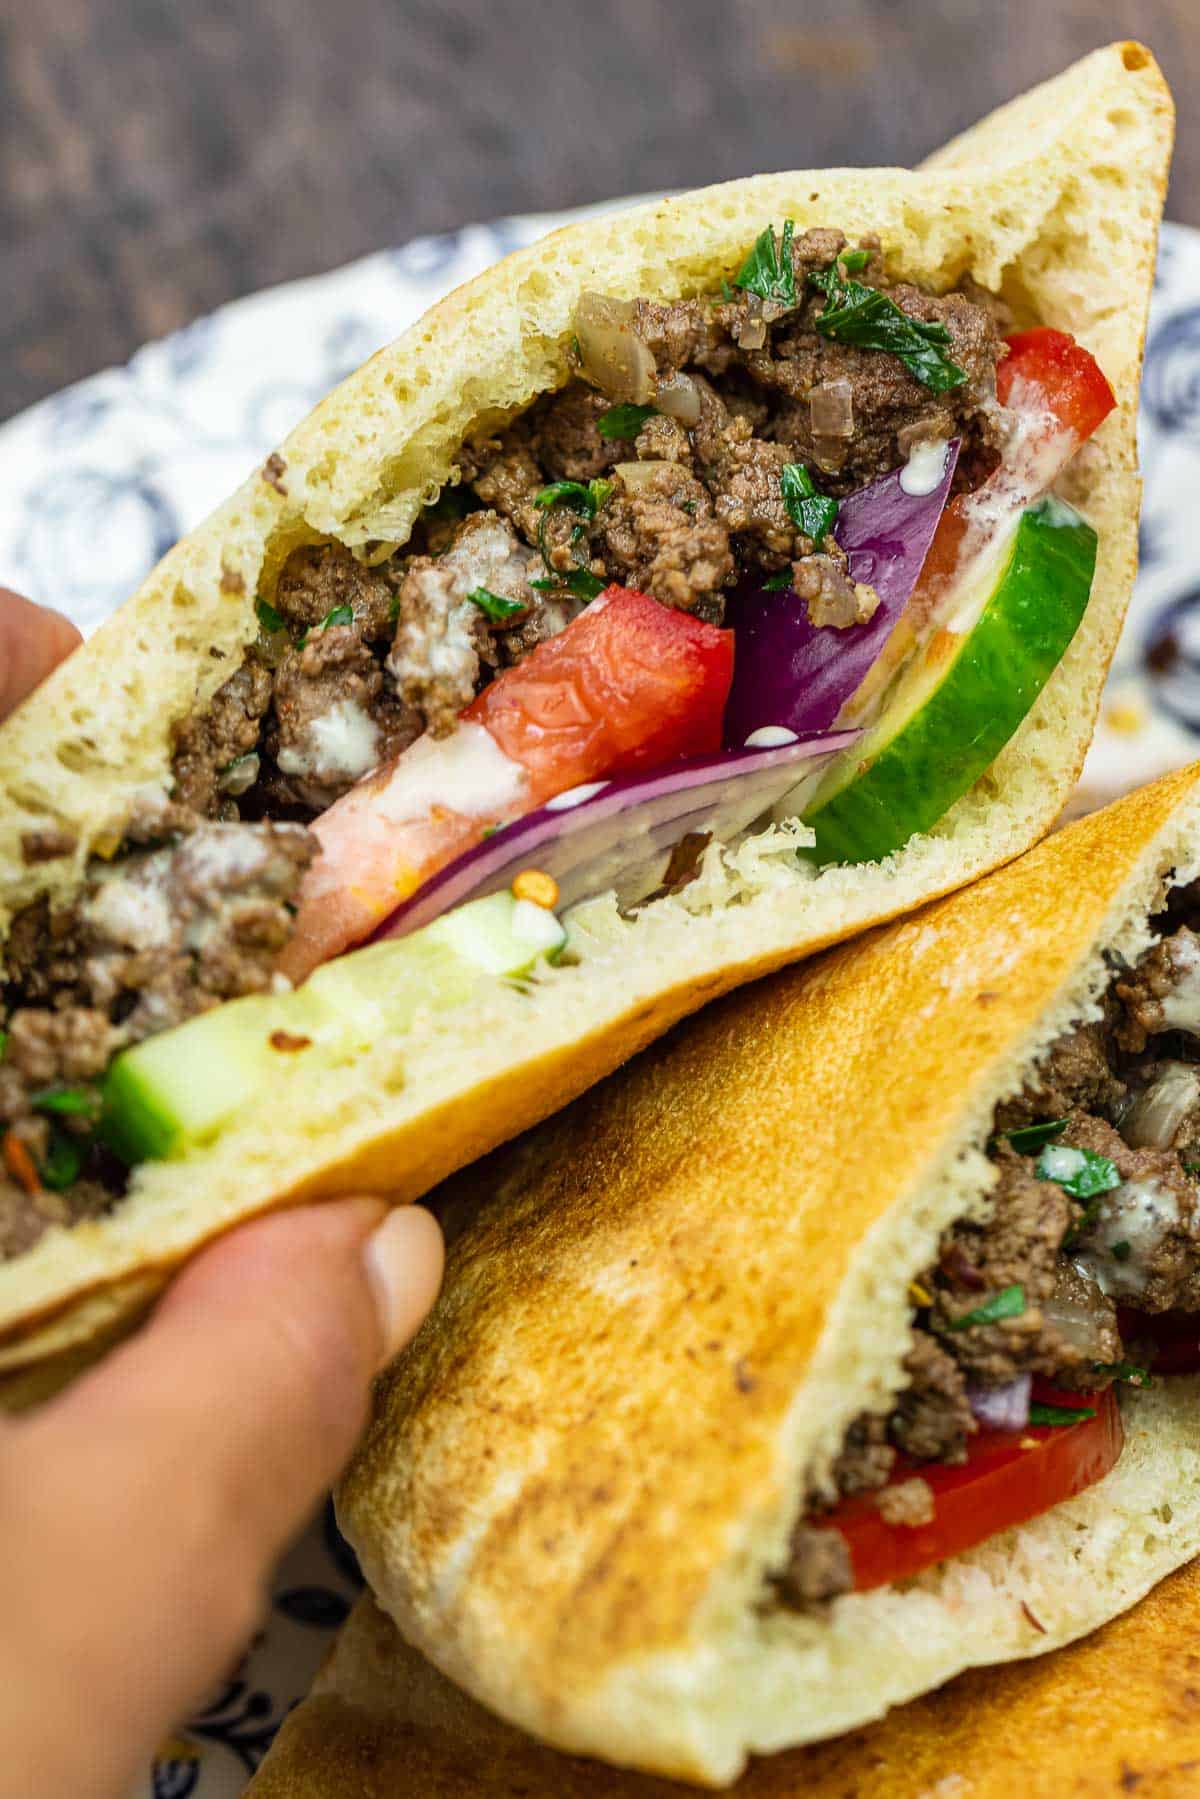 How to make a pita sandwichThis easy ground beef recipe is as easy as 1, 2, 3! To save time, work on your fixings while the beef cooks. Here’s how to make pita sandwiches:
 Serving suggestionsI love how customizable this ground beef sandwich is! Stuff your pita pockets with as many or as few fixings as you want. Here are some ideas:
How to store leftoversI don't usually have leftovers, but if you have a smaller family this recipe makes great leftovers and if you're a planner it's an easy make-ahead meal for dinner or work lunches.
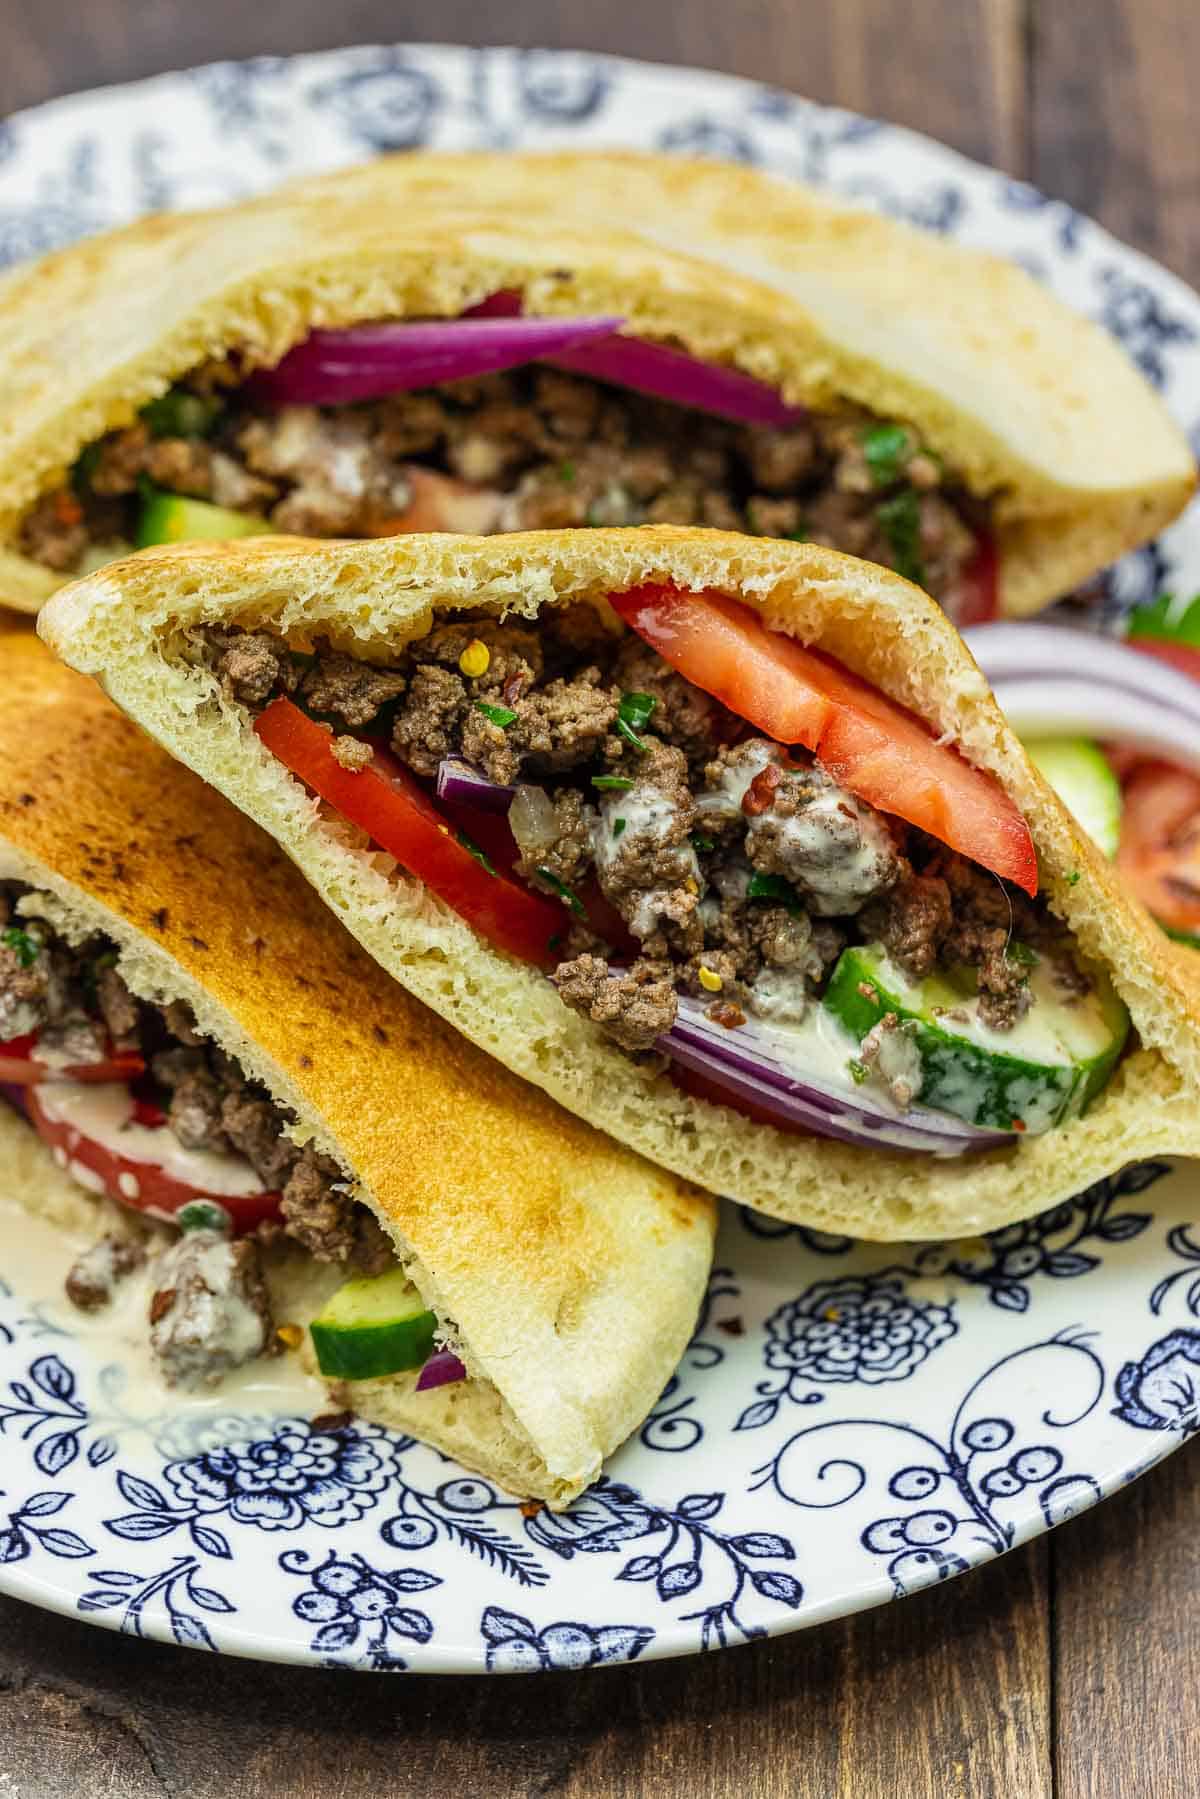
When you're ready to eat, drizzle a skillet with a little olive oil, add the beef and warm it over medium heat. It should only take about 10 to 15 minutes. Assemble in pita pockets with your favorite veggies and sauces. More ground beef recipesBrowse all Mediterranean recipes.  Middle Eastern Ground Beef Pita Sandwich
Sandwich night is about to get better with this easy ground beef pita sandwich recipe. Simply cook up and season some lean ground beef and load it into warm pita pockets with tomatoes, cucumber, and a sauce of your choice. Dinner in 20 minutes!
Servings 6 people
Calories 309.4kcal
Ingredients
To serve
Instructions
VideoNotes
Nutrition
Calories: 309.4kcal | Carbohydrates: 22.9g | Protein: 26.5g | Fat: 12g | Saturated Fat: 4.8g | Polyunsaturated Fat: 0.6g | Monounsaturated Fat: 5g | Trans Fat: 0.7g | Cholesterol: 73.7mg | Sodium: 426.3mg | Potassium: 631.6mg | Fiber: 2.3g | Sugar: 3.2g | Vitamin A: 944.1IU | Vitamin C: 16.4mg | Calcium: 67.9mg | Iron: 3.6mg
The post Kofta-Seasoned Ground Beef Pita Sandwich appeared first on The Mediterranean Dish. via The Mediterranean Dish https://www.themediterraneandish.com/ground-beef-pita-sandwich/
0 Comments
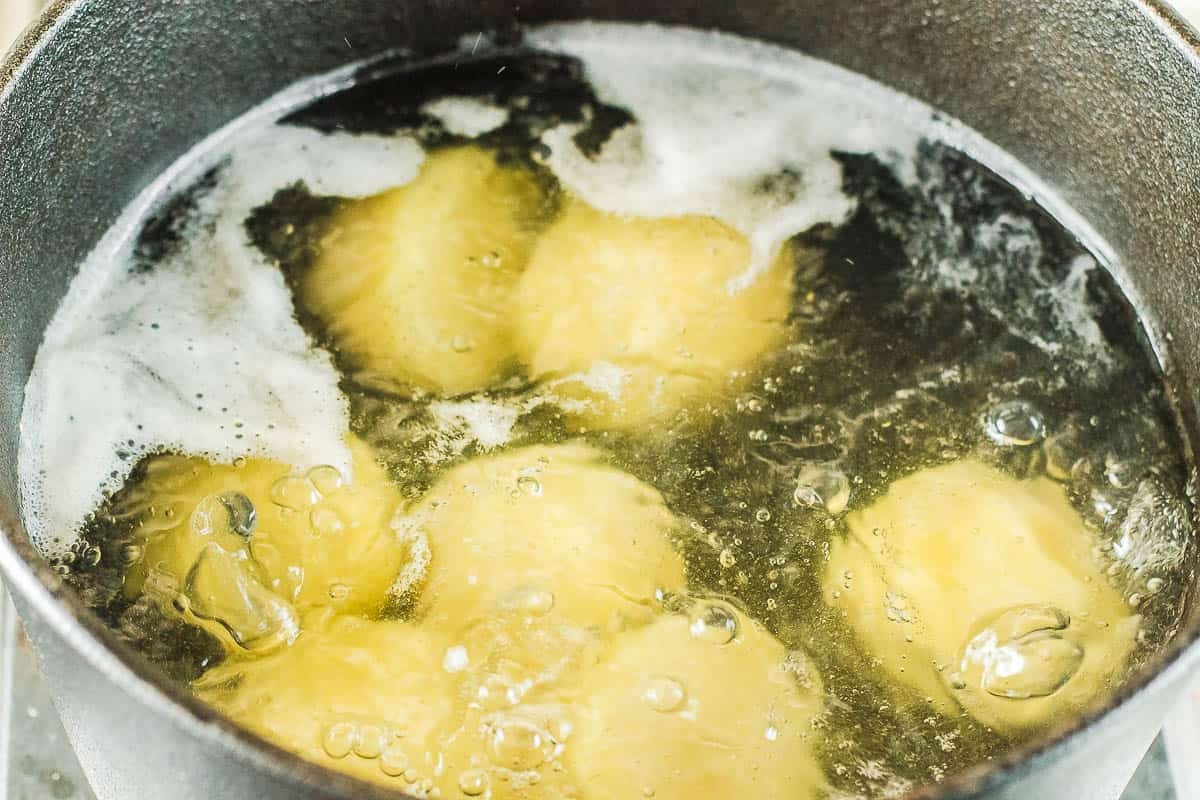
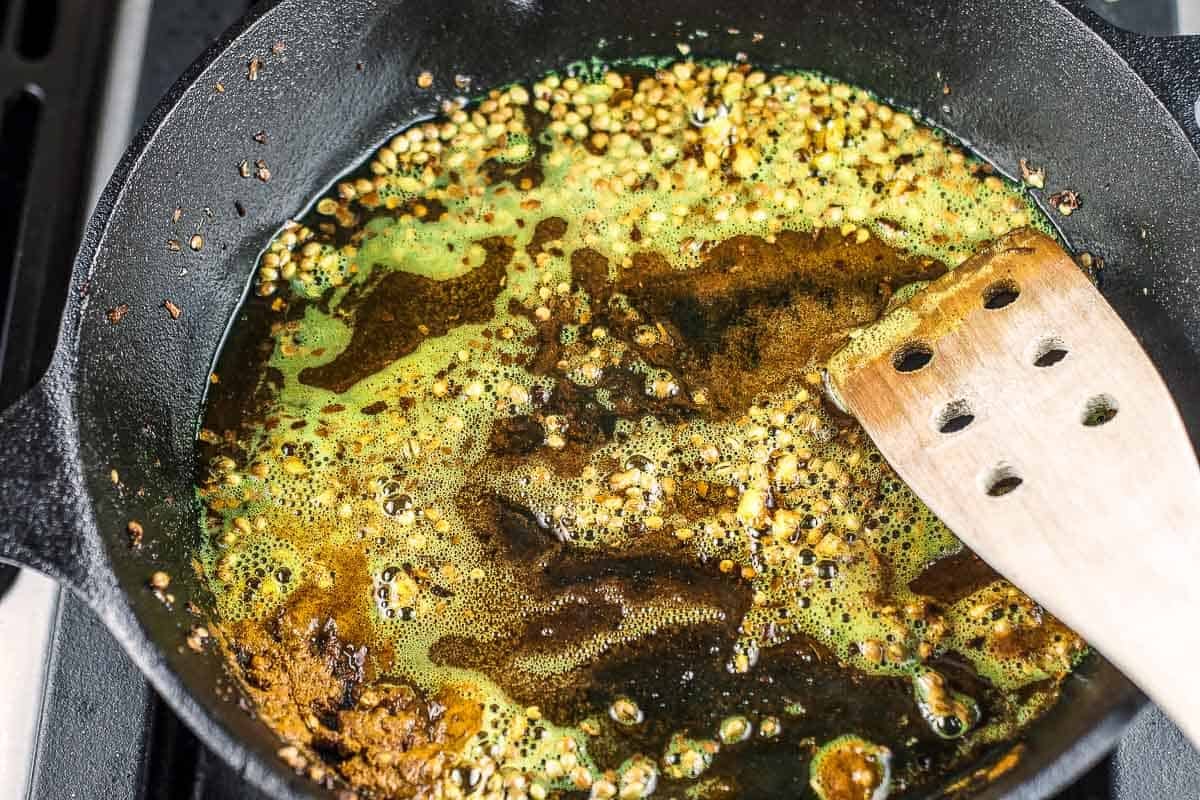
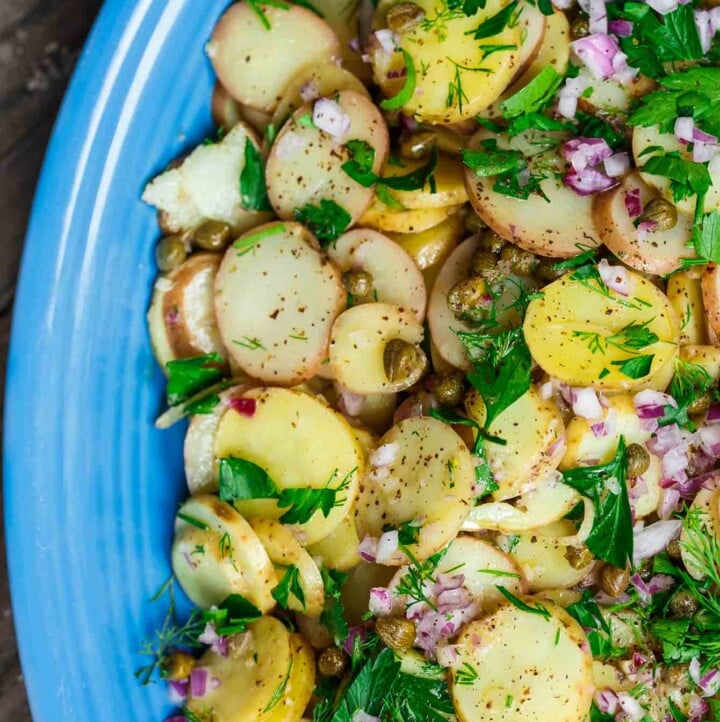
Take your weeknight side dish game up a notch with batata harra, Middle Eastern spicy potatoes! Fluffy potatoes, fresh herbs, lime juice, and spices give you a mouthwatering skillet potato dish you will add to your regular rotation. 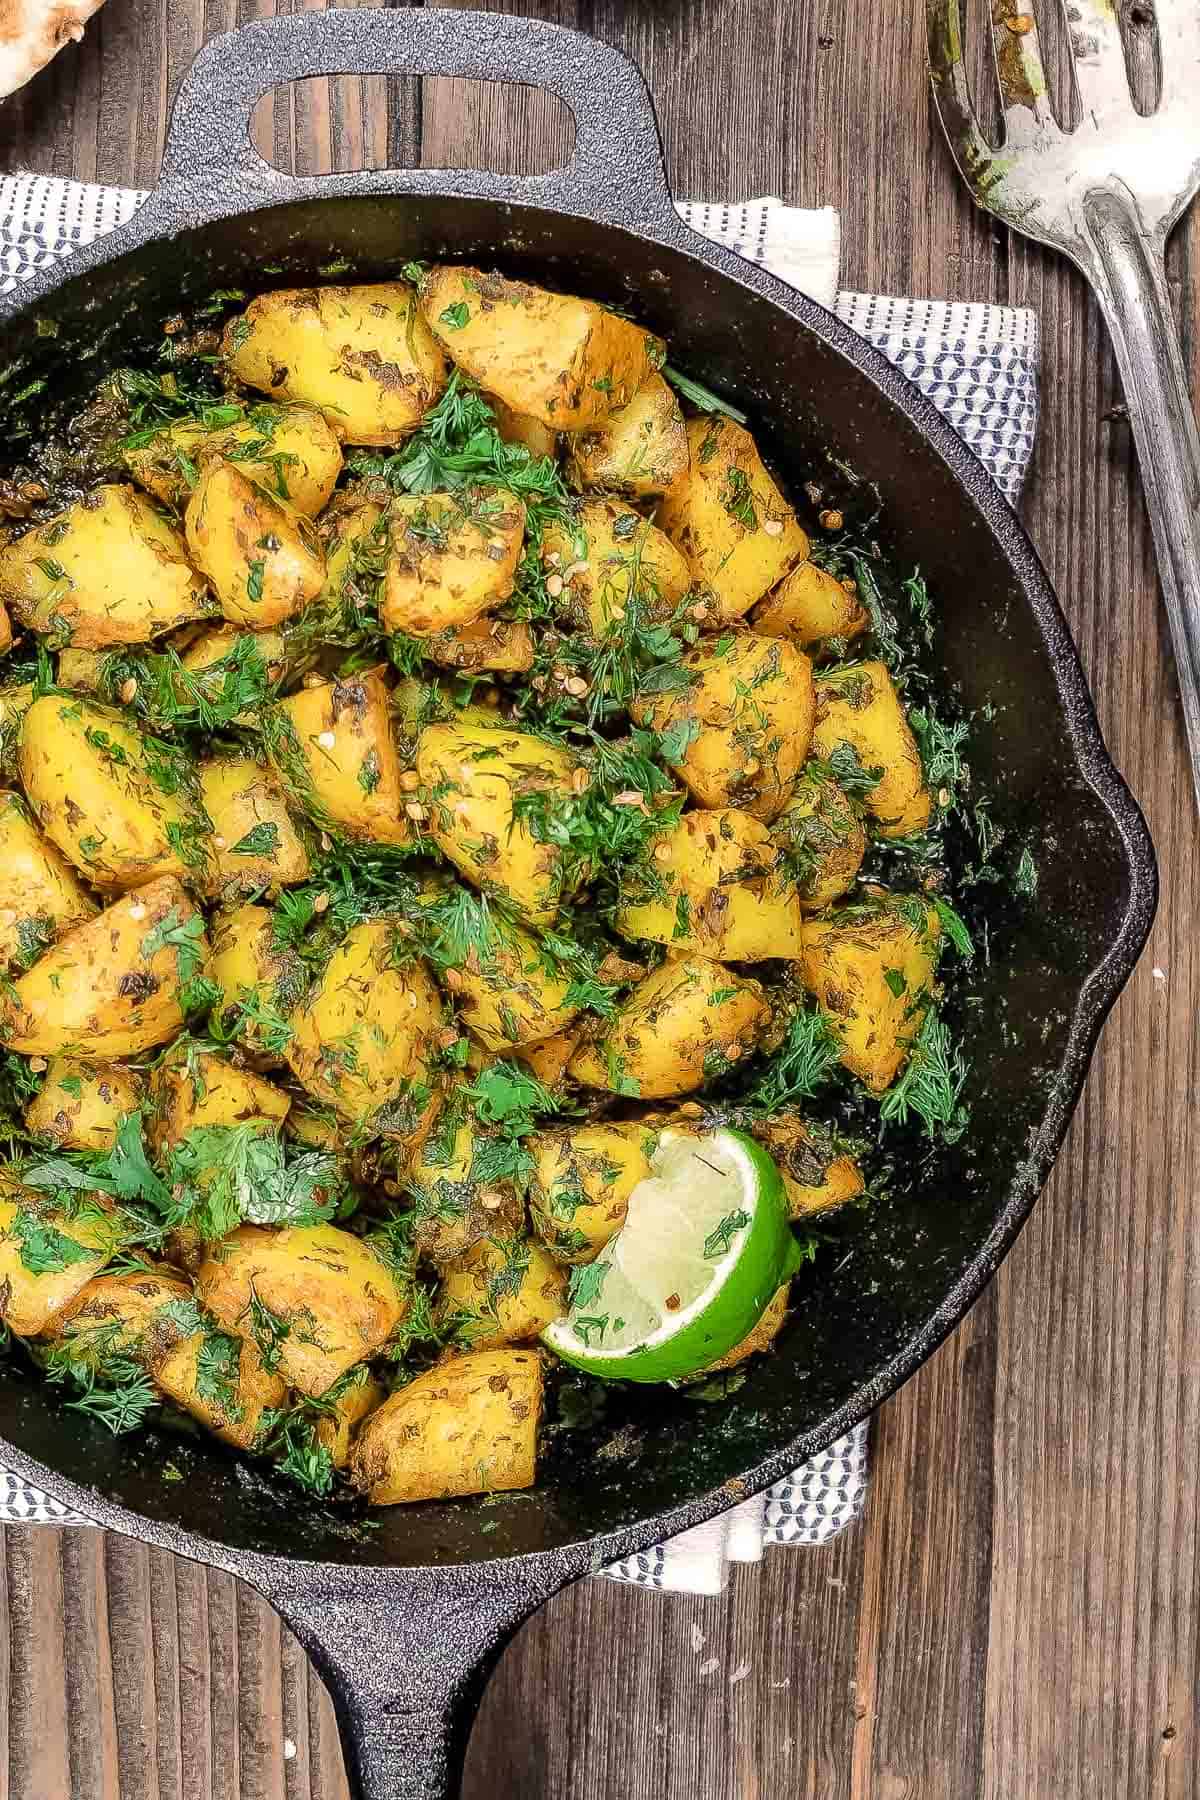 If you haven't tried batata harra yet, you are in for a treat! These quick Middle Eastern skillet potatoes pack tons of flavor from garlic, fresh herbs, and a unique mix of warm spices like turmeric and coriander seeds, which give them plenty of earthy flavor. A splash of lime juice adds a little extra brightness. Potatoes are so easy to have fun with, because you can eat them in various different forms. And whether they’re whipped into a garlicky dip, sliced into wedges and roasted, or piled with colorful toppings and baked, potatoes are the ultimate chameleon, seamlessly blending in with whatever flavors we cook them in. These skillet potatoes are yet more proof that potatoes can do anything, and in this recipe, we turn up the heat with red pepper flakes. These vegan, gluten free spicy potatoes are versatile, flavorful, and so quick to make – they come together in 25 minutes or less! Simply boil them, saute with herbs and spices, and serve! What is batata harra?Batata harra translates from Arabic to “spicy potatoesâ€, and it is a popular Middle Eastern potato dish. In some countries, batata harra is extremely spicy, thanks to the addition of harissa paste or harissa spice blend. But in places like Egypt, where I grew up, you'll find these skillet potatoes to be subtly spicy with just a sprinkle of crushed red pepper flakes, relying more on garlic, fresh herbs, and warm spices like turmeric for flavor. You can think of batata harra as being similar to the popular Spanish tapa patatas bravas, which are fried potatoes smothered in a spicy sauce. I always look for ways to make our food as healthy as possible, so while many batata harra recipes call for frying, I boiled mine then sautéed them in a little olive oil. 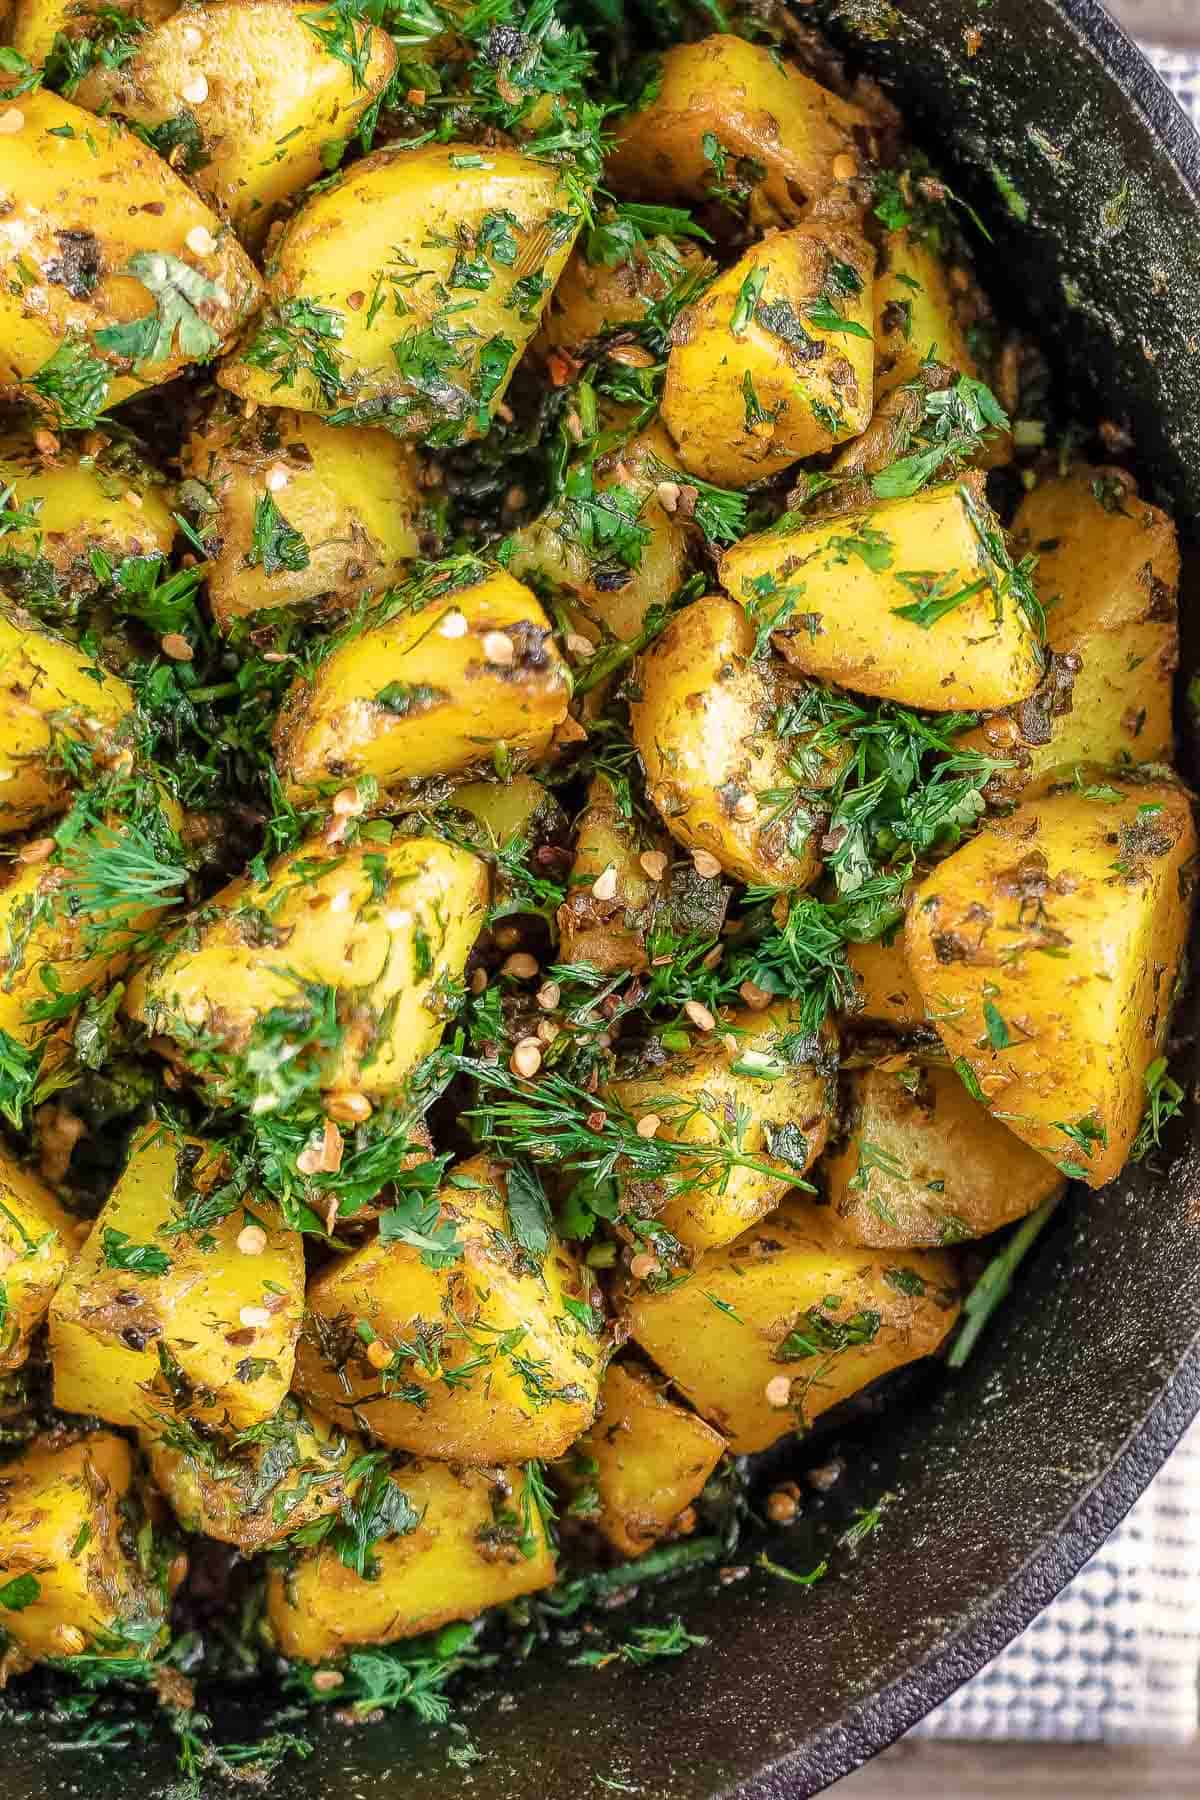 Ingredients for spicy potatoesBatata harra comes together with potatoes, spices, and fresh herbs. Here’s what you’ll need to make it:
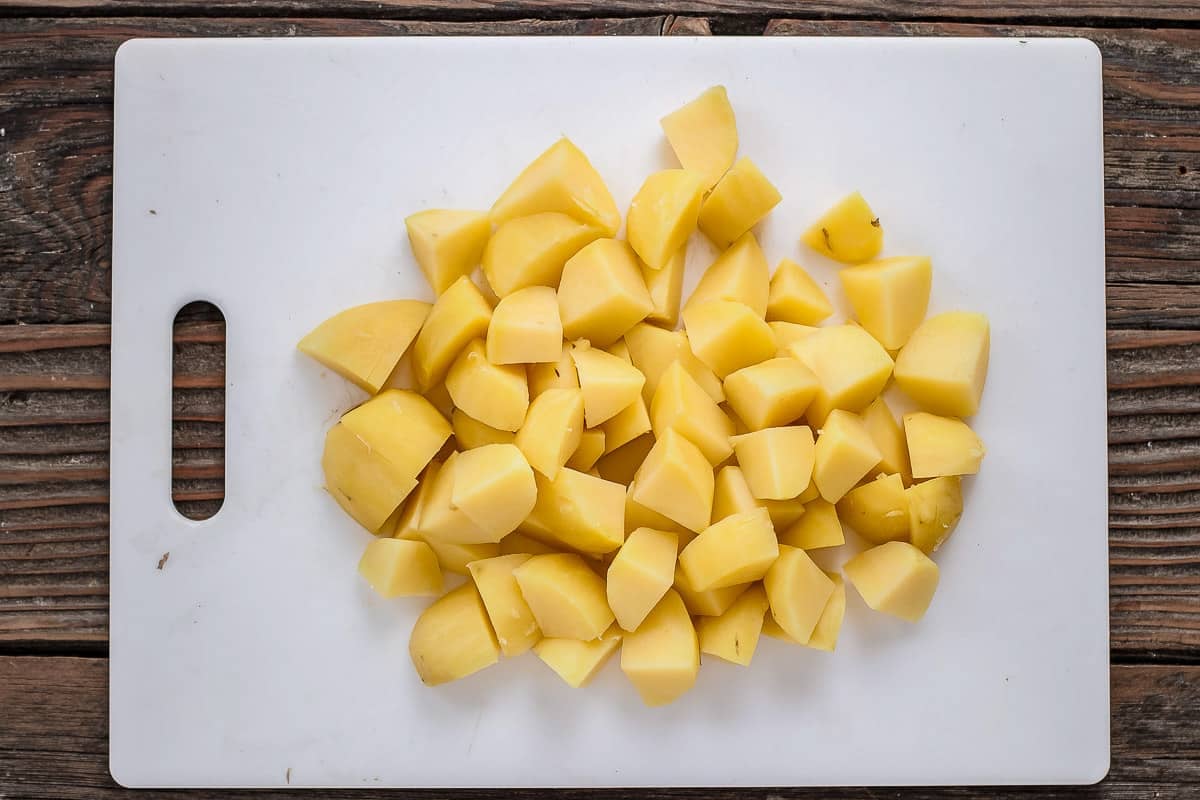
What are the best potatoes to use in batata harra?Yukon gold potatoes are my favorite potato to use in this turmeric potatoes recipe. They are creamy and fluffy when cooked, but still hold their shape. All-purpose potatoes are the best for batata harra, because they have a medium amount of both starch and water, meaning they are suited to most kinds of preparation. Starchy varieties like russet potatoes and waxy kinds like fingerlings or red potatoes don’t have quite the right texture for this recipe. Cut the potatoes into small bite-sized chunks after they’re boiled, so using whole baby potatoes wouldn’t be much of a shortcut, since you’d likely need to cut them into smaller pieces anyway. How to make batata harra
Different ways to make batata harraPotatoes not only adopt the flavors they are paired with, but they also lend themselves to different cooking methods. I prefer to boil and saute them, but feel free to experiment with your own technique.
Ways to adjust the heatBatata harra can be as spicy or as mild as you want it to be. My recipe, while subtly spicy, is on the milder side for this skillet potatoes dish. To tone down the heat further, cut the amount of red pepper flakes from 1 teaspoon to ½ teaspoon. If you want more heat, you have a few options:
Note that both harissa powder and paste are a blend of several different spices. The flavor is much more complex than red pepper flakes or cayenne pepper alone. 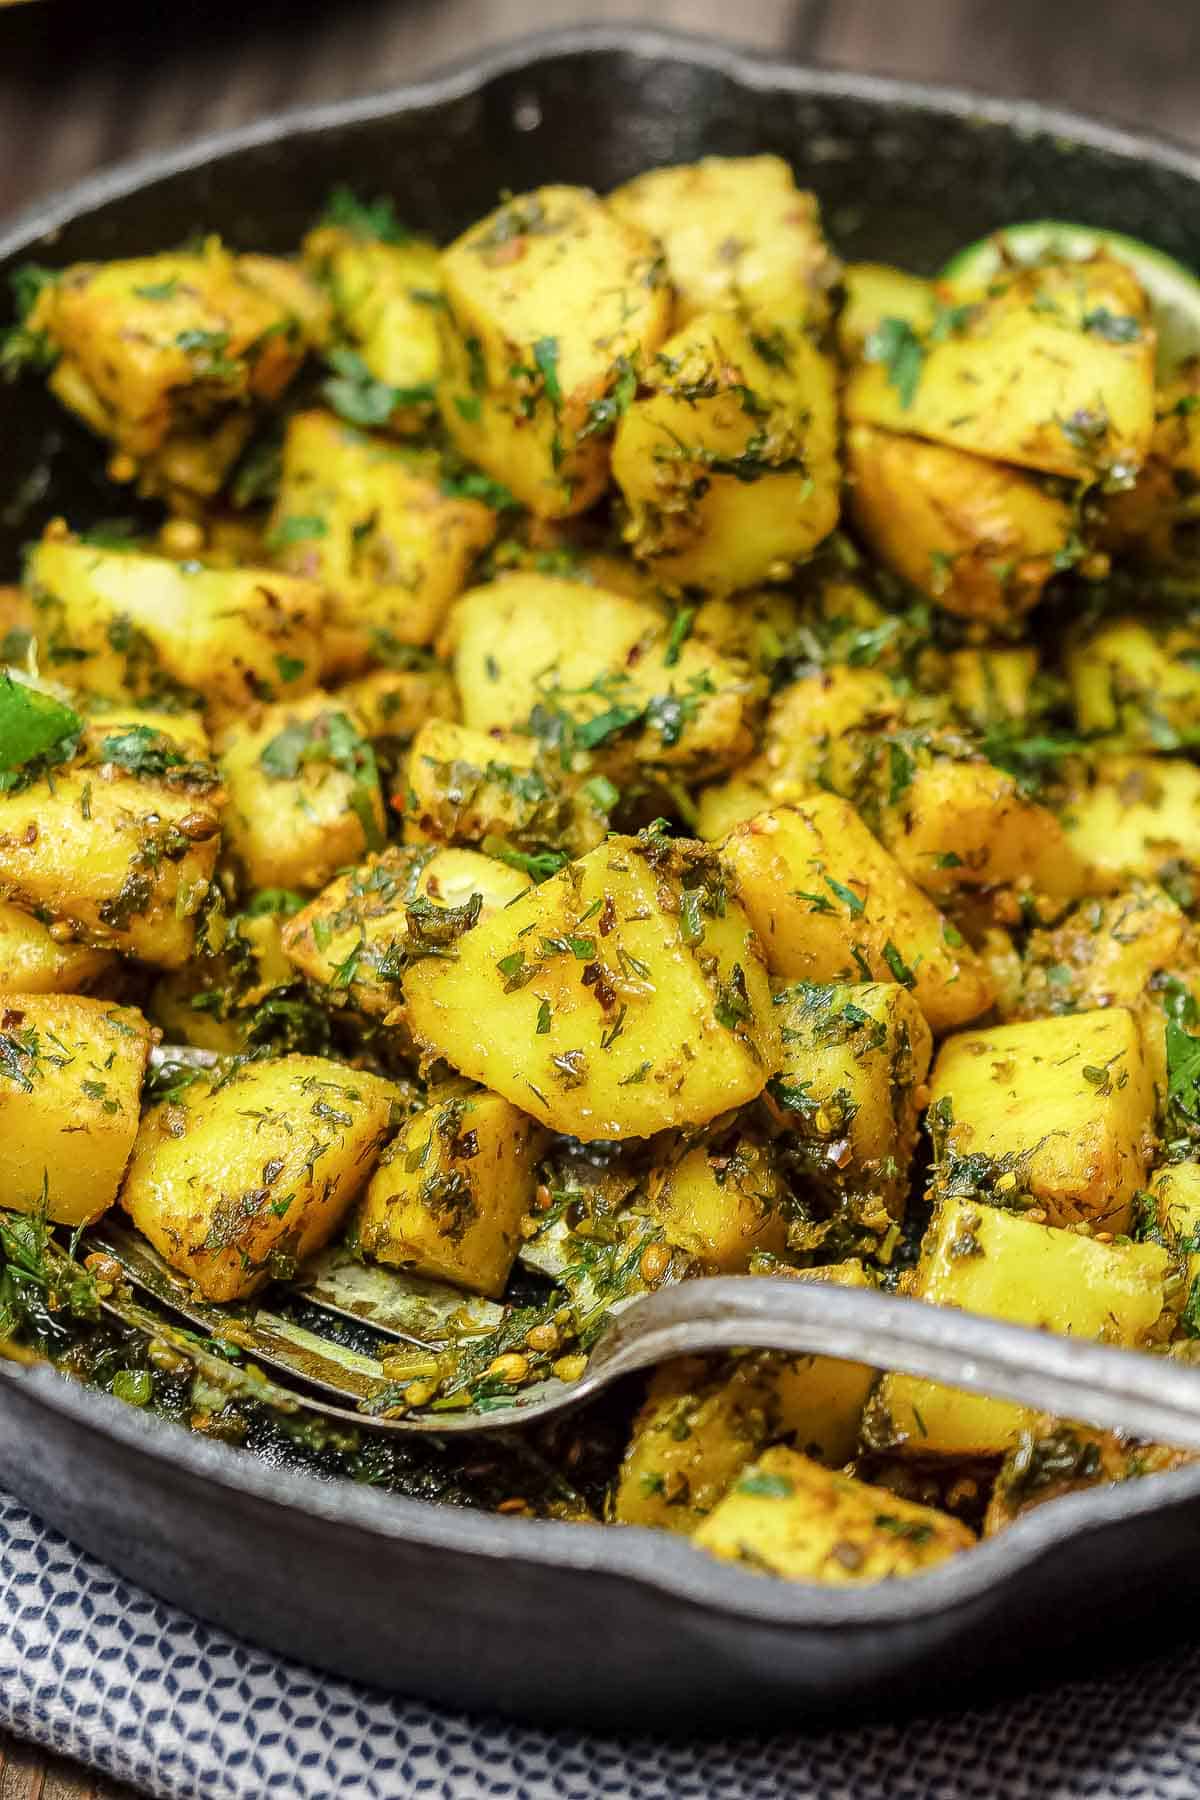 Ingredient swaps and substitutions
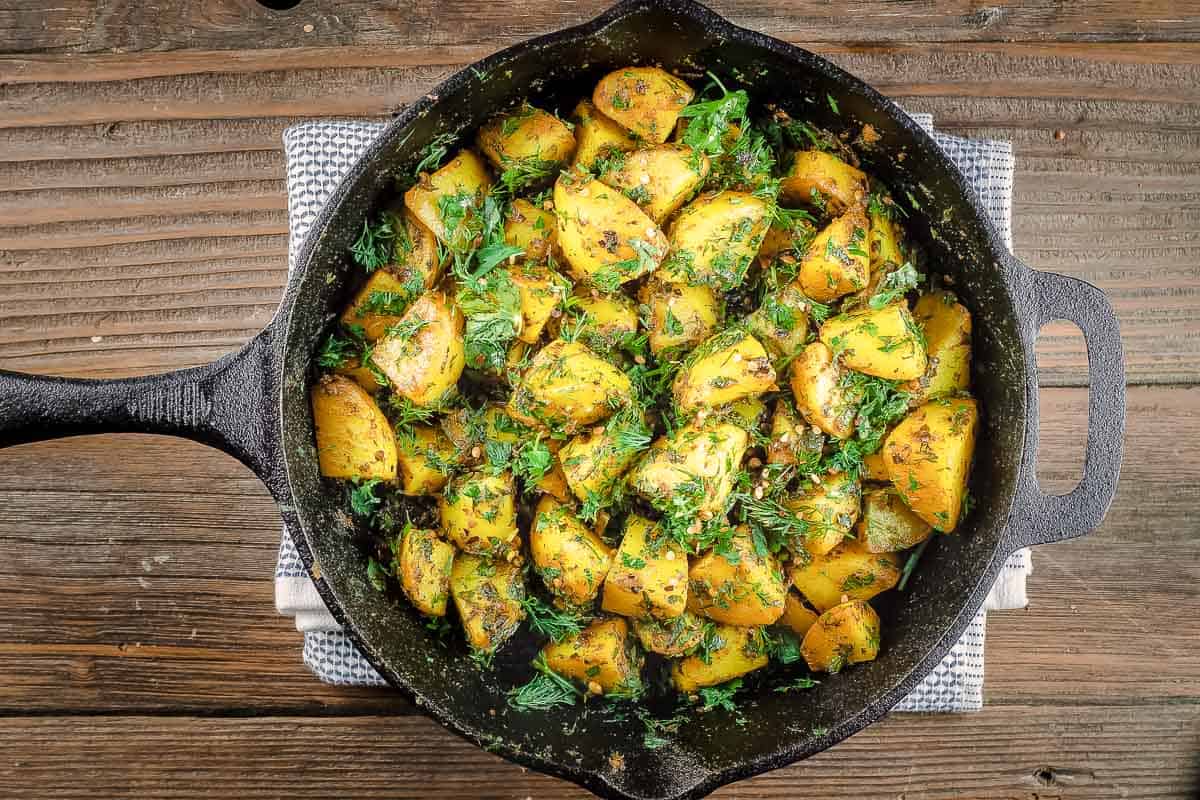
What to serve with batata harraI like to serve these turmeric potatoes as a simple side dish. It goes well with many meat dishes including baked kofta, chicken souvlaki, or even pan-seared trout. It can be served hot or at room temperature. A dollop of Greek yogurt or tzatziki are great cooling elements to tone down the heat! If you're up for a big mezze feast, definitely add these skillet potatoes next to other small dishes like: How to store leftoversBatata harra doesn’t last long in my household, so I usually don’t have leftovers! But leftover spicy potatoes will keep in an airtight container in the refrigerator for up to 4 days. Serve leftovers and room temperature, or reheat in a skillet over medium heat with a little extra virgin olive oil for a few minutes until warm. More potato recipes to tryBrowse all Mediterranean recipes.  Batata Harra: Middle Eastern Spicy Potatoes
Easy vegan, gluten-free skillet potatoes prepared Middle Eastern-style with garlic, warm spices like turmeric, fresh herbs and a splash of lime juice! It's called batata harra, and it's ready in just 25 minutes, too! The best potatoes to use are all-purpose potatoes like Yukon gold potatoes. Serve these turmeric potatoes as a hearty side alongside baked kofta or pan-seared trout.
Servings 6 servings
Calories 210.5kcal
Ingredients
Instructions
VideoNotes
Nutrition
Calories: 210.5kcal | Carbohydrates: 33.4g | Protein: 4.4g | Fat: 7.6g | Saturated Fat: 1.1g | Polyunsaturated Fat: 0.9g | Monounsaturated Fat: 5.3g | Sodium: 125.2mg | Potassium: 890.1mg | Fiber: 5.2g | Sugar: 1.7g | Vitamin A: 1734.8IU | Vitamin C: 58mg | Calcium: 65mg | Iron: 3.1mg
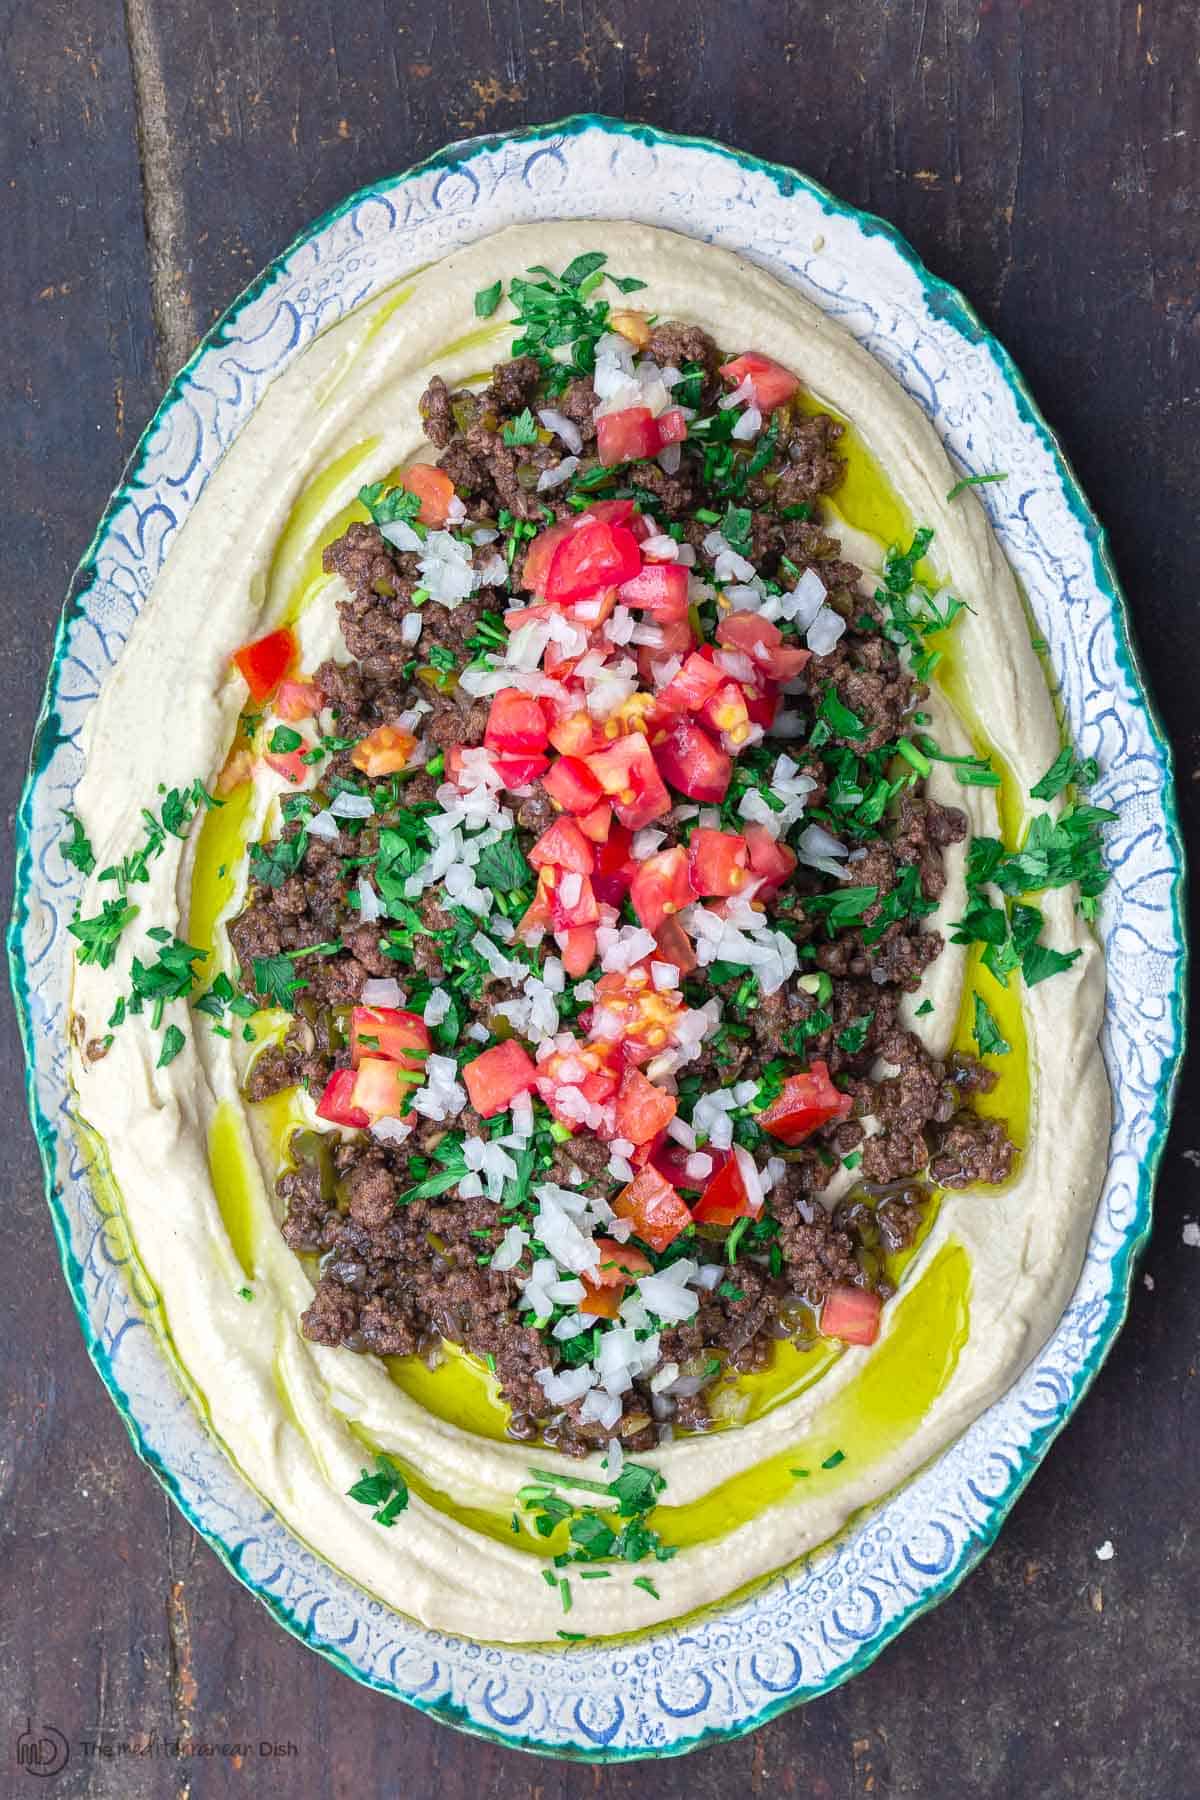
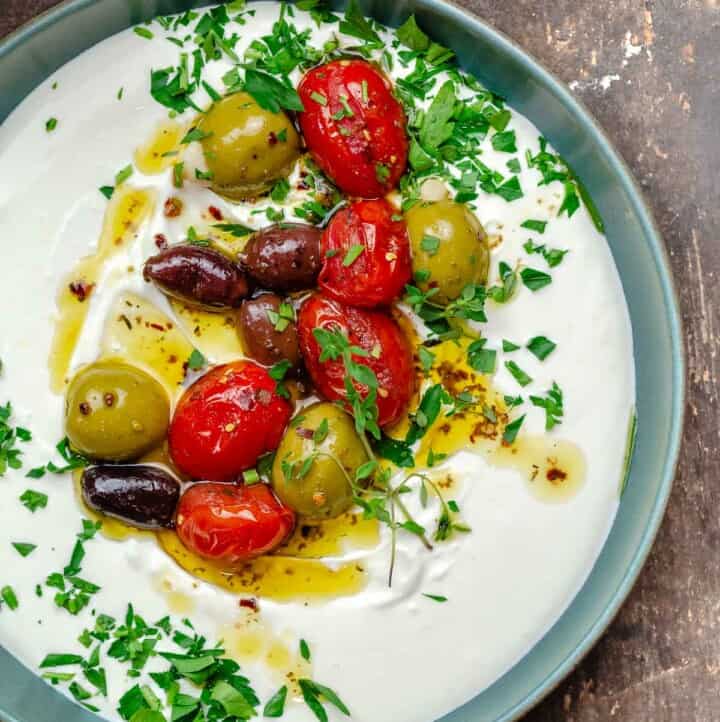
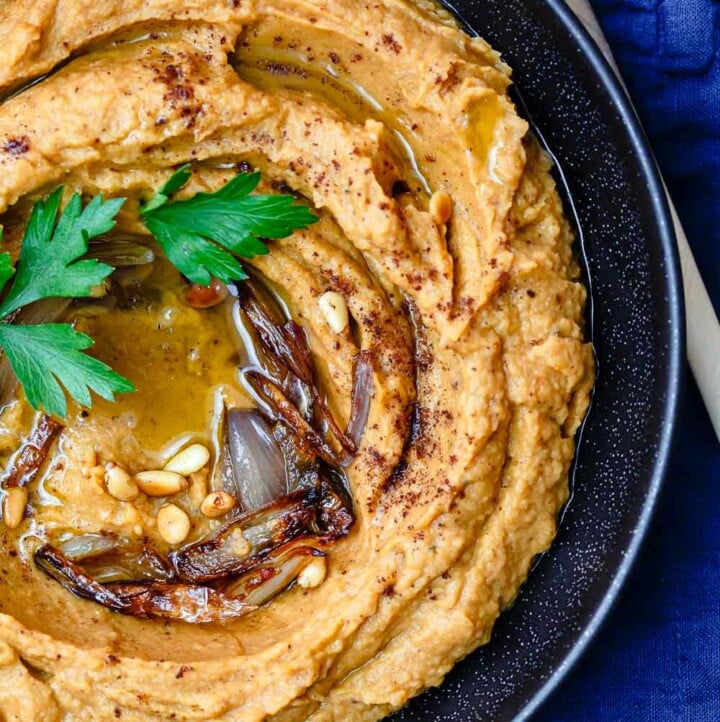
* This post has been recently updated with new information and media for readers' benefit. The post Batata Harra: Middle Eastern Spicy Potatoes appeared first on The Mediterranean Dish. via The Mediterranean Dish https://www.themediterraneandish.com/middle-eastern-spicy-potato-salad-recipe-batata-harra/ Quick and easy layered hummus dip is perfect for a simple dinner or appetizer. Creamy hummus is topped with spiced beef, fresh vegetables, and toasted pine nuts. 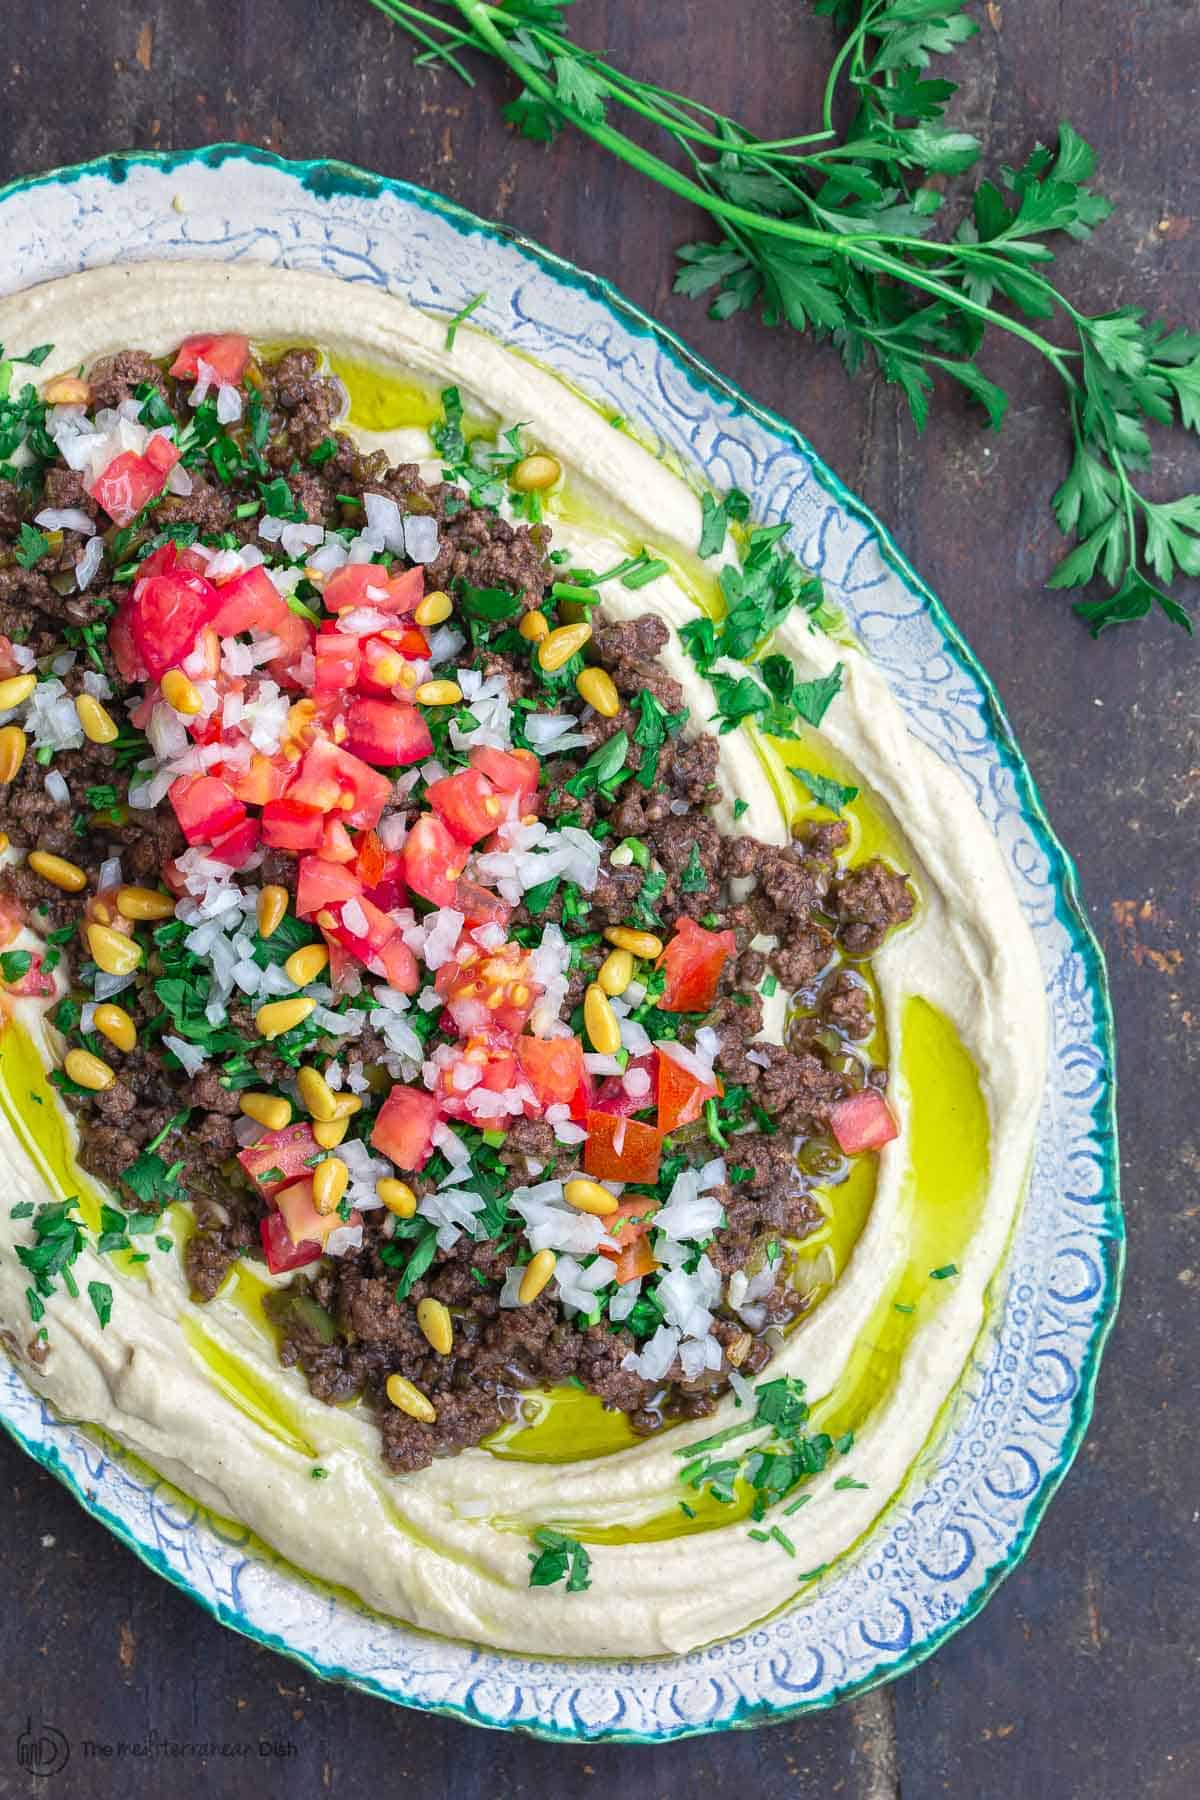 Easy layered dip!I’m a happy camper with nothing more than a bowl of homemade hummus dip, some crunchy vegetables and pita chips, but sometimes I want to dress up my classic chickpea spread and turn it into dinner. The best way to do that is to turn hummus into a layered hummus dip, essentially using it as a bed to carry some delicious toppings. Layered hummus dip is easy, utterly delicious and looks great on your table. Start with a layer of hummus and a generous drizzle of extra virgin olive oil followed by a layer of ground beef seasoned with sumac, cinnamon and allspice. Top it off with diced tomatoes, chopped onions, fresh parsley, and toasted pine nuts. The flavor and texture combinations of cool, creamy, warming spices, and fresh vegetables is like a party for your tastebuds. Trust me, you’re gonna love it! Make this for a light dinner or serve as an appetizer to share with friends! Your family will think you ordered take out from your favorite, mom-n-pop Lebanese restaurant.
In this post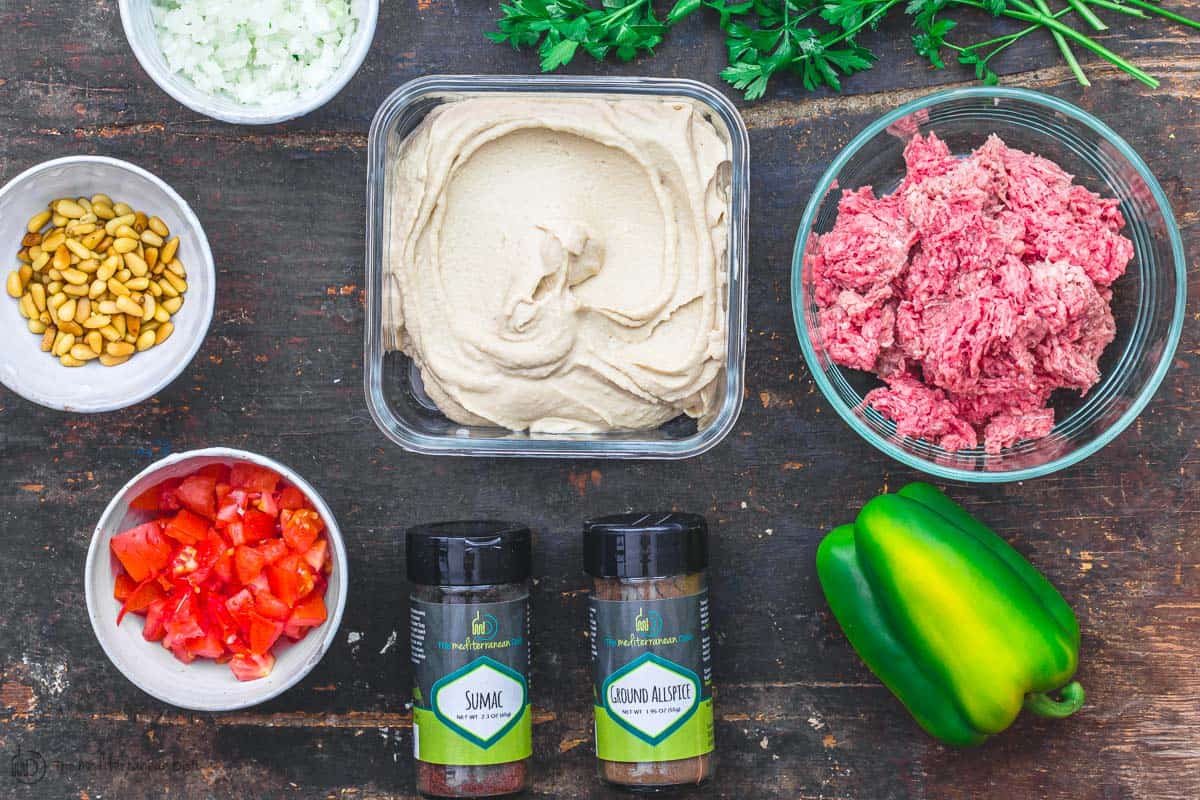 Layered hummus dip ingredientsThis 3-layer layered dip is made up of 3 main parts: hummus, ground beef seasoned with allspice, cinnamon, sumac, garlic and onion, then loaded with fresh toppings like diced tomatoes, parsley, and toasted pine nuts. It’s filling, protein-packed, and delicious. HummusThis recipe begins with hummus. You can make it ahead of time using my tried-n-true hummus recipe. If you don't have the time to make it in advance, don't sweat it — you can use your favorite store-bought hummus. Just make sure it's plain hummus so you don’t have any competing flavors. Spiced lamb or beef mixtureThe spiced meat is the middle layer of this layered dip, and it comes together with just a few aromatics and spices. Here’s what you’ll need to make it:
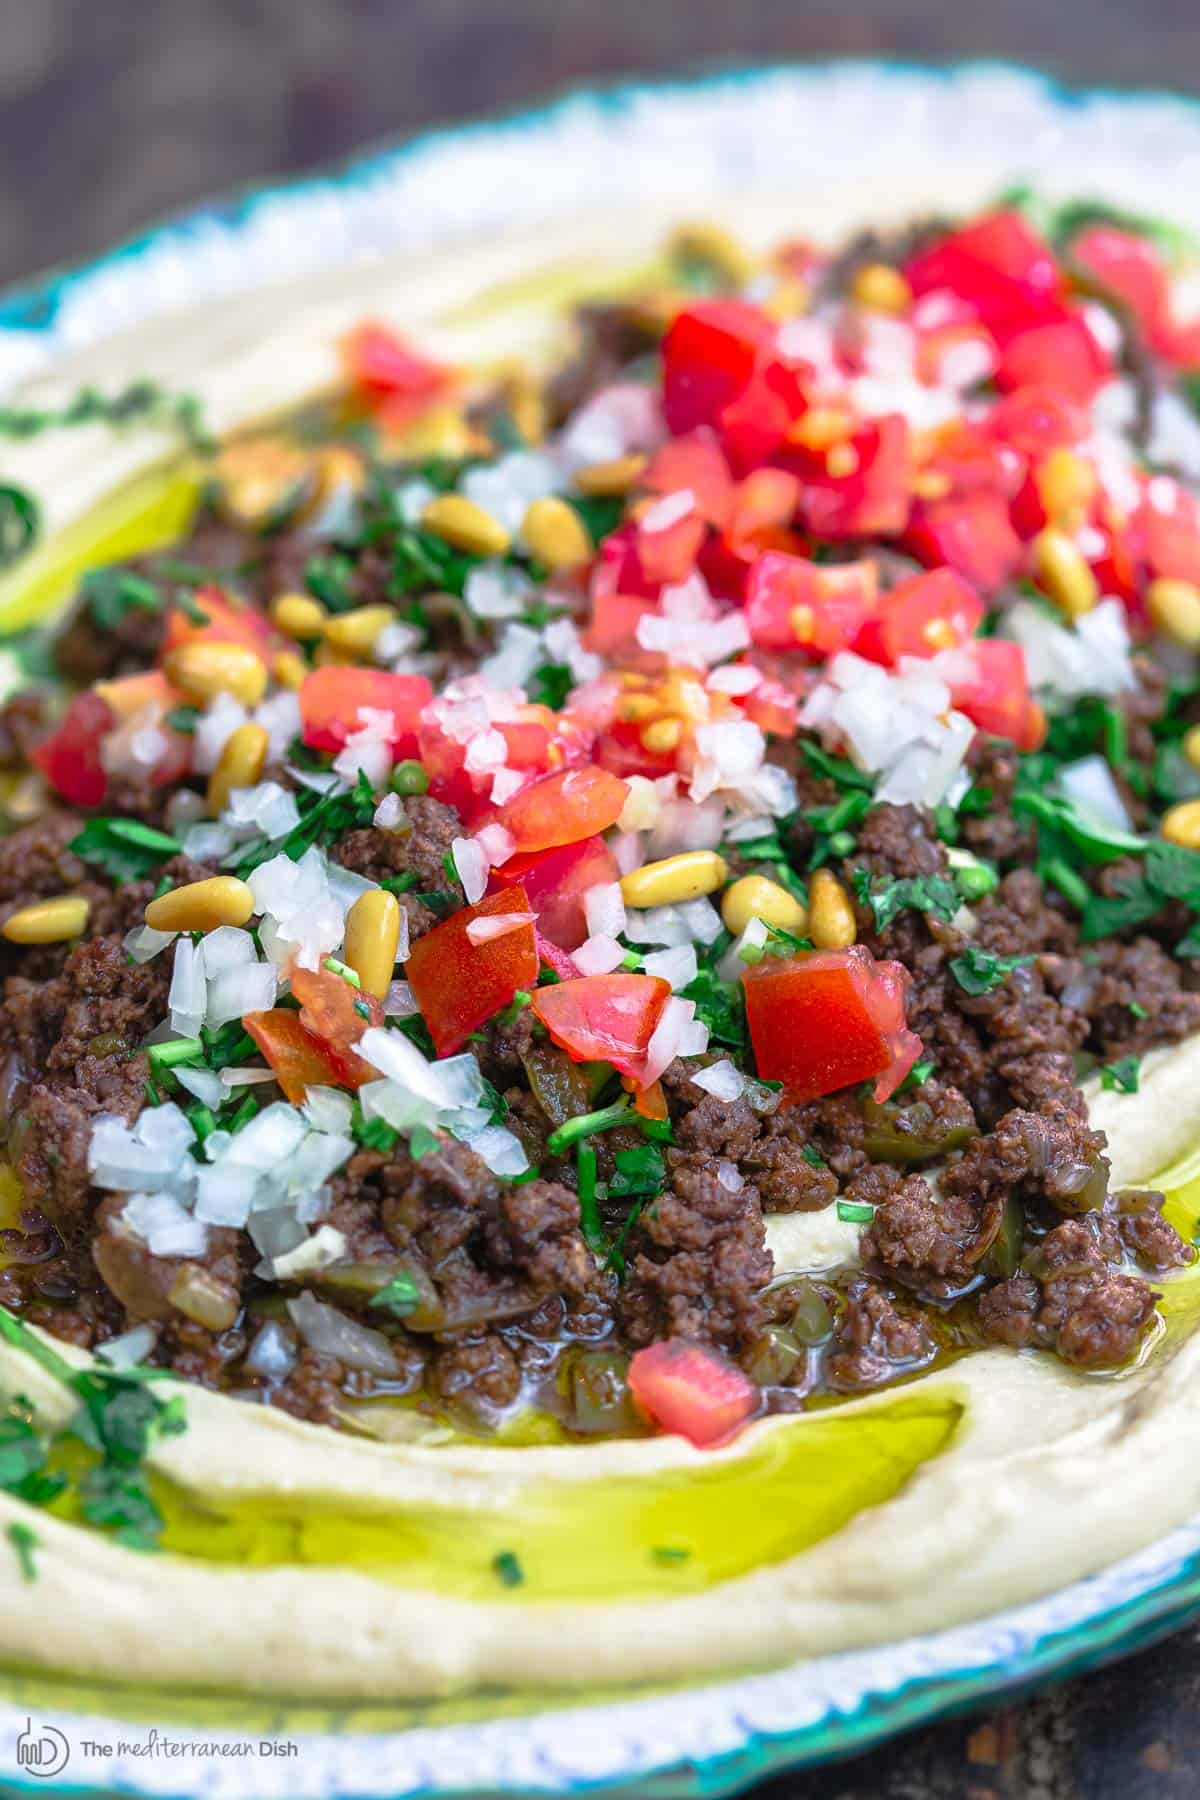
Fresh toppingsThe sky's the limit with the fresh toppings! I like to add color, texture, and some freshness with the following:
But you can also use fresh chopped bell peppers, cucumbers, shishito peppers, different herbs like cilantro and dill, kalamata olives, or toasted sesame seeds and slivered almonds. This recipe is easy to play with and make your own. How to make itPreparing this layered hummus dip is as easy as cooking the meat mixture, spooning it onto some hummus, and topping that with some fresh vegetables, herbs, and toasted nuts or seeds. Here’s how to make it:
 Make ahead tipsIf you want to make the hummus from scratch, feel free to make it a day or so in advance and store it in an airtight container in the refrigerator. You can also cook the meat ahead of time and store it similarly in a separate container. What to serve with this Lebanese-style layer dipObviously, I'm all about some warm pita pockets, pita chips, or your favorite cracker to serve along. To be honest, you don’t need much else! If you’re serving a crowd, and want to fill out the meal a little more, these easy roasted tomatoes are a great addition to serve over toasts. I also love this Turkish-style fried eggplant as another option. If you’re looking for side salad ideas, I’ve got you covered:
 Swaps and substitutions
How to store leftoversStore leftover layered hummus dip in an airtight container in the refrigerator for up to 4 days. Other delicious creamy dips to tryBrowse all Mediterranean recipes.  Best Layered Hummus Dip Recipe
This layered hummus dip makes a beautiful appetizer or light dinner in under 30 minutes! Top creamy hummus with a layer of perfectly spiced meat, and finish it off with fresh tomatoes, a sprinkle of parsley, red onion, and toasted pine nuts. You don't need much more than some warm pita or crunchy pita chips to enjoy this layered dip!
Servings 6 servings
Calories 246.1kcal
IngredientsFor Hummus:
For Spiced Beef:
Fresh toppings
Instructions
VideoNotes
Nutrition
Calories: 246.1kcal | Carbohydrates: 16.1g | Protein: 15.1g | Fat: 14.6g | Saturated Fat: 2.9g | Polyunsaturated Fat: 4.6g | Monounsaturated Fat: 5.7g | Trans Fat: 0.2g | Cholesterol: 24.6mg | Sodium: 413.1mg | Potassium: 488.3mg | Fiber: 5.9g | Sugar: 2.2g | Vitamin A: 659IU | Vitamin C: 19.3mg | Calcium: 54.9mg | Iron: 3.6mg
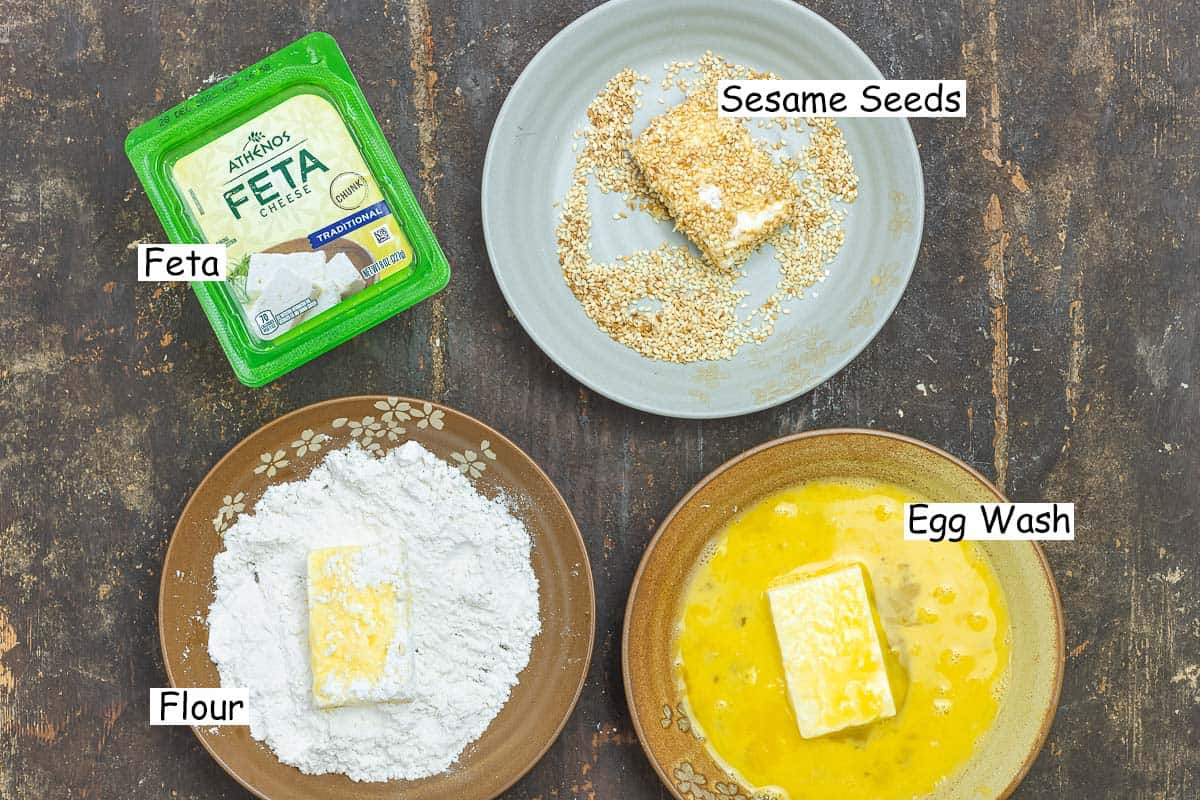
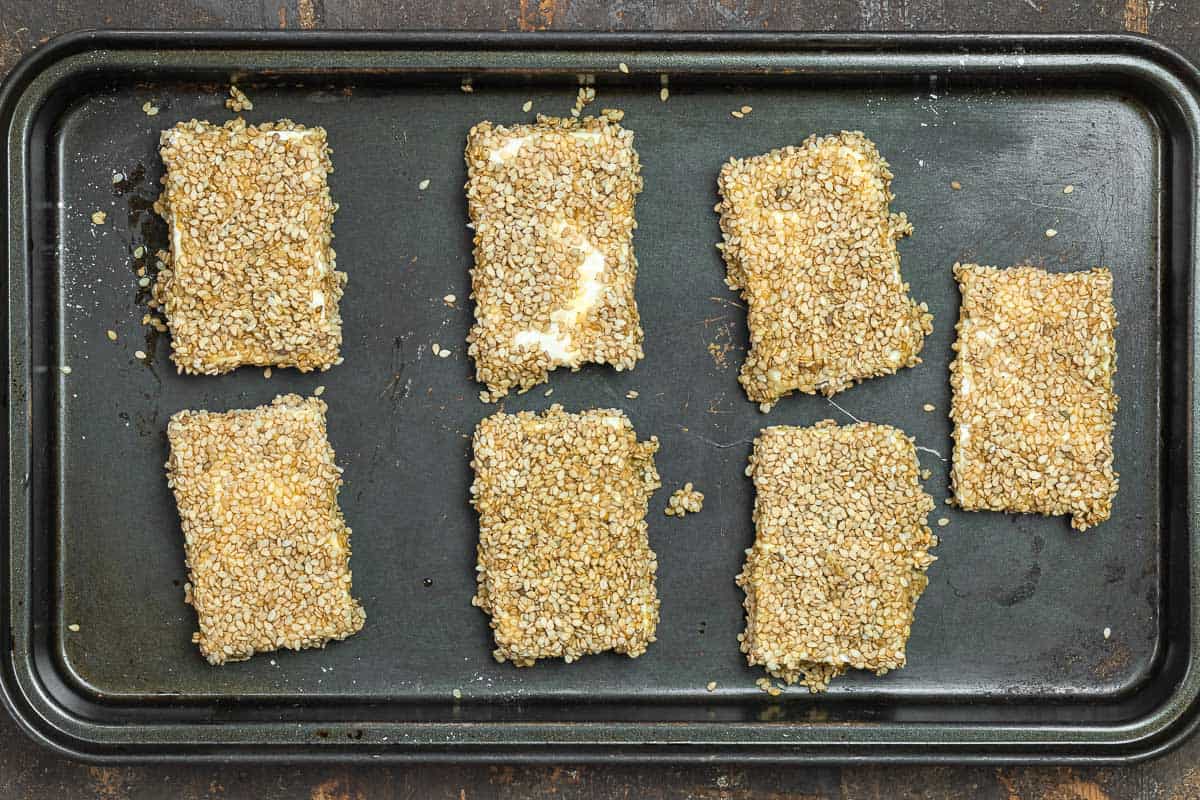
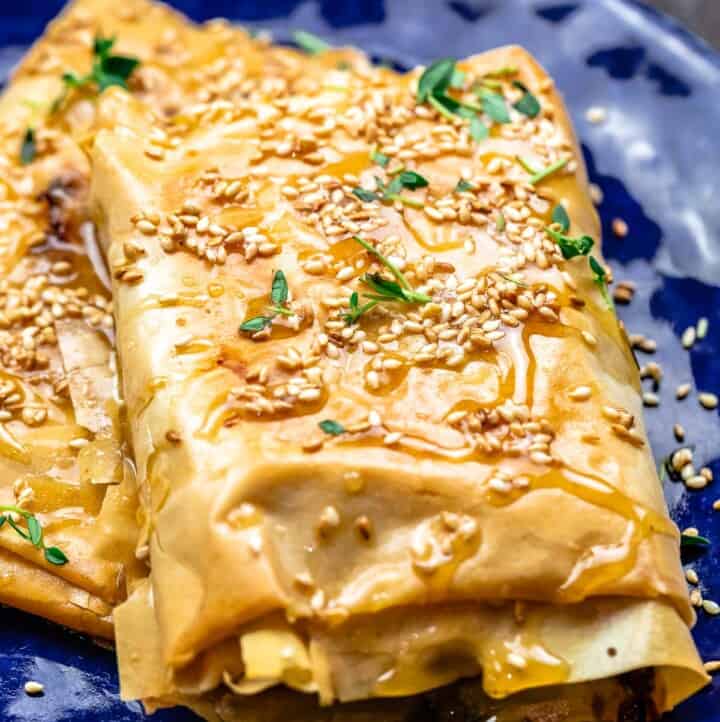
* This post has been recently updated with new information and media for readers' benefit. The post Layered Hummus Dip Recipe appeared first on The Mediterranean Dish. via The Mediterranean Dish https://www.themediterraneandish.com/layered-hummus-dip-recipe/ If you haven’t tried fried feta yet, you are in for a special treat! Olive oil fried feta with a crispy sesame crust and a drizzle of good honey makes a decadent appetizer in about 10 minutes! This post is sponsored by Athenos; I used their creamy traditional chunk feta cheese in this recipe. All opinions are my own. 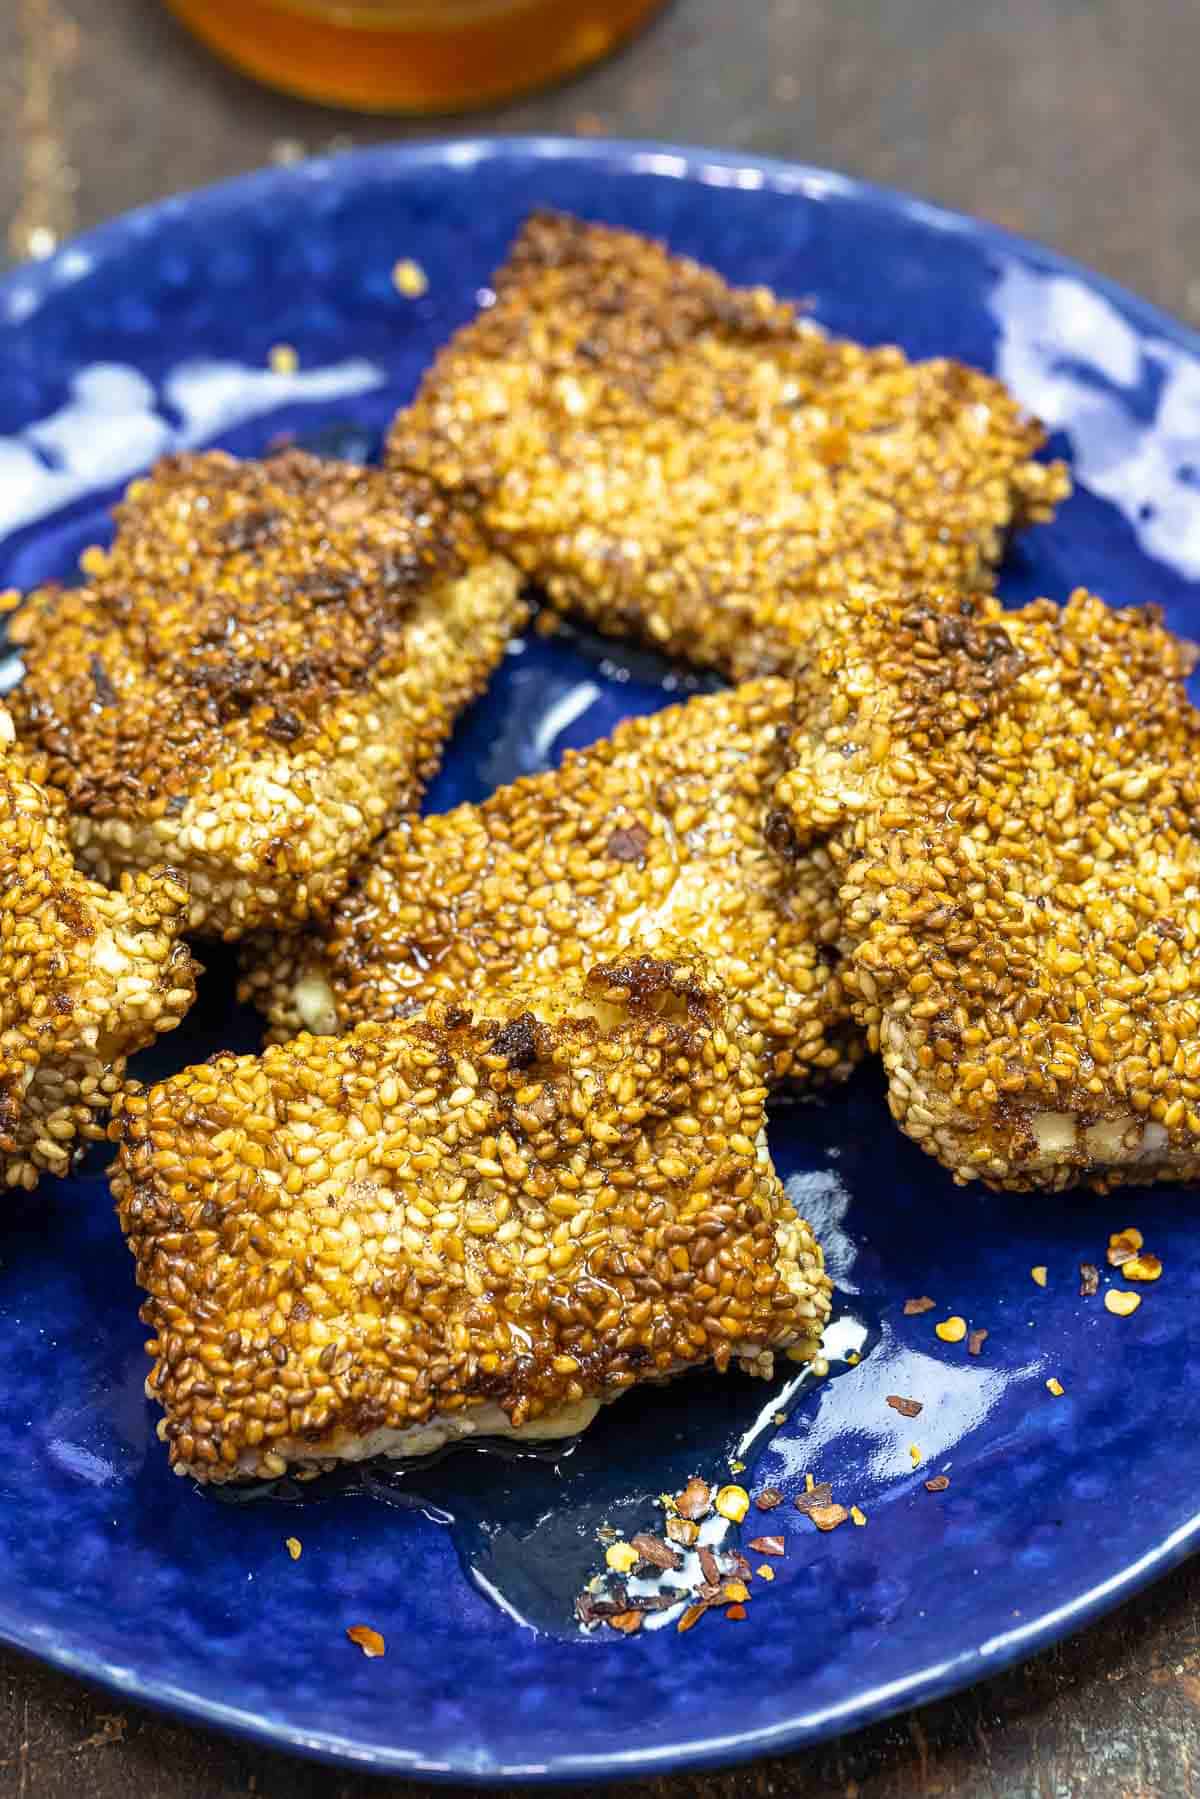 I always have a block of good feta cheese in my fridge. It's my secret ingredient to elevate a salad, to crumble over tomatoes or saucy shrimp, or even to slice up and bake with salmon and vegetables for dinner (yes, it’s a great sheet-pan situation to try soon!). But feta can easily be the star of the show! A little heat transforms it into the ultimate appetizer — soft, creamy, and just a little indulgent. You’ve seen it in my Greek baked feta, and today, we’re going for another decadent show-stopper: fried feta! 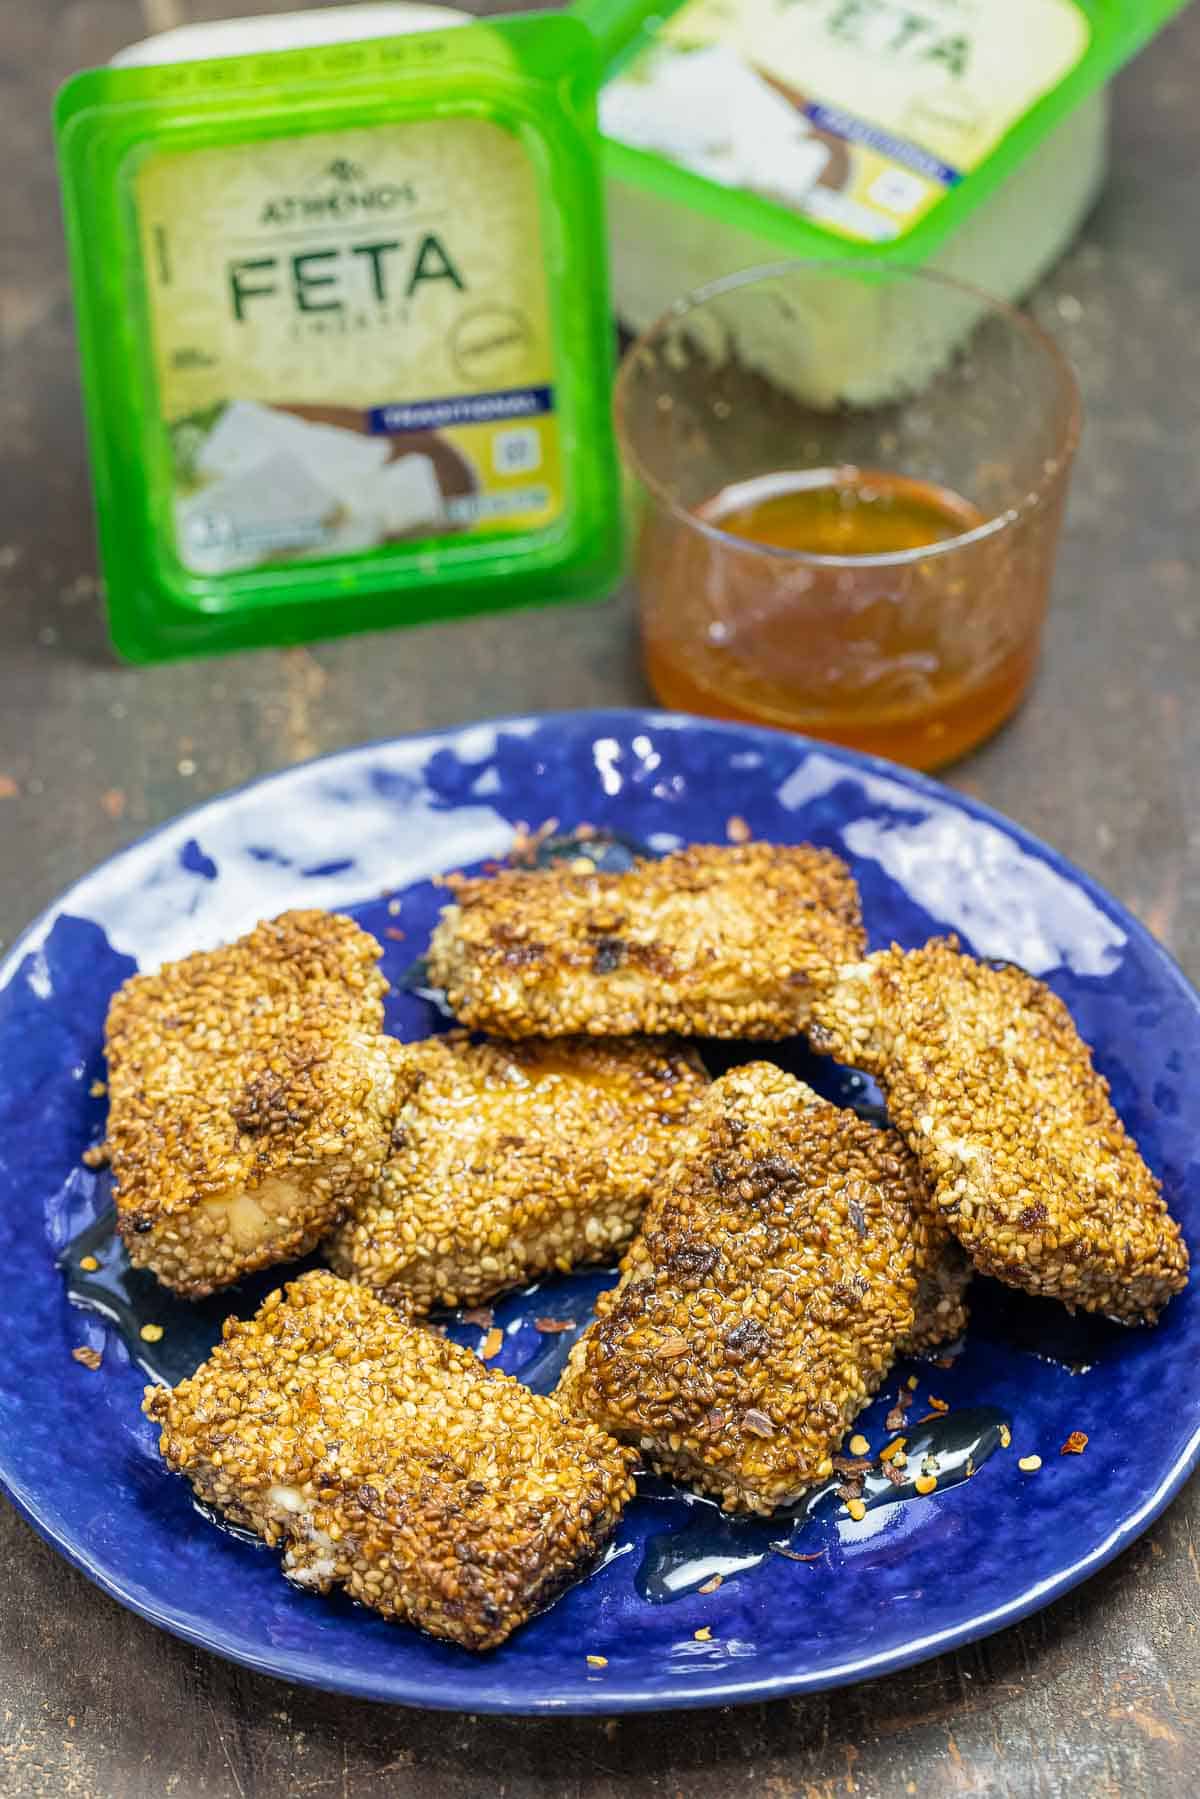 Pan fried feta cheese ingredientsFried feta or feta saganaki with honey and sesame uses 5 simple ingredients: feta, flour, eggs, sesame seeds, and honey (plus a little olive oil for quick frying). Think of this recipe as having three simple components: The fetaIn this recipe, you’ll need a quality block of tangy, creamy feta that you can cut into without having it crumble all over the place. That’s why I am using Athenos traditional chunk feta cheese, which you can easily find at a store near you. Plus, I love that Athenos feta is made with fresh, simple ingredients (it’s been made this same way for over 20 years!) In this recipe, you’ll start by slicing your block of feta into ½-inch thick slices before coating them with a delicious sesame crust! The sesame crustBefore you quickly pan fry the feta slices in olive oil, you’ll give them a quick coating in some flour, eggs, and toasted sesame seeds. And once fried, this coating will turn into the perfect crust–crispy and slightly nutty, the perfect complement to the creamy warm feta! Warmed honeyTo finish this delectable fried feta appetizer, I like to drizzle a little bit of good warmed honey all over (just warm the honey in a little pan so it’s perfectly runny). I’m a big fan of the sweet and salty combo here! And if you’re in the mood, you can sprinkle a little red pepper flakes too (totally optional). 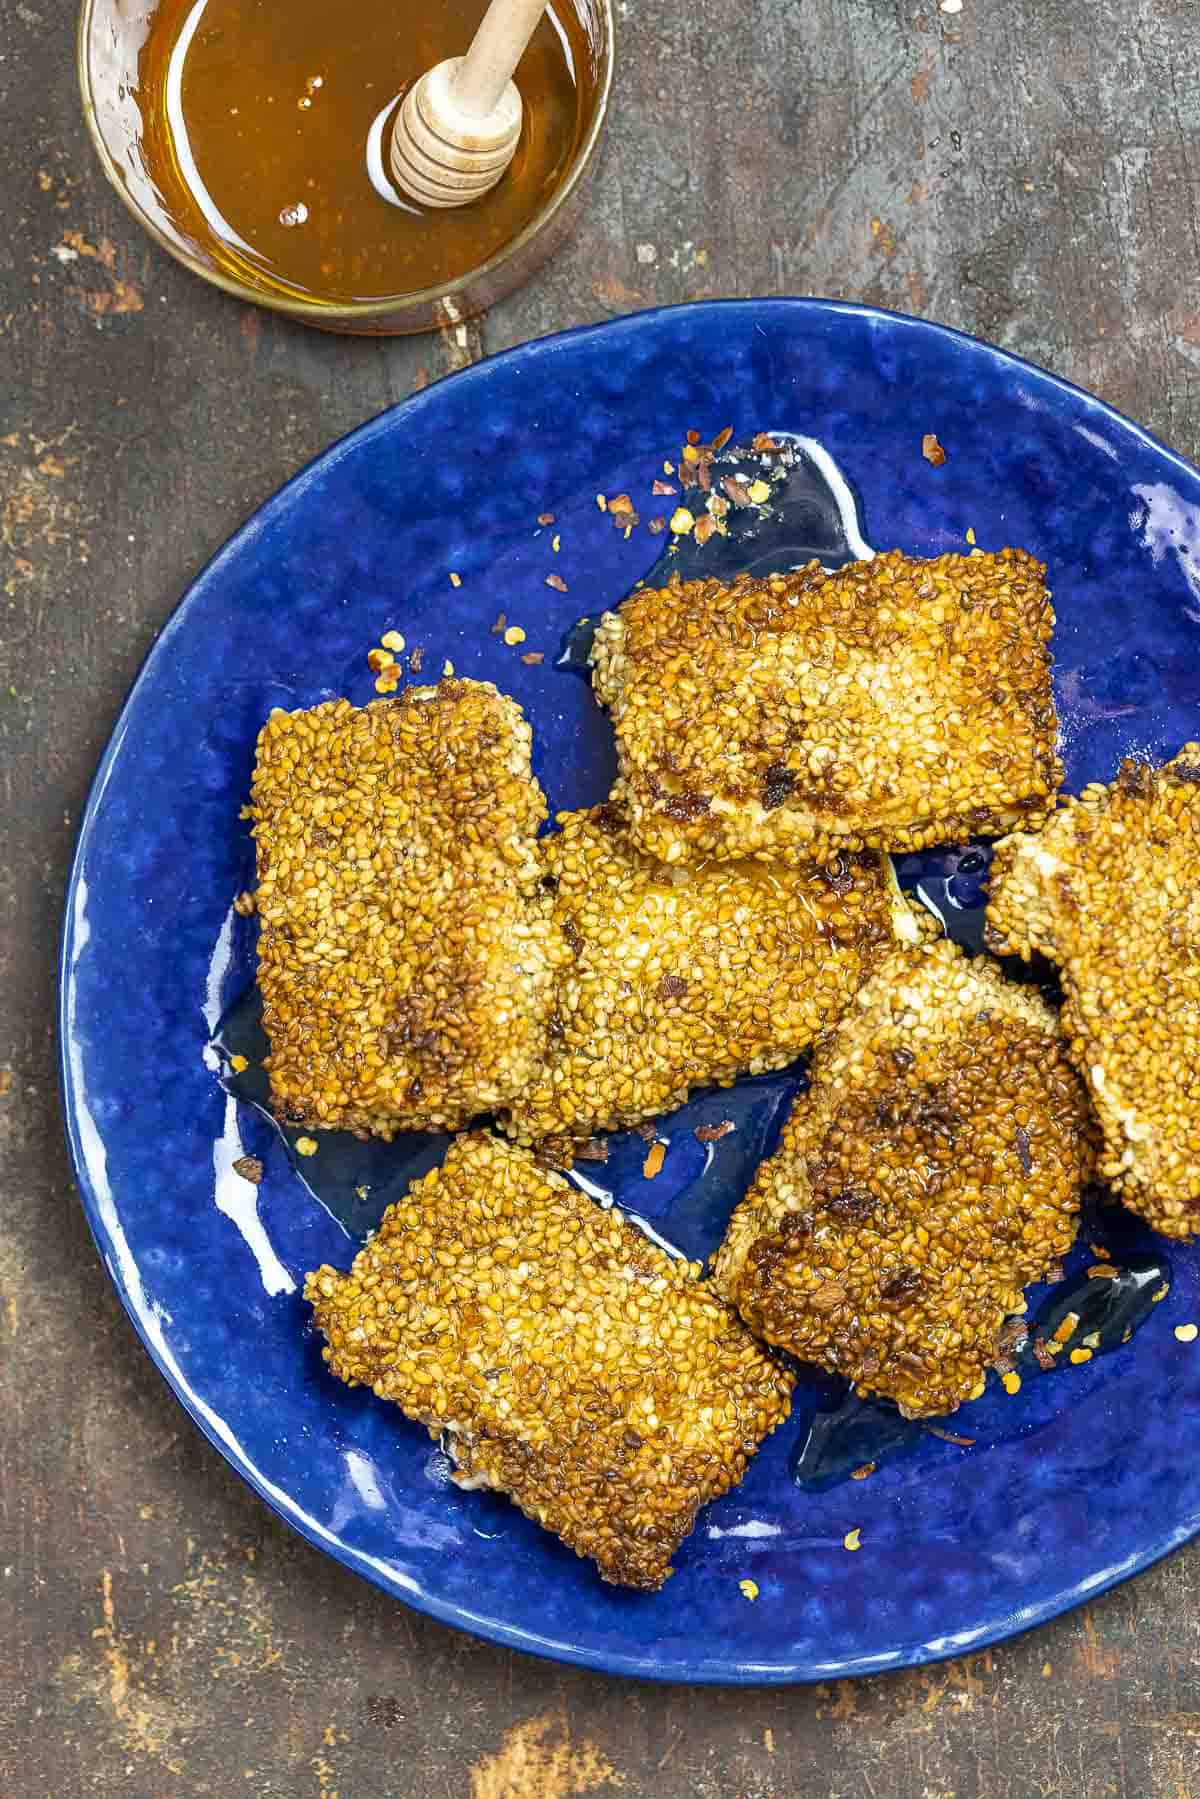 How to fry feta cheeseFrom start to finish, you can have this easy but elegant feta appetizer ready in 10 minutes or less. For my visual friends, here’s how you make fried feta with honey (printer-friendly recipe below):
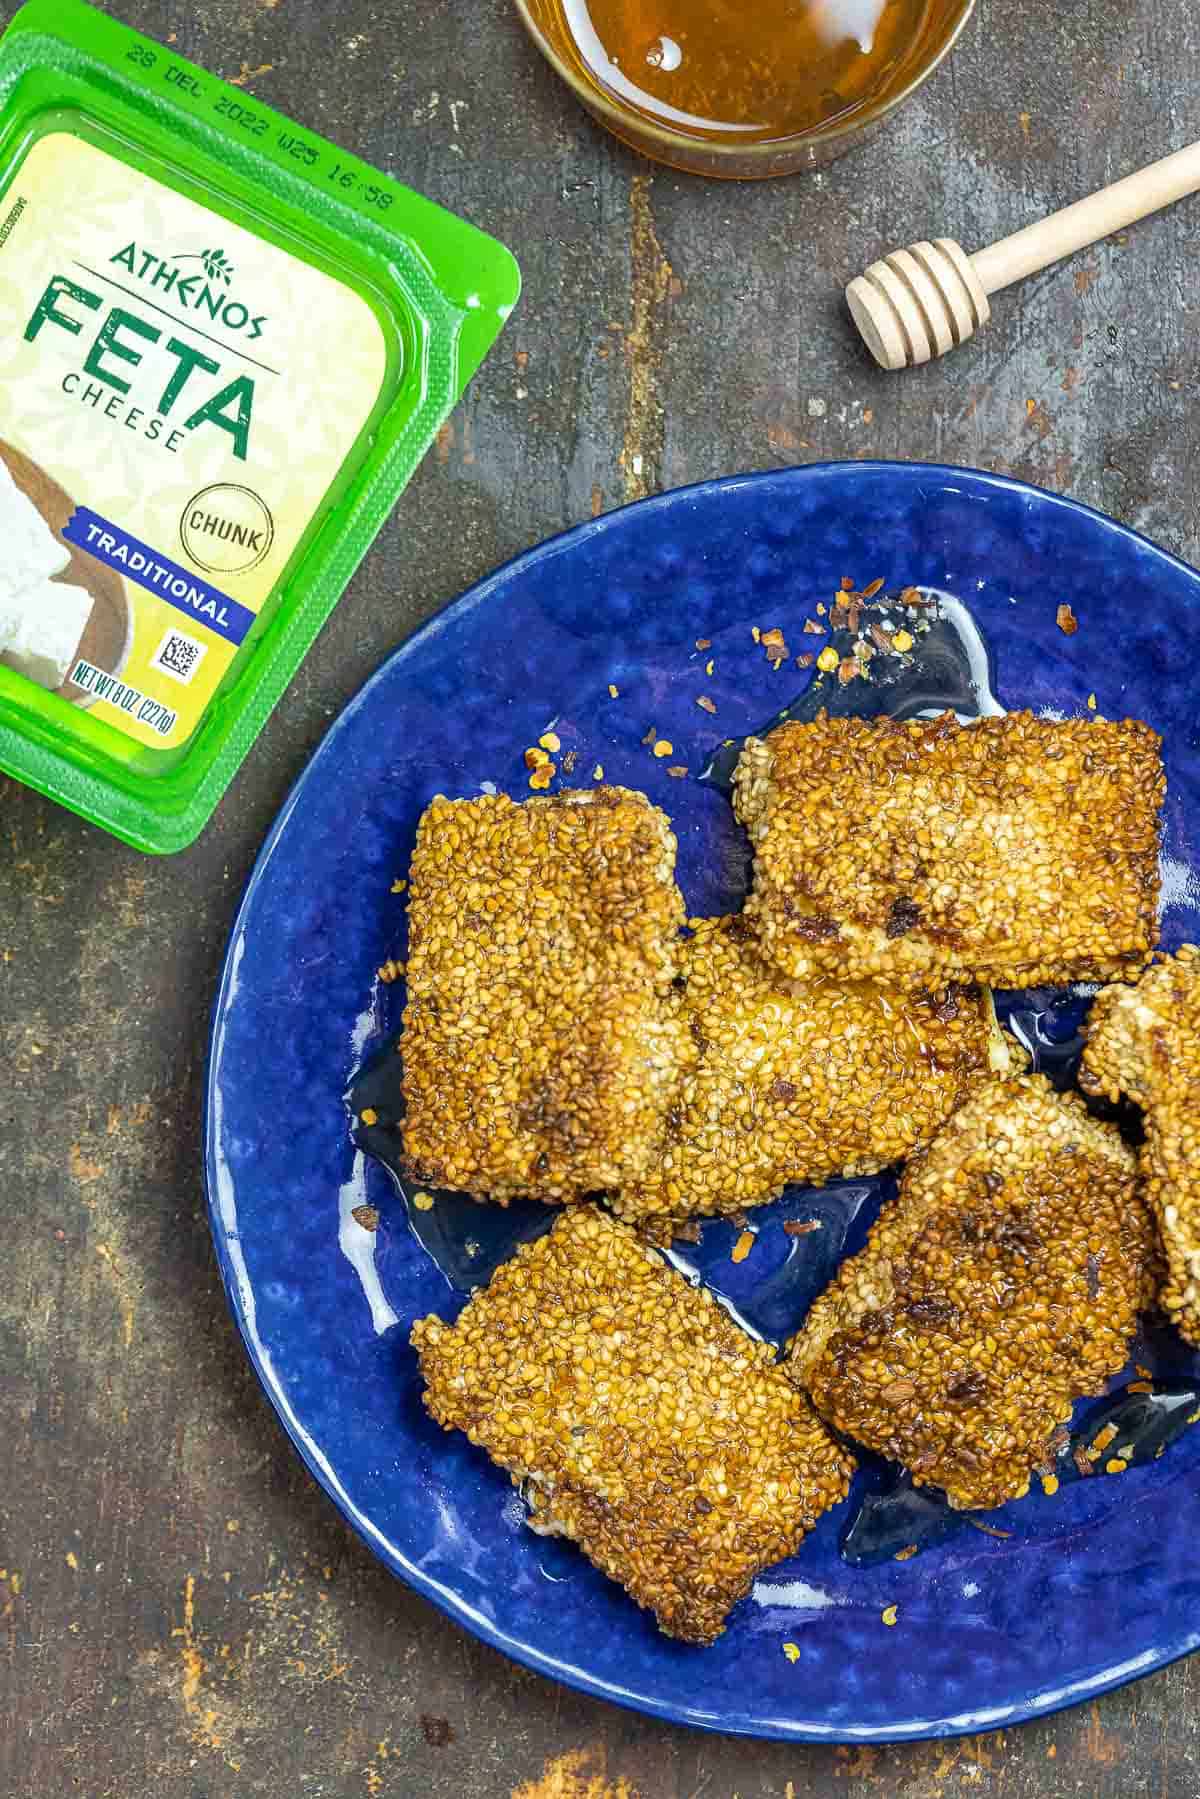 Serving ideasBe sure to serve this decadent feta appetizer while the feta is still warm; it’s the best! And I will say, a little ouzo cocktail on the side really completes the little Greek affair. Nothing much is needed otherwise, but if you like, you could serve this fried cheese with pita chips or crusty bread, or even as part of a large mezze platter. How to store leftoversFried feta is best enjoyed while still warm; we’ve never had a hard time finishing it, though. If you, for some reason, end up with leftovers, store them in an airtight container in the refrigerator for up to 3 days. You can then enjoy it at room temperature. More recipes with feta cheeseBrowse all Mediterranean recipes.  Fried Feta with Honey and Sesame (Feta Saganaki)
You have to try this decadent fried feta appetizer that takes just 10 minutes to make! Feta cheese with a sesame seed crust is lightly pan-fried in extra virgin olive oil before being drizzled with warmed honey. Serve it warm with an ouzo cocktail and pita chips, or as part of a larger mezze spread.
Servings 8 Slices
Calories 116.1kcal
Ingredients
Instructions
VideoNotes
Nutrition
Calories: 116.1kcal | Carbohydrates: 14g | Protein: 3.5g | Fat: 5.8g | Saturated Fat: 1g | Polyunsaturated Fat: 2.3g | Monounsaturated Fat: 2.2g | Cholesterol: 41mg | Sodium: 18.3mg | Potassium: 68.7mg | Fiber: 1.2g | Vitamin A: 60.2IU | Vitamin C: 0.1mg | Calcium: 98.8mg | Iron: 1.8mg
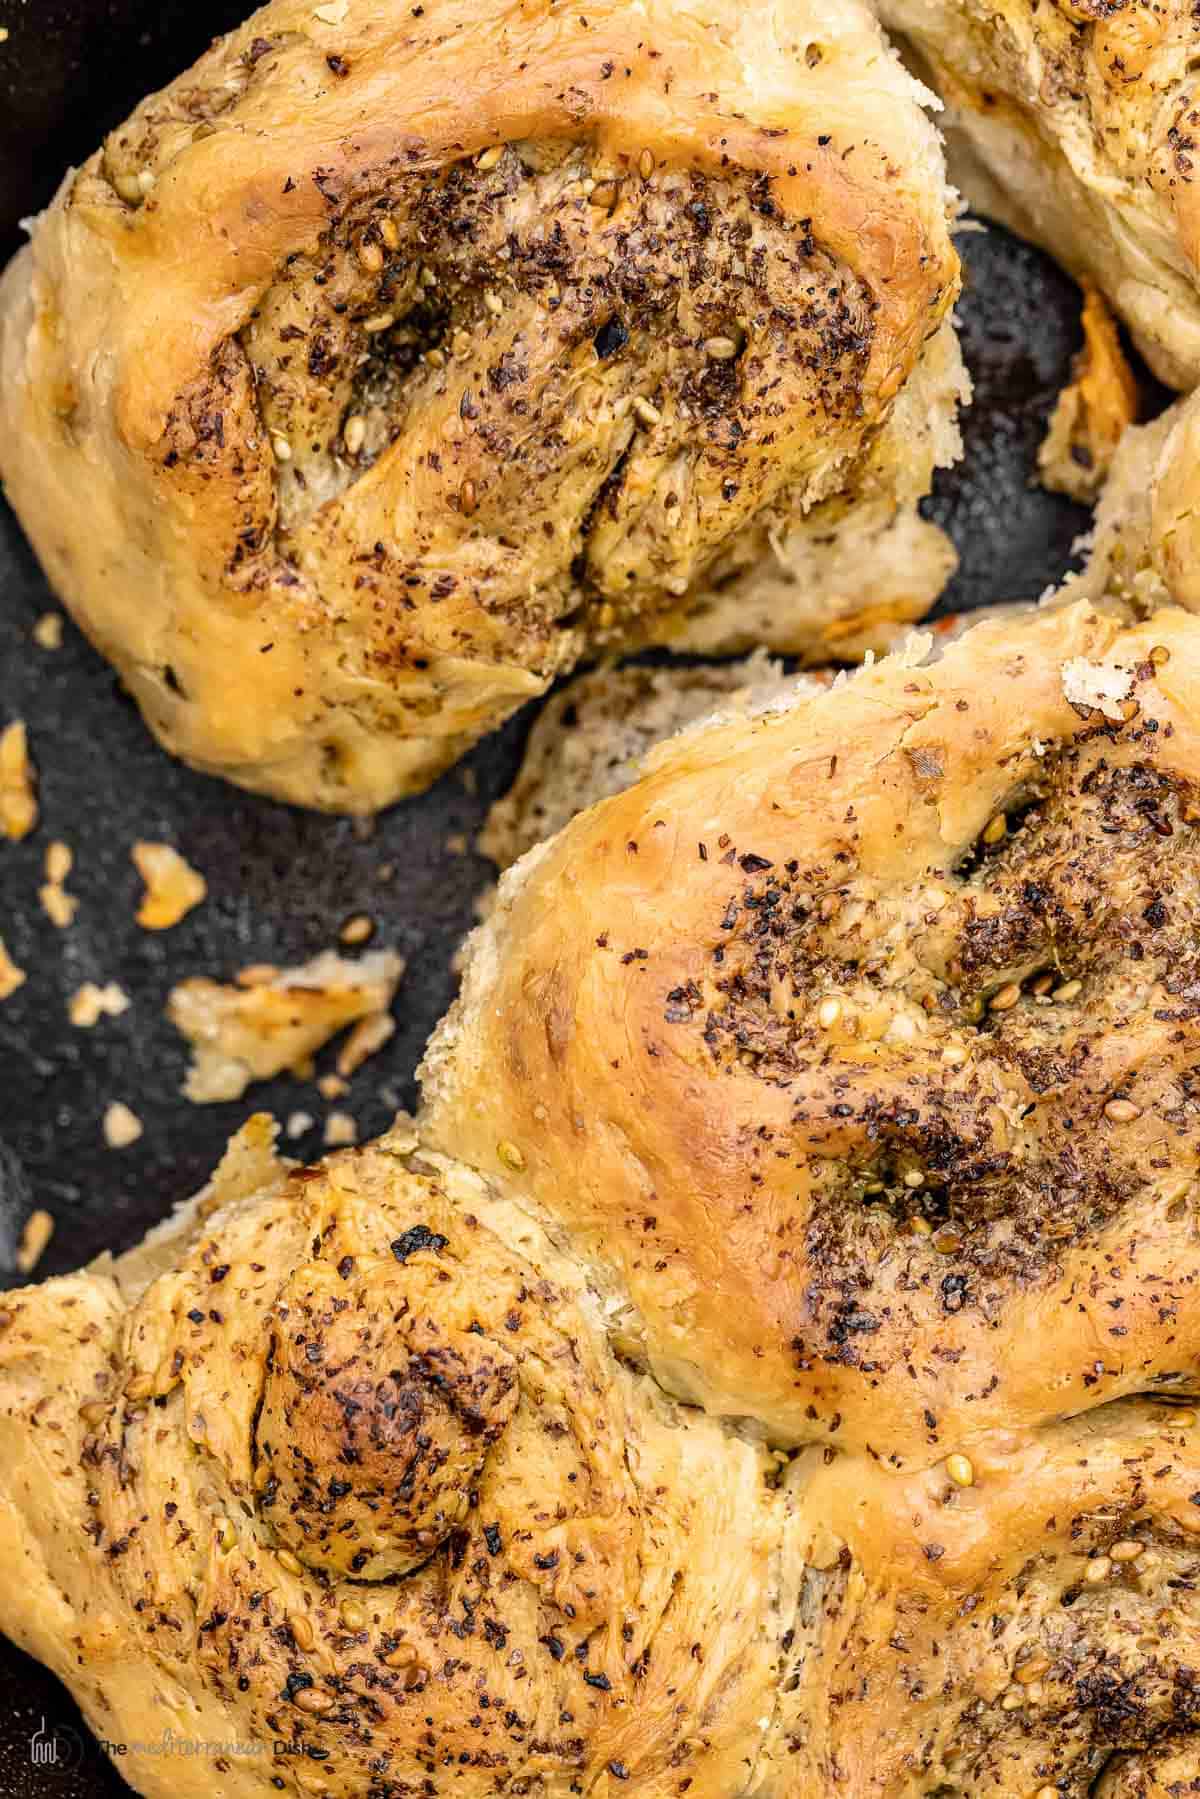
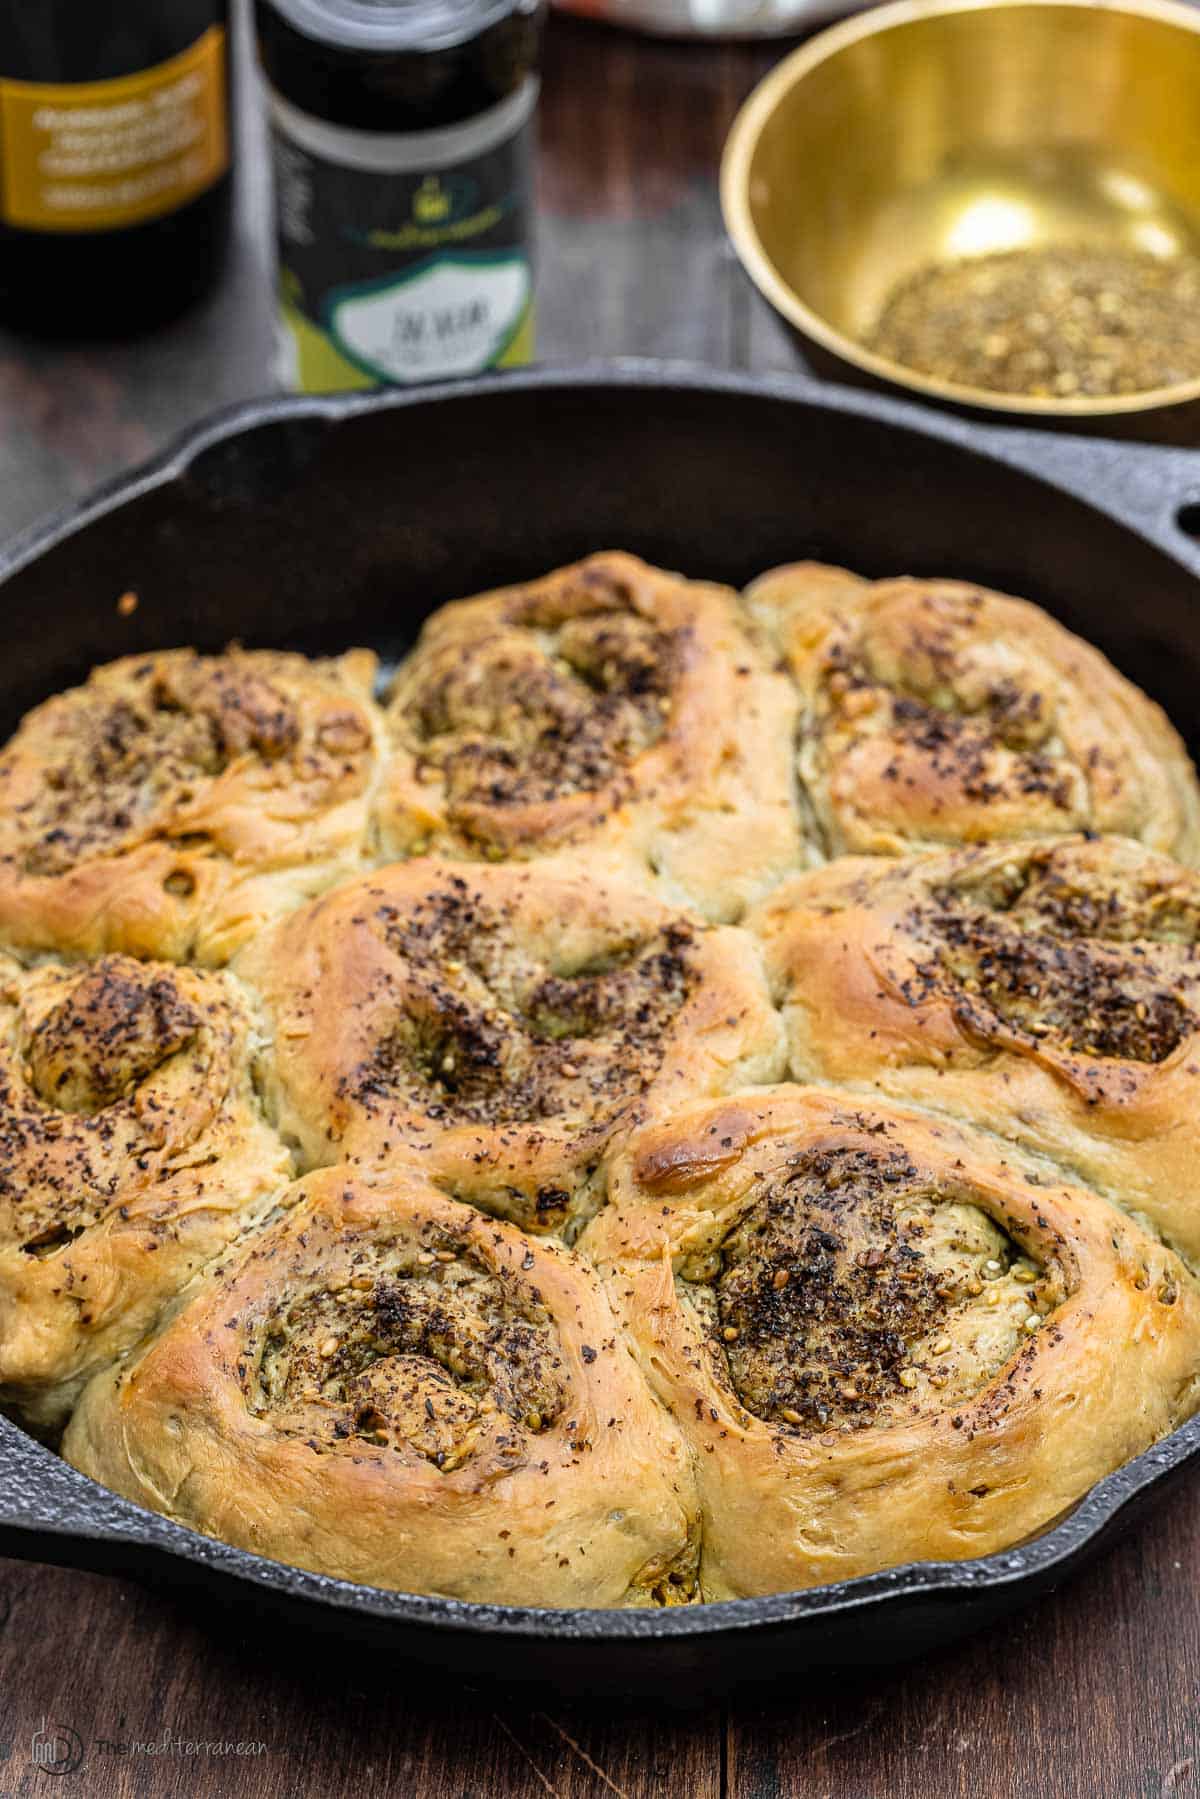
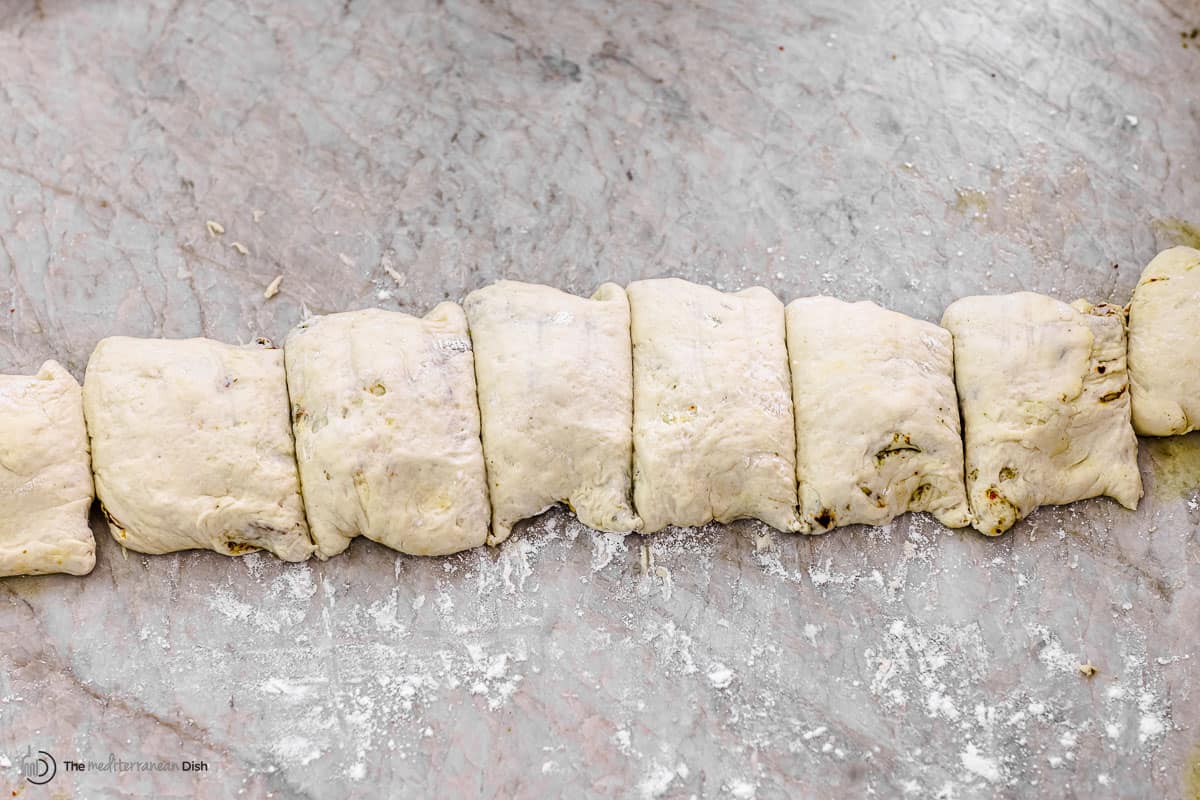
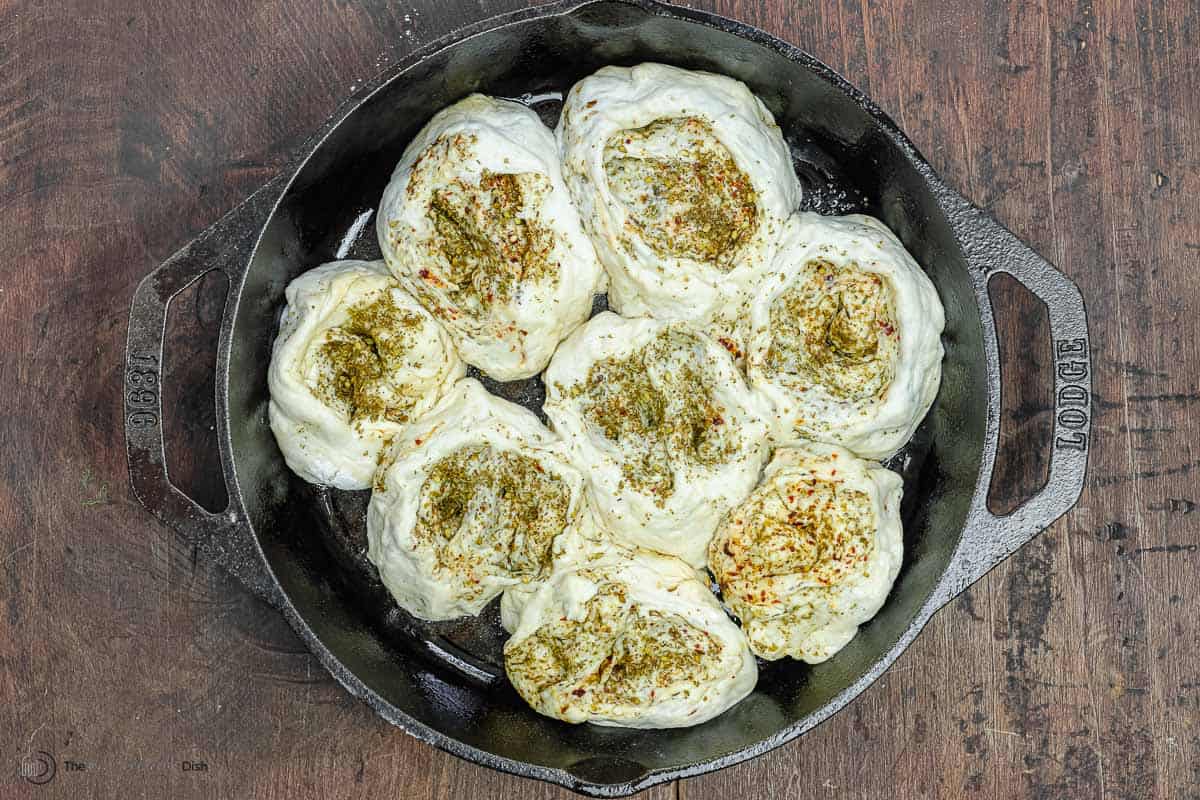
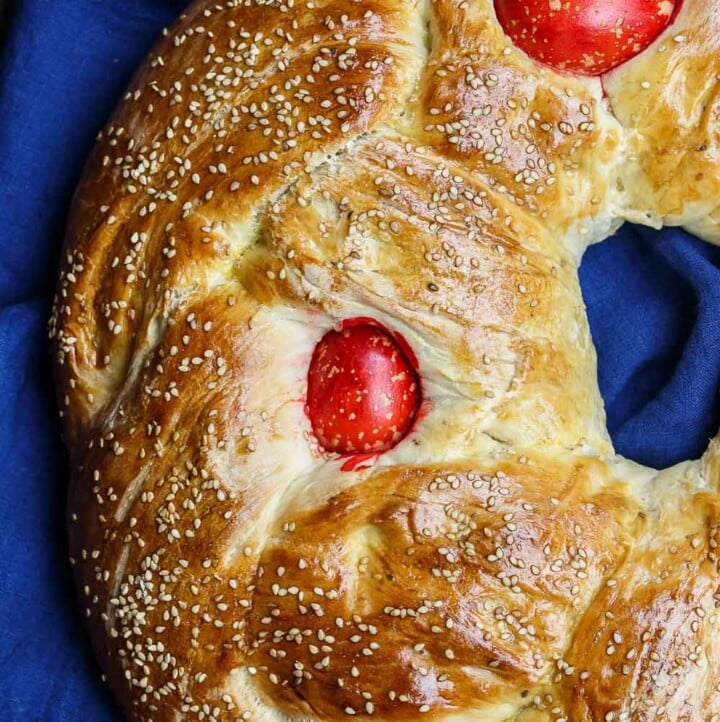
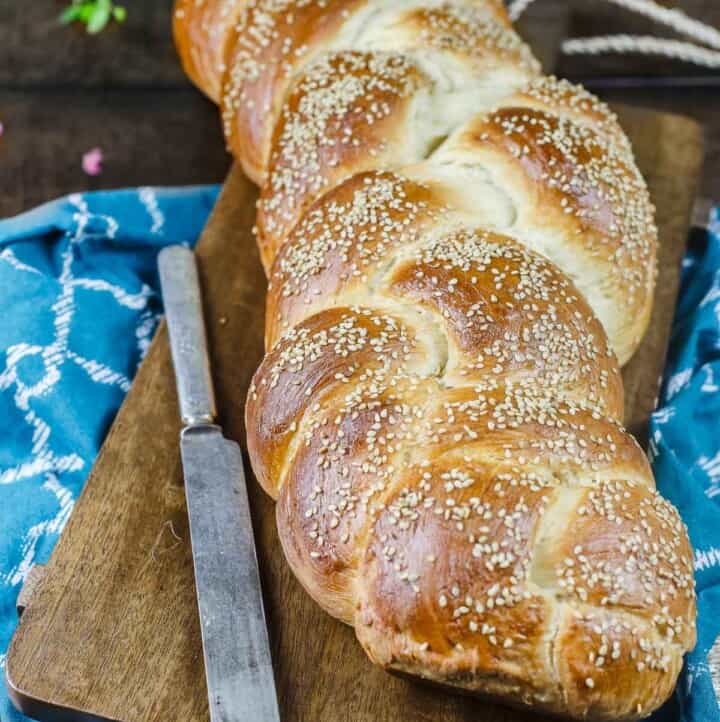
The post Fried Feta with Honey and Sesame (Feta Saganaki) appeared first on The Mediterranean Dish. via The Mediterranean Dish https://www.themediterraneandish.com/fried-feta-cheese/ You’ve never had bread rolls like this! Za’atar bread rolls baked in a cast iron skillet are fluffy, airy, and addictively soft. Enjoy them as a savory breakfast roll, in the evening with soup or as an afternoon snack! This recipe is from my friend Georgina Hayden's new cookbook, Nistisima, and I can't wait for you to try it. 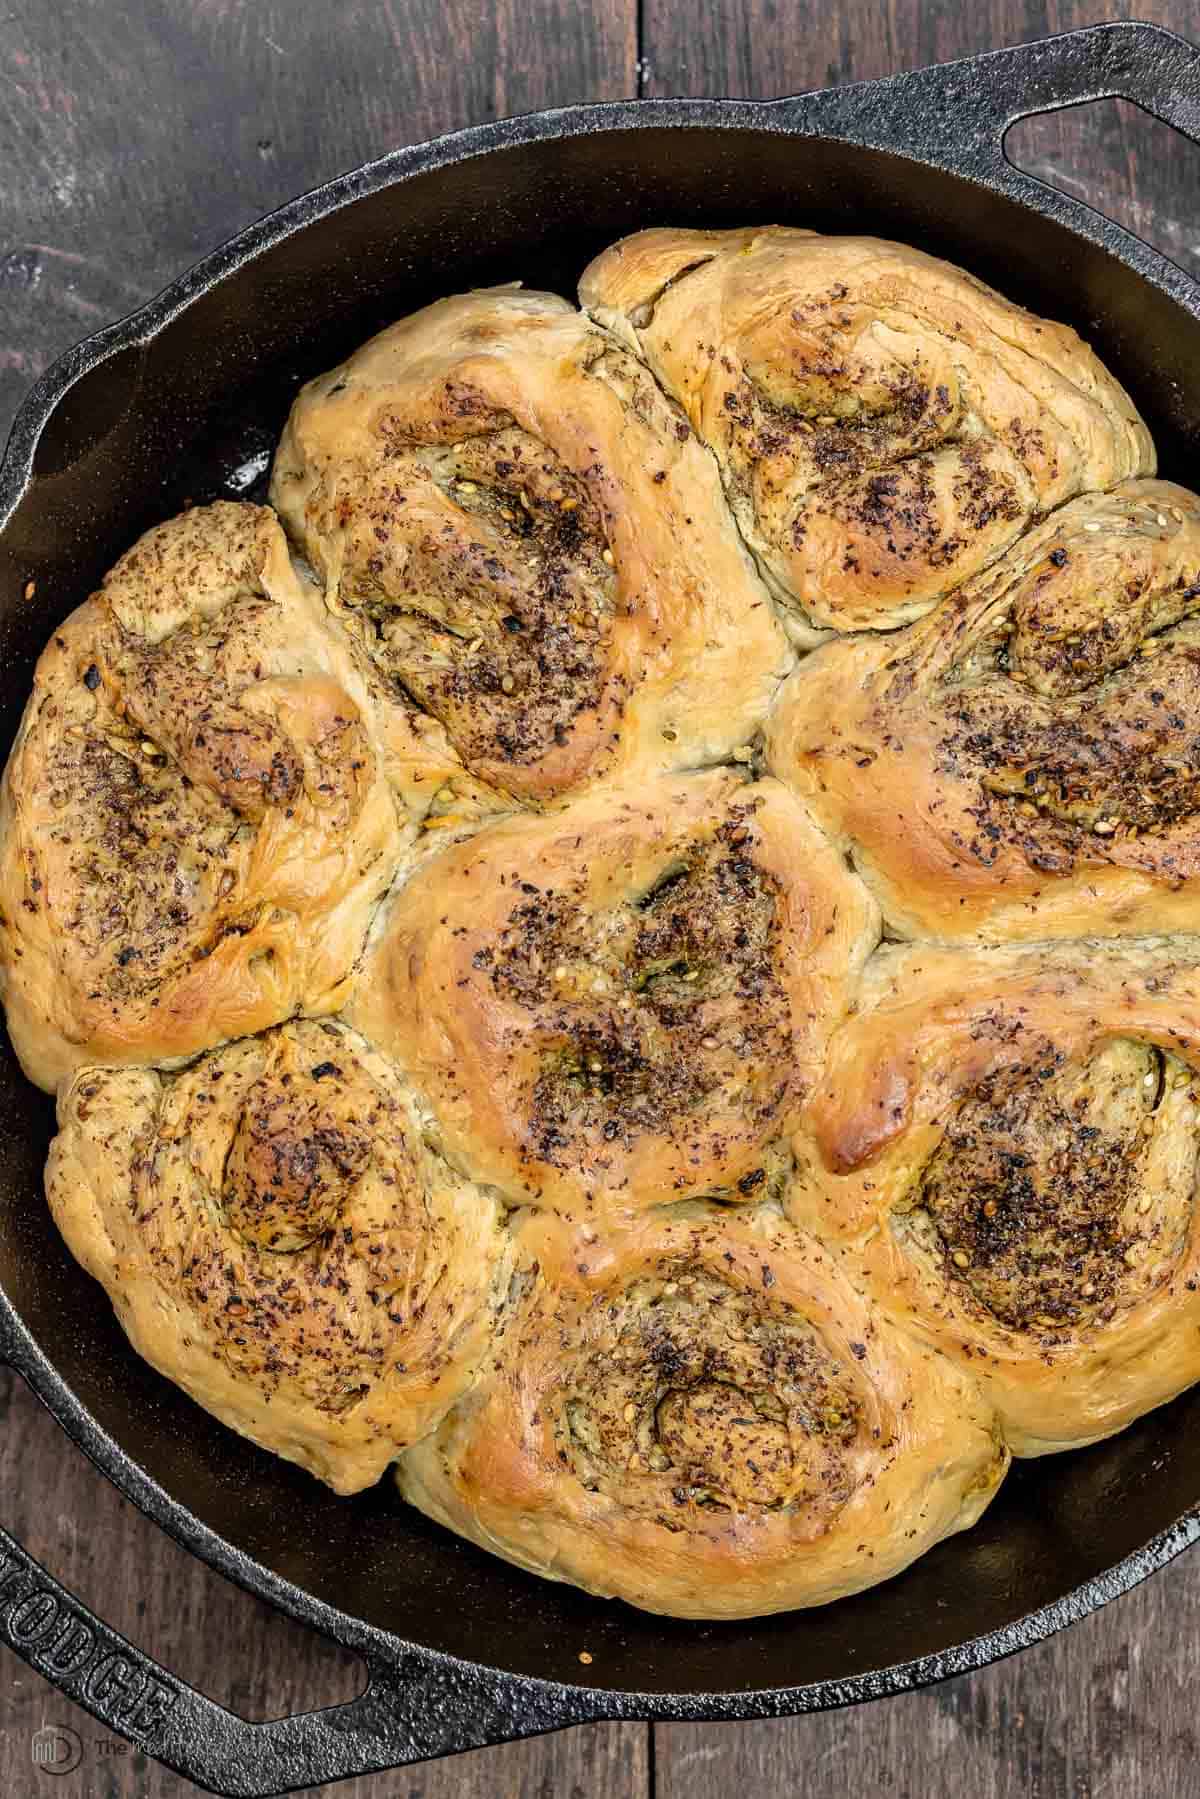 Yeast rolls with za’atar!Take a plain homemade bread roll to the next level with these za’atar bread rolls from my friend Georgina Hayden's new cookbook, Nistisima, which is filled with delicious vegan recipes! Perfectly pillowy, comforting, and loaded with flavor, these yeast rolls are great as a snack on their own or for breakfast served with whipped labneh, baked eggs, or loaded hummus. They’re sort of like a softer, pull-apart version of za’atar manaqish (za’atar bread). These rolls are so easy! Simply make the dough and let it rise until it has doubled in size. Once it's ready, roll out the dough, sprinkle it with a generous amount of za’atar and a little Aleppo pepper, roll it up into a tight spiral log, then cut it into individual rolls and let it rise again. (If you've ever made cinnamon rolls then you know how to roll and cut za'atar rolls.) Bake the rolls in the oven until golden and the addictive smell of freshly baked bread loaded with spices wafts through the house. Nothing brings people to the table faster than the sent of freshly baked bread rolls. This recipe comes together with little effort, but you do need stick around the house to give the dough time to rise. Save them for a day when you don't have much on your plate and you can enjoy the rhythmic process of making, shaping and baking. Serve them for breakfast or pair these rolls with your favorite lunch or dinner! In this post
 What you'll need to make these za'atar rollsThis bread roll recipe starts with the basics: flour, yeast, sugar, and salt, but once the dough is made we use za’atar and Aleppo-style pepper to kick things up a notch and add Mediterranean flair. Here’s what you’ll need:
How to make breakfast rollsZa’atar bread rolls are a bit of a labor of love, and definitely better saved for when you have some time on your hands. Here’s how you make them:
What is the difference between active and instant yeast?Working with yeasted dough can feel intimidating. This is especially true if you've never done it before, but follow a few simple tips and you’ll be a pro in no time! This recipe calls for active dry yeast, but you can substitute instant yeast if it's all you have.
How to know if your yeast is good?If a recipe that uses yeast for bread, cake, or loukoumades (Greek donuts) doesn't rise, ninety percent of the time something is happening with yeast. It's usually one of two things: the yeast is old and no longer active or it was killed during the proofing process. The good news is it's easy to solve both of these problems. First, make sure your yeast hasn't expired. To test the freshness of both active and instant yeast combine 1 teaspoon of sugar with water between the temperature of 105°F and 110°F. Add the yeast and set it aside for 5 minutes. If it's foamy the yeast is alive and you can proceed with the recipe. If foamy yeast isn't visible on the surface of the water then replace the yeast with a fresh jar before you begin baking. Consider proofing yeast as a safety measure so you don't go through the whole recipe only to realize the yeast is old and the bread rolls will never rise. If you bake often and know the yeast is good, skip the proofing step and just add the yeast to the flour. Yeast is a living organism. When we buy it at the store it's just dormant. Once it's combined with warm water it wakes up, but if the water used to proof the yeast is too hot it can kill it. If it's too cold it doesn't activate in the water. The perfect temperature of liquid for proofing yeast is between 105°F and 110°F. Keep the yeast alive with the proper water temp for fluffy rolls every time. Can you substitute instant yeast for active dry yeast?The short answer is yes! If you're dying to make za'atar bread rolls and you only have instant yeast on hand never fear! Just follow these tips:
 What to serve with themI enjoy these skillet rolls the most at breakfast time with some za’atar fried eggs, labneh, or marinated feta. For a breakfast on the go, a plain za’atar roll is the perfect choice! But don't think this is a breakfast only kind of recipe! If I have any rolls on hand at dinner time they work great to sop up sauces or soak up the last bit of broth from a favorite soup recipe. Try them with chicken stew, mushroom chicken, or even braised leeks. How to store bread rolls
More bread recipesBrowse all Mediterranean recipes.  Za'atar Bread Rolls
You've never had bread rolls like this before! Fluffy, pillowy bread rolls with a Mediterranean twist — a generous sprinkle of za'atar and Aleppo-style pepper — are easier to make than you think. They take a little time, though, so save them for a day when you have some to spare! I like eating za'atar bread rolls for breakfast with fried eggs, labneh, or marinated feta.
Servings 9 rolls
Calories 233.6kcal
Ingredients
Instructions
Notes
Nutrition
Calories: 233.6kcal | Carbohydrates: 43.5g | Protein: 5.8g | Fat: 3.9g | Saturated Fat: 0.6g | Polyunsaturated Fat: 0.6g | Monounsaturated Fat: 2.4g | Sodium: 207mg | Potassium: 81.3mg | Fiber: 2.5g | Sugar: 1.5g | Vitamin A: 134.3IU | Vitamin C: 1.3mg | Calcium: 62.1mg | Iron: 5.8mg
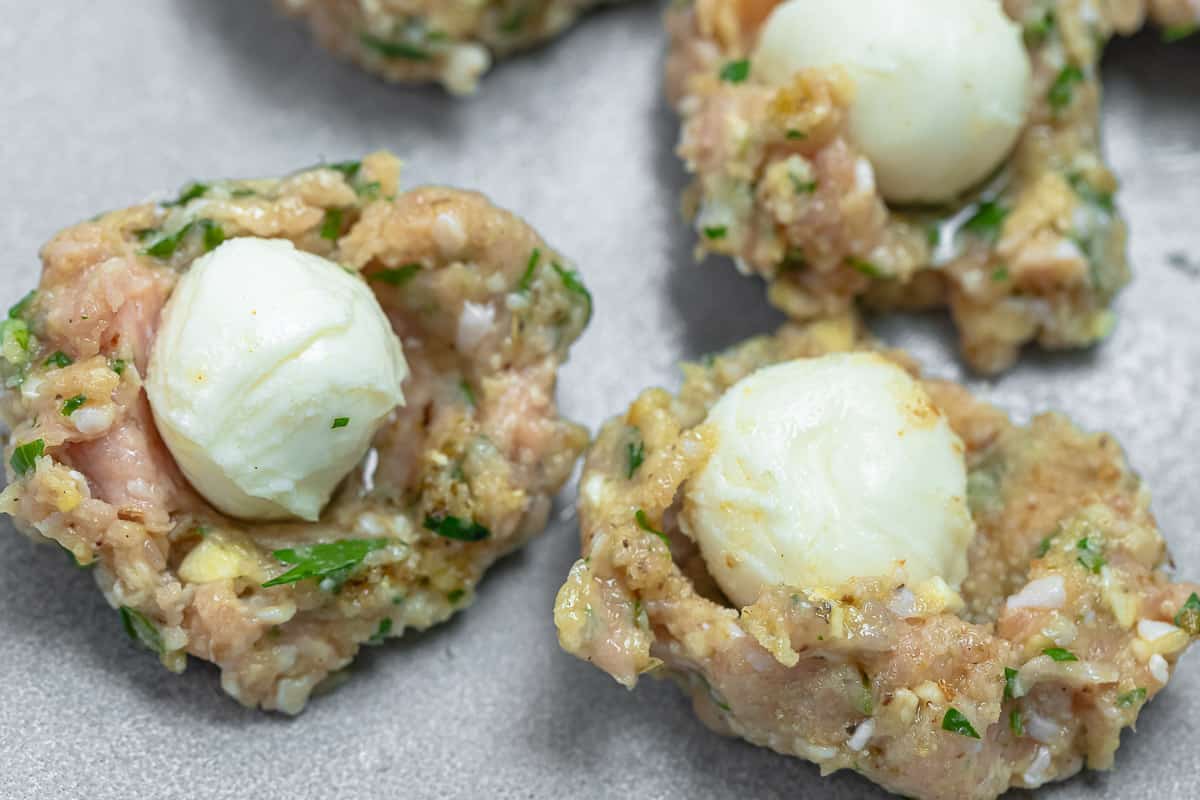
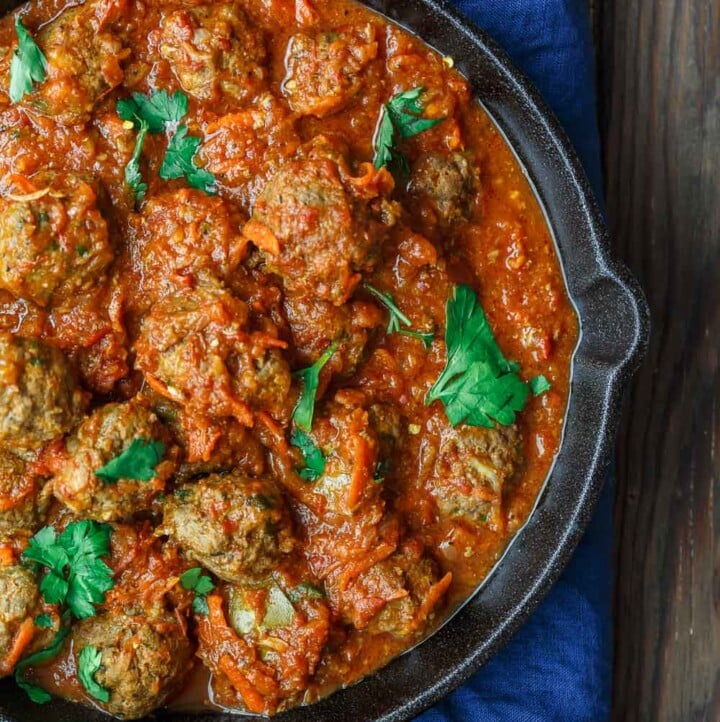
The post Za'atar Bread Rolls appeared first on The Mediterranean Dish. via The Mediterranean Dish https://www.themediterraneandish.com/zaatar-bread-rolls/ Juicy, tender chicken meatballs stuffed with gooey mozzarella cheese and tossed with rich tomato sauce--yes, this is as tasty as it sounds! Try these easy mozzarella stuffed meatballs over some pasta or rice, scooped onto garlic bread, or even spooned into a sandwich. Best part? You can prepare these in advance, check out my tips below. 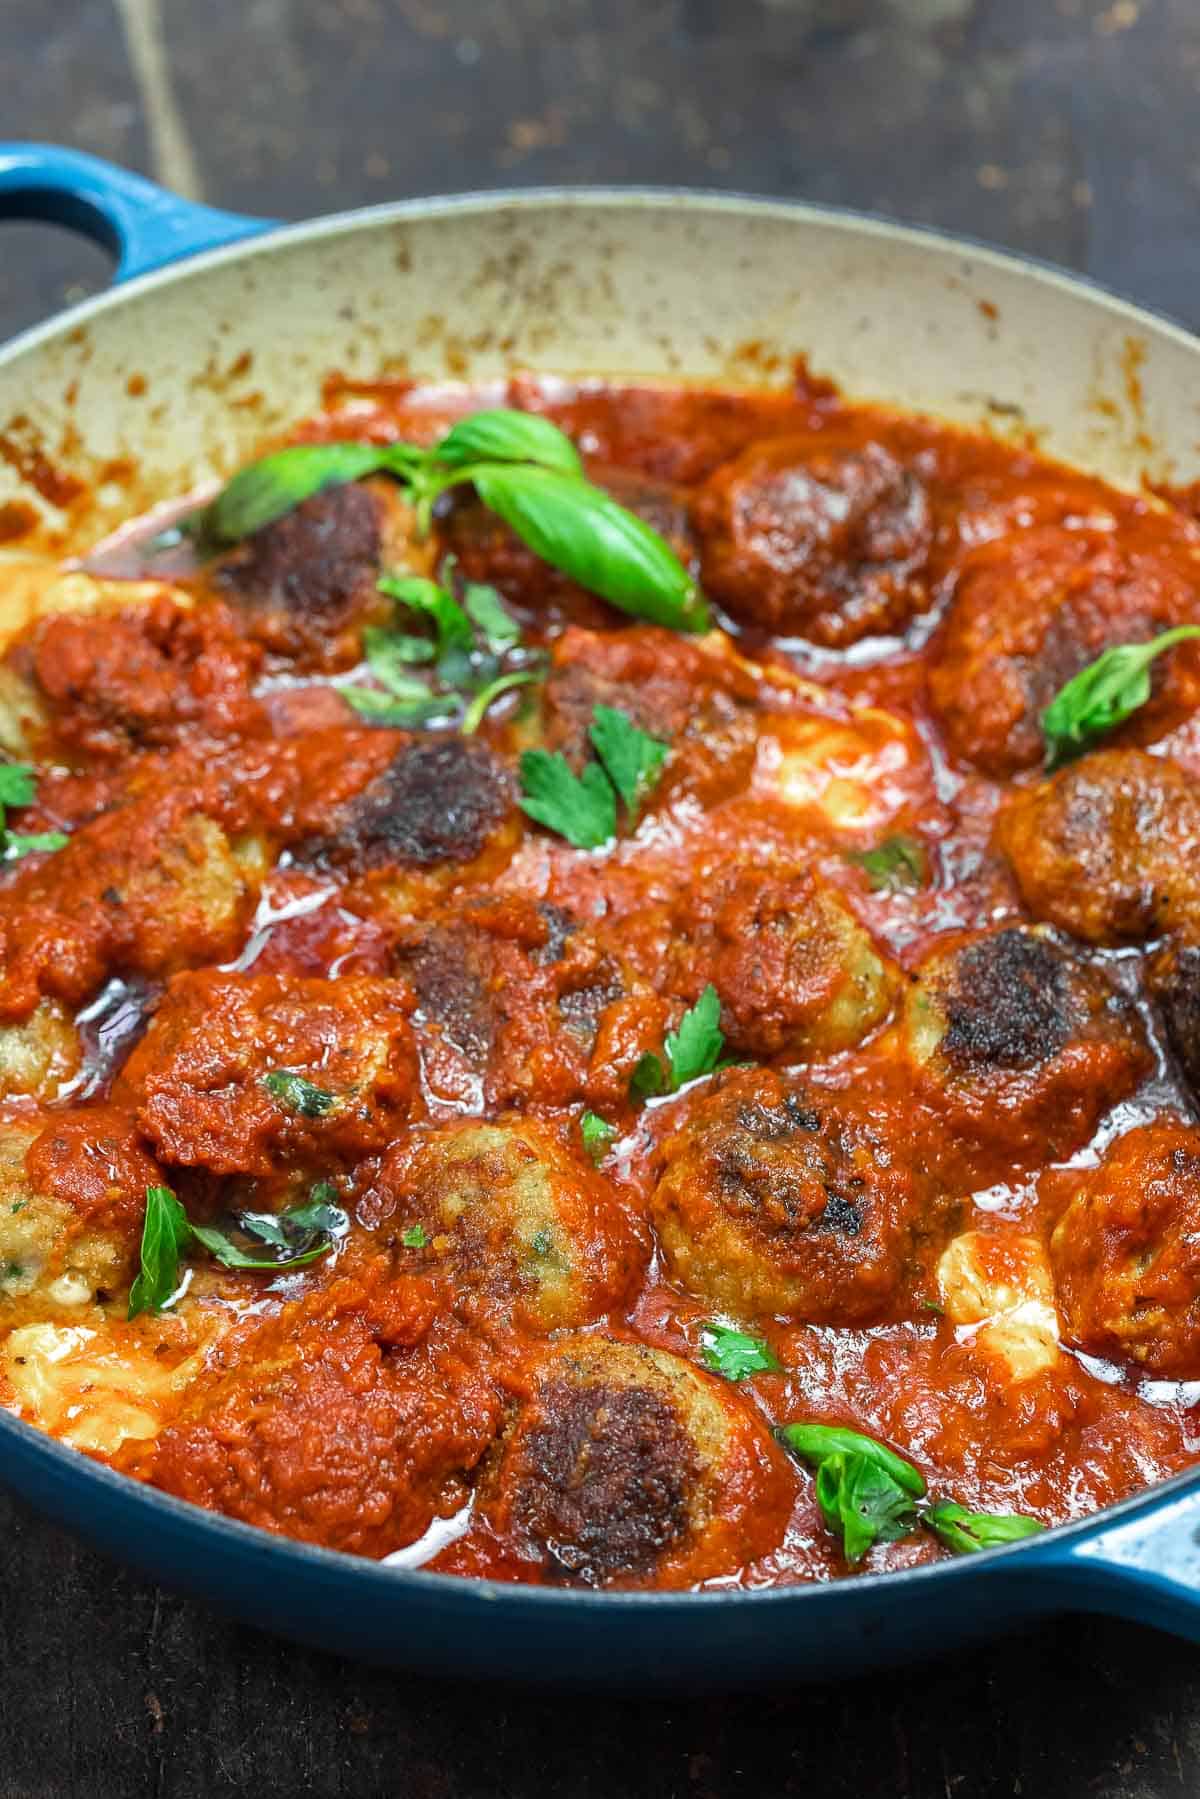 Cheese stuffed meatballs!Is there anything more comforting than juicy meatballs smothered in a rich red sauce? I think not! Not only are these mozzarella stuffed meatballs perfect for batch-cooking, they’re also an ideal appetizer, a low-carb meal along with a salad, or simply served over spaghetti for an easy dinner. One of my favorite meatball recipes is my baked chicken meatballs, so I didn’t reinvent the wheel here. The meatball mixture is very similar, with a few key tweaks. I added a light breadcrumb coating that forms a nice golden-brown crust when sautéed in a little extra virgin olive oil. And I made it a little more indulgent with one simple ingredient: bocconcini (baby mozzarella balls). Yes, bite into one of these stuffed meatballs and you’ll be met with perfectly gooey, warm cheese. In this post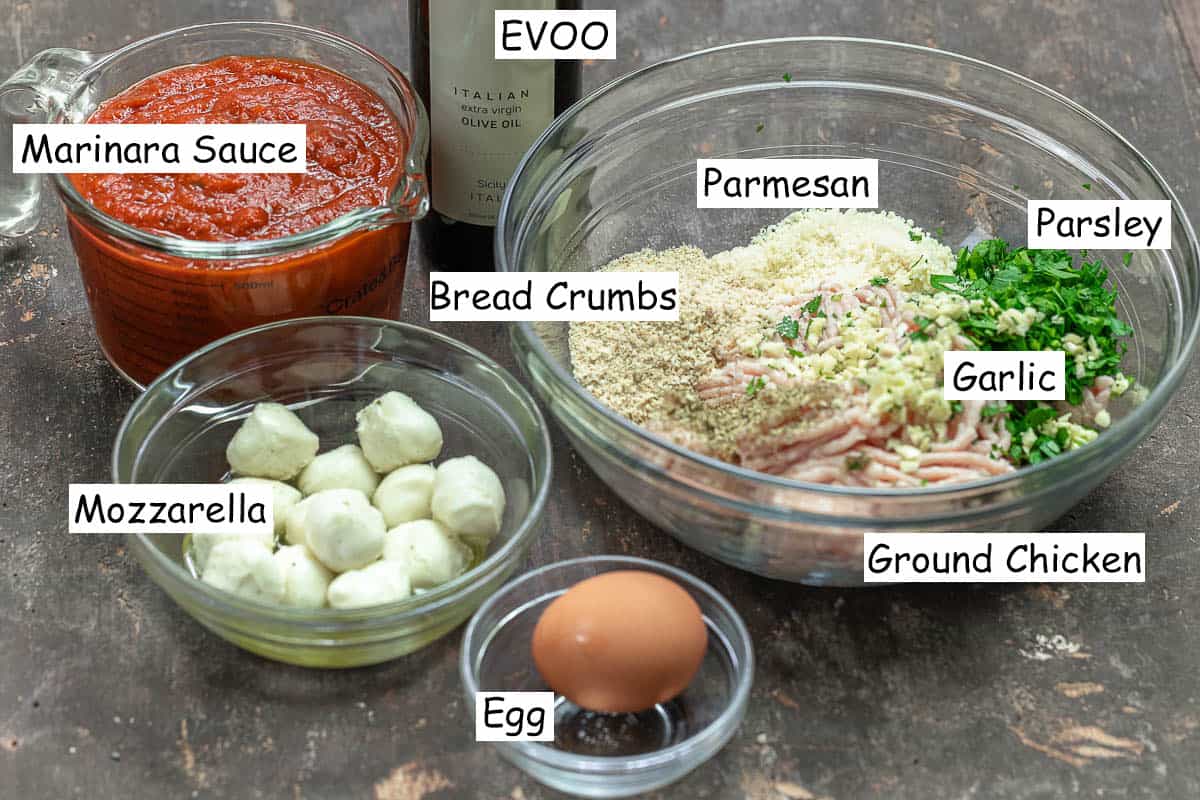 Mozzarella meatballs ingredientsThis chicken meatballs recipe has 3 main components: The meatball mixture, mozzarella cheese, and rich homemade tomato sauce. Here’s what you’ll need to make them:
How to make mozzarella stuffed meatballsWhile these chicken meatballs take a little time and preparation, the effort is well worth it! Here’s how to make chicken parmesan meatballs:
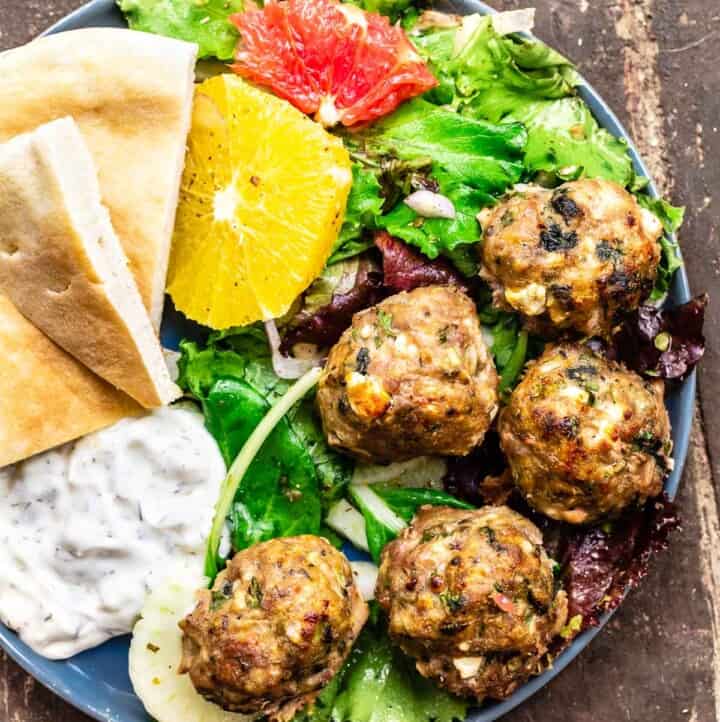
Make ahead tipsMeatballs are a wonderful dish to prepare-ahead of time because they are easy to refrigerate (or freeze!) before you cook them. To refrigerateYou can shape the meatballs a day in advance, and store them on a tightly covered baking sheet in the refrigerator overnight. To freezeTo work even further ahead, you can freeze the uncooked mozzarella stuffed chicken meatballs in an airtight container. I use a long, slightly deep freezer-safe container and freeze the meatballs in layers, with sheets of parchment paper between them so they don’t stick together. They will be good in the freezer for up to 3 months (but I like eating them within 2). You can cook them directly from frozen. 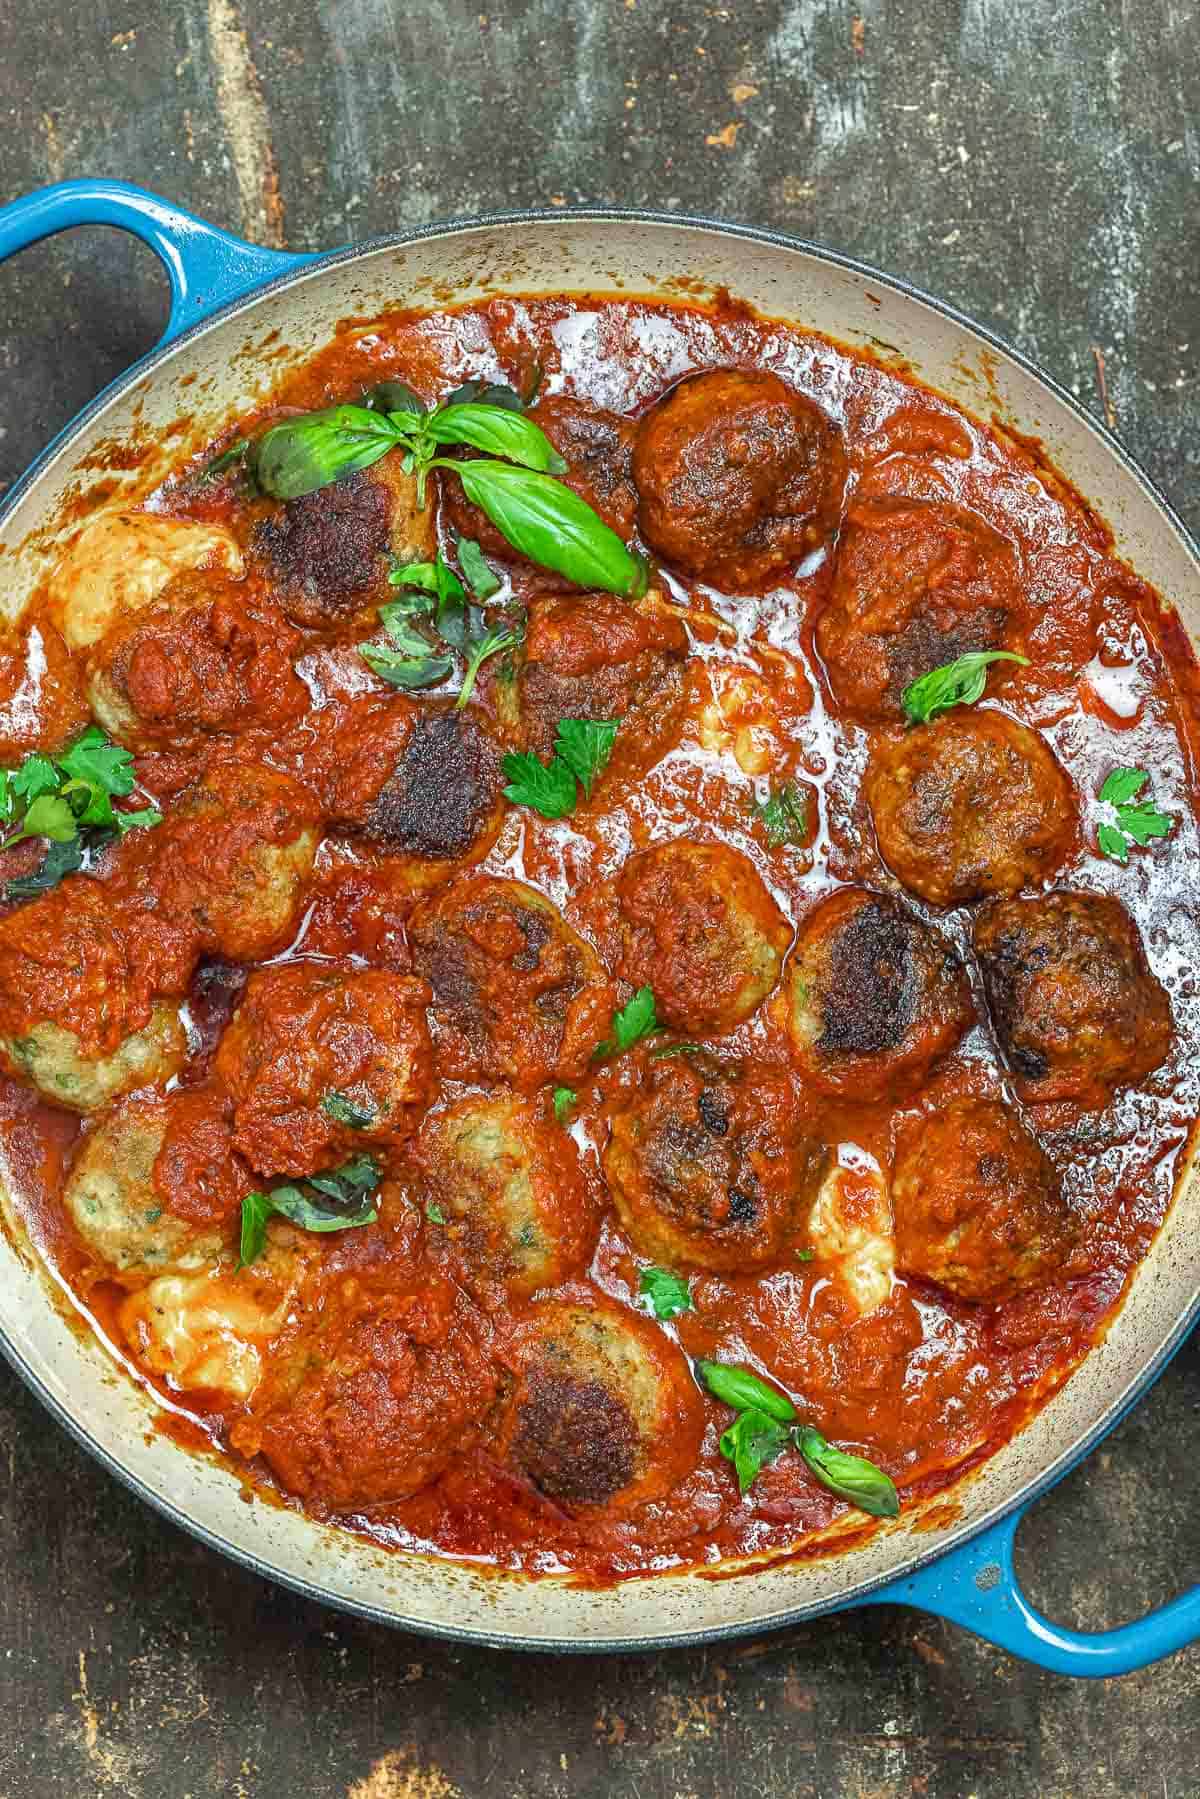 Serving ideasOne thing I love about meatballs is how versatile they are. Need an appetizer? Simply thread a couple onto small skewers and pair them with a dipping sauce. For dinner, the easiest way to turn these chicken parmesan meatballs into a meal for the family is to quickly cook some spaghetti, and smother the noodles in the rich sauce with a few meatballs. Add a side of crunchy garlic bread or a light green salad. Or, turn the chicken parmesan meatballs into a saucy pita sandwich or wrap similar to what I do with my kofta pitas. How to store leftover stuffed meatballsThe great thing about meatballs in general is that they are an excellent option for batch-cooking. I sometimes double the recipe just so I have plenty of leftovers to keep for later! Leftover cooked meatballs will keep in the fridge for up to 4 days in an airtight container. Simply reheat the meatballs and sauce in a skillet over medium heat until warmed through. More meatball recipesBrowse all Mediterranean recipes.  Baked Mozzarella Stuffed Meatballs
You'll love these juicy meatballs with a gooey mozzarella cheese center! Cook them in marinara sauce (either homemade or store-bought) for a simple dinner over some spaghetti, or alongside a light salad. I went with ground chicken for these meatballs, but ground turkey, lean ground beef, or lean ground pork would work as well.
Servings 6 people
Calories 222.3kcal
Ingredients
Instructions
VideoNotes
Nutrition
Calories: 222.3kcal | Carbohydrates: 13.5g | Protein: 20.1g | Fat: 10.5g | Saturated Fat: 3.7g | Polyunsaturated Fat: 1.7g | Monounsaturated Fat: 3.8g | Trans Fat: 0.1g | Cholesterol: 101.7mg | Sodium: 929.1mg | Potassium: 859.1mg | Fiber: 2.7g | Sugar: 4.8g | Vitamin A: 1575.2IU | Vitamin C: 22.1mg | Calcium: 163.5mg | Iron: 3.1mg
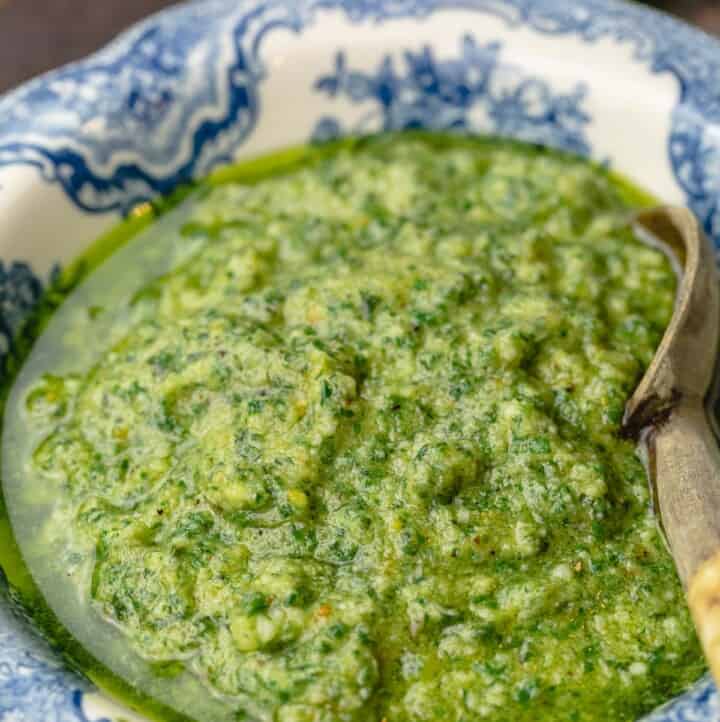
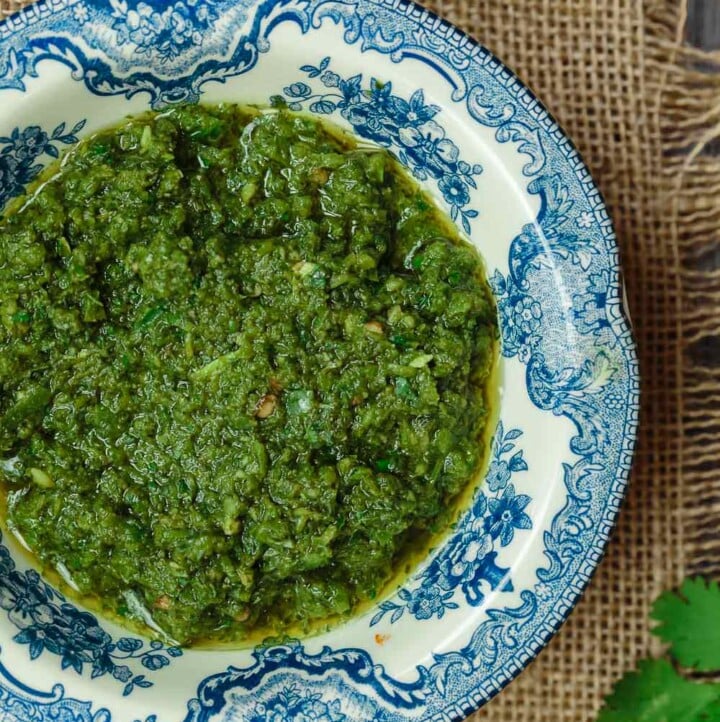
The post Mozzarella Stuffed Meatballs Recipe appeared first on The Mediterranean Dish. via The Mediterranean Dish https://www.themediterraneandish.com/mozzarella-stuffed-meatballs/ This easy basil vinaigrette recipe is from my new cookbook, The Mediterranean Dish: 120 Bold and Healthy Recipes You'll Make on Repeat. It works as a salad dressing or as a sauce, which means you can put it on almost anything. Basically, its everything you love about pesto in a vinaigrette! Drizzle it over chicken or fish, toss it with your favorite salad or spoon it into your soup for an extra burst of flavor! 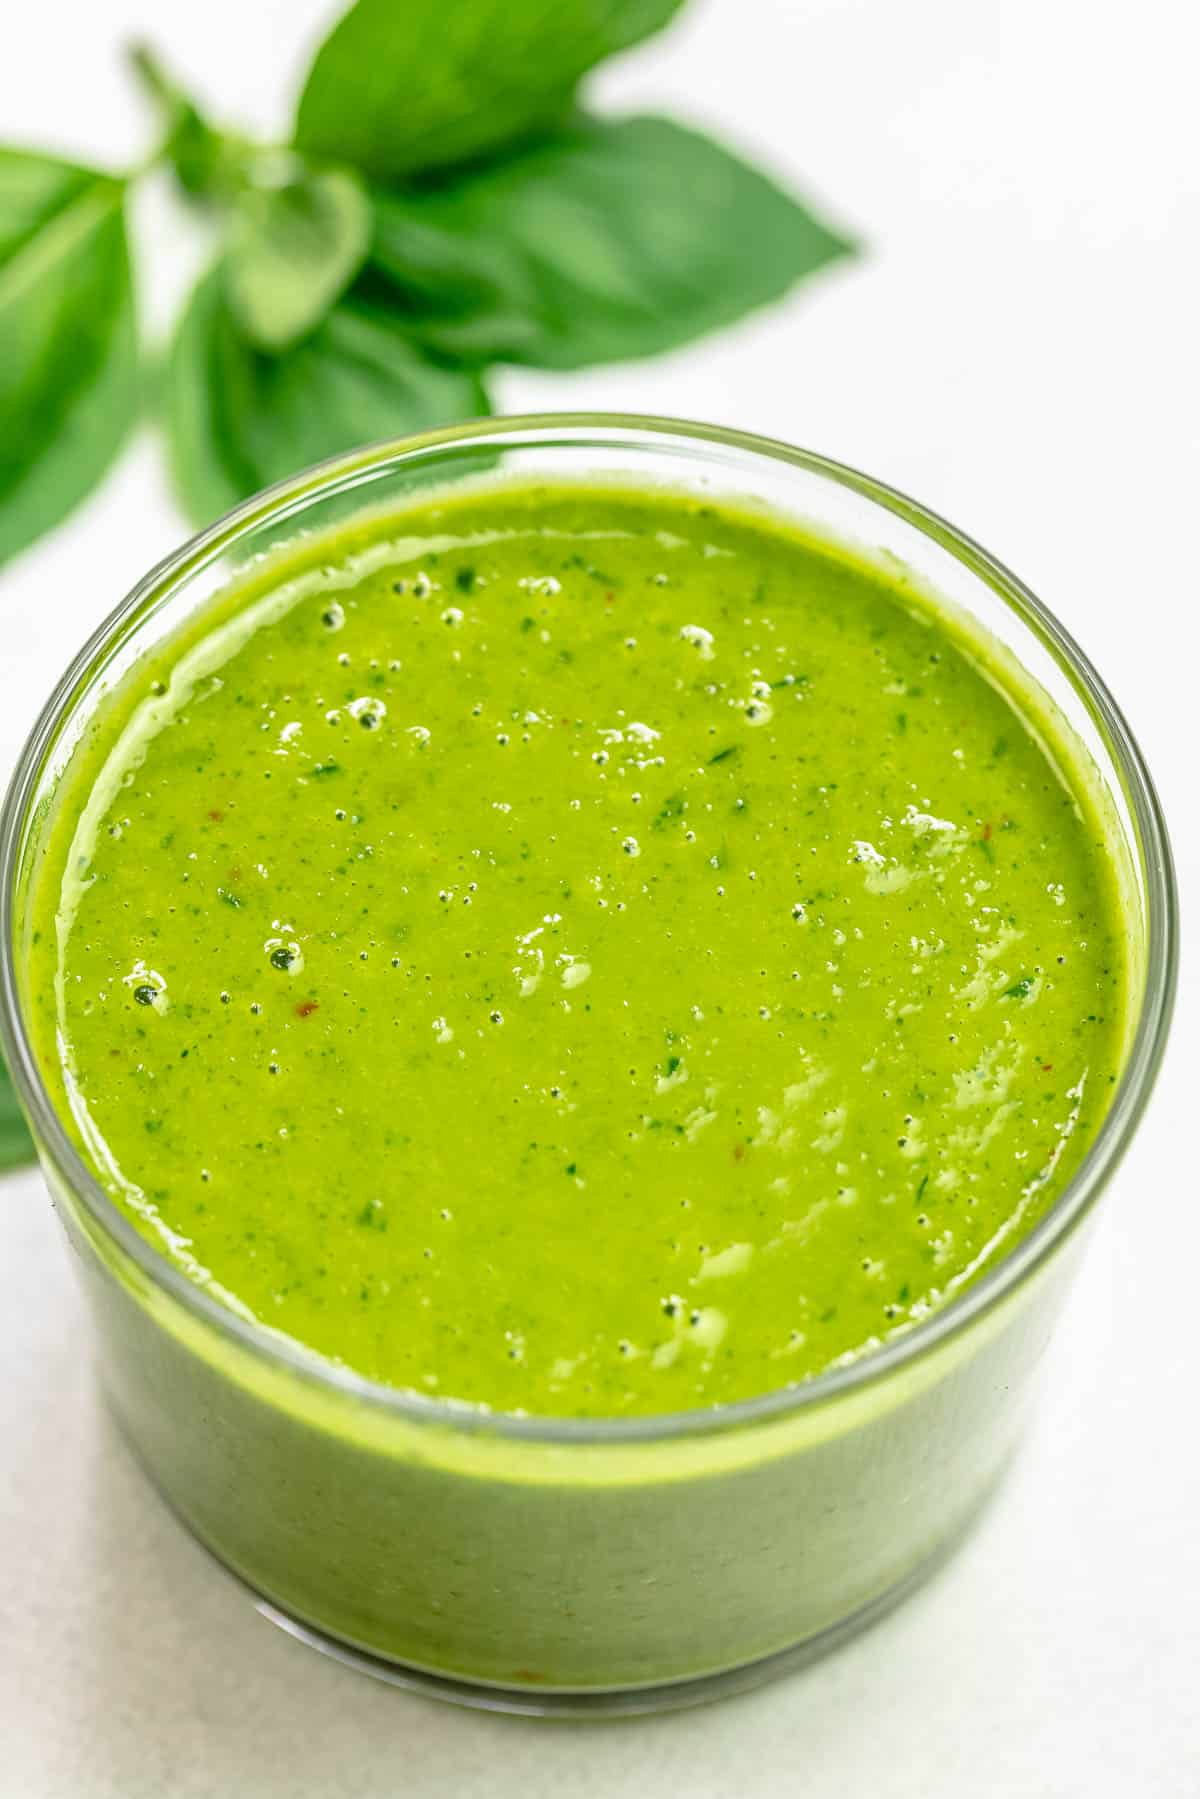 Basil vinaigrette ups the flavor ante in a big way — think of it as pesto’s bolder, zestier vegan cousin! My cookbook is filled with quick and easy recipes, and this is no exception! I pair sweet basil and a peppery extra virgin olive oil with shallots, garlic, and a hint of red pepper flakes for a pesto-inspired vinaigrette that adds a little something extra to any dish it touches! Fresh limes and white wine vinegar give it just the right amount of acidity to balance out the fresh-from-the-garden herbal notes. Think of this as your flavor-boosting secret weapon! It comes together in minutes and keeps in the fridge for up to 4 days. Table of contents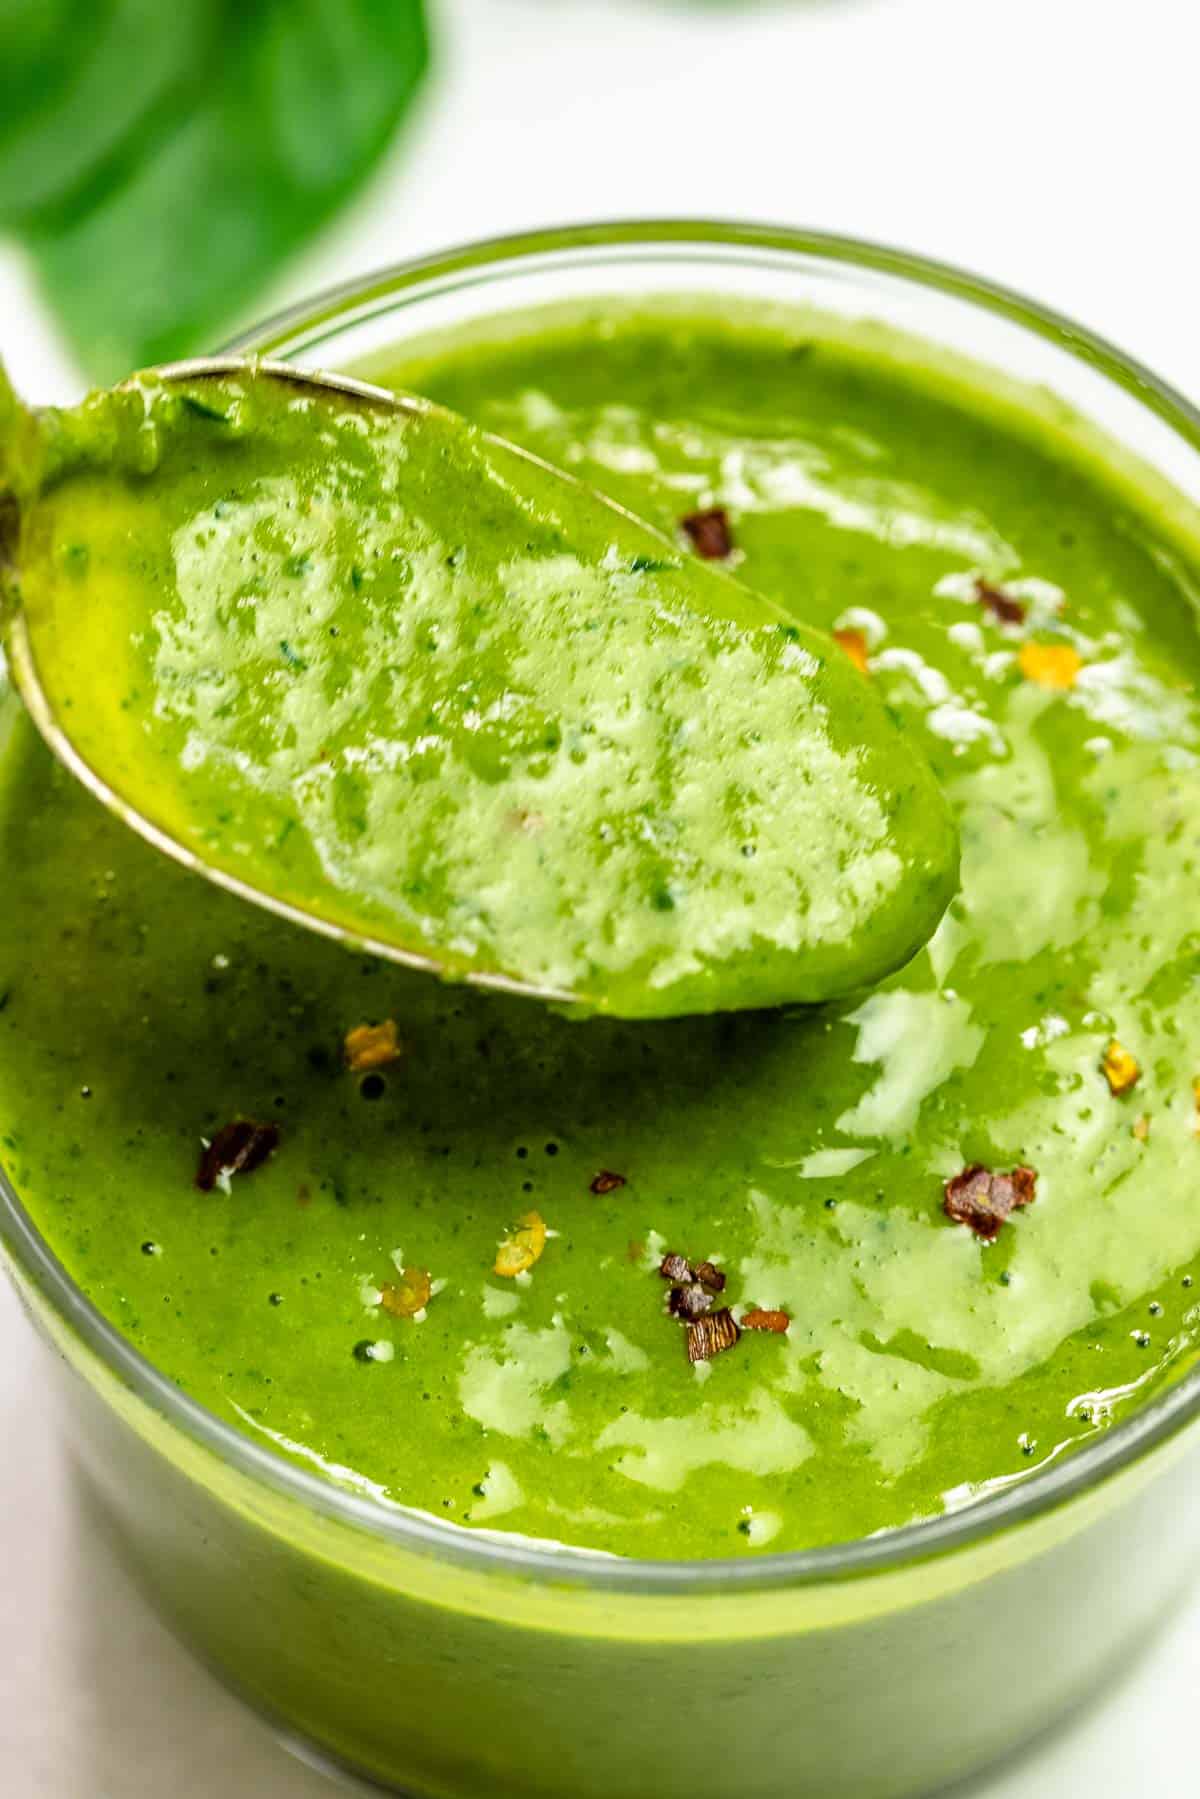 Ingredients for basil vinaigretteA few pantry staples and some fresh herbs from the garden is all it takes to whip up basil vinaigrette. Here’s what you’ll need to make it:
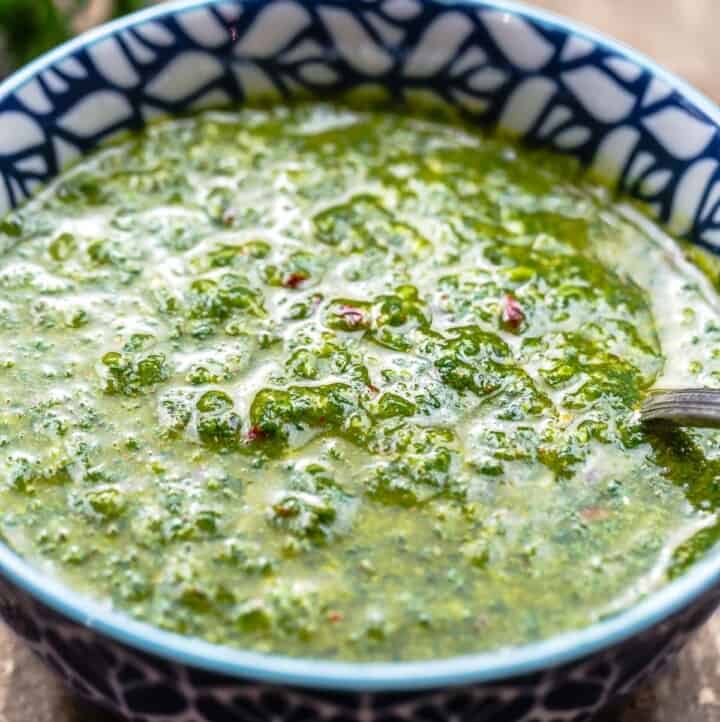
How to keep pesto vinaigrette bright green!Pro tip: Blanch the basil. One of the main complaints I hear about basil, whether in homemade pesto or other sauces, is that it quickly turns from bright green to a dingy, army green color when it is blended. This happens because of oxidation, and an easy workaround will give you vibrant green basil salad dressing every time: Blanch the basil first. Blanching kills off the decomposing enzymes that turn basil that green-brown color. And it takes mere seconds to do! Here’s how to blanch basil:
Another quick tip to stop basil leaves turning brown is to add citrus. Lemons, limes, etc., contain citric acid and ascorbic acid, both of which help to prevent oxidation. In this basil vinaigrette recipe, I use lime juice as my citrus element, but you could also use lemon if that's what you have on hand. 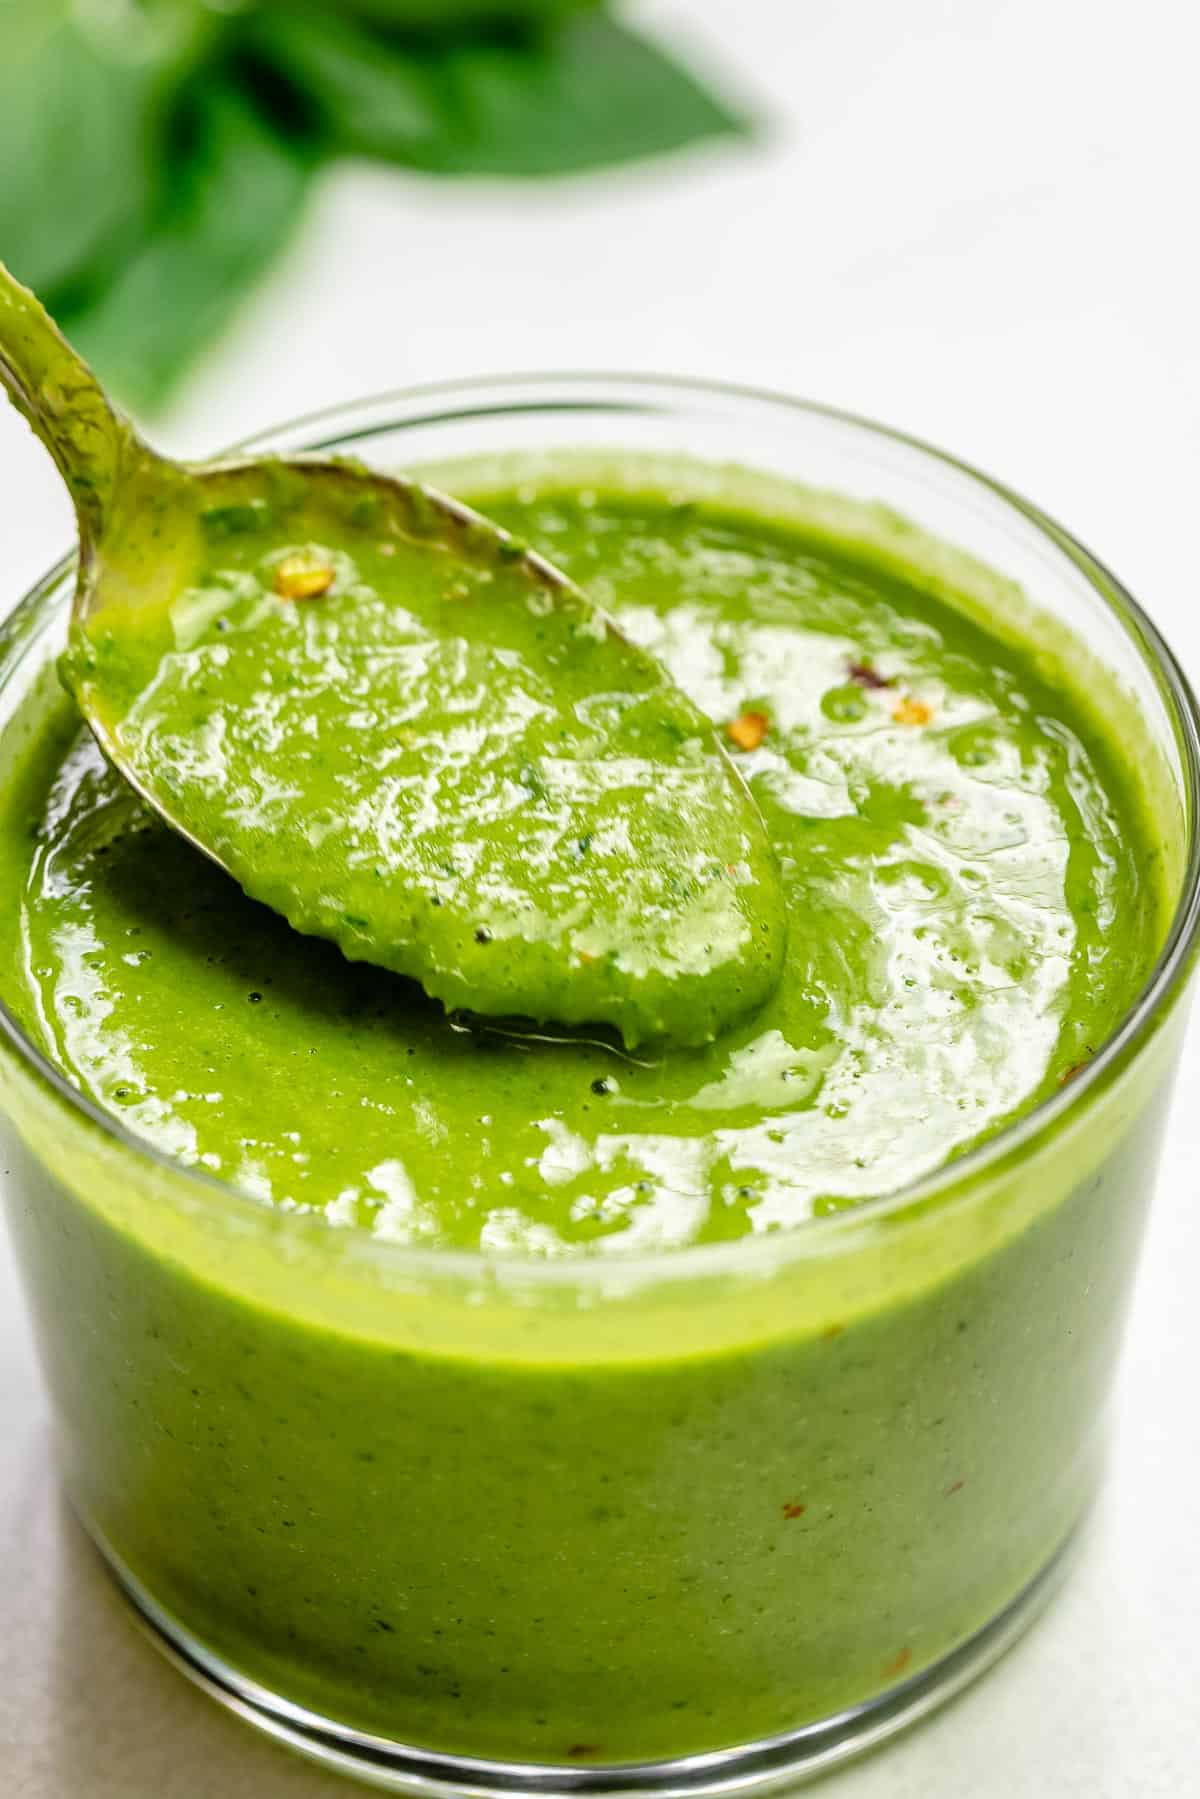 How to make basil vinaigretteOnce you blanch the basil, this salad dressing comes together in a matter of seconds in a food processor or blender!
How to use pesto vinaigretteThe great thing about basil salad dressing is that it is wonderfully versatile. It is an easy way to elevate a fruit and vegetable salads. Drizzle it over: roasted asparagus salad, cucumber salad, green bean salad, or watermelon salad. I especially enjoy it in grain or pasta salads, like this couscous salad or farro salad, because they can absorb the dressing’s big flavor easily. This basil and white wine vinaigrette can also be used as a zippy sauce, perfect to dress up some flaky grilled salmon, a whole baked fish, and lemon garlic drumsticks. I even sometimes pour a little over warm roasted vegetables and boiled potatoes. Use it to dress up your favorite snack or appetizer and try it on bruschetta, fried tomatoes to immediately add color and complexity. Storage tipsStore this sweet basil vinaigrette in a tightly closed Mason jar in the refrigerator. It will keep for up to 4 days. Give it a good shake before you use it again. To save this vinaigrette for a burst of sunshine in the winter, you could also freeze it in ice cube trays. To thaw, simply pop a few cubes into a Mason jar and place it in the refrigerator. It will separate once thawed, but shake it up and it will be good to go! More recipes for your herb gardenBrowse all Mediterranean recipes.  BEST Basil Vinaigrette Recipe
I love this versatile vinaigrette in all sorts of salads, baked chicken, or even fish. It is so easy to make, and tastes sort of like basil pesto in a vinaigrette -- so zesty and fresh! And if you quickly blanch the basil before whizzing it up in a food processor, you'll help it keep its vibrant green color! This recipe makes ¾ to 1 cup of basil vinaigrette.
Servings 16 tablespoons
Calories 62.3kcal
Ingredients
Instructions
Notes
Nutrition
Calories: 62.3kcal | Carbohydrates: 0.4g | Protein: 0.2g | Fat: 6.8g | Saturated Fat: 0.9g | Polyunsaturated Fat: 0.7g | Monounsaturated Fat: 4.9g | Sodium: 1.6mg | Potassium: 16.8mg | Fiber: 0.1g | Sugar: 0.1g | Vitamin A: 176.9IU | Vitamin C: 0.7mg | Calcium: 6.6mg | Iron: 0.2mg
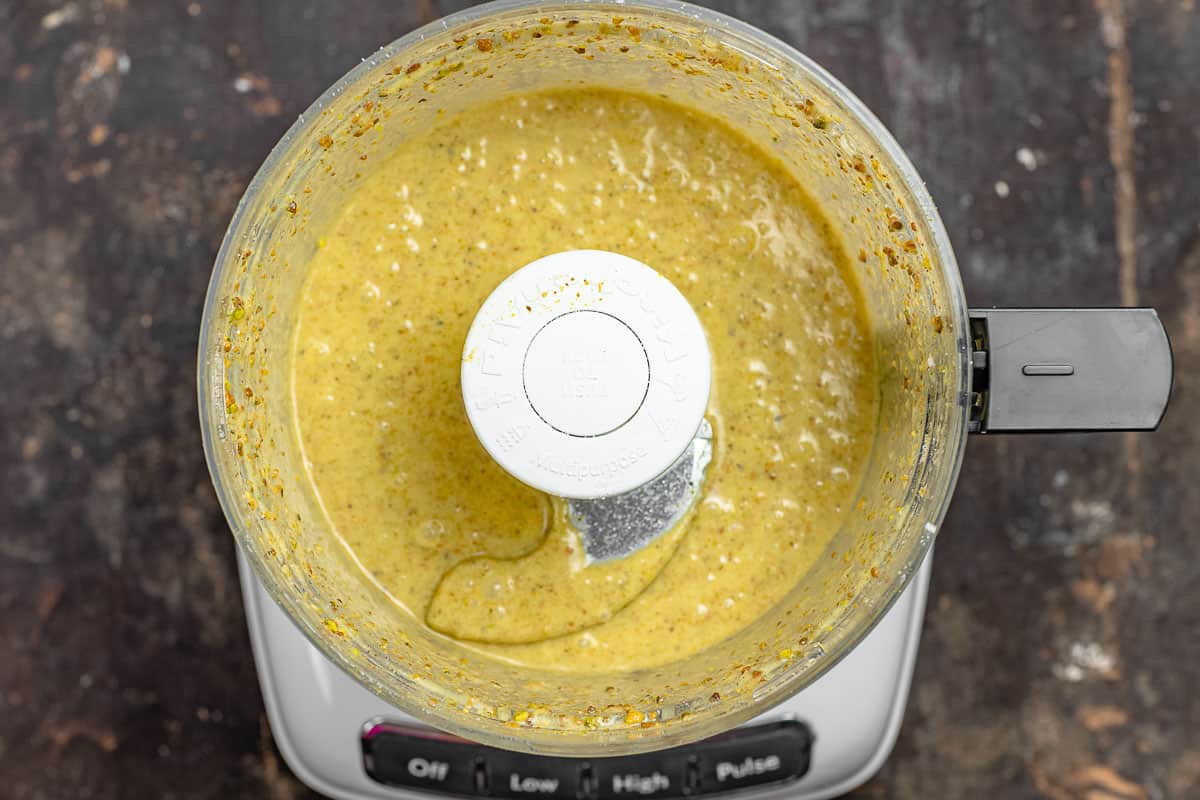
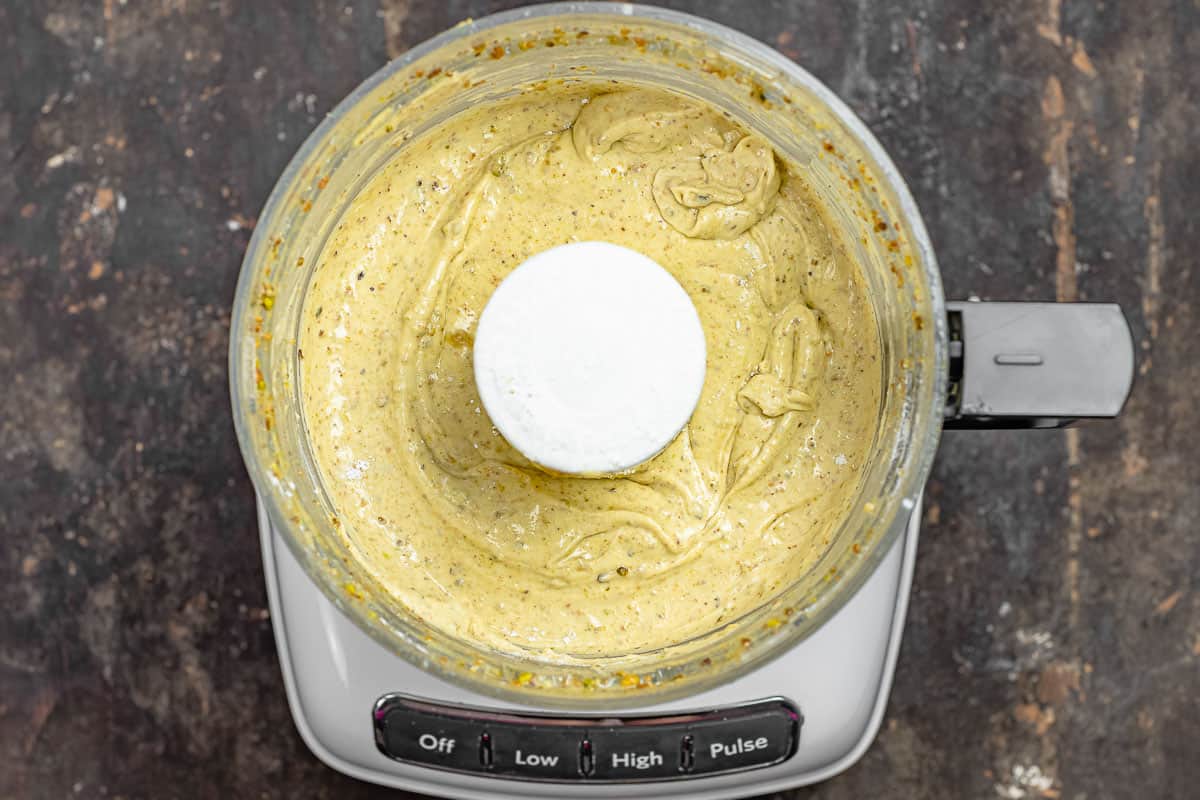
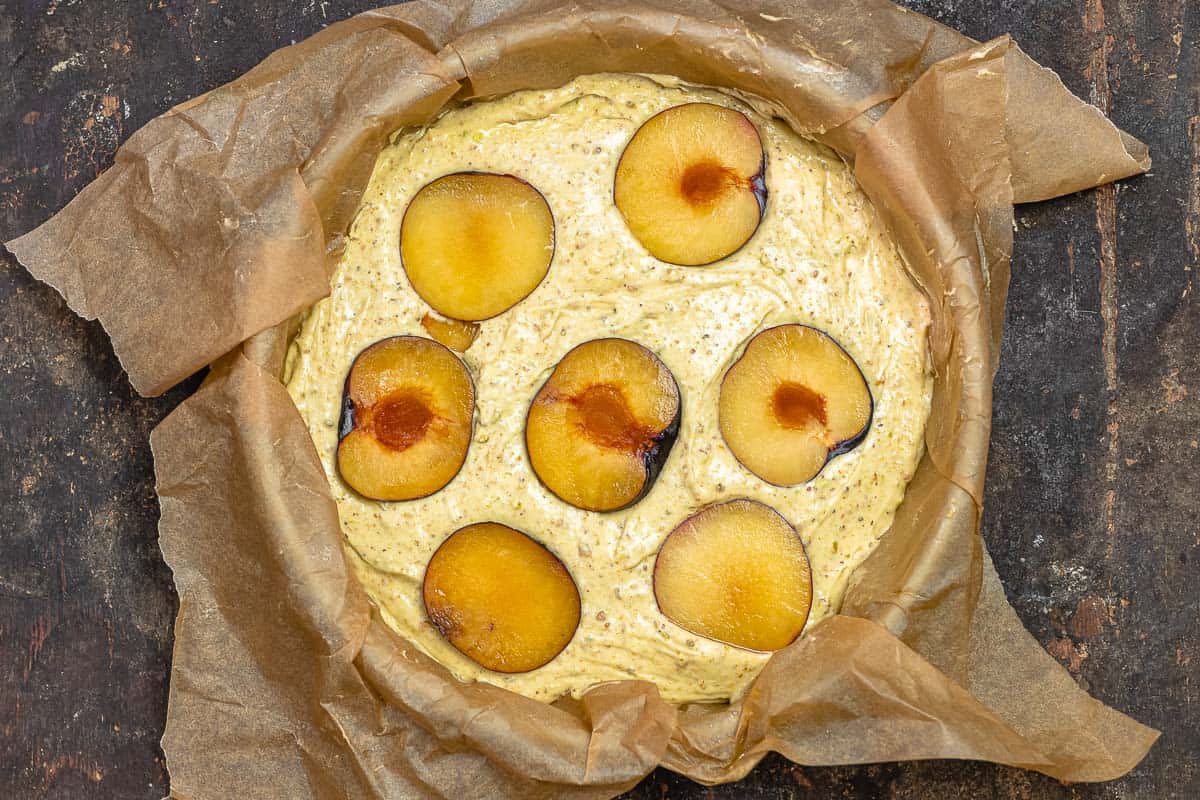
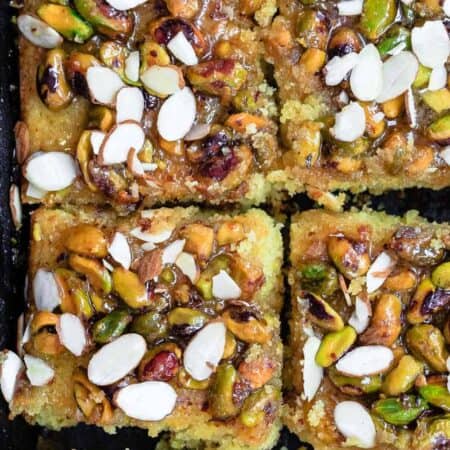
The post Easy Basil Vinaigrette Recipe appeared first on The Mediterranean Dish. via The Mediterranean Dish https://www.themediterraneandish.com/basil-vinaigrette/ Say goodbye to summer in the best way with this easy plum cake recipe from my friend Andy Baraghani’s new cookbook, The Cook You Want to Be. You’ll love how light, tender, and moist it is! Perfect for brunch with a little ice cream or even a dollop of labneh. 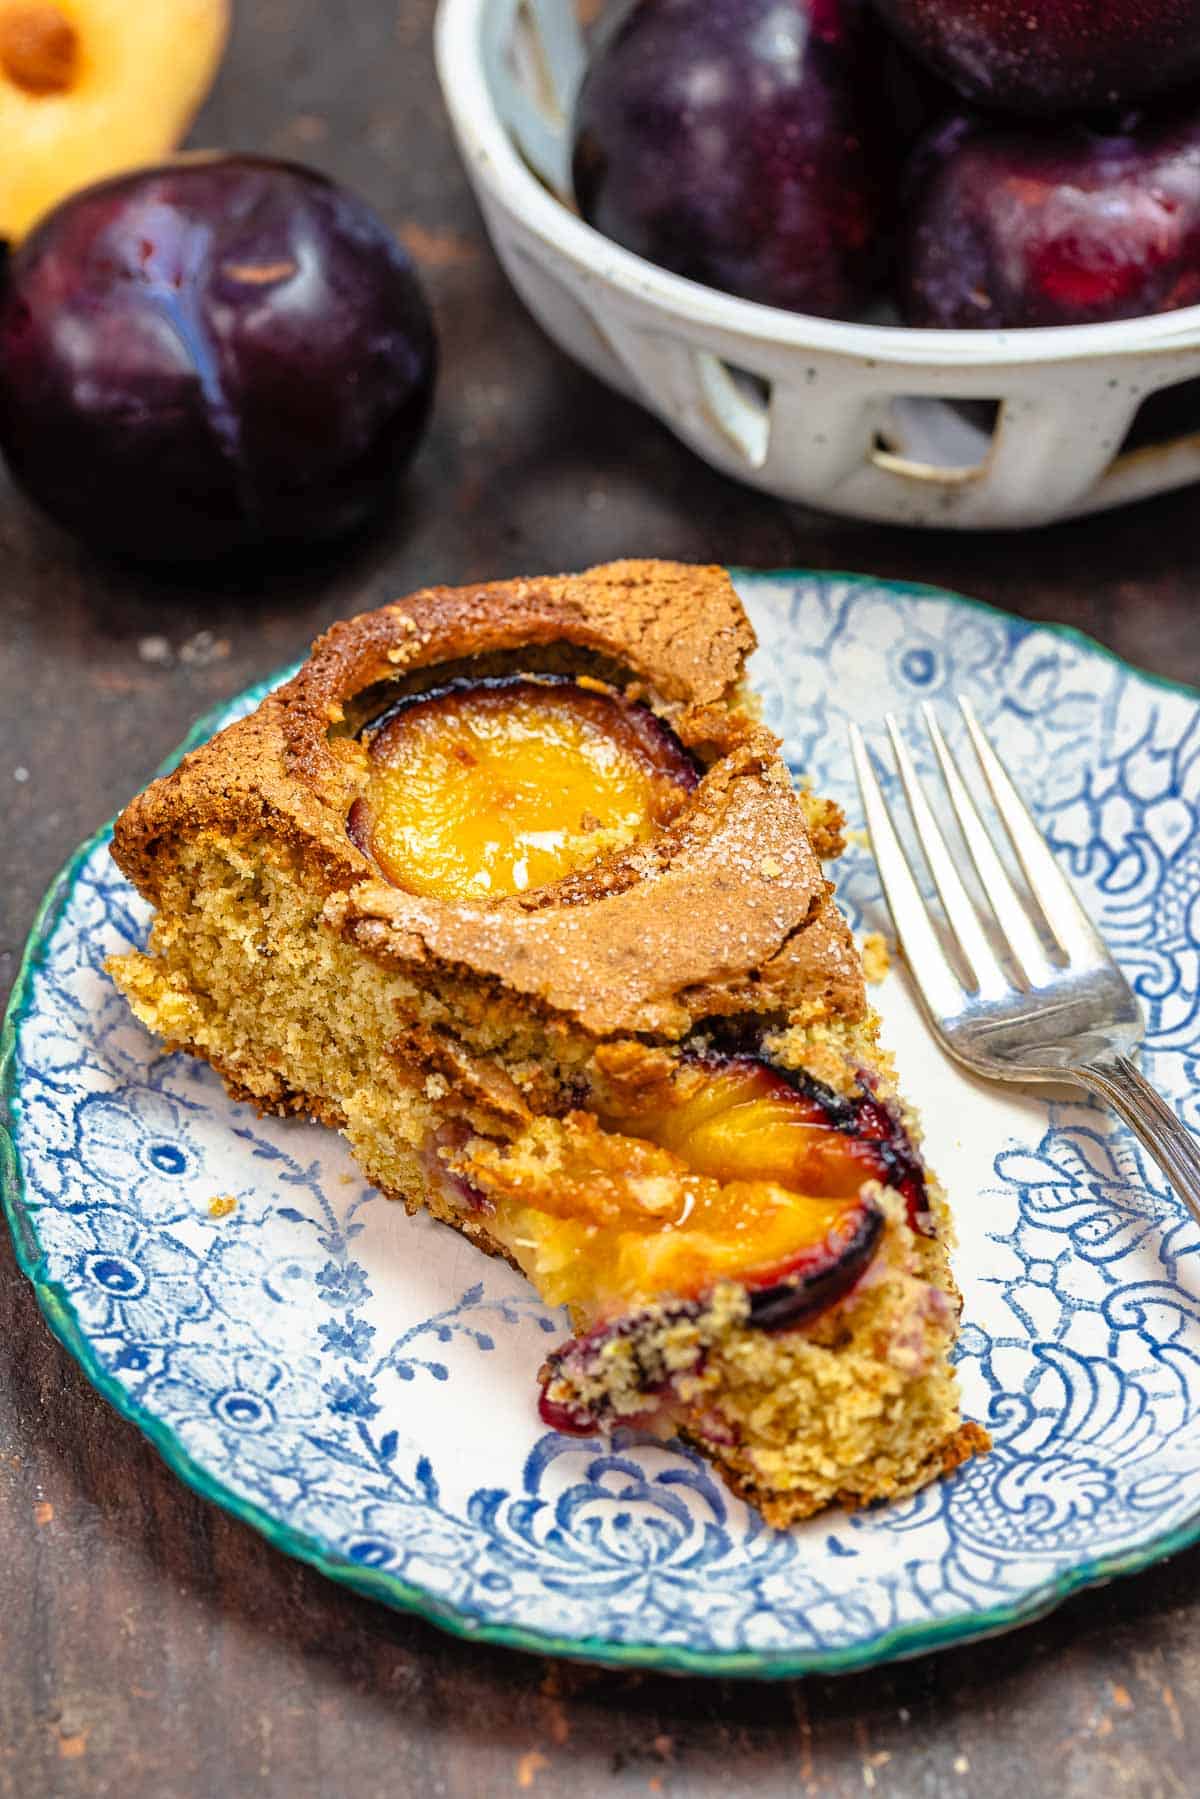 To me, plum cake is the perfect homemade dessert to say goodbye to summer and usher in fall. This recipe for plum cake from my friend, Andy Baraghani’s new cookbook, The Cook You Want to Be, is so worth a try because it's easy and with only eight ingredients you probably have everything you need already. Thanks to a little buttermilk, this cake is tender and – dare I say the "m word"? – moist with a subtle nuttiness from pistachios (or almonds, if you prefer) whizzed in a food processor until finely crushed into a coarse, sandy powder. I’m a sucker for pistachios in desserts and you’ll find me using them a good bit in recipes like baklava and this Greek orange honey cake. They add a depth of flavor and texture that I truly love. But the star of the show in this cake recipe is undoubtedly fresh, juicy plums. Sweet-tart plums take a simple vanilla cake recipe to the next level! You’ll want to use plums that are still quite firm — ripe, but not too soft — so they keep their shape while the cake bakes. Plums that are too soft will simply turn mushy instead of jammy, and you definitely want some good chunks of fruit in your cake! In this post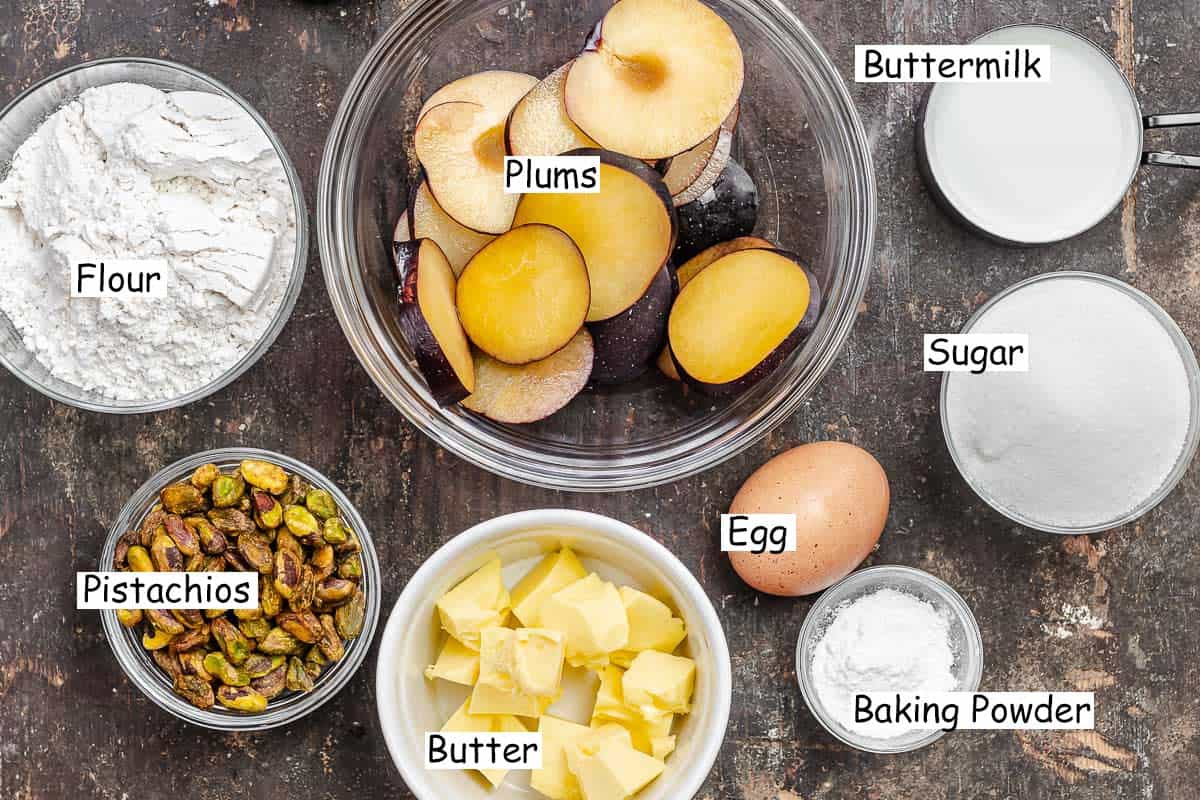 Ingredients and notesThis plum cake needs just a few simple baking staples, fresh plums, and nuts. Here’s everything you’ll need to make this tender plum cake recipe:
How to make plum cakeThis is one of those recipes that looks difficult, but actually comes together in just a few simple steps! Here’s how to make this recipe for plum cake:
Make ahead tipsThis cake with fruit is ideal for making ahead of time. In fact, it can be made up to 3 days in advance. Once it cools completely, place the plum cake in an airtight container or cake stand with a dome lid and store in a cool place. Your kitchen counter will do, but you can also pop it in the fridge to keep it fresh a little longer. Serve it withPlum cake can be served warm or cold, and needs nothing more than a dollop of whipped cream or a scoop of vanilla ice cream on top. Or skip those and simply serve it along with your favorite hot drink. It has fruit in it so I think plum cake is a perfectly acceptable breakfast!  Leftovers and storageThis plum cake recipe will keep for up to 3 days in an airtight or cake container. Just be sure it has cooled completely before covering it. To make it last a bit longer, you can also store it in the fridge for up to 5 days. Can you freeze plum cake?Allow the plum cake to cool completely before double-wrapping it tightly in plastic wrap or foil. I typically place the wrapped cake into a freezer safe bag as well for an extra layer of protection. You can also wrap and freeze individual slices, so you can grab a little at a time from the freezer. The cake will keep for up to 3 months in the freezer whether wrapped individually or as a whole. More cake recipes to tryBrowse all Mediterranean recipes.  Fresh Plum Cake with Nuts
You'll love this delicious, moist, and easy plum cake with nuts! Use plums that are ripe, but still firm, so they hold their shape while baking and don't become mushy. Serve plum cake warm with a little ice cream or even a dollop of labneh. This plum cake recipe is also ideal to prepare ahead, as it will keep for around 3 days at room temperature in an airtight container or cake stand.
Servings 10 people
Calories 339.8kcal
Ingredients
Instructions
Notes
Nutrition
Calories: 339.8kcal | Carbohydrates: 49.1g | Protein: 4.7g | Fat: 14.7g | Saturated Fat: 6.6g | Polyunsaturated Fat: 2.1g | Monounsaturated Fat: 4.9g | Trans Fat: 0.4g | Cholesterol: 40.9mg | Sodium: 299.5mg | Potassium: 189.6mg | Fiber: 1.9g | Sugar: 29g | Vitamin A: 489.6IU | Vitamin C: 4.7mg | Calcium: 58.7mg | Iron: 1.6mg
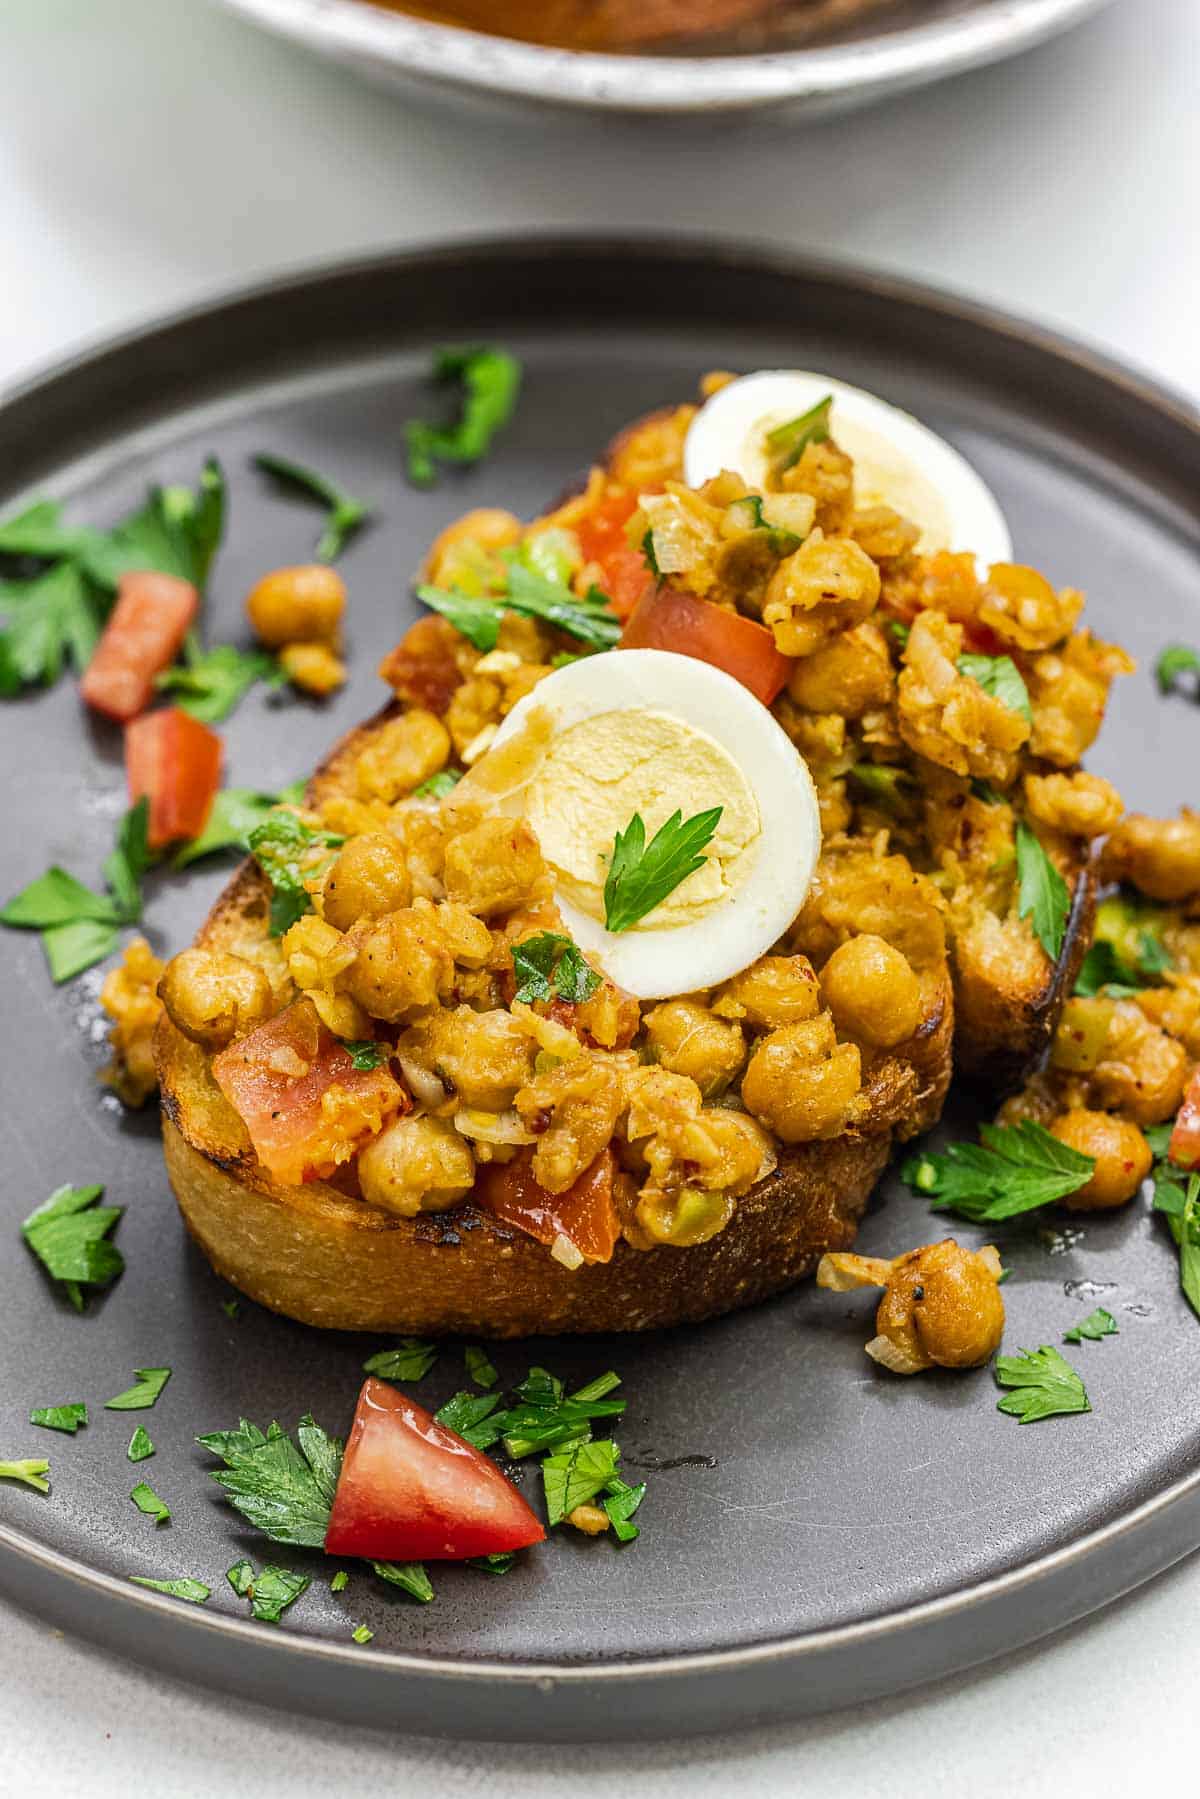
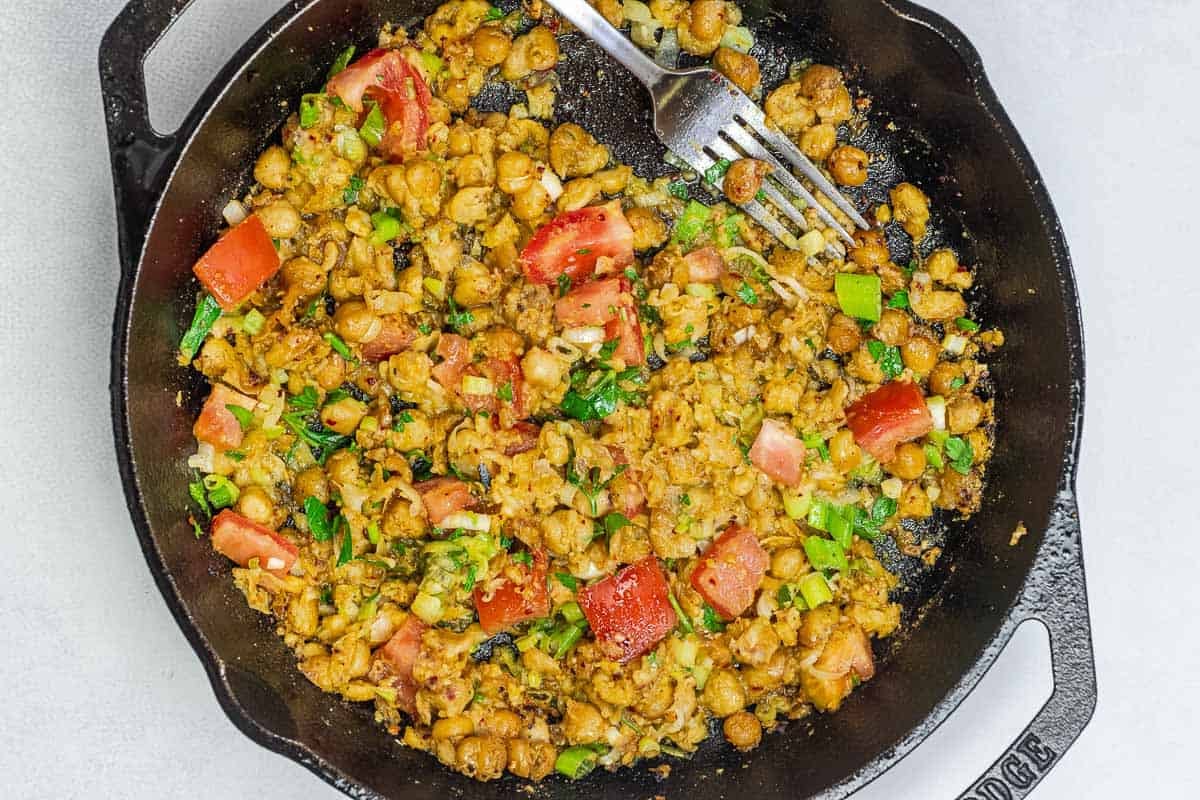
The post Plum Cake Recipe with Pistachios appeared first on The Mediterranean Dish. via The Mediterranean Dish https://www.themediterraneandish.com/plum-cake-recipe/ This smashed chickpea toast recipe turns a humble can of chickpeas into a protein-packed vegetarian meal in 10 minutes or less. It works for breakfast, lunch, or dinner. Keep it vegan or add sliced boiled eggs on top for extra protein. 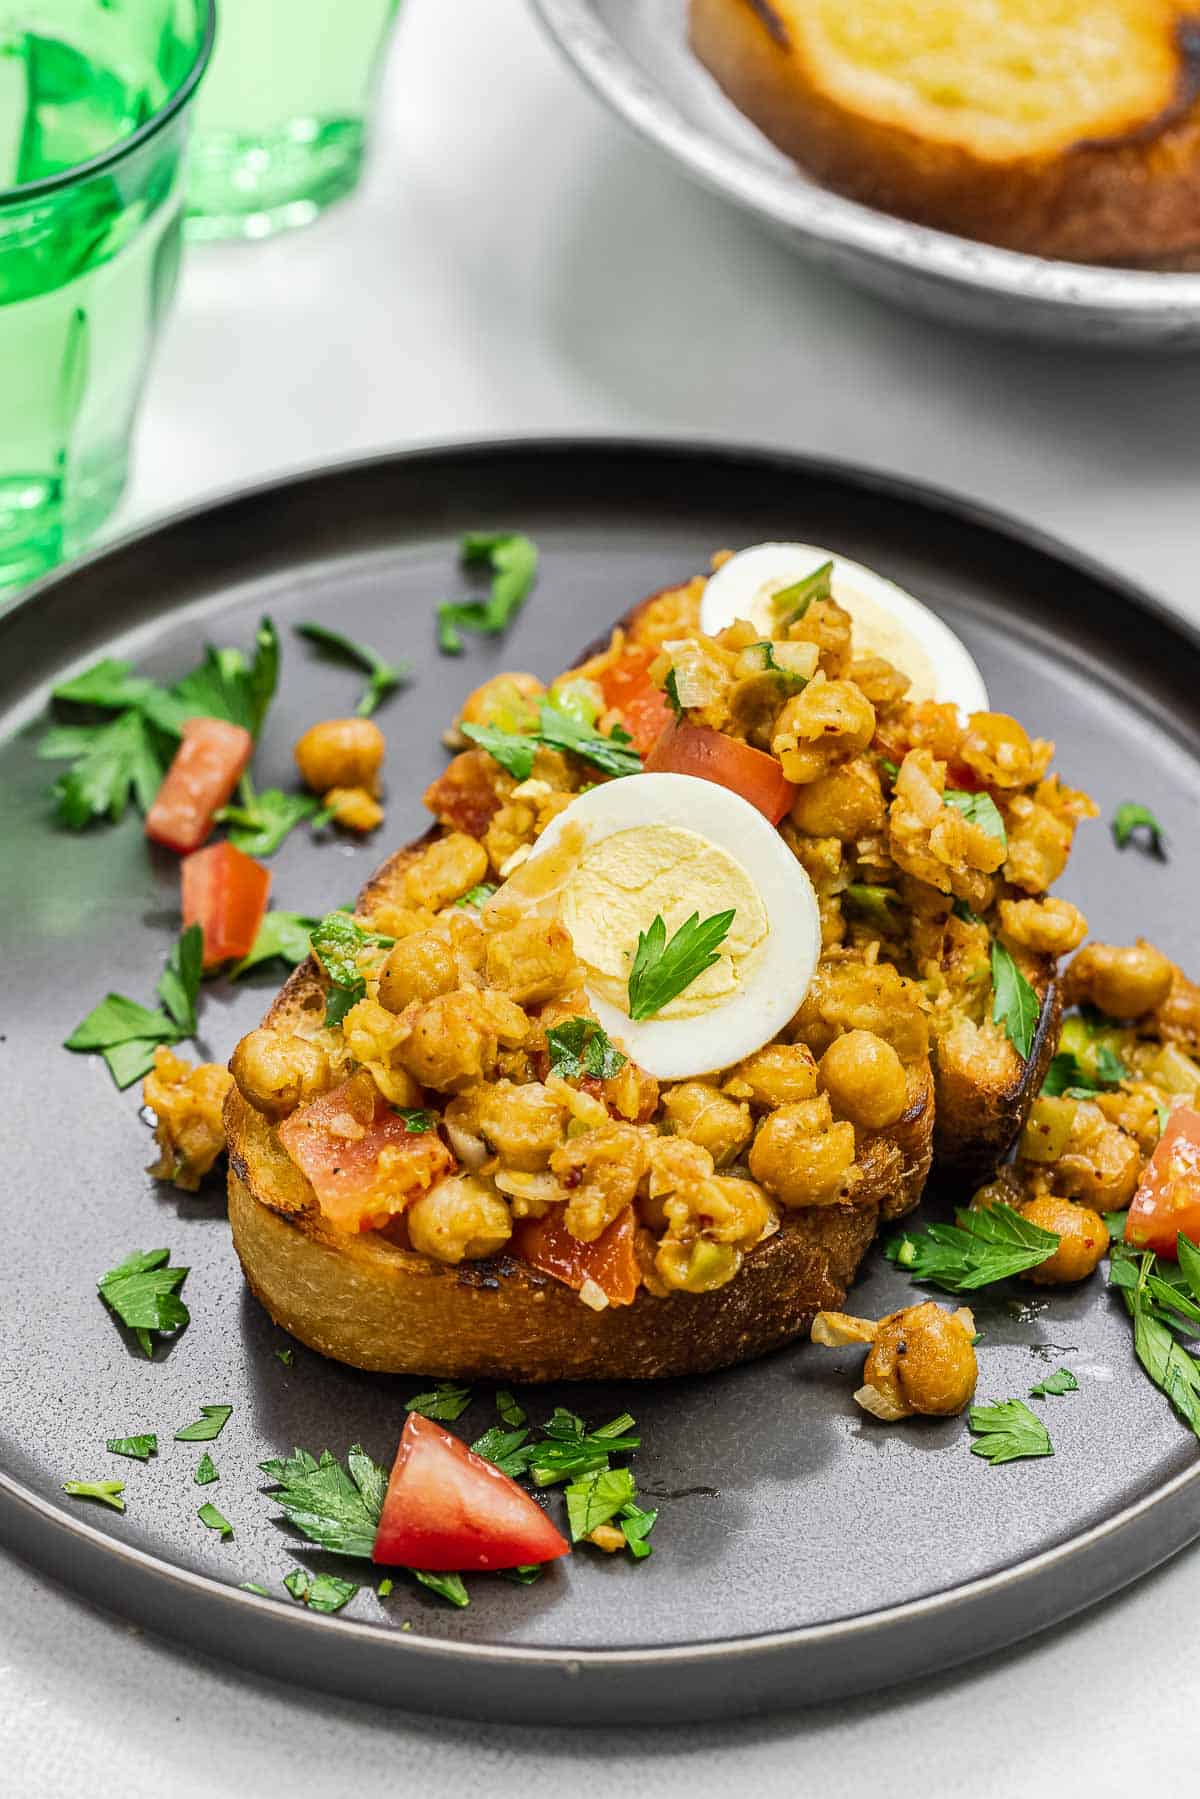 Spiced chickpeas on toast!If someone dared me to make a satisfying meal out of pantry and fridge scraps, chickpea toast would be it. This vegetarian smashed chickpea toast is a classic Mediterranean diet meal that turns a humble can of chickpeas into dinner. Packed with flavor and plant-based protein, chickpeas on toast makes a satisfying meatless meal in under 10 minutes – ideal for busy weeknights or if you're looking for an easy high-protein breakfast. This quick and easy chickpea toast can be as basic or as dressed up as you want it to be. I use five basic ingredients – good crusty bread, chickpeas, extra virgin olive oil (of course), tomato, and scallions. And I season them up with a couple of my favorite spices, cumin and Aleppo-style pepper, but other spices would also be good here (I give you more ideas below). Keep this chickpea recipe vegan or top it with a sliced egg. Nothing more is needed, but if you like, add a simple arugula salad or tomato and cucumber salad to the side. In this post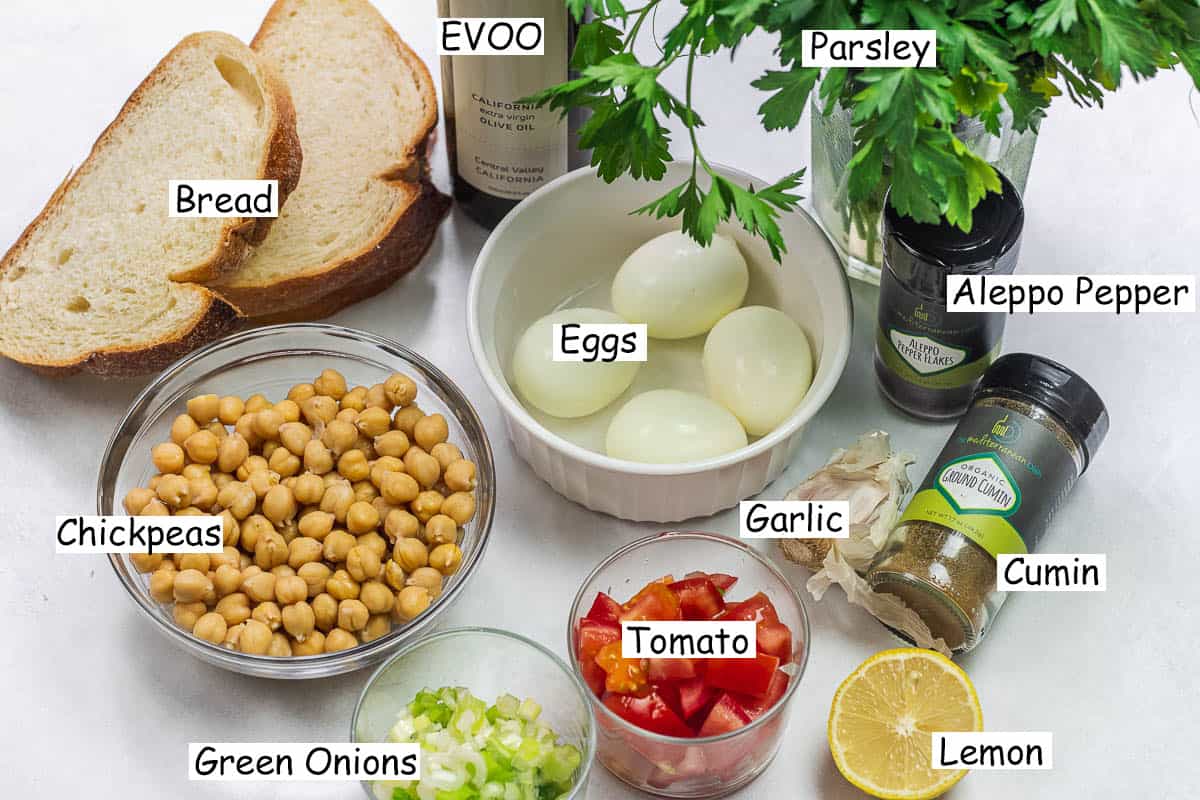 Ingredients for chickpea toastThis is the ultimate “Hmm, what do I have lying around?†meal, with simple ingredients and big flavor! Here’s what you’ll need for this chickpea recipe:
What are chickpeas?I always have chickpeas in my pantry, both canned and dried (there are many ways to use chickpeas aside from the all-essential hummus)! Also known as garbanzo beans, these mild, nutty legumes are my go-to if I need to make a quick nutritious, filling meal or a high protein breakfast that doesn't take too much work. According to the USDA, they’re a plant-based protein powerhouse with about 20g of protein per 3.5 ounces. That’s almost as much protein as an equal amount of chicken! Chickpeas are also high in fiber! In this recipe, I take a shortcut and use canned chickpeas. Rinse them under cold water, and give them a good shake to get rid of any excess moisture. Be careful – water from wet chickpeas can splatter when combined with oil in a hot skillet. So I recommend using a splatter guard when making this recipe or drying your chickpeas on a towel before you toss them in the pan. 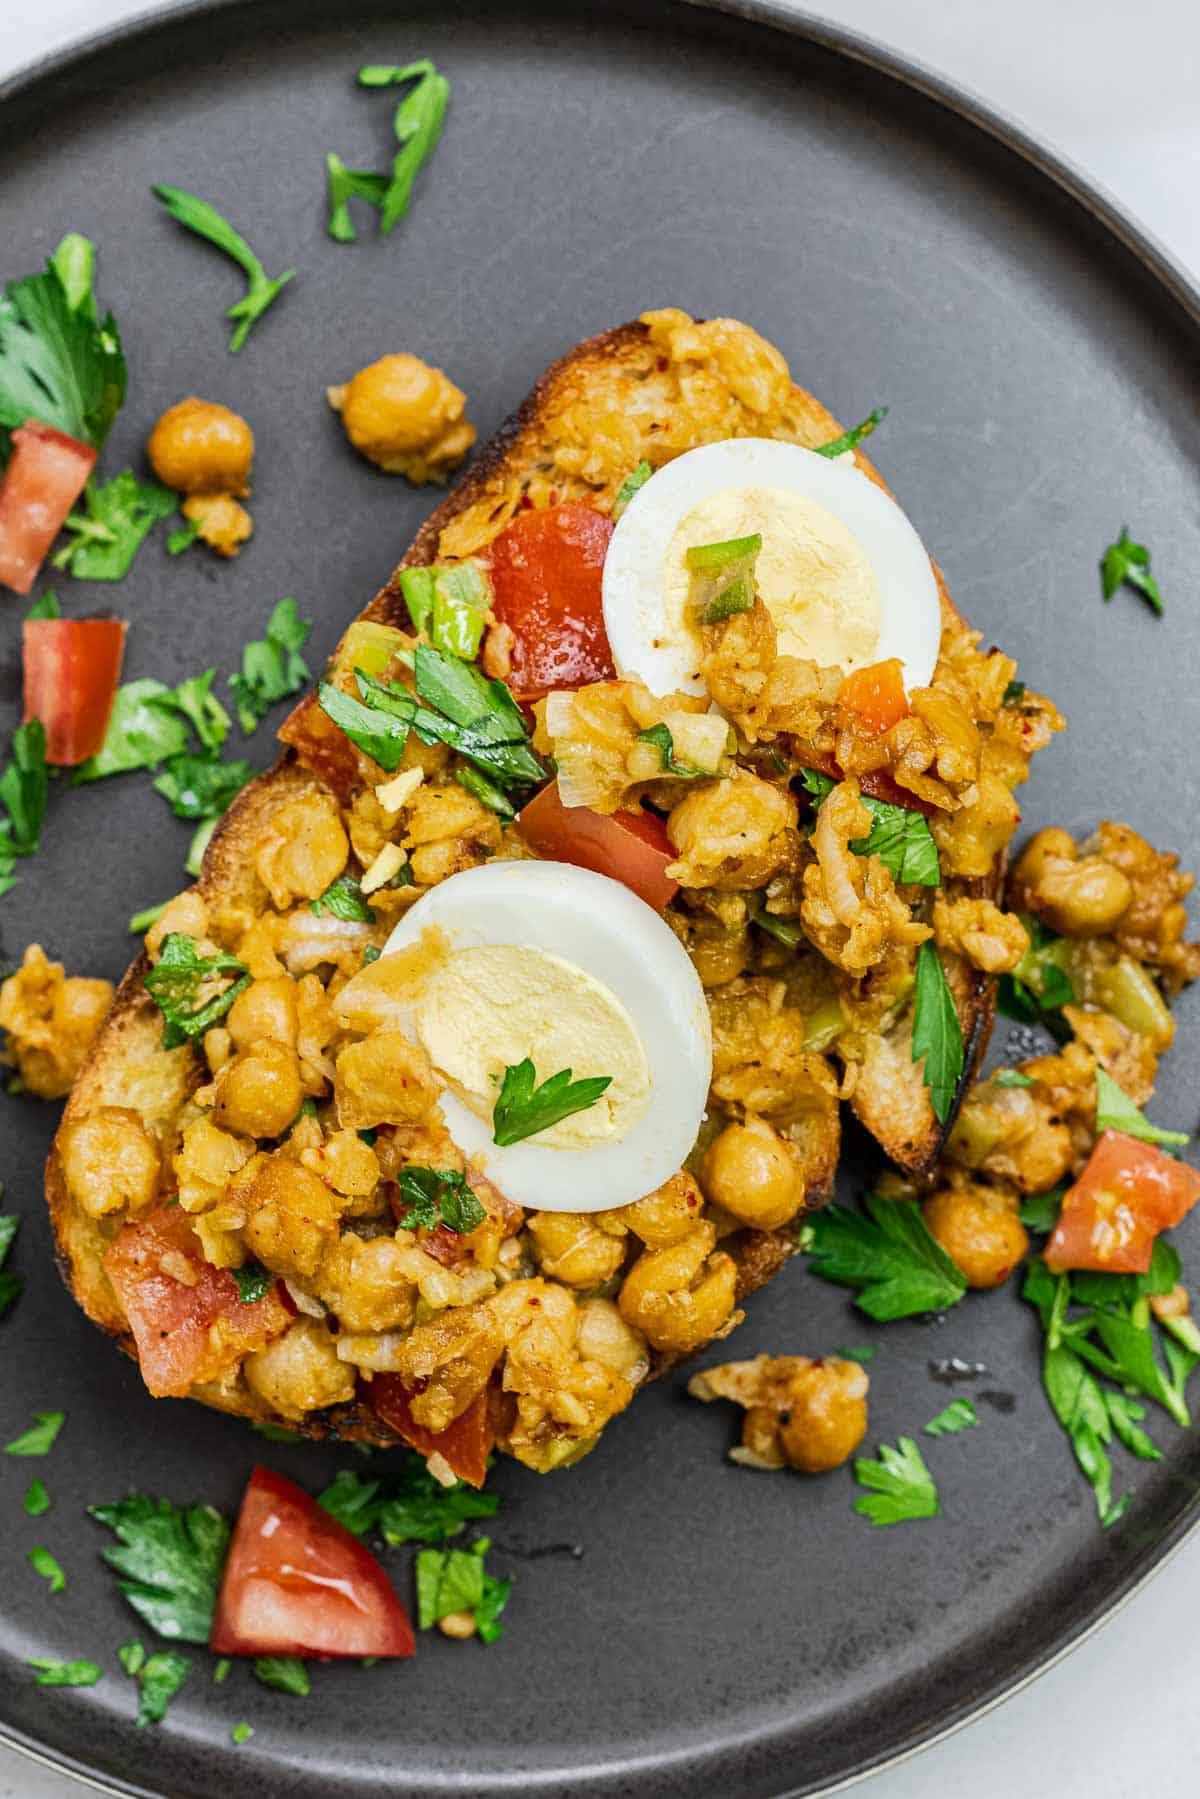 How to make chickpea toast
Make ahead tipsTo work ahead, you can make the smashed chickpea mixture in advance, so all you need to do is quickly reheat it and toast the bread. I also sometimes double the ingredients for the chickpea mash so I can have enough leftovers for the next day. Swaps and substitutionsMissing a few ingredients? No problem! This easy vegetarian toast recipe lends itself well to variations. Here are some ideas for how you can substitute ingredients:
 How to store and reheat leftoversIn my house, 4 slices of bread and 1 can of chickpeas are gone in one sitting! But if you have leftovers of the chickpea spread, simply store it in an airtight container in the refrigerator for up to 4 days. To reheat, add the smashed chickpeas to a skillet set to medium heat. If they’ve dried out in the fridge, add a little water and a drizzle of olive oil to loosen them up. While they reheat, toast more bread. Top the bread with the chickpea smash, drizzle more EVOO, and enjoy! More chickpea recipesBrowse all Mediterranean recipes.  Vegetarian Smashed Chickpea Toast
Easy vegetarian chickpea toast ready in 10 minutes or less! This protein-packed meal is perfect for busy weeknights. I used canned chickpeas for a shortcut and to make this super convenient, but feel free to cook chickpeas from scratch if you'd prefer! For a vegan option, skip the eggs!
Servings 4 servings
Calories 126.6kcal
Ingredients
Instructions
VideoNotes
Nutrition
Calories: 126.6kcal | Carbohydrates: 15.7g | Protein: 6.7g | Fat: 4.2g | Saturated Fat: 1g | Polyunsaturated Fat: 0.9g | Monounsaturated Fat: 1.3g | Trans Fat: 0.01g | Cholesterol: 93.3mg | Sodium: 175.3mg | Potassium: 174.2mg | Fiber: 1.8g | Sugar: 2.8g | Vitamin A: 571.3IU | Vitamin C: 5.1mg | Calcium: 60.5mg | Iron: 1.9mg
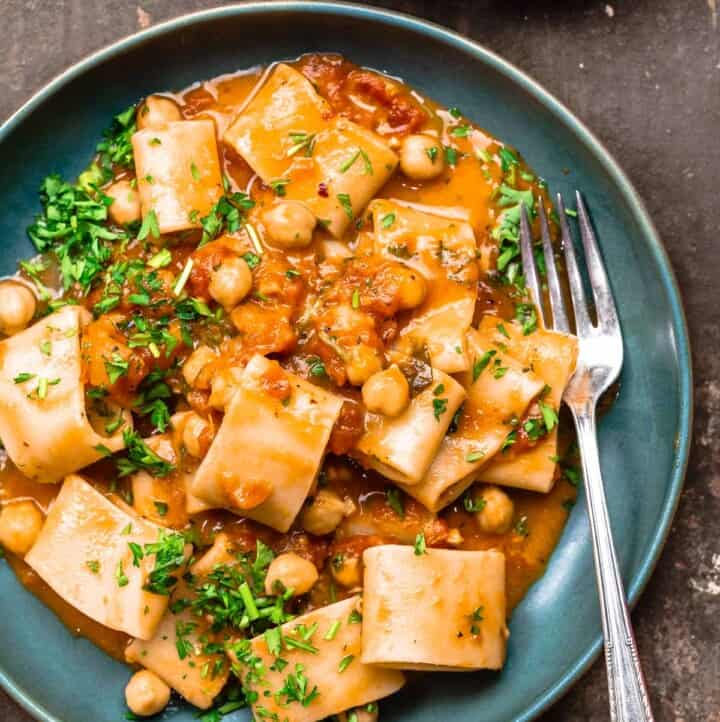
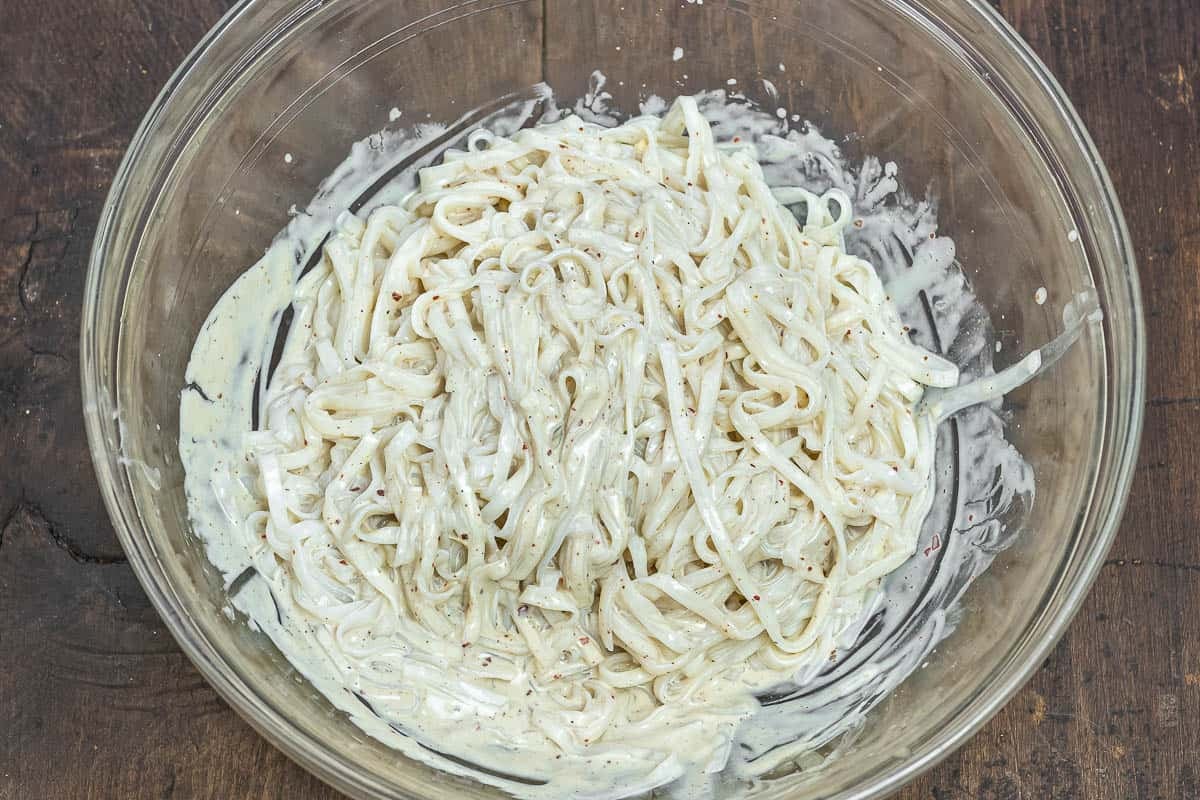
The post Smashed Chickpea Toast with Eggs appeared first on The Mediterranean Dish. via The Mediterranean Dish https://www.themediterraneandish.com/chickpea-toast/ Cold noodle salad with a Mediterranean twist! Chewy rice noodles and crunchy colorful vegetables are tossed in a creamy, nutty tahini dressing with plenty of warm spices to make a quick and easy dinner salad. Plus, learn how to make rice noodles perfectly, so they aren’t clumpy or gummy!  I love Asian-style cold noodle salads, brimming with chopped vegetables and tossed in a creamy peanut sauce. It’s one of my favorite things to order when we eat out, but when I’m at home I add a Mediterranean twist by swapping out peanuts for allergy friendly tahini! The best part is this healthy, vegan, gluten-free dinner salad is ready in 15 minutes. While a typical noodle salad has quintessentially Asian ingredients like rice vinegar and soy sauce, I took a different approach for this recipe. Asian rice or soba noodles are quickly cooked until tender, and then tossed in a decidedly Mediterranean dressing. While there are plenty of nods to this recipe’s Asian inspiration — ginger, garlic, and lime juice — I used the sesame-forward flavor of tahini paste to add a little twist! If you need a peanut substitute or want to try something a little different but just as flavor-packed, this noodle salad recipe is your ticket! Keep it vegan for a light meal or add pan-seared salmon, grilled shrimp, or turkey meatballs for extra protein. In this post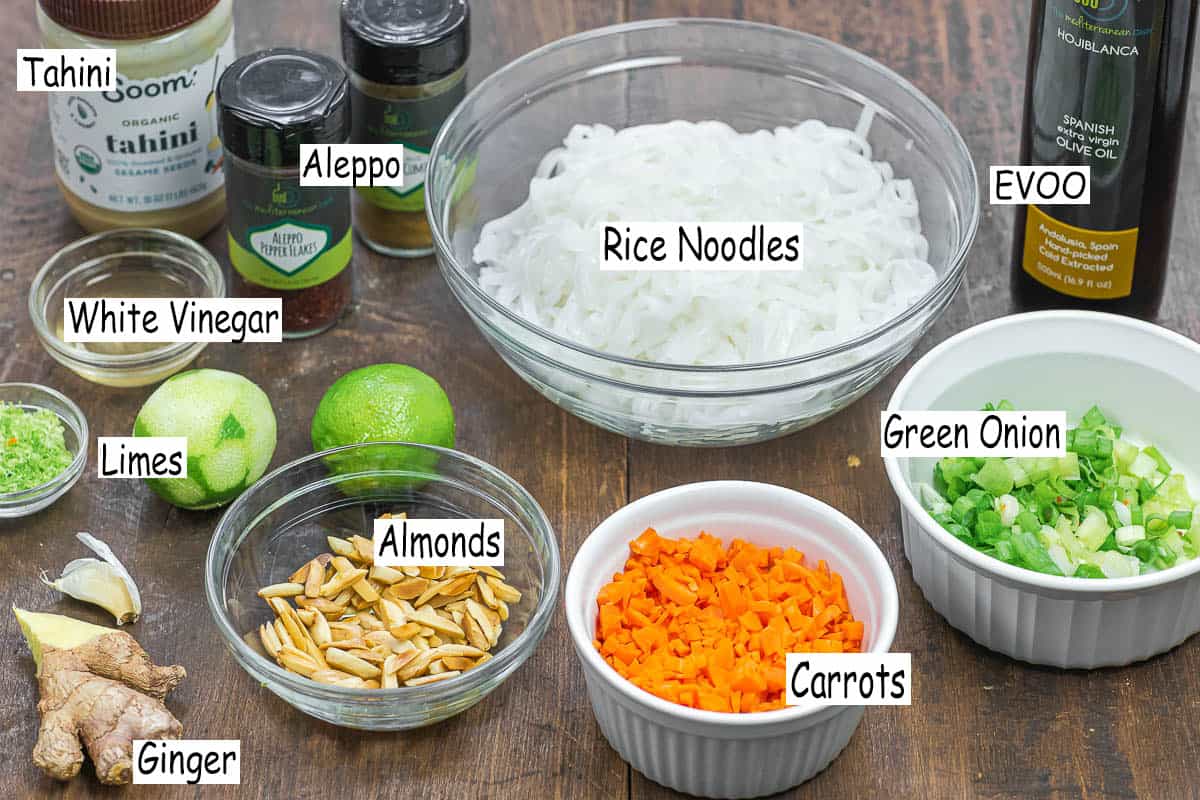 Ingredients you’ll needTo make this vegan noodle salad, you’ll need noodles, a variety of colorful vegetables, and the tahini dressing. Here’s everything you’ll need to get started: NoodlesFor this salad, my favorite noodles are rice or soba noodles. Rice noodles are a white noodle made from, you guessed it, rice! They have a neutral flavor and kind of sit in the background of the other flavors you pair it with. Soba noodles are made from buckwheat, and have a lovely nutty taste, which works well with the nutty flavor of tahini paste. Despite the name, buckwheat doesn't contain any actual wheat and is gluten free. Soba noodles are also the more nutritious option: 100 grams (about 3.5 ounces) of cooked soba noodles has 5.1 grams of protein, for example, and it is also a complete protein (which means it contains all 9 essential amino acids that our bodies cannot produce). Other types of noodles you can use in this salad include:
Noodle salad dressing with tahiniThe tahini-based dressing is what adds the Mediterranean twist to this otherwise Asian-inspired salad. Tahini is a rich and creamy paste made from a single ingredient: roasted sesame seeds. Most people know it because it adds the creamy, nutty flavor to hummus. It’s the perfect swap for peanut butter in this recipe because it provides the nutty flavor and creamy texture you crave without the allergen risk. Even if allergies aren’t a concern in your family, the shift in flavor profile from peanuts to sesame seeds is a fun way to switch things up! Here, the noodle salad dressing combines tahini with lime juice, fresh garlic, and spices to give the salad a Mediterranean flair. Here’s what you’ll need to make it:
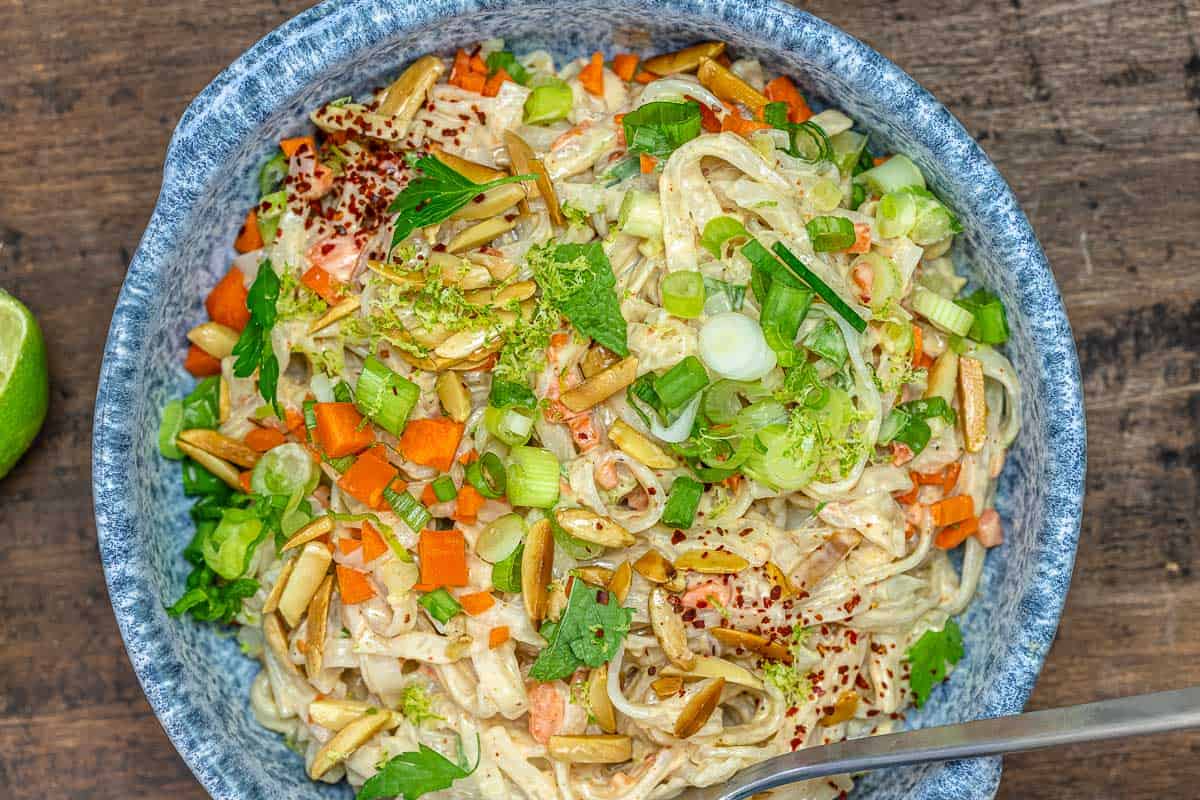
The vegetablesColor and crunch are important elements for the vegetables in this rice noodle salad, especially to add interest when contrasted with the chewy noodles. I used scallions, carrots, and radishes in my noodle salad, but you can use your favorite crunchy vegetables. Broccoli, cabbage, cucumber, bell peppers, and red onions would all be delicious options. I also added chopped cilantro for a peppery bite and a good amount of slivered almonds for even more texture and nutrition. How to make itThis simple dinner salad comes together in 15 minutes or less. Here’s how to make it (the print-friendly recipe with ingredient measurements is below):
Tips for the best noodle saladMaking perfect noodles every time requires a little knowhow. It’s not uncommon for people to end up with clumpy or gummy noodle salad, but there is hope! Just follow the steps below for silky, slippery noodles every time!
 Serve it withI love this salad recipe because it’s filling, allergy friendly, and vegan, which makes it perfect for weeknights or to quickly toss together for unexpected guests. How to store leftover noodle saladWe never have leftovers of this at my house, but if your household is smaller or you served it as part of a larger spread you'll want to follow a few rules when storing noodle salad.
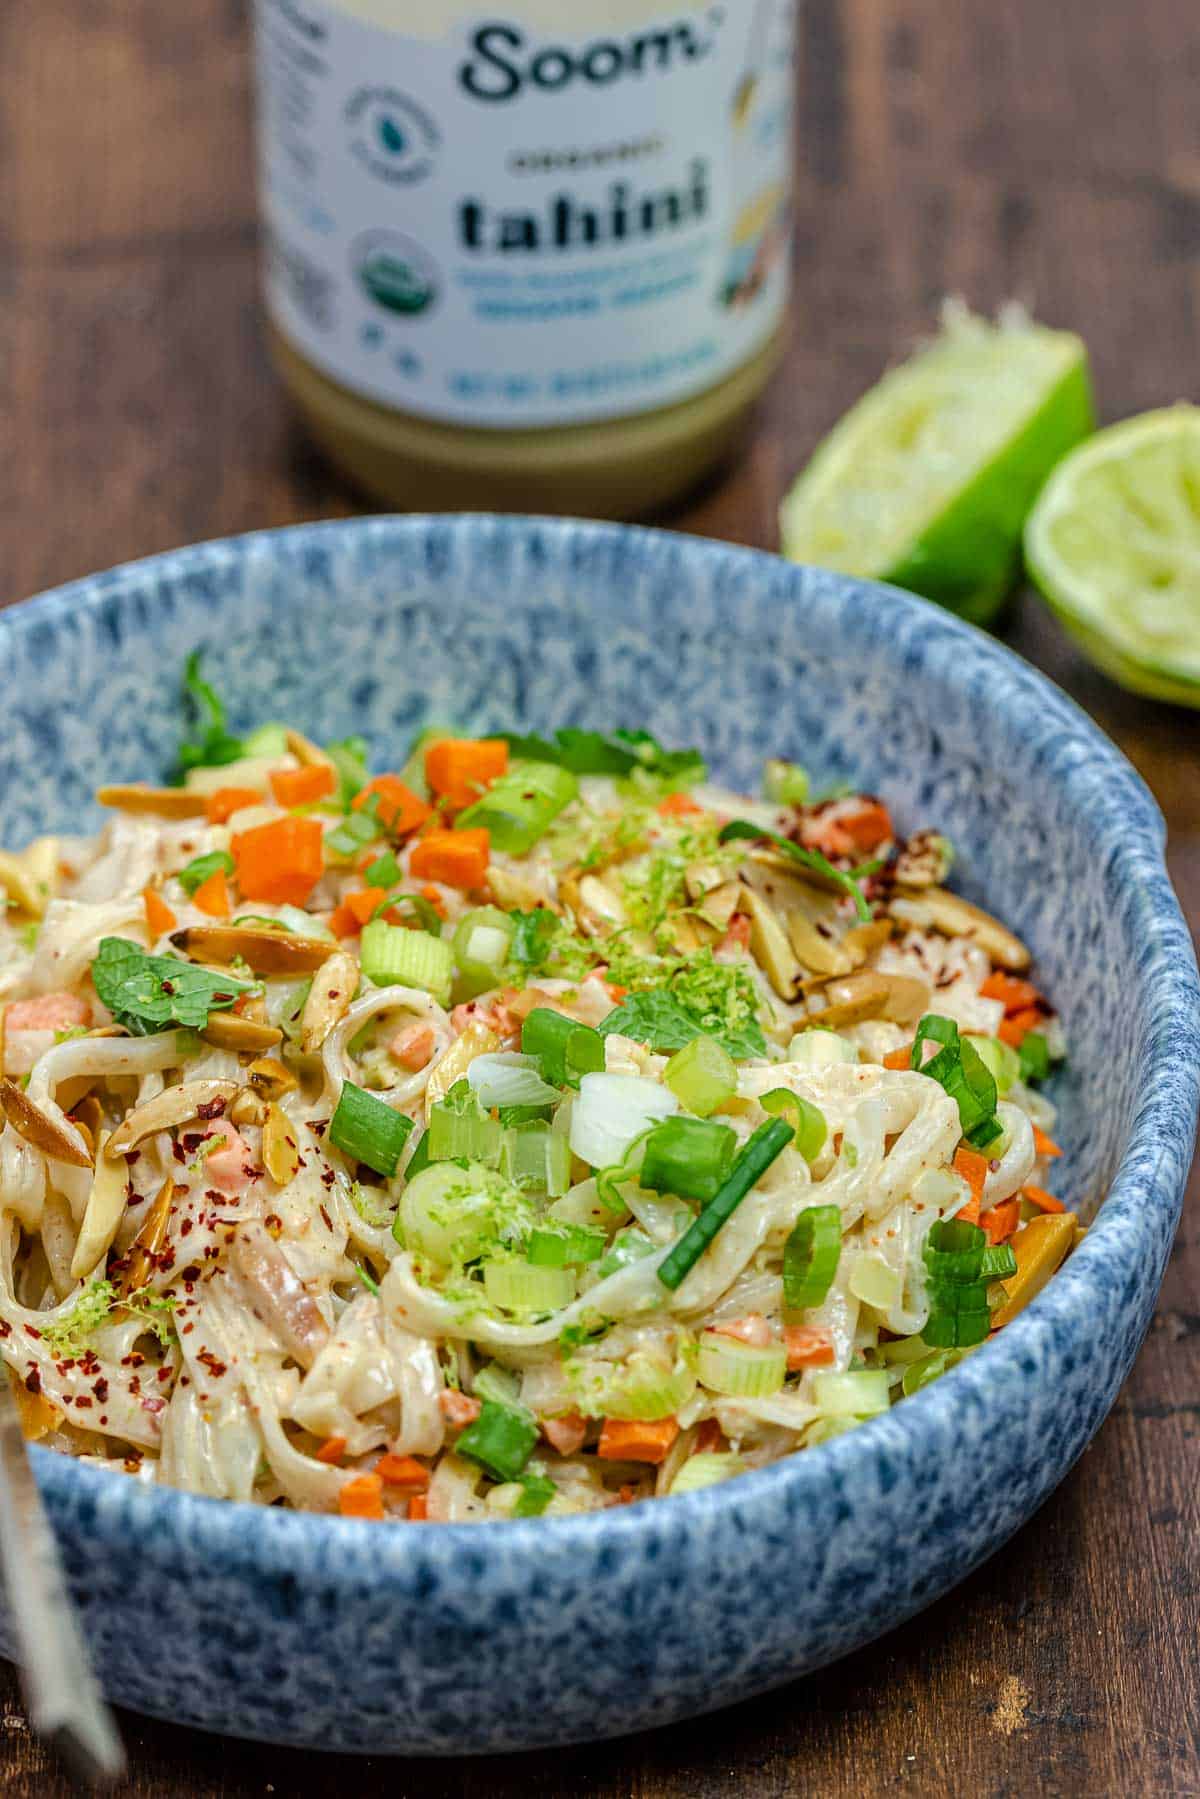
More pasta salad recipesBrowse all Mediterranean recipes.  Cold Noodle Salad with Creamy Tahini Dressing
Must-try Asian-inspired cold noodle salad with a Mediterranean twist! I swap out peanut sauce for allergy friendly tahini (roasted sesame seed paste), add some warm spices like ginger, and toss in plenty of colorful crunchy vegetables for a satisfying and easy vegan dinner! And don't miss my tips for how to cook rice noodles perfectly, so they don't clump together.
Servings 4 servings
Calories 521.7kcal
Ingredients
For the dressing
Instructions
VideoNotes
Nutrition
Calories: 521.7kcal | Carbohydrates: 52g | Protein: 12g | Fat: 32g | Saturated Fat: 4.1g | Polyunsaturated Fat: 11.5g | Monounsaturated Fat: 15g | Trans Fat: 0.003g | Sodium: 260.4mg | Potassium: 430.2mg | Fiber: 5.7g | Sugar: 1.9g | Vitamin A: 2962.5IU | Vitamin C: 10.3mg | Calcium: 127.4mg | Iron: 3.3mg
The post Mediterranean-Style Cold Noodle Salad with Tahini Dressing appeared first on The Mediterranean Dish. via The Mediterranean Dish https://www.themediterraneandish.com/cold-noodle-salad/ |
ABOUT MEHi, I am Daniel Jones from Overland Park, MO. I am a chef by profession, & also publish my recipe tips online on blogs and social media. Archives
April 2023
Categories |


 RSS Feed
