|
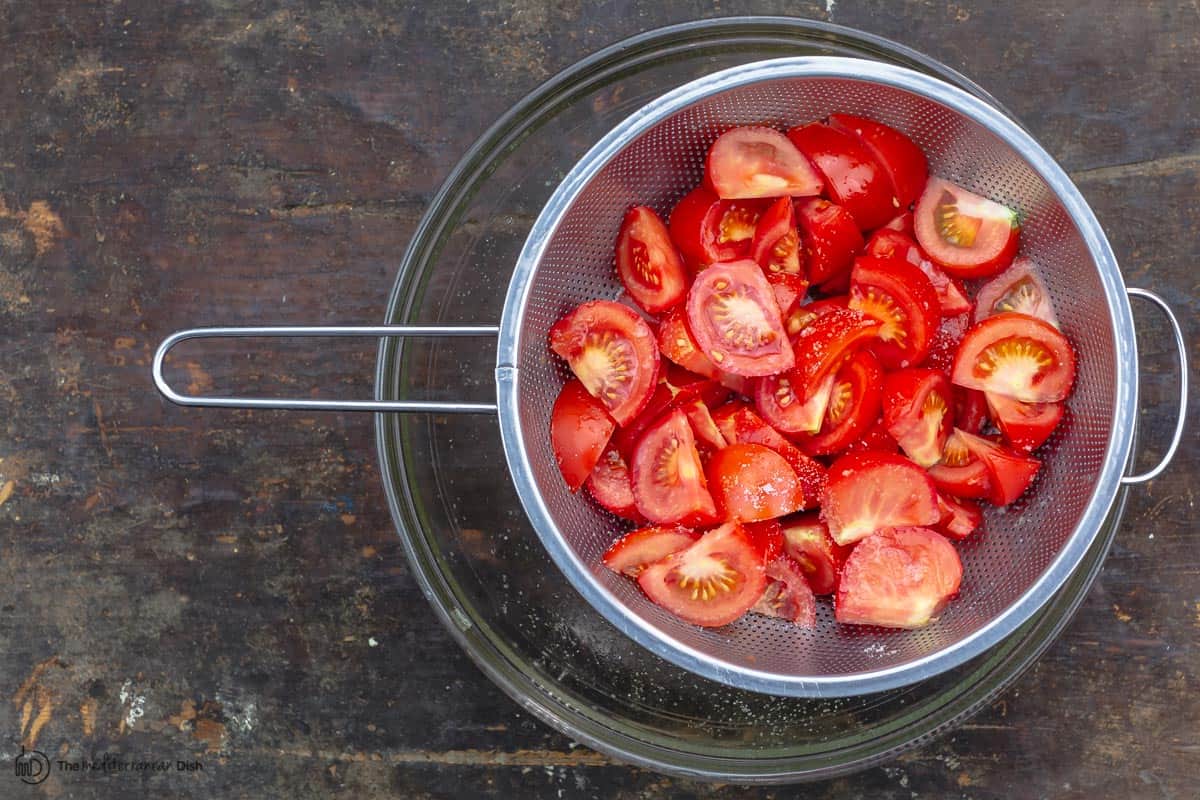
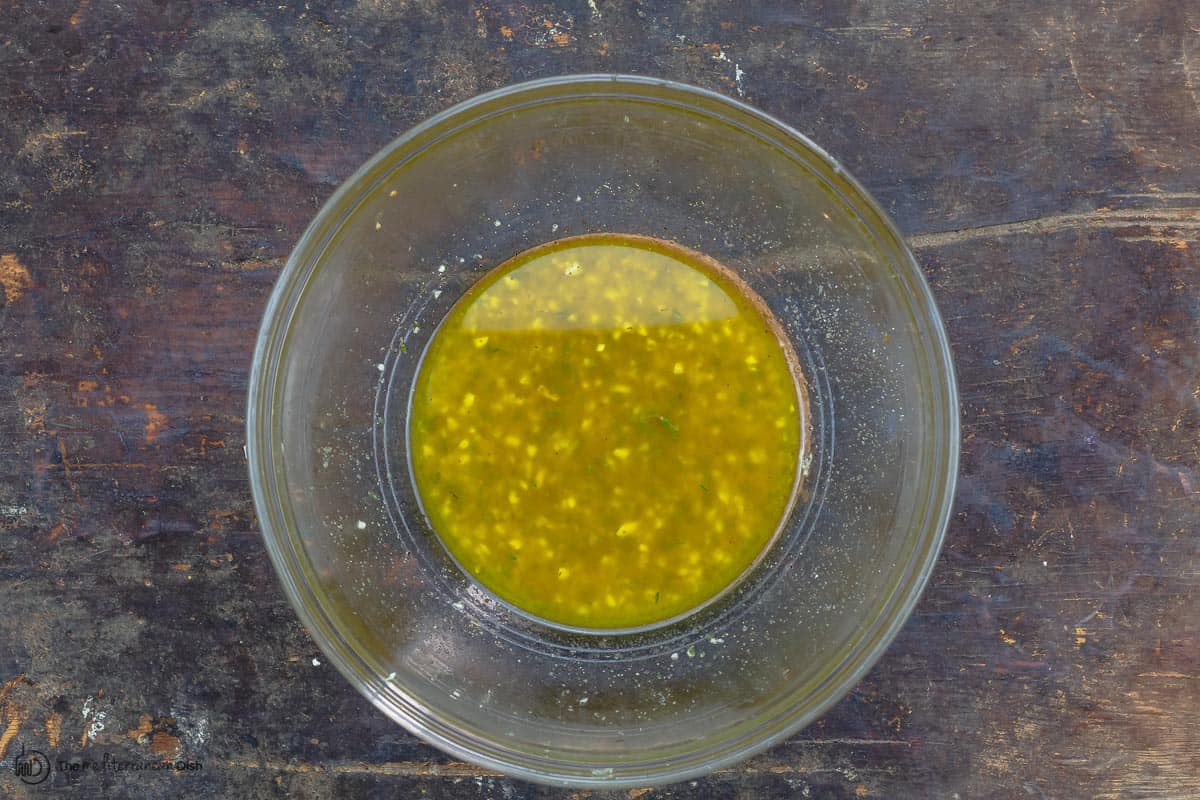
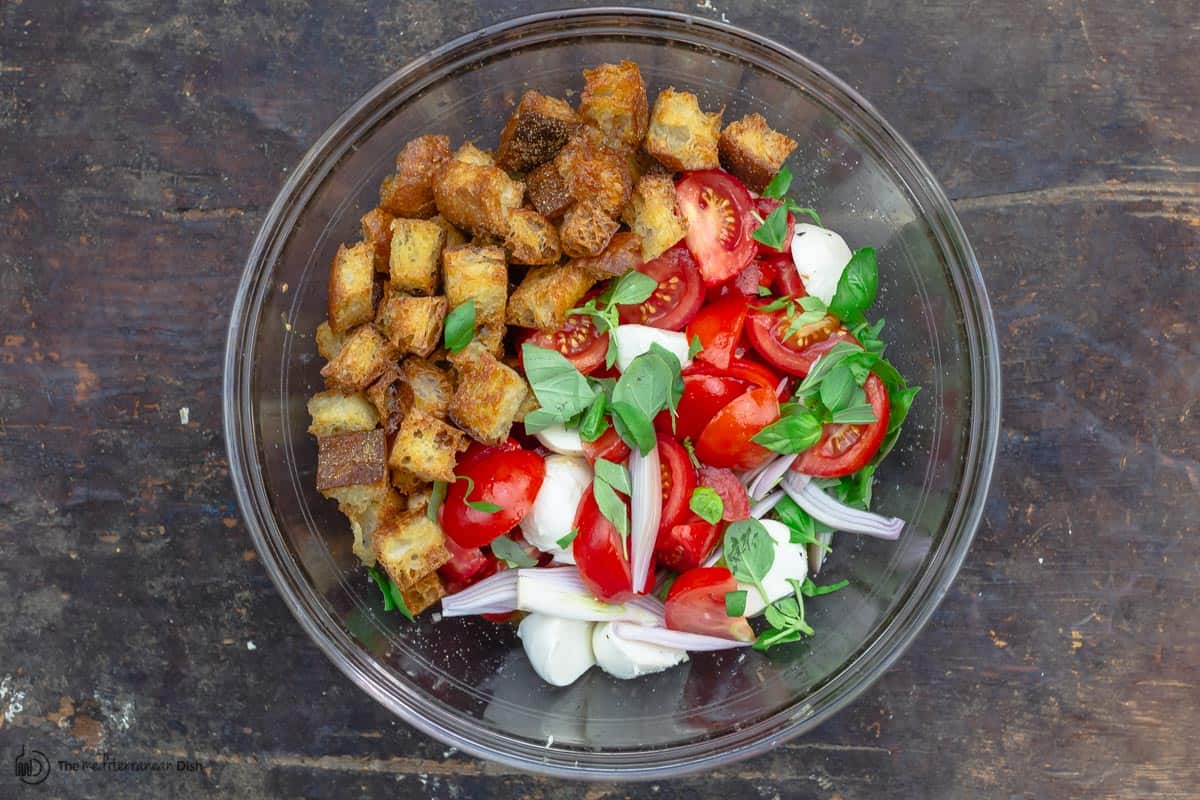
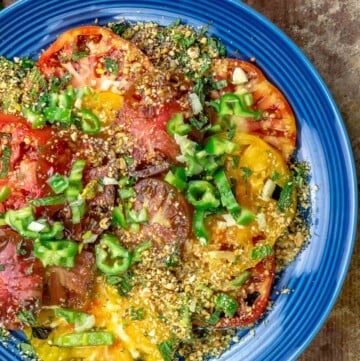
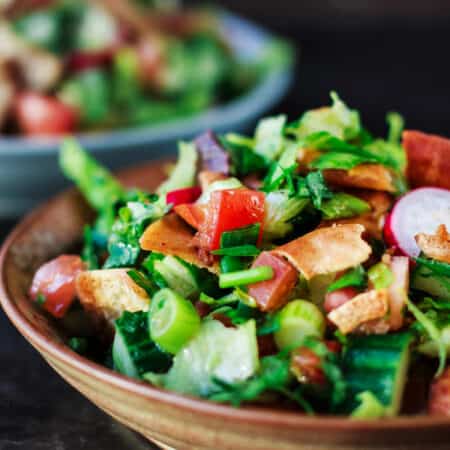
Perfect ripe tomatoes, hearty Italian bread, and a tangy vinaigrette make this easy panzanella salad! Drying and toasting the bread with a little olive oil in the oven gives you the best texture. Check out more tips for how to make panzanella perfectly! 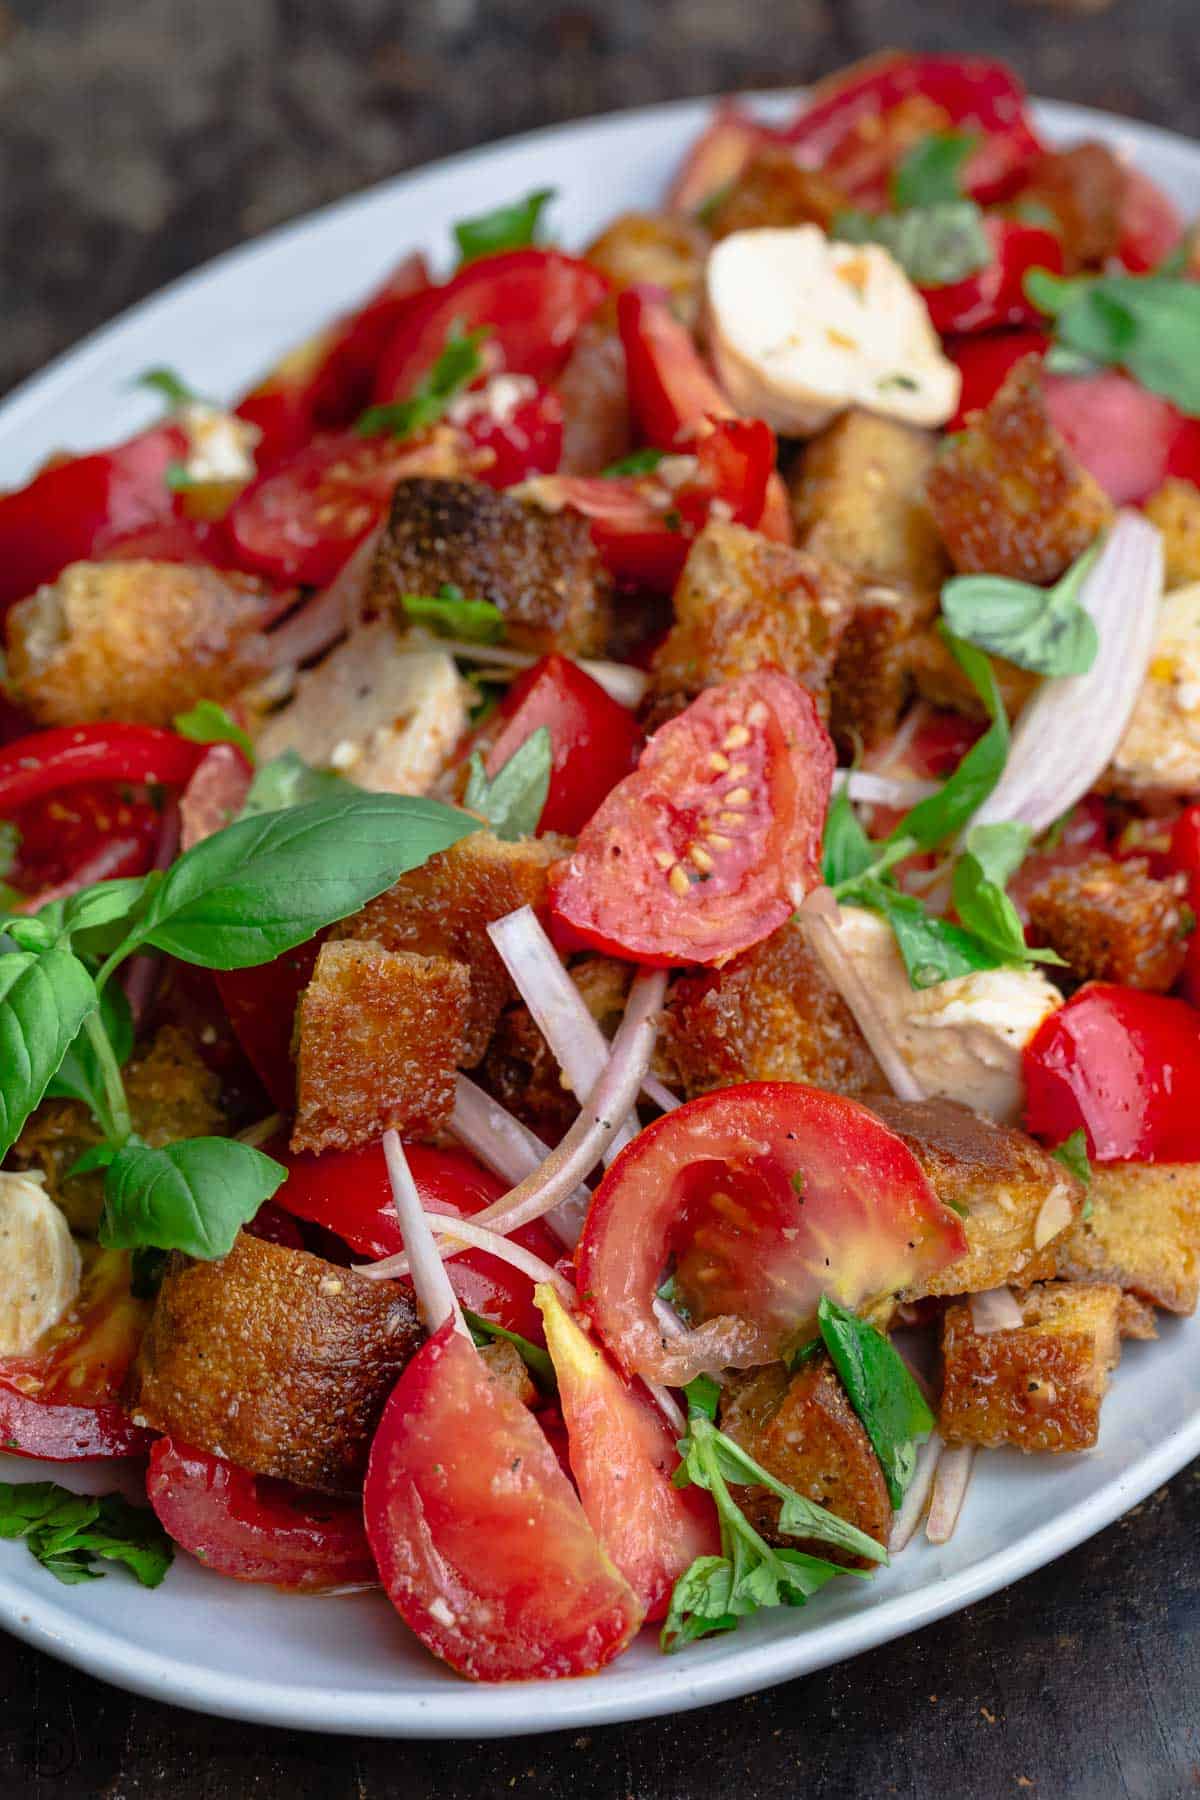 A classic Tuscan bread salad, panzanella is made of ripe tomatoes, dried Italian bread, and a simple tangy dressing. But for something so simple as bread and tomatoes, panzanella salad is one surprisingly complex and delightful summer dish, and one of my favorite things to make with tomatoes. As much as tomatoes seem like the star of this salad, my Italian friends will say that panzanella is not another tomato salad with some bread croutons; it's a bread salad that can be made with tomatoes or any other vegetables (although I stick with the classic tomatoes in this panzanella recipe). The idea of bread salads is a familiar thing in different parts of the Mediterranean (if you've had my fattoush salad, you know it's another delicious example that gives leftover bread--in this case, pita--a new life). And beyond salads, in Mediterranean cooking, you'll find other ways to use up some bread in soups like gazpacho and ribollita, to sweet like sopapillas and endless bread puddings and more. 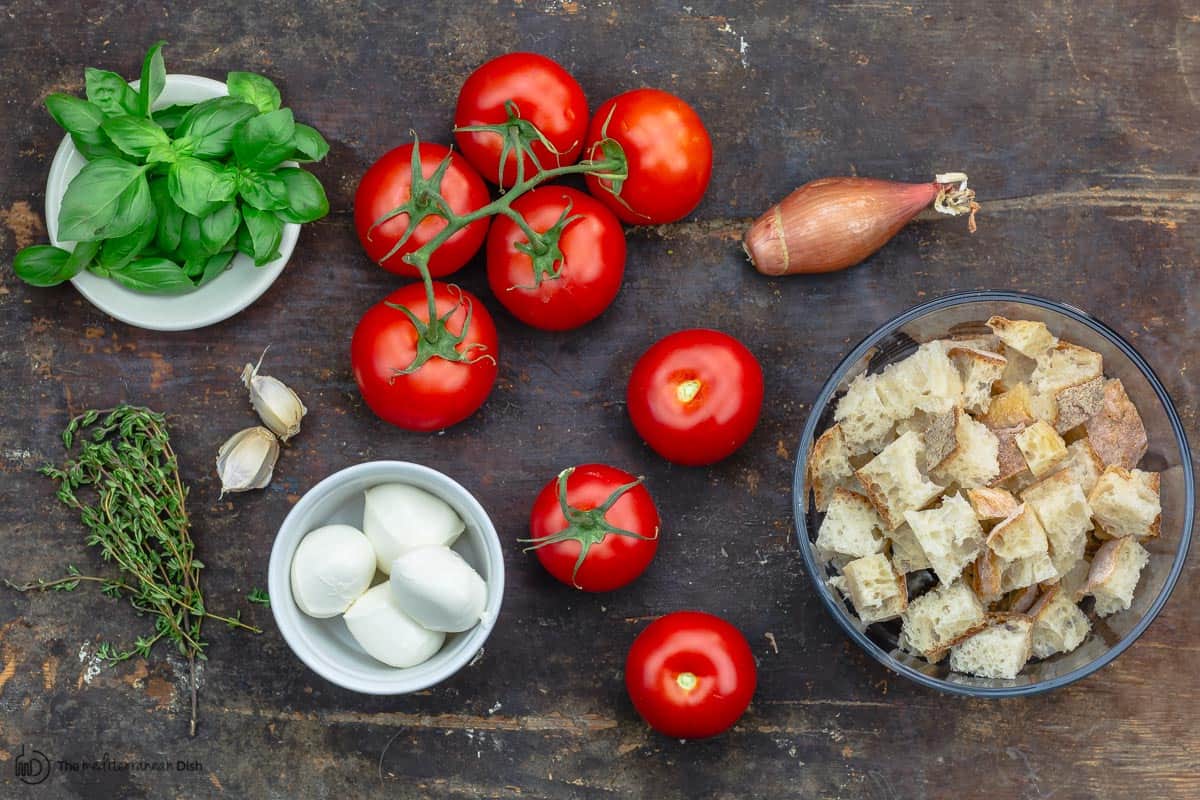 So, about traditional panzanellaThe Guardian points out that as with other peasant dishes born of necessity, from Florence down to Rome, there are endless variations of this salad, but the non-negotiable is hefty day-old country bread. Prepared the traditional way, this salad will always start with stale bread that's soaked in water for about 15 minutes or so, then wrung out and cut up or crumbled by hand to be tossed with vegetables (whatever is in season), extra virgin olive oil, and red wine vinegar. But after tinkering a few times, I give you my favorite version of panzanella (mine does have mozzeralla), and I'm excited to share some tips that have made all the difference for me. Dry and toast your bread for panzanella!The best bread for this salad is a hearty loaf with a coarse, chewy center and a good crunchy crust that will allow it to sit in the dressing without falling apart and getting too soggy. Try Italian country bread or ciabatta, and if you remember, tear the bread up and allow it to sit uncovered for a few hours or overnight so that it will dry and harden. And before you make the salad, go ahead and toss the bread in some good extra virgin olive oil and toast it in the oven for a few minutes until it crisps in some parts but remains somewhat chewy too. By drying your bread and toasting it first, it will absorb the delicious dressing and will become soft and delicious without getting too soggy. 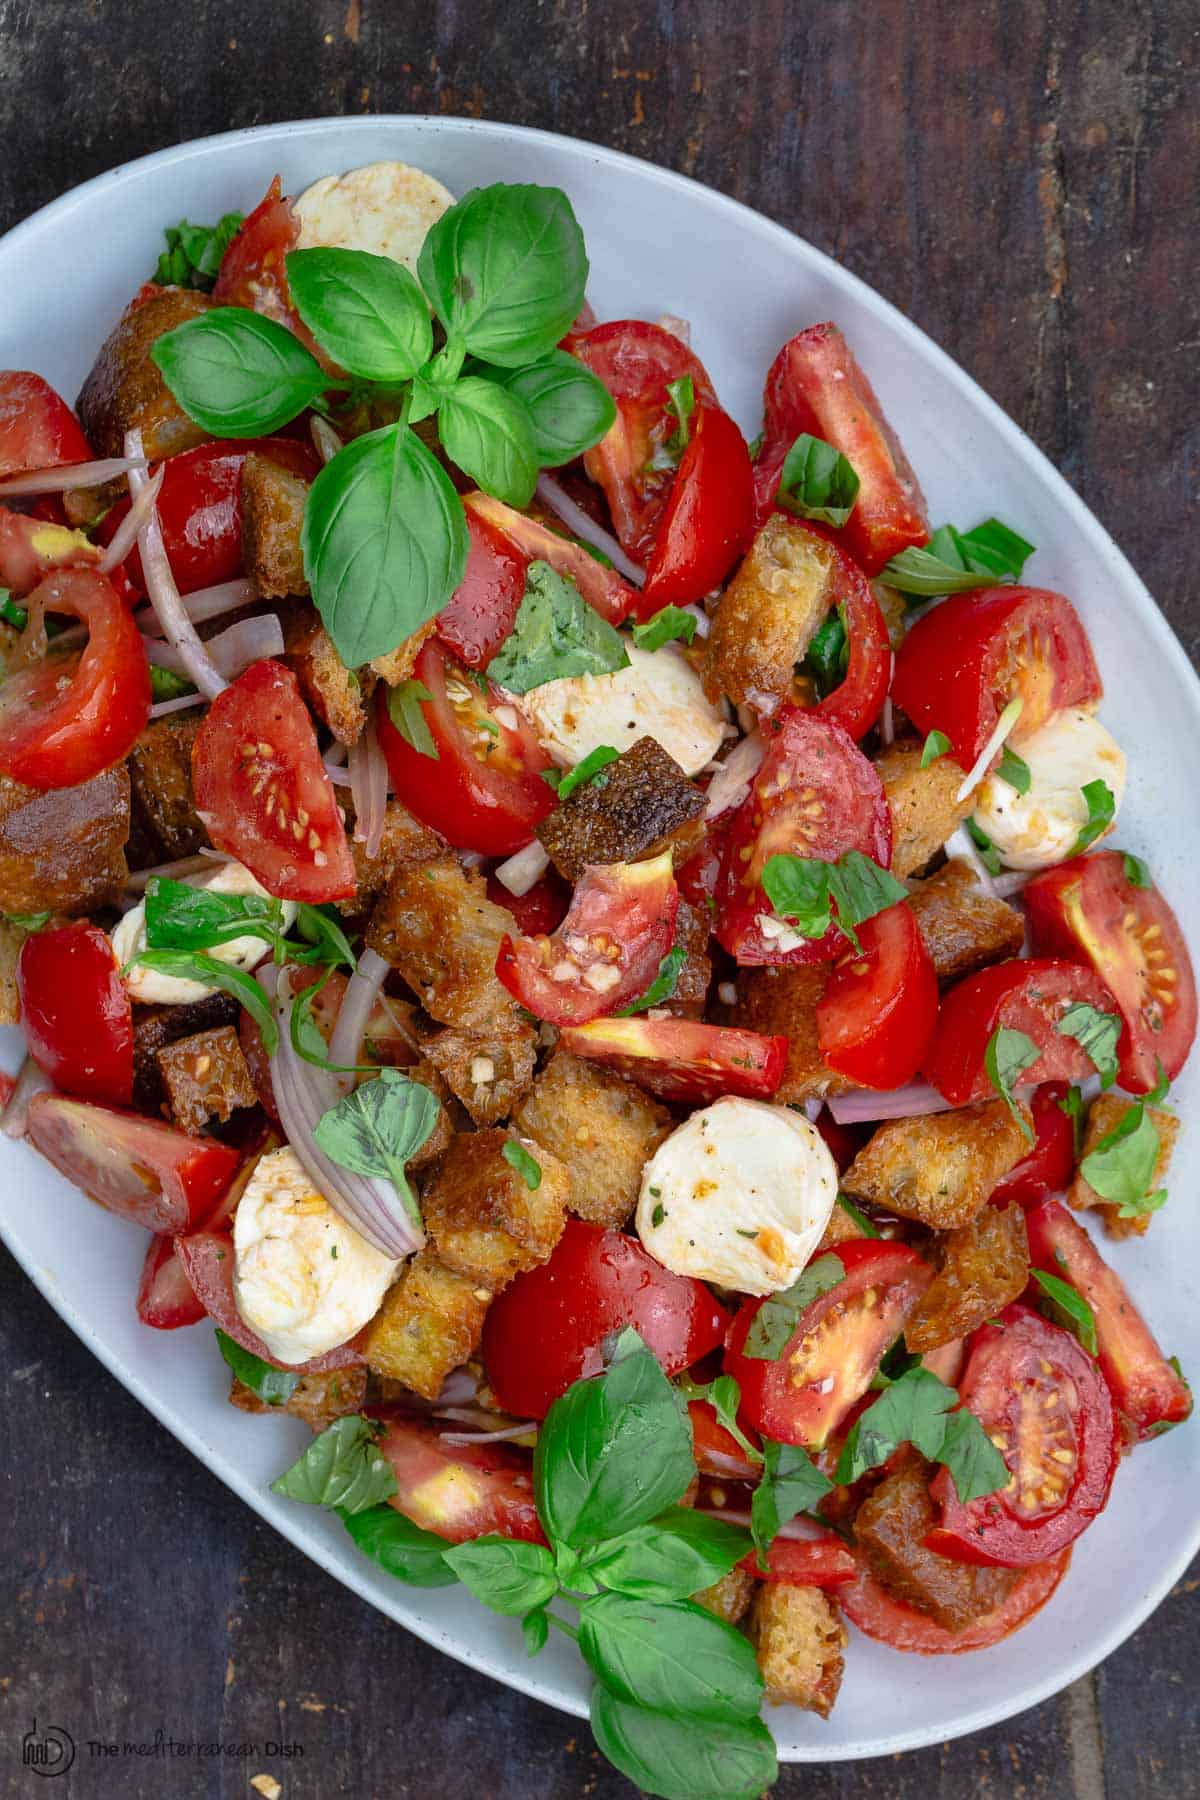 Use plump ripe tomatoesAlthough you can use cucumbers or other garden veggies that are in season, I'm all about a simple tomato panzanella. Look for perfectly ripened tomatoes that are plump and heavy for their size. They should be firm with some give, and the skin should be tight without blemishes. As far as what kind of tomatoes to use, in this recipe, I used vine ripe tomatoes but when colorful heirloom tomatoes are in season, that's what I like to use. If you choose to use small tomatoes like cherry tomatoes or grape tomatoes, for example, be sure to cut the them in half, because if you keep them whole, you miss out on their juice which is an important part of the tasty dressing. Salt your tomatoes firstShould you salt your tomatoes first? In this recipe, I highly recommend that you slice and salt your tomatoes before you make the salad. This only takes about 15 minutes or so for the salt to draw out the juices of the tomatoes. This intensifies the flavor of the tomatoes and gives you some delicious liquid to use in making the dressing! And it's convenient, since you work on toasting your bread while the tomatoes are sitting in the colander. The dressingA traditional panzanella recipe will call for the simplest of dressings made of good extra virgin olive oil and red wine vinegar. The dressing in this salad is kicked up a couple of notches with the addition of fresh garlic, thyme, and a small squeeze of Dijon mustard. And don't forget, use the tomato juice you created from salting the tomatoes. How to make panzanella salad
Let the salad sit for 30 minutes before serving!Once you mix the salad, allow it to sit for a few minutes so the flavors meld and the bread can soak up a good bit of the dressing. How long? Some recipes will allow panzanella salad to sit for up to 4 hours before serving. But if you're like me, and you don't love a terribly soggy panzanella, then 20 to 30 minutes will do the trick. The bread with grab the dressing and develop some good flavor without disintegrating and turning into mush. Serve it withThis sunny Tuscan bread salad is the perfect thing to serve during the warmer months when tomatoes are in season. It's perfect on BBQ night with anything from grilled chicken to salmon kabobs. It's also a great starter to a fun Italian menu with anything including sundried tomato pasta, eggplant parmesan, chicken pesto, or Fish of your choice. Panzanella can also be the perfect summer salad for your next BBQ with things like chicken kabobs, lamb burgers, or grilled shrimp. Other tomato salads to tryYou may also enjoy 50+ Top Mediterranean diet recipes. For all recipes, visit us here.  Simple Tomato Panzanella Recipe
Panzanella salad with hearty Italian bread, tomatoes, shallots and basil, tossed in a light and tangy dressing. If you like, add fresh mozzarella cheese. Toasting the bread in the oven for a few minutes produces the best texture. How long you allow your panzanella salad to sit is up to you, I find 30 minutes to be a good amount of time for the flavors to meld and for the bread to soak just enough of the dressing without getting too soggy.
Servings 6 people
Calories 82.3kcal
Equipment
Ingredients
Instructions
VideoNotes
Nutrition
Calories: 82.3kcal | Carbohydrates: 7.1g | Protein: 5g | Fat: 4.4g | Saturated Fat: 1.4g | Potassium: 409mg | Fiber: 2.1g | Vitamin A: 1538.2IU | Vitamin C: 24.5mg | Calcium: 89.9mg | Iron: 0.6mg
*This post first appeared on The Mediterranean Dish in 2020 and has been updated with new information for readers' benefit. The post Panzanella Salad (Bread and Tomato Salad) Recipe appeared first on The Mediterranean Dish. via The Mediterranean Dish https://www.themediterraneandish.com/tomato-panzanella-salad-recipe/
0 Comments
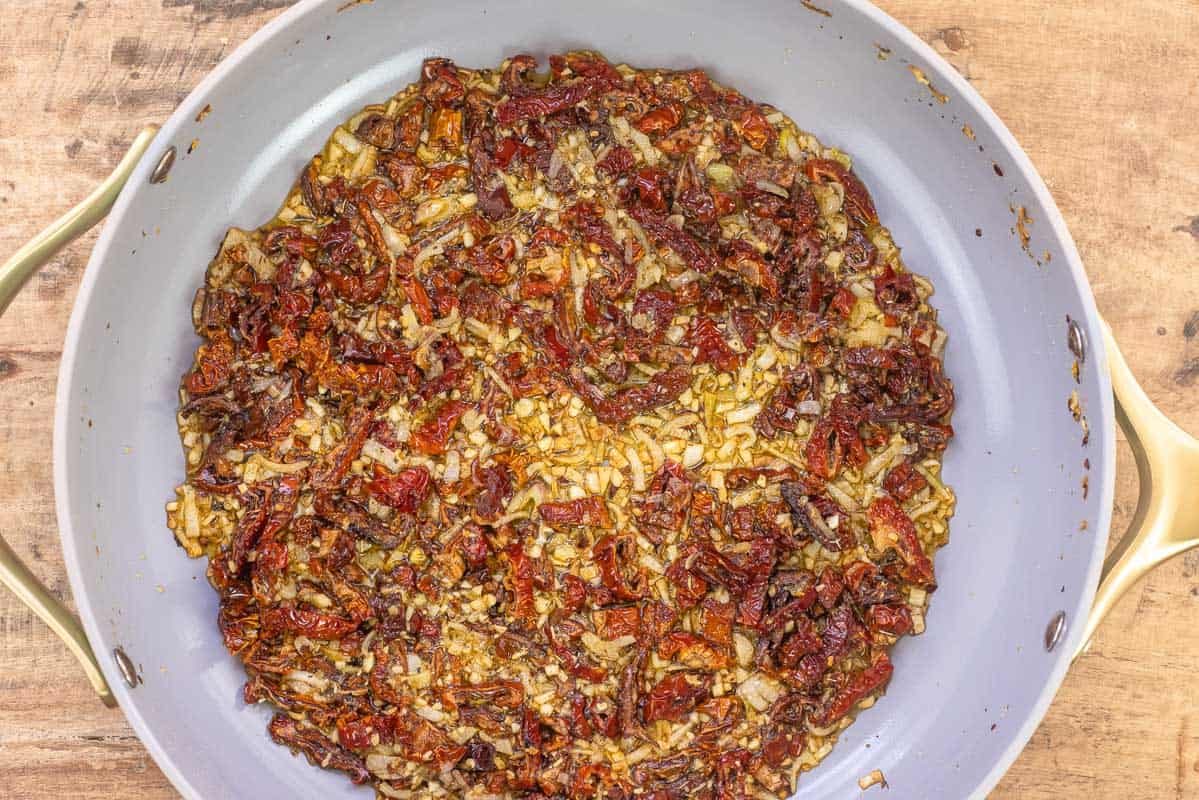
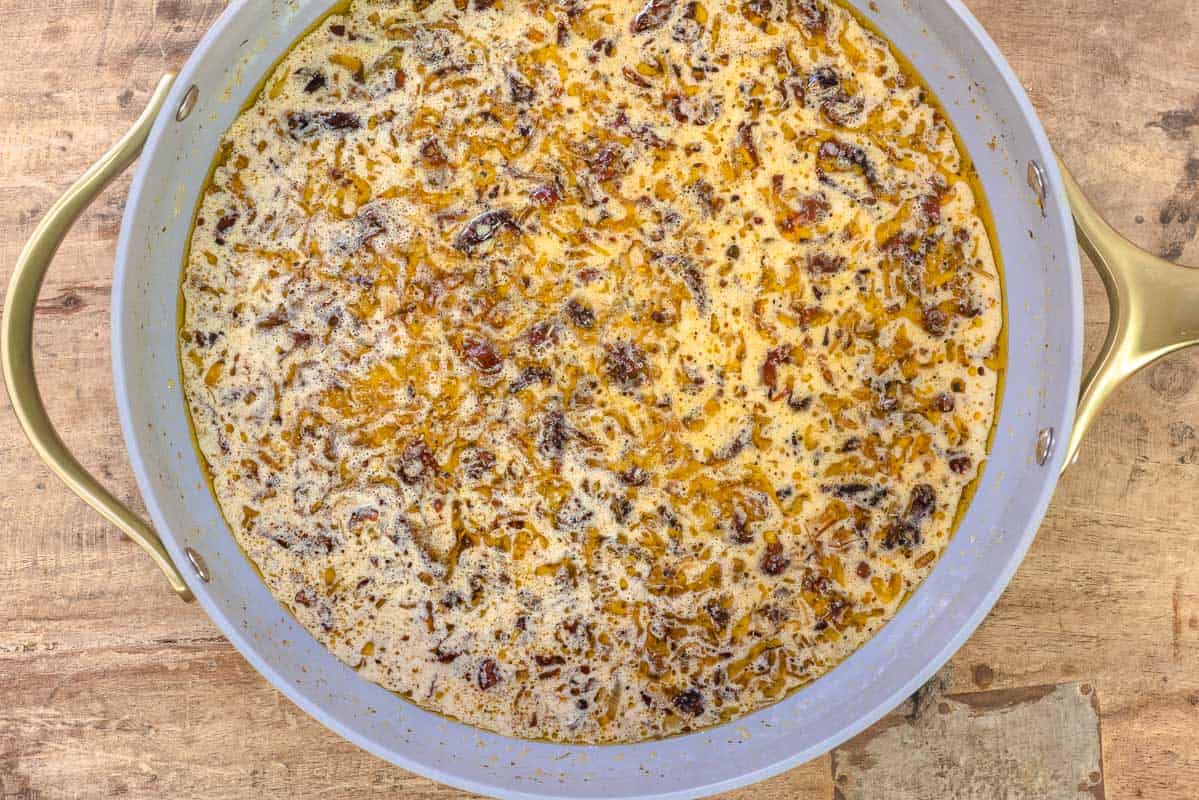
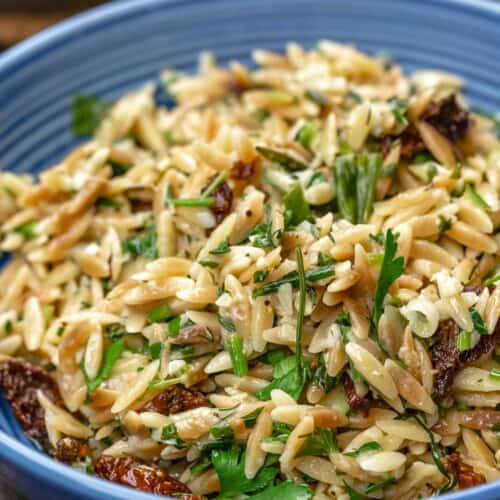
10 minutes and a few pantry staples give you this delicious, creamy sun-dried tomato pasta! Bursting with tangy and subtly sweet flavor, this Italian-style pasta with sundried tomatoes is perfect as a vegetarian dinner or with chicken breast. 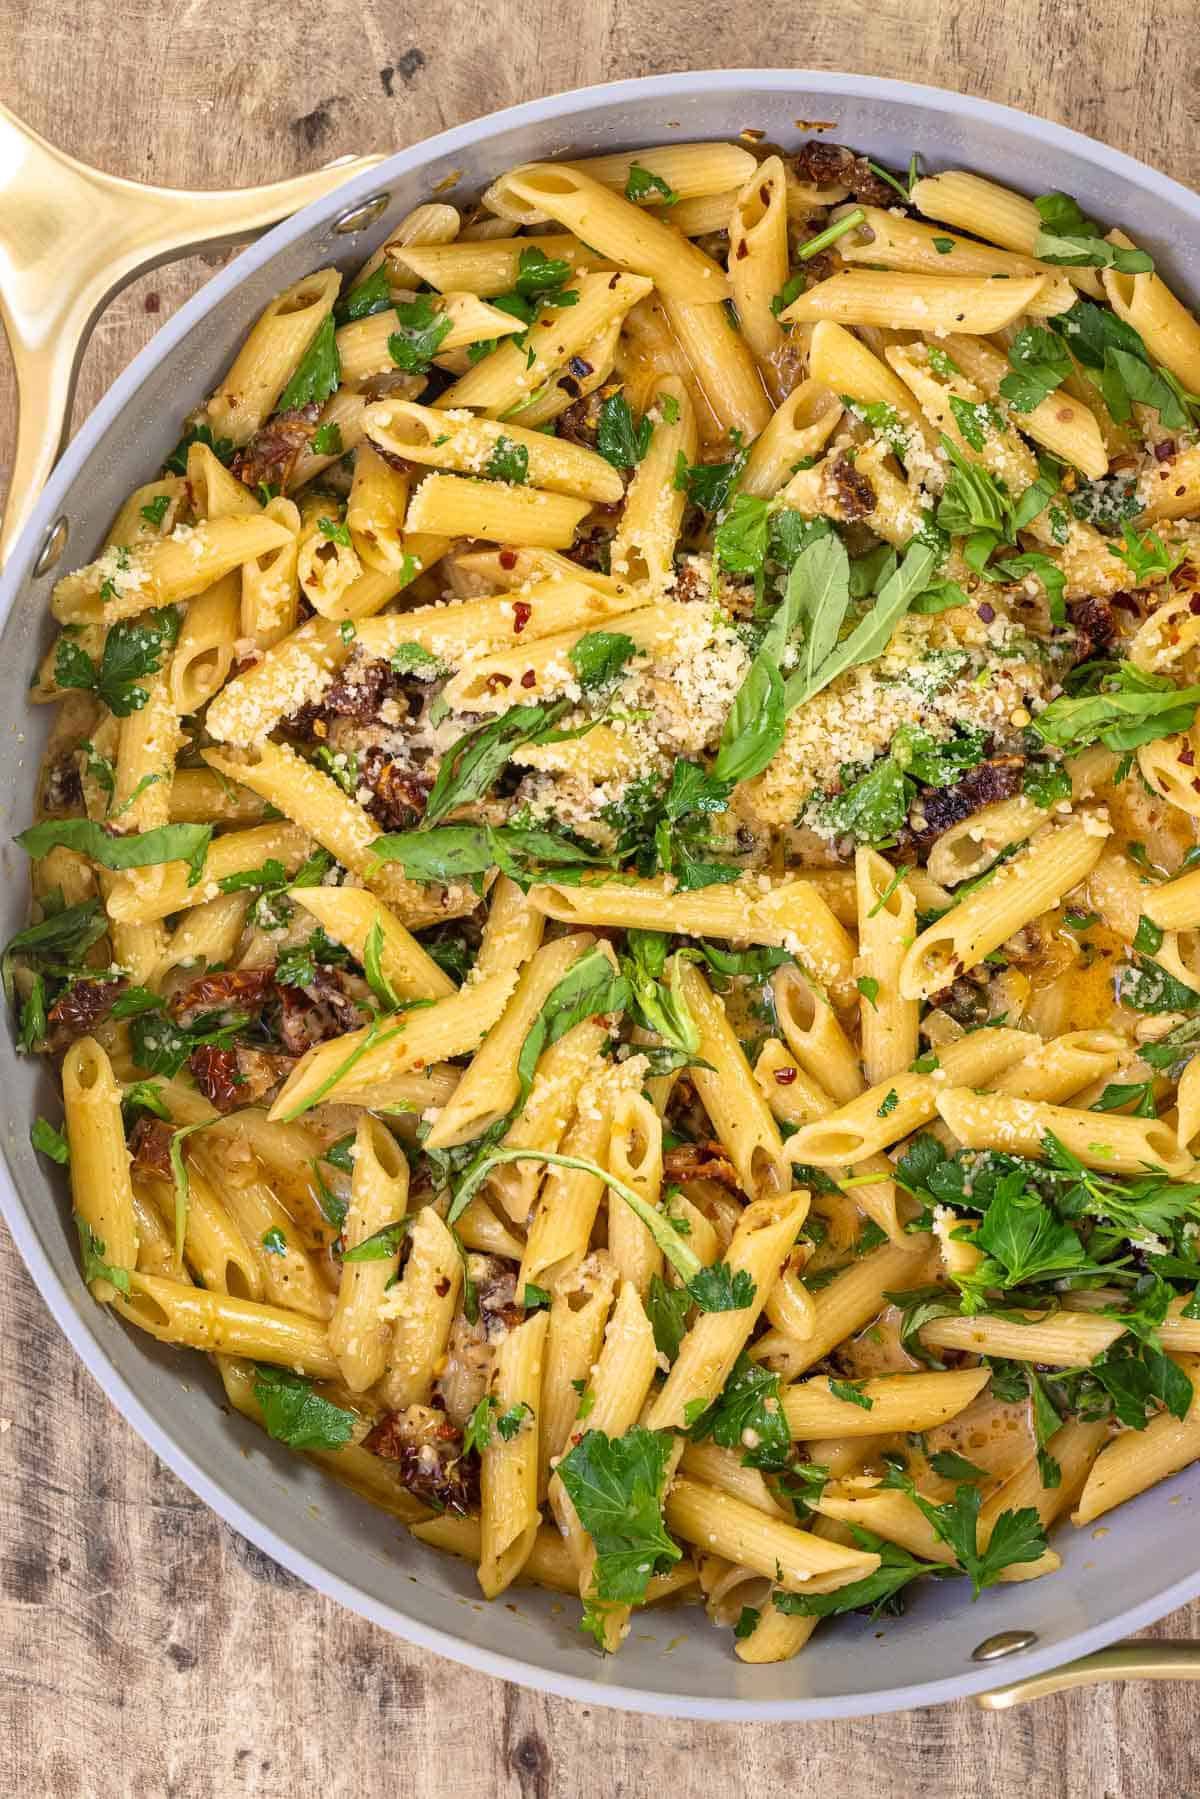 Sun-dried tomato pasta for the win!Tangy-sweet sun-dried tomatoes, your favorite pasta, and a quick creamy sauce make an easy pasta dinner. While the penne pasta is cooking, you’ll work on the sauce, so your dinner is ready in like 10 minutes! This is another meatless weeknight dinner that my family loves as much as they do my pasta primavera. But whenever I have leftover chicken, I toss it in! 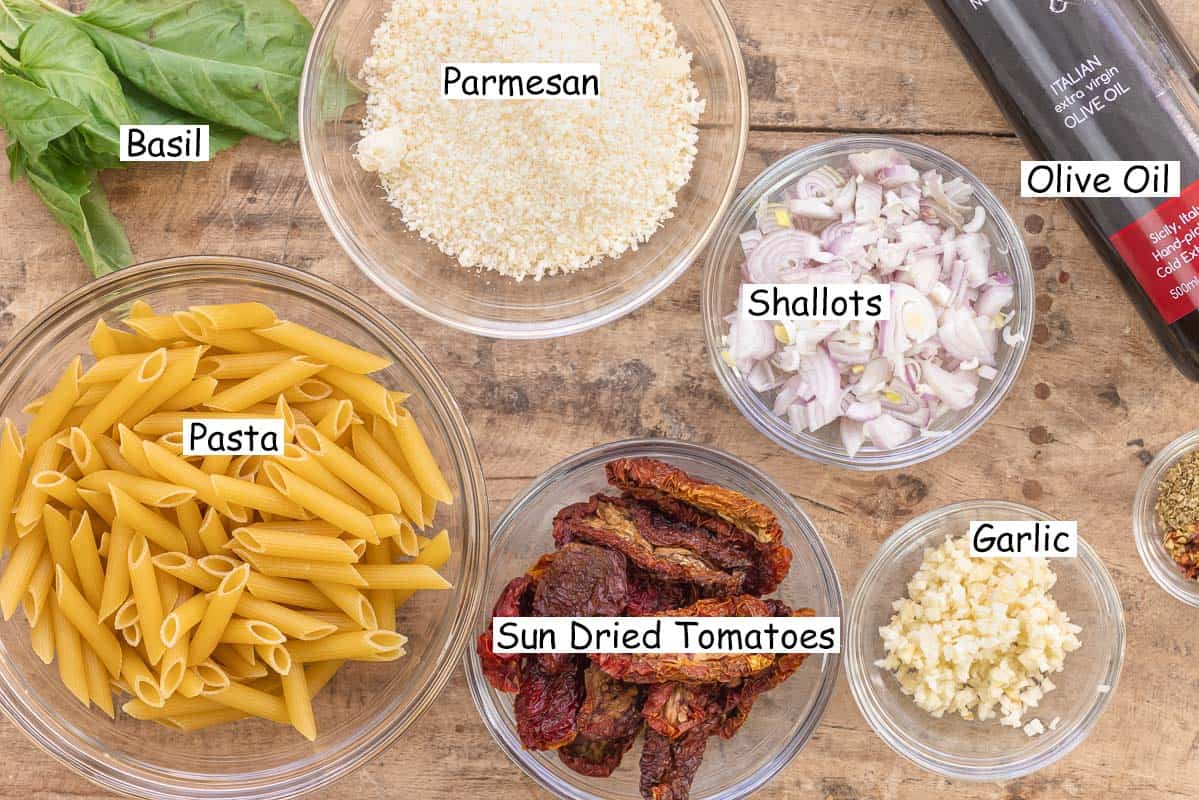 Ingredients for sun-dried tomato sauceTo me, the sauce makes all the difference. It is just creamy enough, but not too heavy that it weighs down the pasta. I don’t use heavy cream to make the sauce, relying instead on Parmesan cheese, whole milk, and a little bit of the starchy pasta water. Here is what you need to make the sauce for your sun-dried tomato pasta:
How to make sundried tomato pastaIn 10 minutes or less, you can have a flavorful vegetarian pasta dinner! Here’s how to make this sun-dried tomato pasta recipe:
Sun-dried tomato pasta with chickenYes, you can absolutely add chicken to this pasta! You can use leftover rotisserie chicken; just debone and shred the chicken and fold it in with the pasta. But if you’ve made my Italian-style baked chicken breast or my skillet chicken, either of those chicken recipes would work really well with sundried tomato pasta! Other variations
What to serve alongPasta with sundried tomatoes is a satisfying meal on its own, but I do like to start my meal with a big fresh salad, like my easy heirloom tomato salad or quick cucumber salad. Leftovers and storageLeftovers will keep in an airtight container in the fridge for around 4 days. Reheat over medium heat on the stove until warmed through. You might need to add a little water in case the sun-dried tomato sauce has become too thick. More recipes with sun-dried tomatoesBrowse all Mediterranean Recipes  10-Minute Sun-Dried Tomato Pasta
Dinner is ready in 10 minutes with this creamy sun-dried tomato pasta! I use my favorite all-natural sun-dried tomatoes, and I skip heavy cream in favor of a little whole milk and starchy pasta water for a lighter sauce, but you can definitely use heavy cream if you prefer! If you're not worried about keeping this pasta dish vegetarian, toss in some shredded rotisserie chicken or leftover Italian-style baked chicken breast or skillet chicken.
Servings 6 people
Calories 234.9kcal
Equipment
Ingredients
Instructions
Notes
Nutrition
Calories: 234.9kcal | Carbohydrates: 40.6g | Protein: 10.5g | Fat: 4.1g | Saturated Fat: 1.9g | Polyunsaturated Fat: 0.5g | Monounsaturated Fat: 0.8g | Cholesterol: 9.7mg | Sodium: 177.9mg | Potassium: 662.9mg | Fiber: 3.5g | Sugar: 8g | Vitamin A: 333.9IU | Vitamin C: 6.9mg | Calcium: 135.3mg | Iron: 2.1mg
The post Easy Sun-Dried Tomato Pasta (10 Mins) appeared first on The Mediterranean Dish. via The Mediterranean Dish https://www.themediterraneandish.com/sun-dried-tomato-pasta/ Simple and elegant, radish and butter is a popular French snack you'll be making on the regular! For this homemade radish snack recipe, you can serve the radish sliced and topped with the butter and salt, or leave them whole and serve the butter and salt to the side for dipping. Fresh and delicious either way! 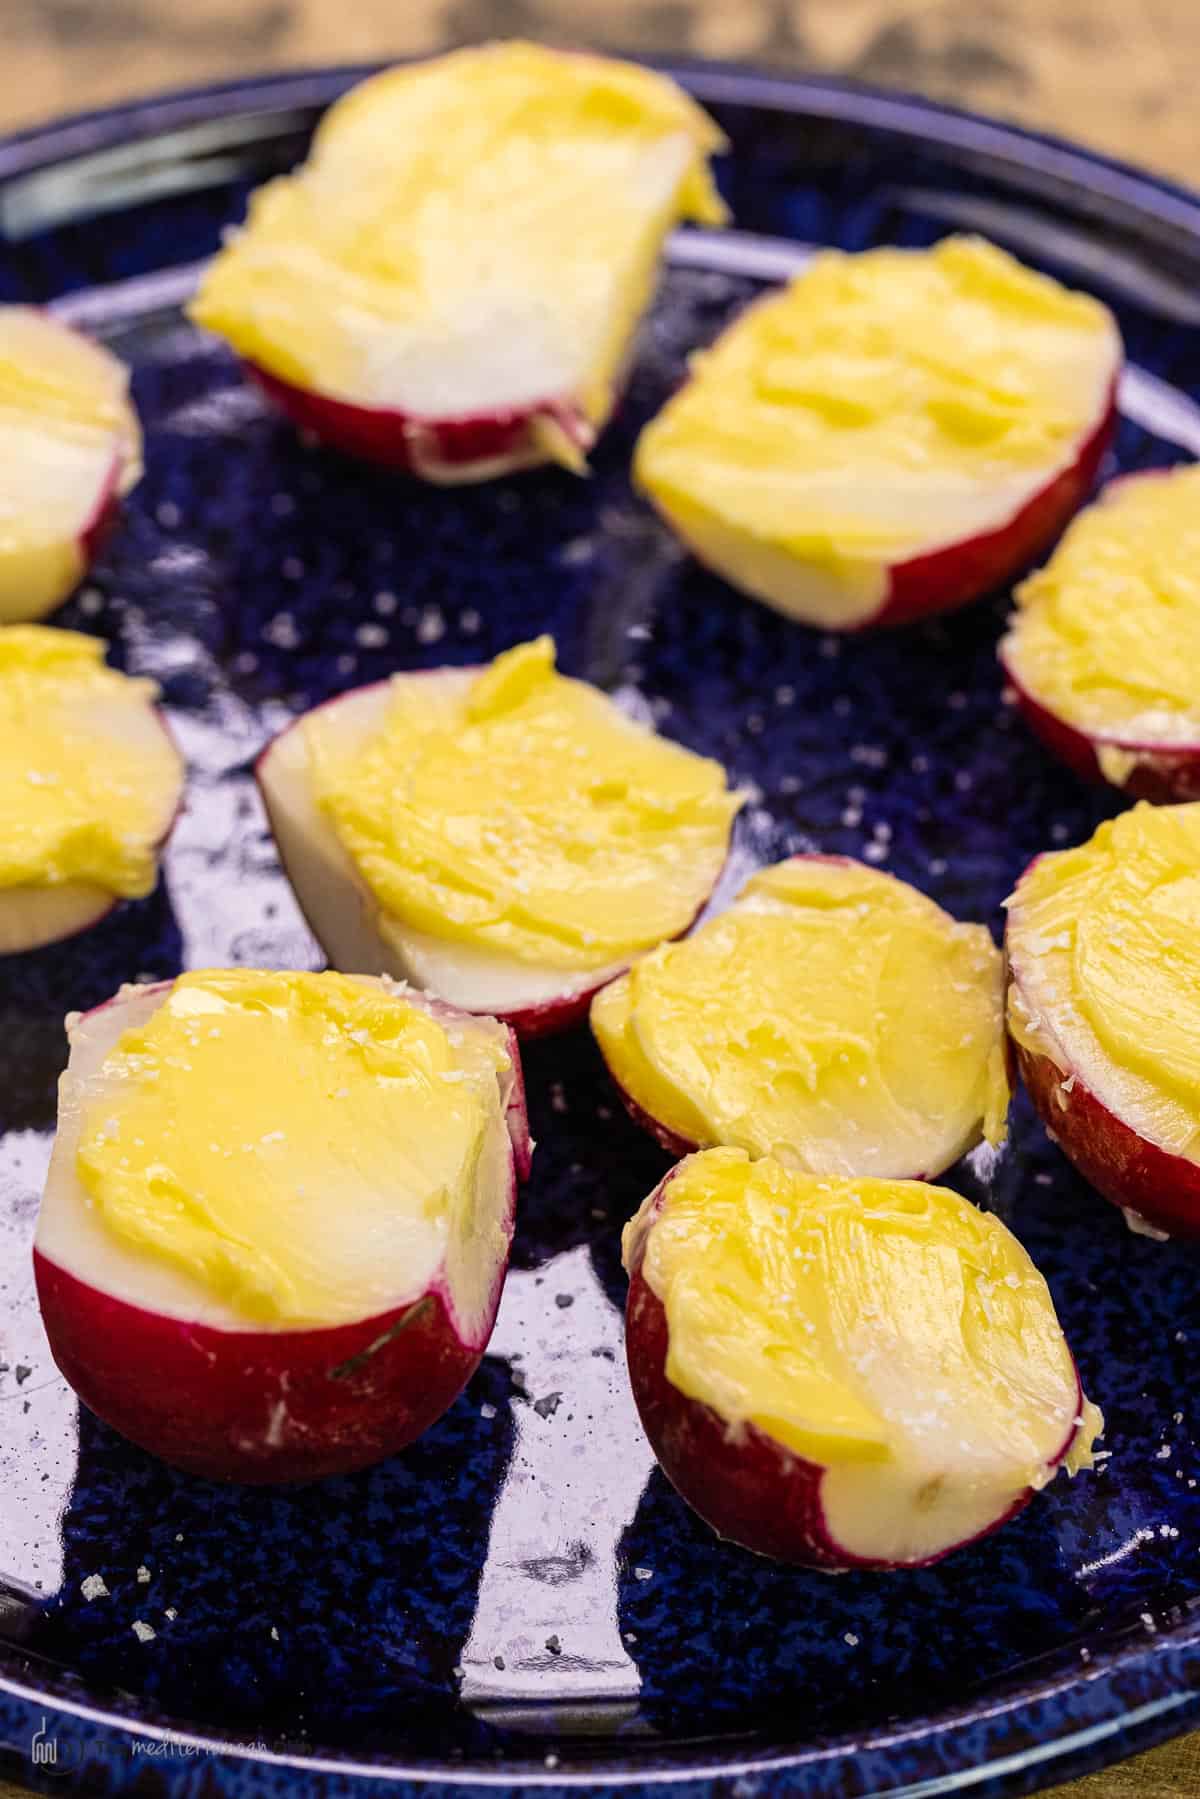 Radish and butter, a match made in...France!Peppery, crispy radish, topped with butter and finished with a pinch of flaky sea salt is a French snack that is both simple and elegant. I'm not typically a butter person (other than the occasional cookies, I mostly rely on good olive oil and rarely use butter for anything). But, I fell in love with this idea of radish and butter while visiting Paris a few years ago. And it's one of the easiest fresh, low-carb treats you'll make! A couple ways to make this simple radish snackIn this homemade version, you simply trim the leaves and stems off the radish, cut it in halves, and spread a bit of softened butter on each half (it's important for the butter to be at room temperature). Finish with a pinch of sea salt or kosher salt. But, if you want to prepare it closer to the delicate French way, you'll leave a small bit of the radish stem at the bottom so you can hold the buttered radish like a little lollipop and dip it in a little sea salt. way to serve this simple radish snack is by keeping the trimmed radishes whole and keeping a small dish of good room temperature butter and flaky salt to the side. Everyone can dip their radish in butter, adding as much or as little of the salt as they like. And my little Middle Eastern twist on it would be radish with a little labneh in place of butter (just keep that in mind next time you make a little labneh!) Why do people eat radish with butter?The butter truly tones down the peppery, hot flavor of radish and, with a little salt, turns it into an indulgent treat. Dorie Greenspan explains, "It’s a little trick the French play to bring foods into balance and it works." 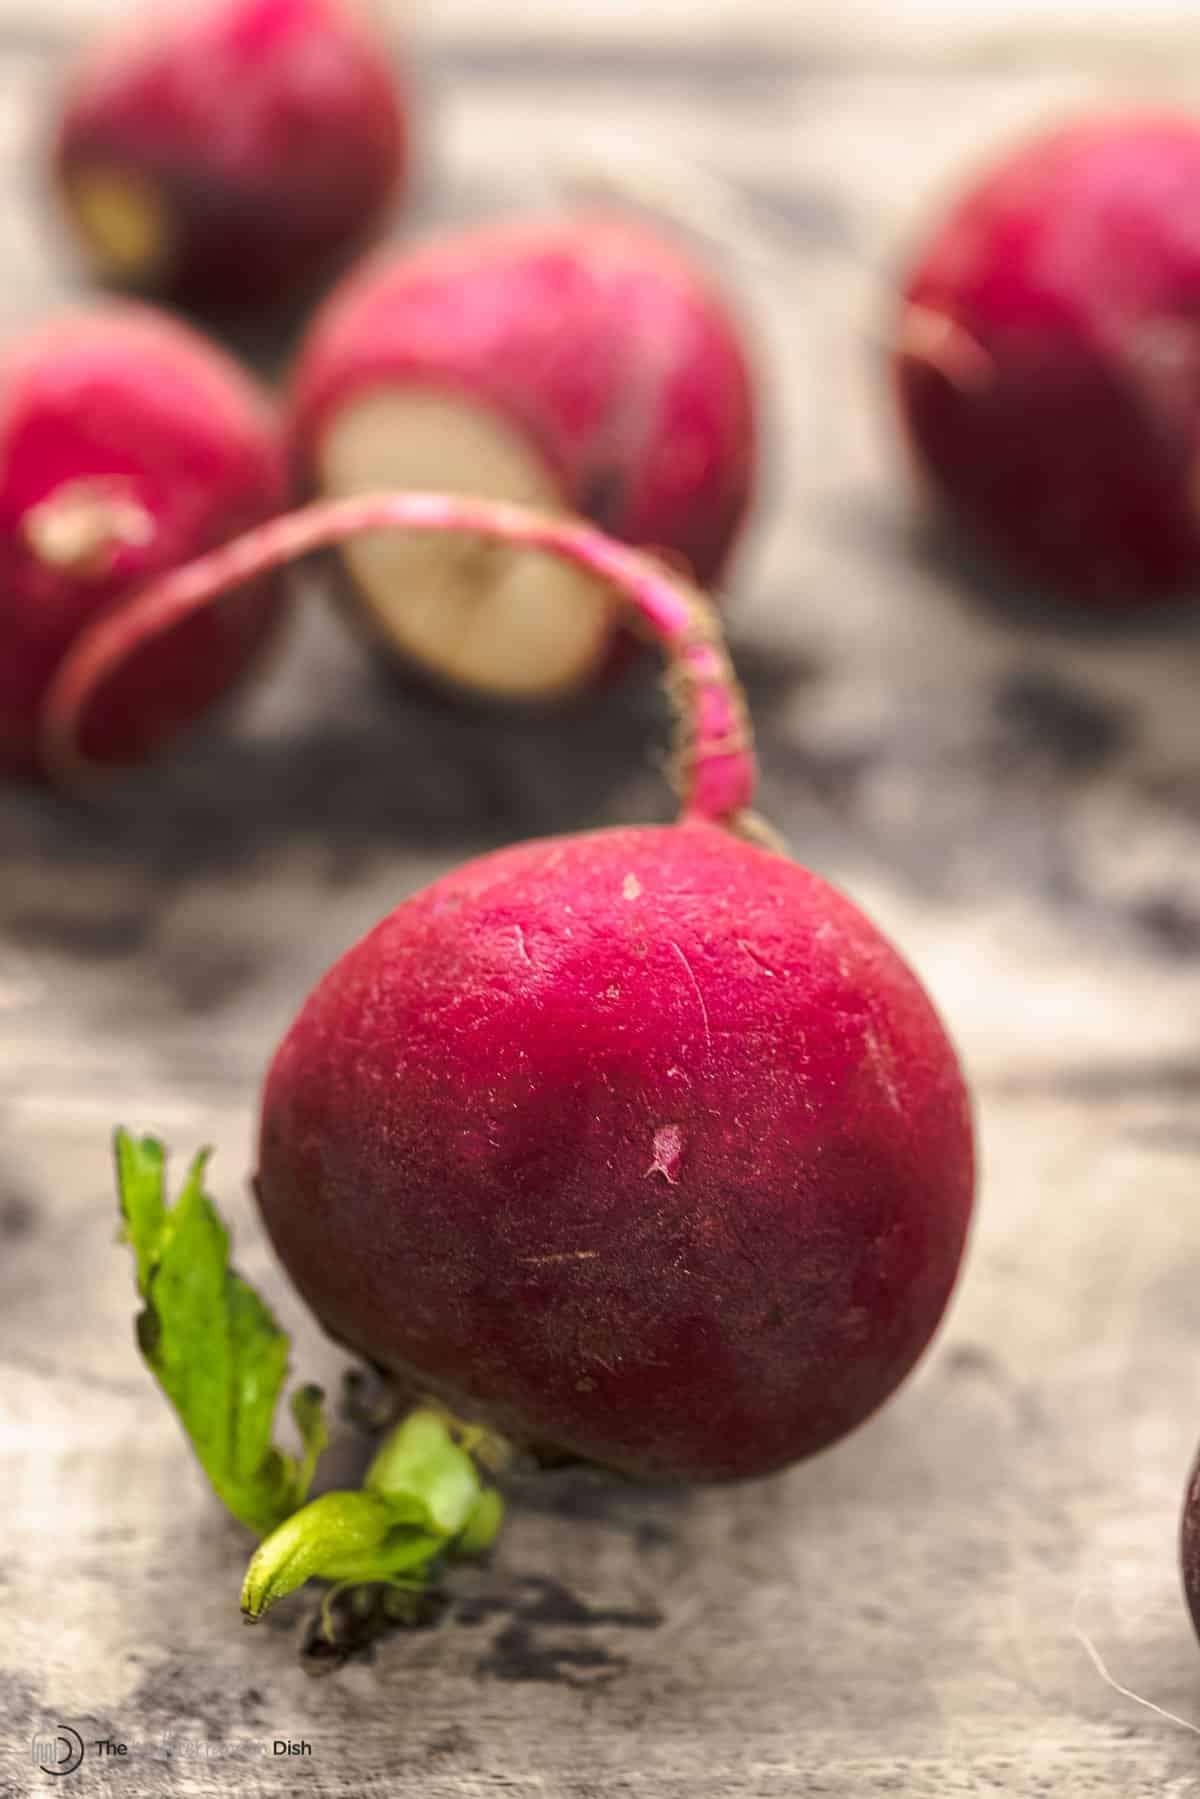 Radish tipsYou can find radishes year-round; some grocers will have them already trimmed and bagged in the refrigerator section. But if you're after the best fresh, in-season radish with the long green leaves, look for them in the produce section particularly in April or May (they're likely near things like parsley and green onions). Young, fresh radishes that are in season will be milder and not as hot (and you can even use their leaves for salad greens). When buying them, check the tops; they should be bright green. And give your radish a squeeze to make sure they are firm and not hollow or soft in the center. More fresh radish recipes and ideas:Browse more recipes | Visit our shop  Radish with Butter and Salt
Sliced radish and butter, finished with a pinch of salt is a simple French snack where the butter cuts the hot pepperiness of the radish, giving you an indulgent low-carb treat in seconds. I use butter very rarely, otherwise, but it does work here. This is my homemade version of the popular French snack. Use the best radishes you can find (the greens should be bright and not wilted, and the radish should be firm) and quality butter at room temperature.
Servings 4 people
Calories 19.2kcal
Ingredients
Instructions
VideoNotes
Nutrition
Calories: 19.2kcal | Carbohydrates: 0.3g | Protein: 0.1g | Fat: 2g | Saturated Fat: 1.3g | Polyunsaturated Fat: 0.1g | Monounsaturated Fat: 0.5g | Sodium: 309.9mg | Fiber: 0.1g | Vitamin A: 63IU | Vitamin C: 1.2mg | Calcium: 2.8mg | Iron: 0.1mg
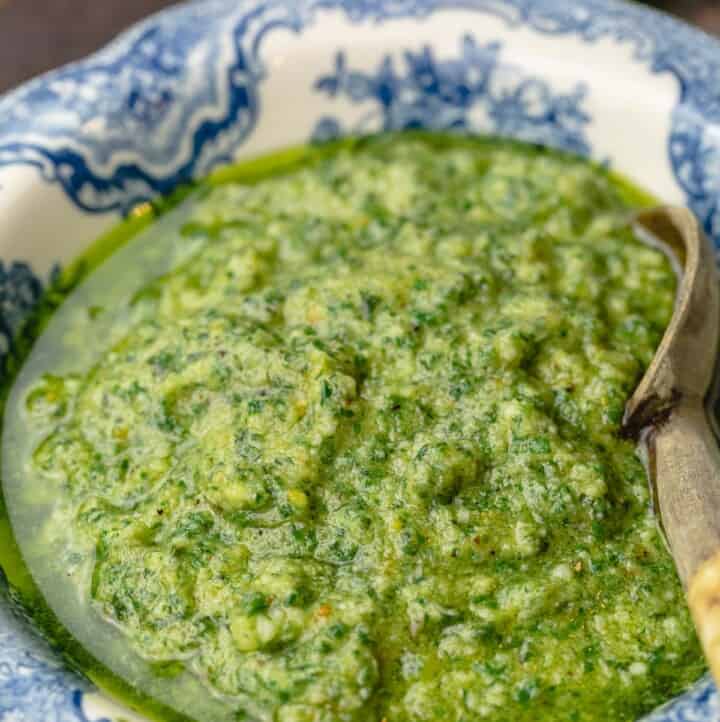
The post Radish with Butter and Salt appeared first on The Mediterranean Dish. via The Mediterranean Dish https://www.themediterraneandish.com/radish-and-butter/ Loads of fresh herbs, garlic, lemon juice, and nutty sesame tahini make this 5-minute vegan green goddess dressing! Wonderfully creamy, tangy, and herby, this rich green tahini sauce is a delicious condiment you’ll be using in so many ways! 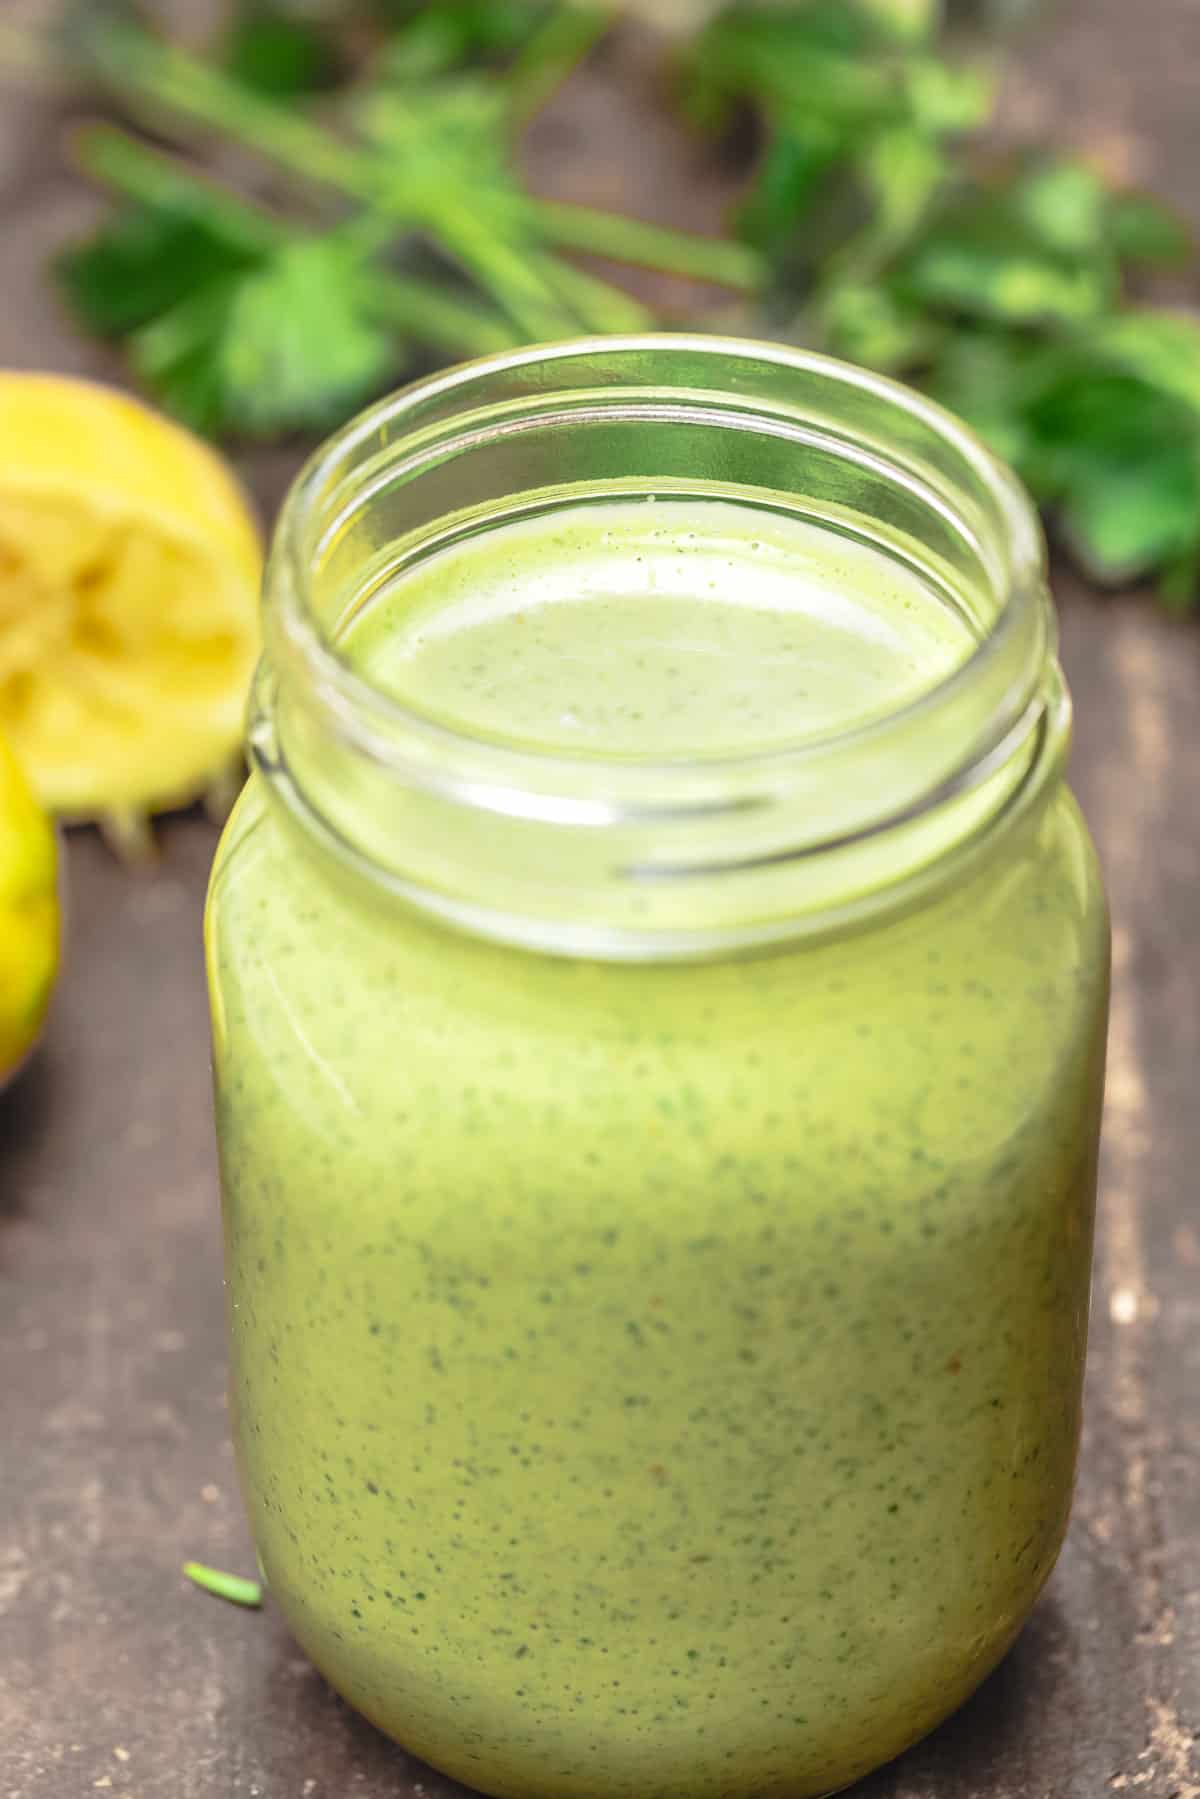 Green goddess dressing is one of those classics that have seen fun variations over the years, and especially lately, thanks to TikTok. And if you’re a fan of the delicious green sauce but want something a little bit different (and maybe even lighter), this vegan green goddess sauce with loads of fresh herbs, garlic, tahini, and lemon juice is worth a try! Tahini sauce with loads of herbs isn't a new thing, really, it's been around in parts of the Middle East and in Egypt for a while (we called it tahini bil bakdonis, or parsley tahini sauce). This tahini green goddess dressing is a riff of that, except I use a variety of herbs. This recipe takes just 5 minutes to make, and you can keep it in the fridge for days to use it when you need to! What is green goddess dressing?Classic green goddess dressing is a bright green sauce that usually contains things like sour cream, mayonnaise, fresh herbs, garlic, lemon juice, and anchovies. It is bold and creamy with a hint of umami from the anchovies. You can say that green goddess sauce is somewhat similar to the French herby mayonnaise, sauce verte. A fun vegan riff that is equally creamy!Today’s green goddess recipe is a vegan riff on the classic, but it is equally herby and creamy without the use of dairy or mayonnaise! The secret ingredient is none other than tahini! I simply love the rich, nutty undertones sesame tahini paste lends to this green dressing. Still, this green tahini sauce is as herby, zesty, and bold as can be, thanks to a trio of herbs (parsley, cilantro, and dill), lemon juice, garlic, and creamy tahini. 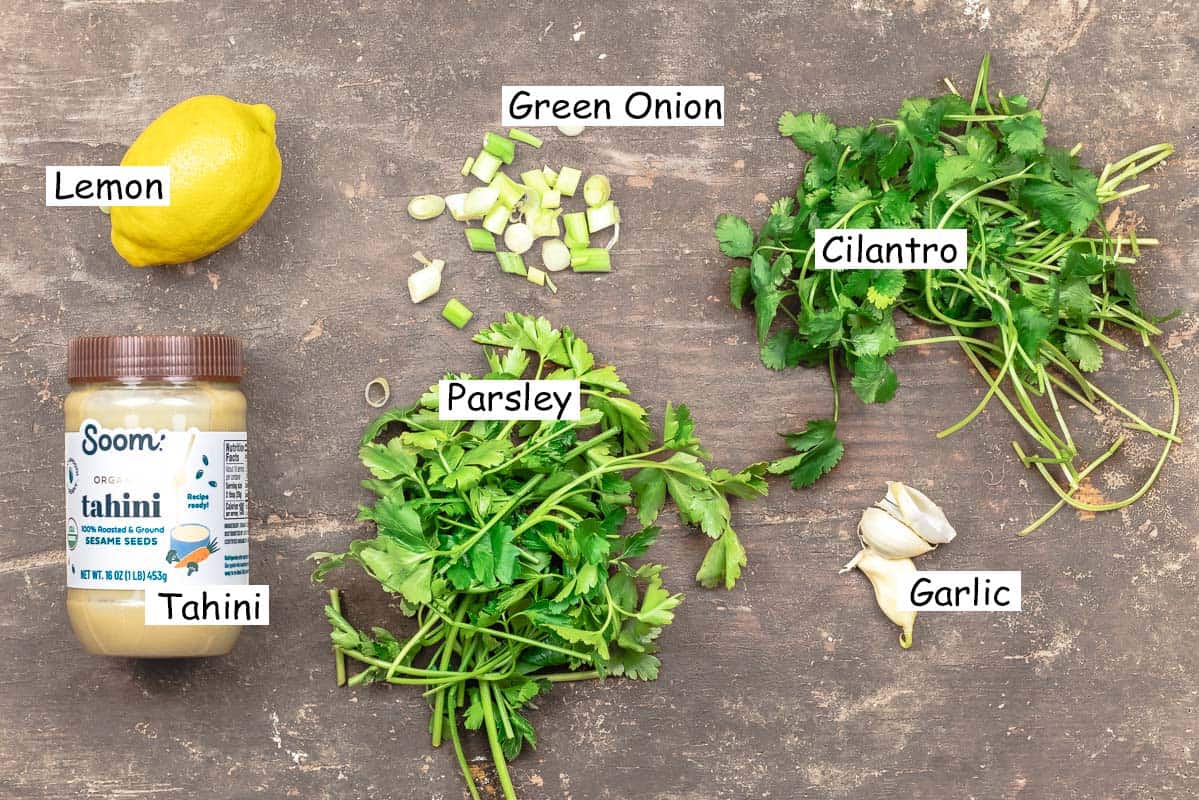 What is it made of?You just need a few simple ingredients for this green tahini sauce:
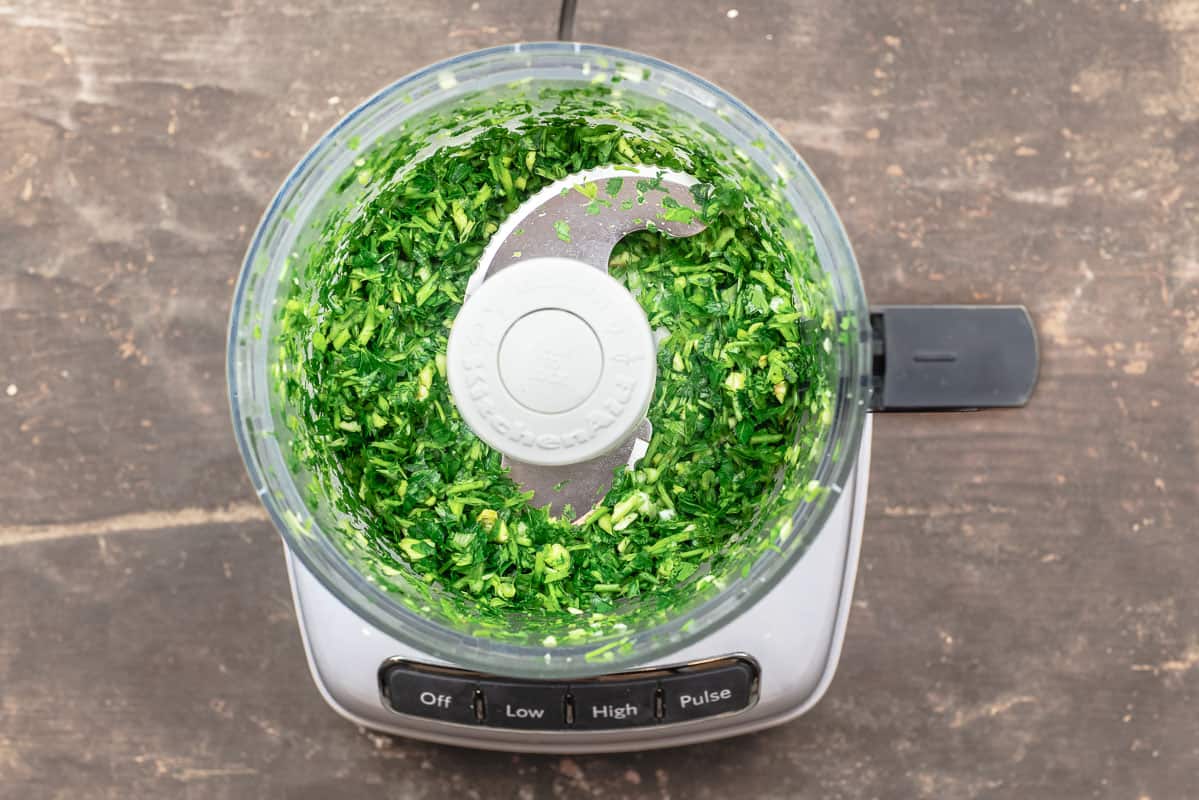 How to make vegan green goddess dressing recipeIn 5 minutes, you can have a zesty, garlicky vegan green goddess dressing. All you need are a few fresh ingredients, tahini, and a food processor (or a high-speed blender). Start by adding the cilantro, parsley, dill, green onion, and garlic to the bowl of a food processor fitted with a blade. Season with a big pinch of kosher salt and red pepper flakes or Aleppo pepper (optional, but highly recommended for some mild heat). Blend until everything is finely chopped, and then add tahini and the juice of 2 lemons. Run the food processor again until smooth and creamy. At this point, you can play with the consistency by adding a little water at a time until you reach your desired consistency. (If you plan to use this as a salad dressing, you’ll want it to be runny so you can drizzle it. But otherwise, you can keep it more thick and creamy to use more as a dip).  VariationsThere are so many ways to make this gluten-free green tahini sauce your own! Here are some ideas:
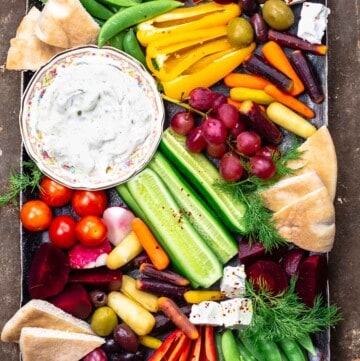
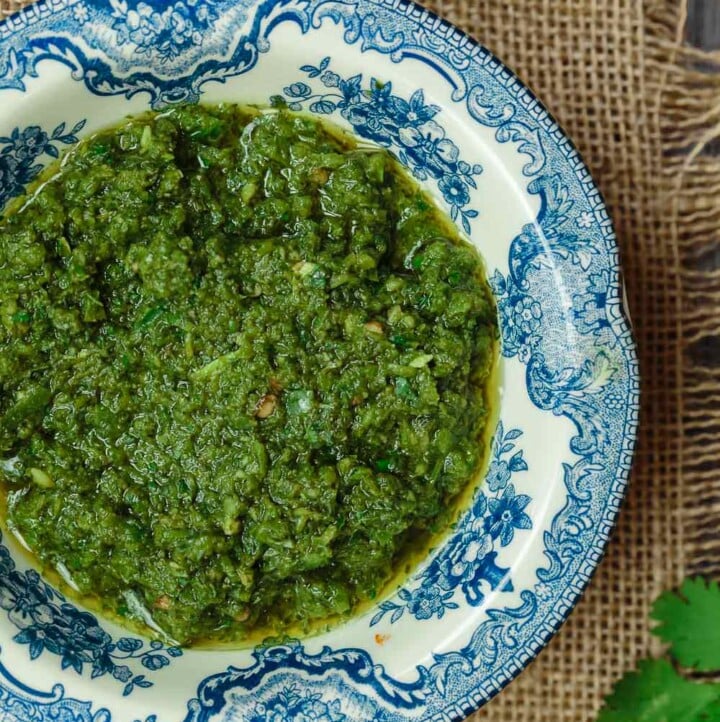
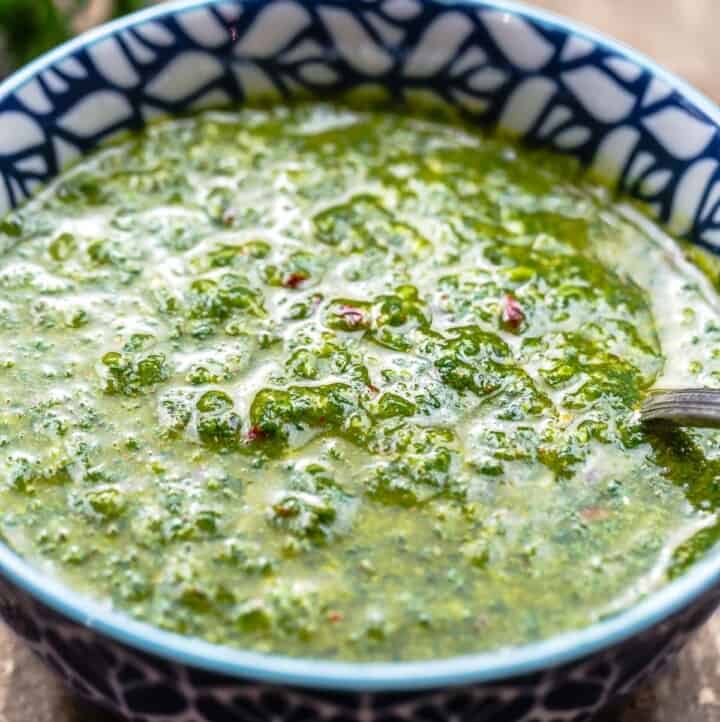
What to put green goddess dressing onOnce you make this easy dressing or sauce, you’ll find so many ways to use it! Green goddess salad dressing over your favorite fresh salad is amazing! It’s also great as a dip on a crudités platter, or drizzled over grilled meat and fish (great on lamb and salmon kebabs, for example). Use it on lettuce wraps or with your dinner bowls. 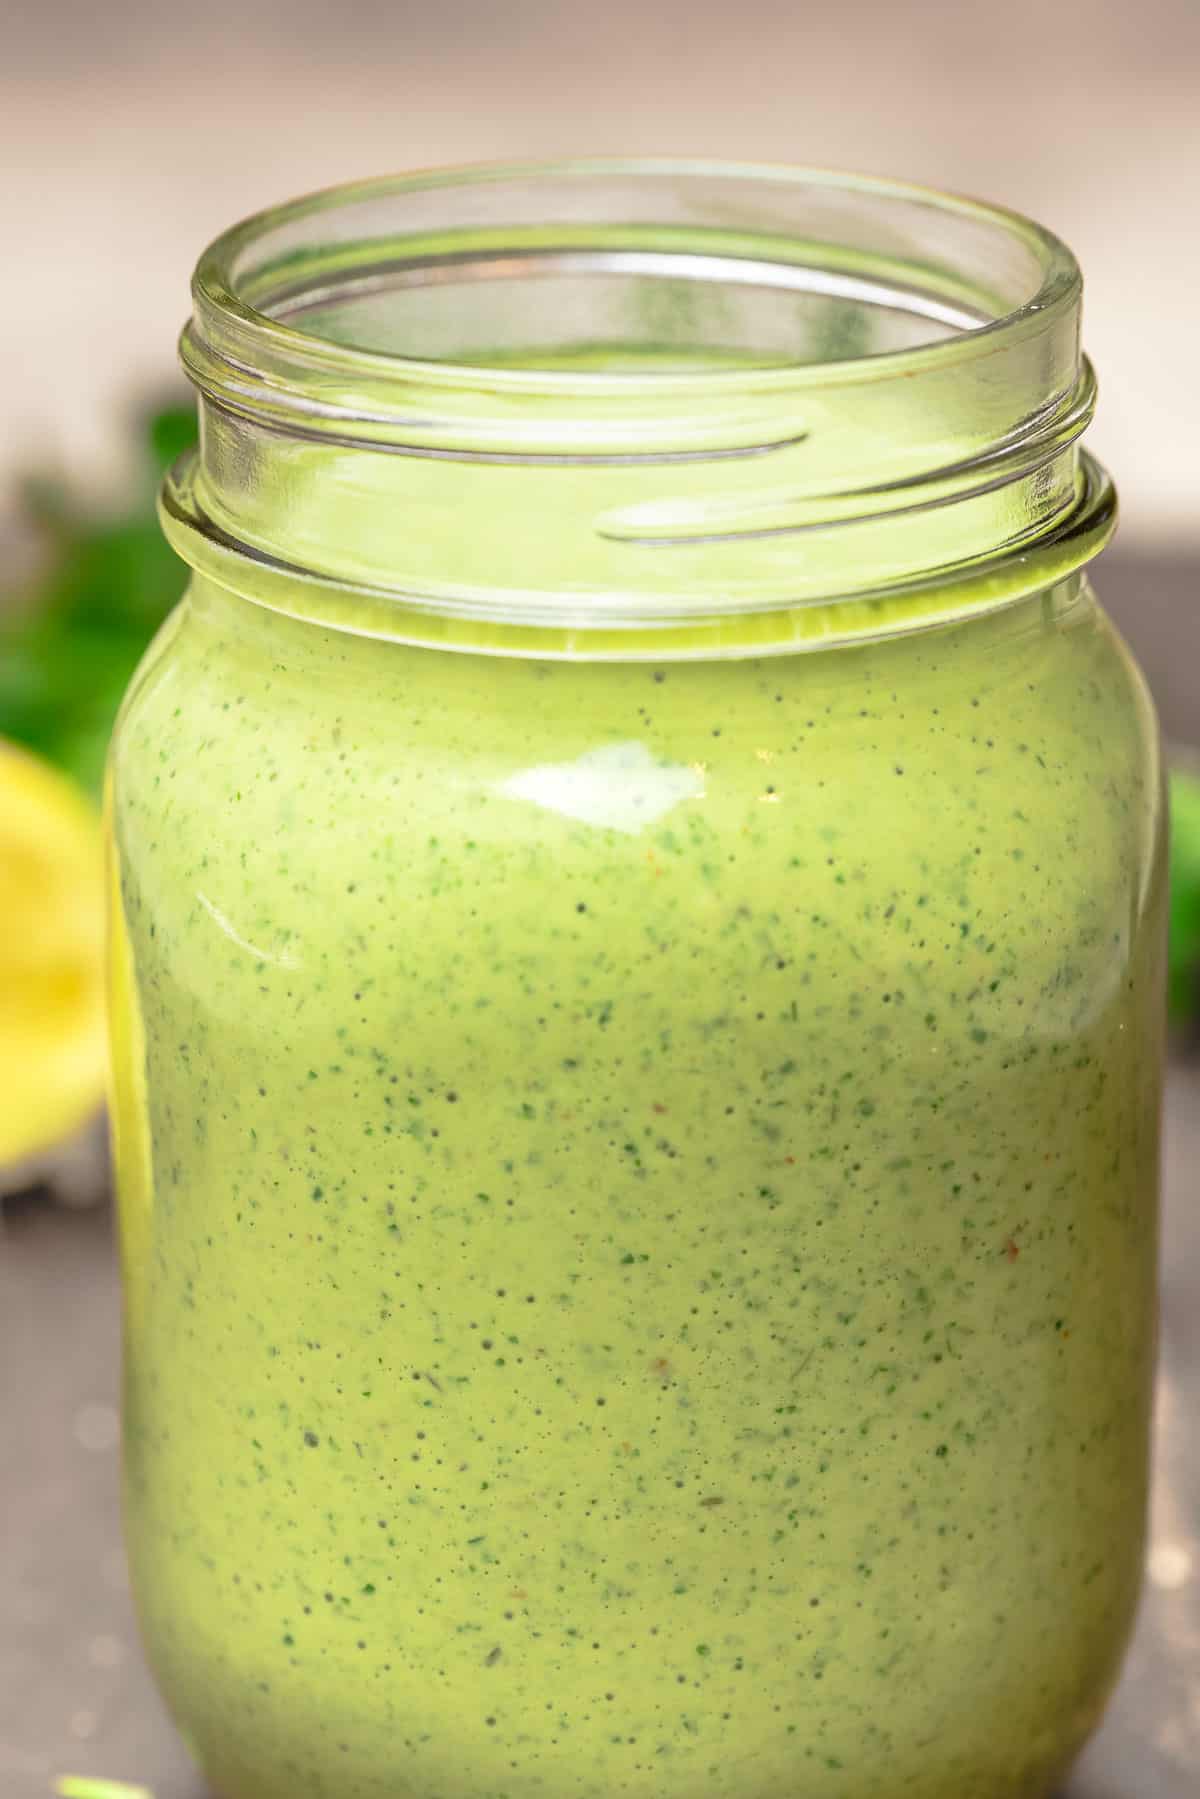 Make ahead tipsVegan green goddess dressing is a great make-ahead condiment because it tastes even better after it has chilled in the refrigerator for a couple of hours. So feel free to make it several hours to a day before you want to serve it, to give the flavors a chance to meld even more. How to store itStore plant-based green goddess dressing in a 12-ounce Mason jar with a tight lid. It will keep in the refrigerator for up to 5 days. More green sauce recipes to try:Browse all Mediterranean Recipes  Vegan Green Goddess Dressing with Tahini
5-minute vegan green tahini sauce loaded with fresh herbs, garlic, lemon juice, and nutty tahini! So versatile and easy to make your own! Want it spicy? Add jalapenos! Not a fan of cilantro? Mint, basil, tarragon, and chives would taste amazing instead! Want some briny flavor? Throw in some capers! I like to use vegan green goddess dressing on grilled meat and fish, and shrimp lettuce wraps. This recipe will make 1 ½ cups of green tahini sauce, or enough to fill a 12-ounce Mason jar.
Servings 24 tablespoons
Calories 34.7kcal
Ingredients
Variation
Instructions
VideoNotes
Nutrition
Calories: 34.7kcal | Carbohydrates: 2.4g | Protein: 1.2g | Fat: 2.7g | Saturated Fat: 0.4g | Polyunsaturated Fat: 1.2g | Monounsaturated Fat: 1g | Sodium: 5.2mg | Potassium: 71mg | Fiber: 0.7g | Sugar: 0.3g | Vitamin A: 469.3IU | Vitamin C: 11.2mg | Calcium: 18.1mg | Iron: 0.6mg
The post Vegan Green Goddess Dressing with Tahini (5 minutes) appeared first on The Mediterranean Dish. via The Mediterranean Dish https://www.themediterraneandish.com/vegan-green-goddess-dressing/ “How do you keep your herbs fresh and vibrant?” is a question I get on the regular. So today, I’ll tell you exactly how to store fresh herbs so they last and stay green and flavorful for a good while (10 days to 2 weeks, and sometimes, when I'm lucky, even longer!) 
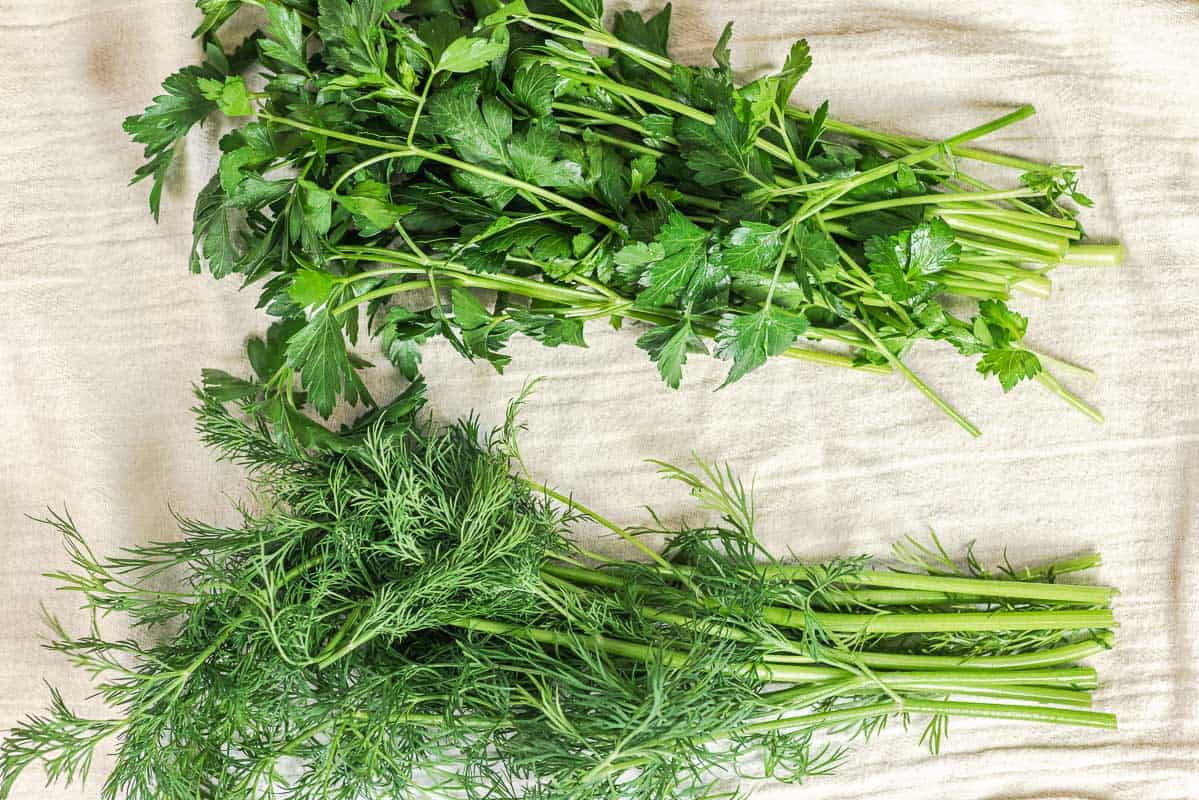
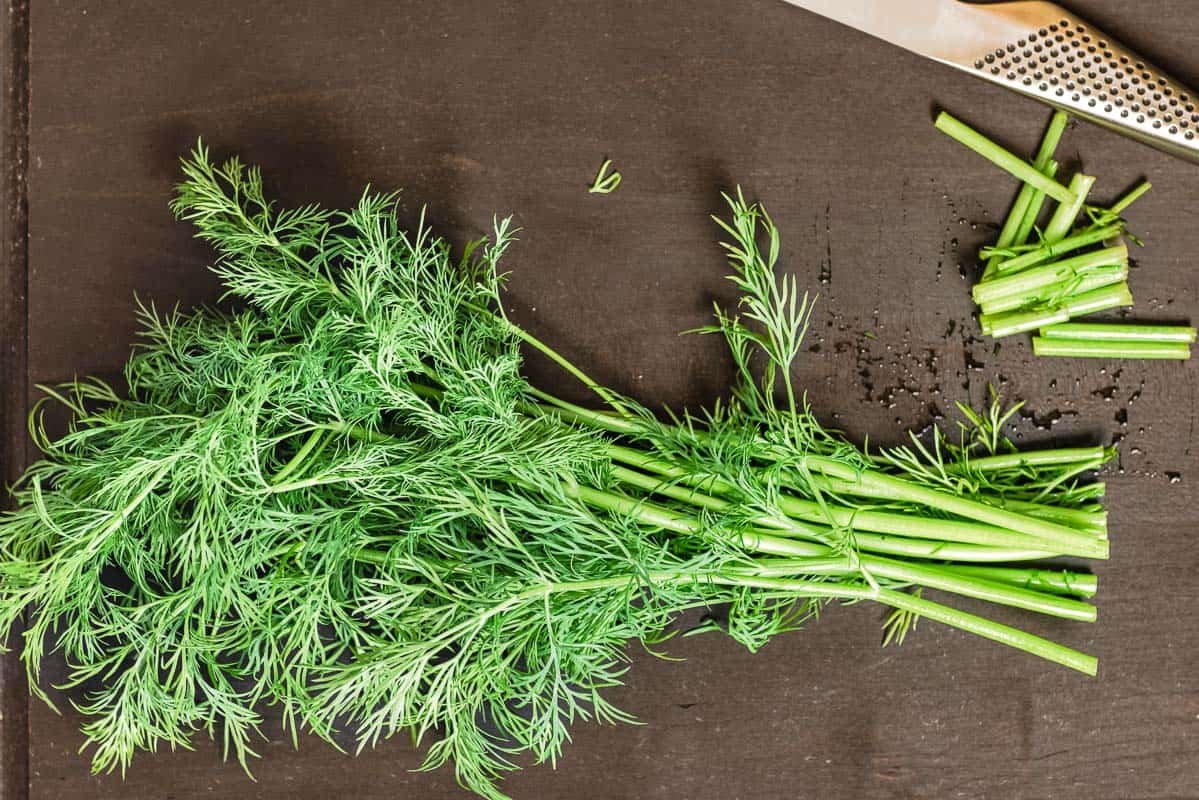
My friends have a running joke about me being the “parsley queen”! It’s funny because it’s true! Cooking the Mediterranean way, I know I use more herbs than anyone I know! I usually buy my herbs in bulk (bunches of them at a time), and I have a great way to store them so they last me a good 10 days and up to 2 weeks, and sometimes even longer! Today, I’m sharing all my tips for how to store herbs, particularly soft herbs (like parsley, cilantro, dill, etc.) I also have some tricks for storing hardy herbs like oregano and rosemary so they keep well and remain flavorful. Know the type of herb you’re working withThere are two types of herbs: soft herbs and hardy herbs, and they need to be stored differently. Luckily, it's really easy to figure out which type of herb you have. Soft herbs have tender stems and delicate green leaves. The stems are also edible, though, in some cases, they may taste bitter. Some examples of soft herbs are cilantro, dill, mint, parsley, and basil. Hardy herbs have woody stems (which should not be eaten) and tougher leaves. Rosemary, thyme, and oregano are all hardy herbs. Most fresh herbs are best stored in the refrigerator (with the exception of basil – more on that later). But depending on the kind of herbs, soft or hardy, you’ll need to prepare them a certain way so they will last in the fridge. Why do herbs go bad?If the leaves are turning dark and slimy, or the stems are starting to mold, or your herbs have a funny smell you know it’s time to throw those herbs out. But why do they get bad quickly? Here are a few reasons:
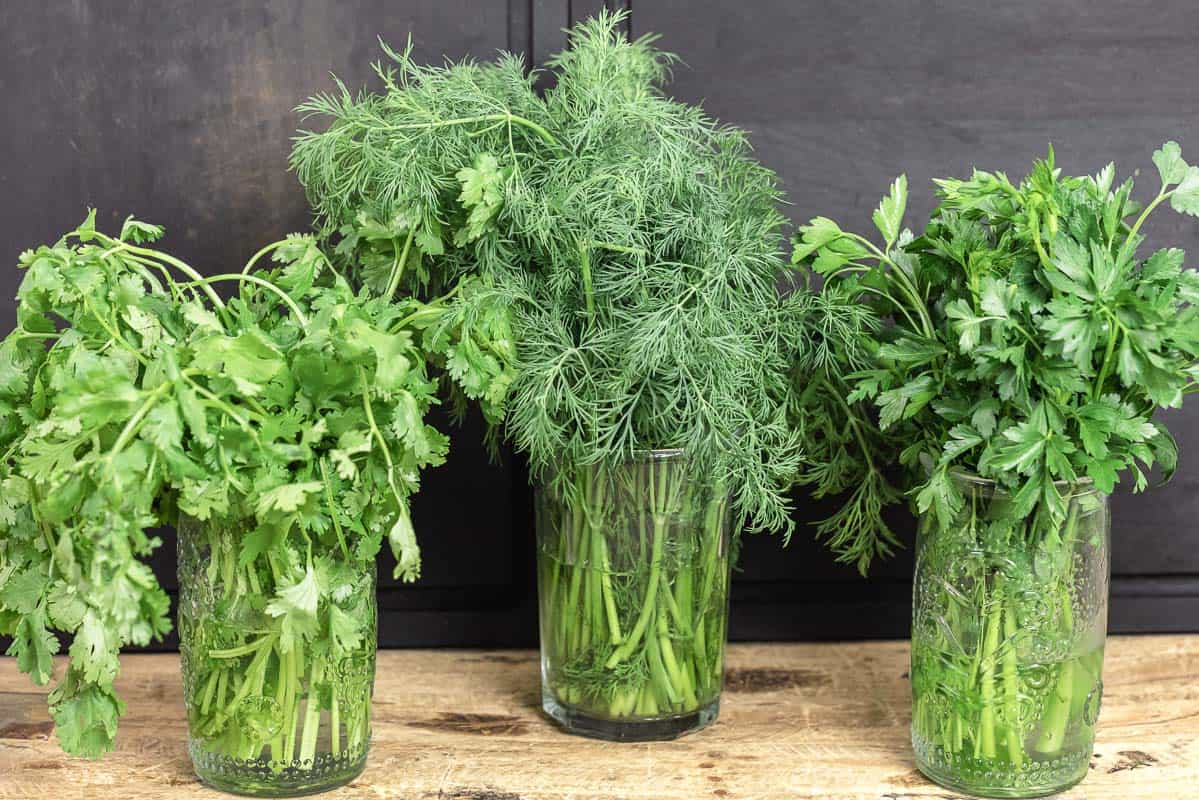
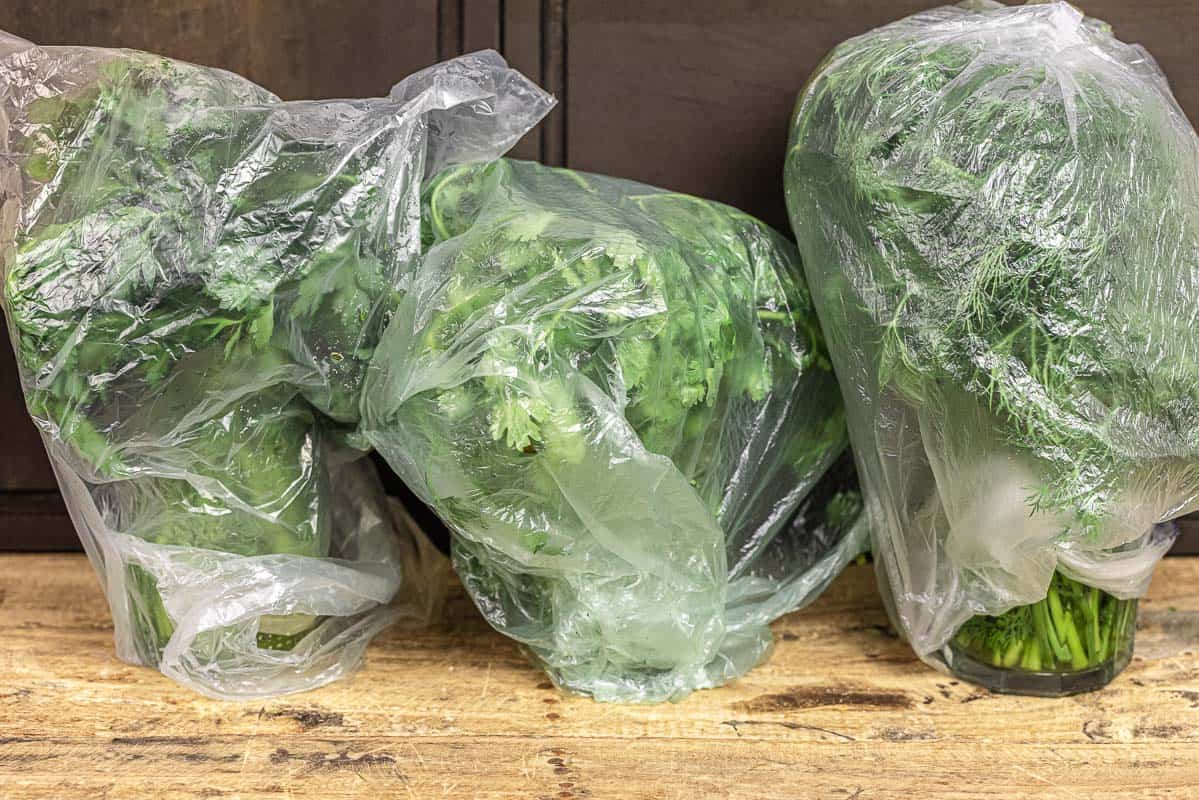
Should you wash herbs before storing?I always wash my herbs before storing them! There is some debate about washing fresh herbs before storing them in the fridge, because washing adds moisture, which can cause decay. But bacteria remains on the herbs if they’re not washed, which can cause them to rot. How to store soft herbs in the fridgeTime needed: 10 minutes. This is my favorite way to keep soft herbs (such as parsley, dill, cilantro, and mint) fresh for 10 days to 2 weeks in the fridge (sometimes even longer!):
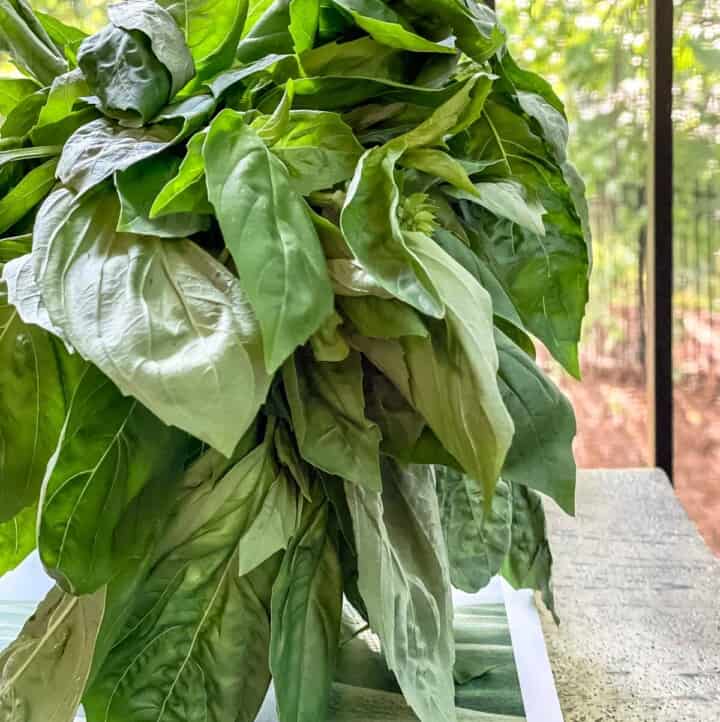
How about storing basil?Do not refrigerate basil! Unlike cilantro, parsley, mint, and other soft herbs, basil leaves are very delicate and will bruise and turn black if refrigerated. If you’re wondering how to store basil properly, check out my quick hack to keep basil fresh for up to 2 weeks! Storing hardy herbsHardy herbs such as rosemary, thyme, and sage can also be stored in the fridge. Start by washing and drying the hardy herbs thoroughly (just like you would soft herbs). Trim off about an inch of the stem. Wrap or roll the herbs in damp paper towels so that you cover the entire herb, then store them in a ziploc bag in the fridge. Even without any special care, hardy herbs tend to last longer in the refrigerator than soft herbs, even if you just keep it in the little plastic container it’s sold in – usually a week or so. You’ll know they’ve gone bad when the leaves have darkened and wilted, and the stem shows signs of mold. How long will fresh herbs last in the fridge?Soft and hardy herbs can last up to 3 weeks in the fridge if stored correctly. To help out my tender herbs (like cilantro and parsley), I change their water and trim their ends every few days. I also make sure they’re completely covered by the plastic bag at all times. Hardy herbs are more hands-off – once prepped, I leave them alone until I need to use them. Can you freeze herbs?Yes! You can freeze herbs, both soft and hardy!
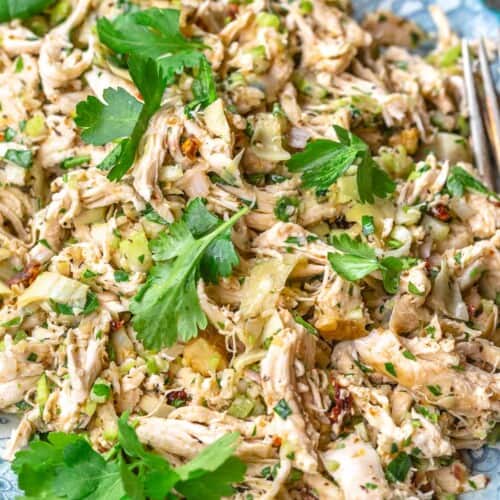
More How-Tos You Might EnjoyBrowse all Mediterranean Recipes The post How to Store Fresh Herbs So They Last! appeared first on The Mediterranean Dish. via The Mediterranean Dish https://www.themediterraneandish.com/how-to-store-fresh-herbs/ Juicy shrimp , crunchy vegetables, and a drizzle of creamy sauce are all you need to make the best lettuce wraps. These shrimp lettuce wraps are a quick and light meal that's kicked up with delicious Mediterranean flavors--you'll be making these on repeat! 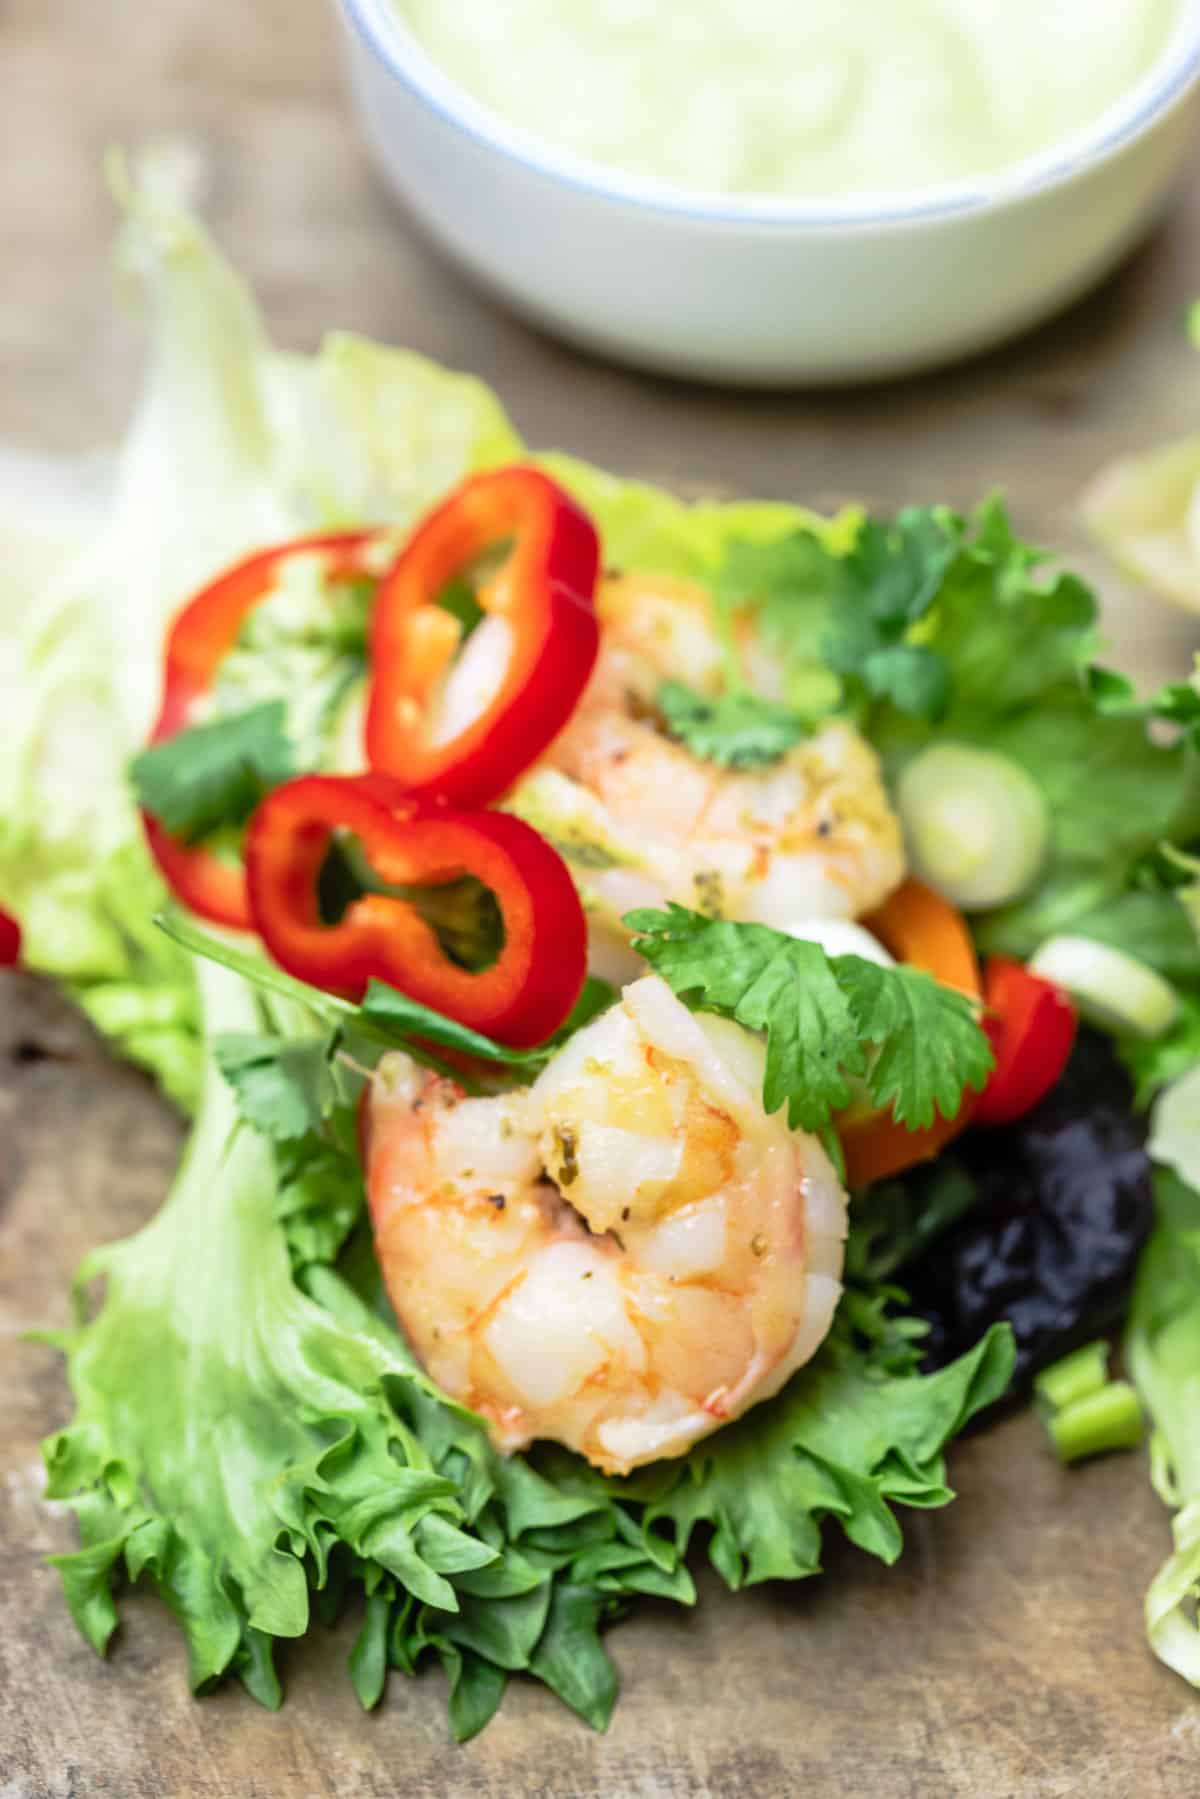 There is no shortage of shrimp recipes around here, but these wraps are a quick and simple way to turn a few frozen shrimp into a delicious little meal! Homemade shrimp lettuce wrapsReady in about 10 minutes, this shrimp lettuce wraps recipe is bright and nutritious in the best way. Fresh lettuce leaves are the perfect carrier for succulent shrimp, colorful vegetables like cucumbers, tomatoes, onion, and peppers, fresh herbs, and a drizzle of tasty sauce (like tzatziki, tahini, or even green goddess sauce – recipe to come!). Each bite is bursting with bold flavor! When I make these lettuce wraps, I like to prep all the ingredients then I arrange buffet-style for everyone to make their own wraps. Does it get messy? Yes, but that just makes it all the better! Which lettuce is best for wraps?Butter lettuce (also known as bibb lettuce or Boston bibb lettuce) and Romaine leaves are popular options to use for wraps. But you can use any large lettuce leaves you have on hand, just as long they are pliable enough that they don't break when you bend or fold them over. Sauce for lettuce wrapsSimply seasoned shrimp pairs well with a variety of sauces. A few Mediterranean-style options are rich tahini sauce, creamy tzatziki, whipped garlic sauce, bright chermoula, and vibrant romesco. My personal favorite is tahini green goddess dressing (recipe coming soon!).  How to make lettuce wraps with shrimpShrimp lettuce wraps are a quick and easy healthy recipe. Start by making your sauce of choice. Then chop and slice all your herbs and vegetables. Set the sauce and veggies aside while you season and cook the shrimp until they just turn pink. Grab your lettuce and start by arranging some vegetables and herbs on it, followed by 1 or 2 shrimp. Lastly, drizzle some sauce over the top. Serve and enjoy! Tips for success
Can I use chicken or meat in place of shrimp in these lettuce wraps?Not a fan of shrimp? No problem! You can use other cooked proteins like chicken, salmon, or even beef to make your lettuce wraps. If you have leftover chicken gyro or shawarma, you can use them here. Baked salmon or even Greek keftedes (meatballs) will work as well. Use your judgment to figure out how much chicken or beef you can fit into the lettuce wrap without it ripping. A piece or two or chicken, and maybe 1 to 1 ½ halved meatballs would probably work well. 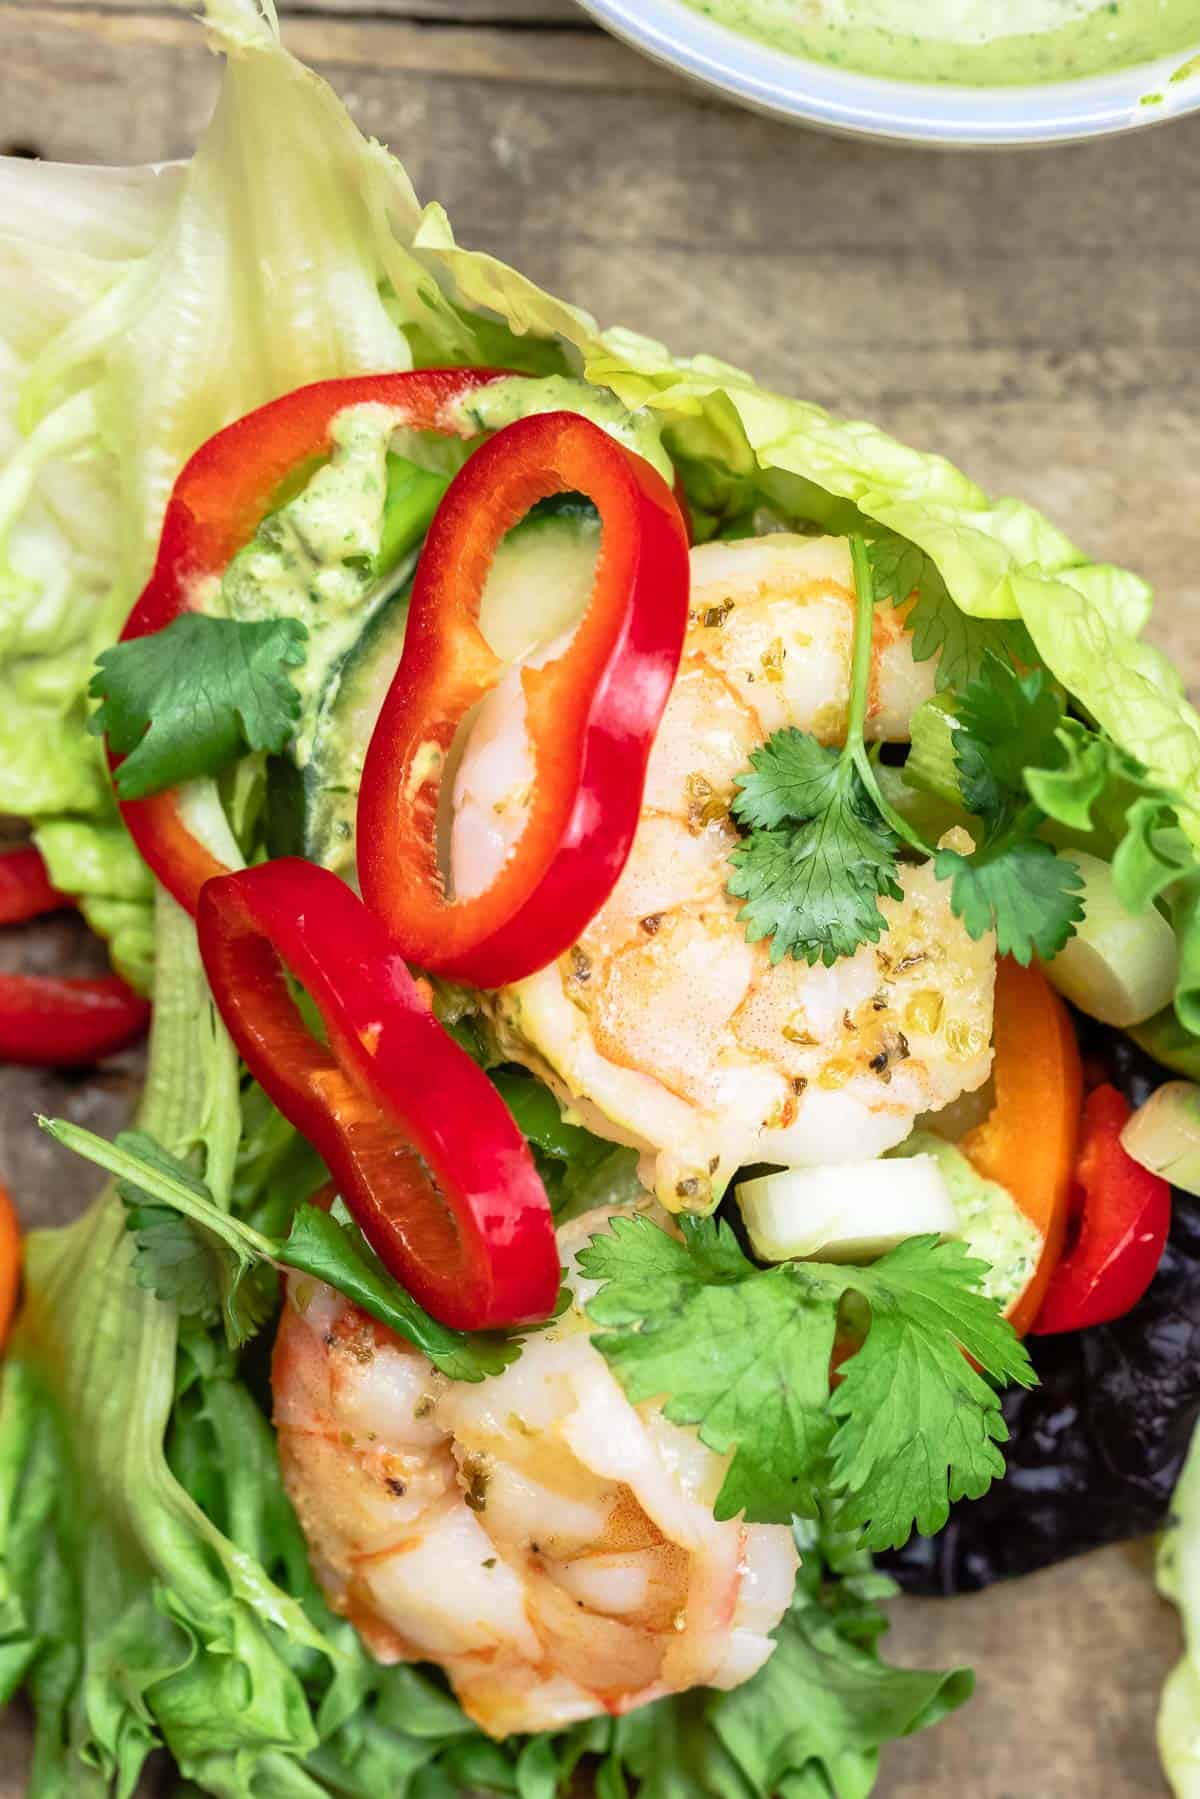 What to serve alongHealthy lettuce wraps with shrimp are a satisfying low-carb lunch or appetizer. To serve them for dinner or a heftier meal, serve them alongside white bean salad or potato salad. Make ahead tipsWhile gluten-free lettuce wraps are best served immediately, you can work ahead by making your sauce of choice a night in advance, and storing it in the fridge in an airtight container. You can also slice the vegetables ahead of time and store them separately in the fridge in tight-lid containers. Leftovers and storageStore leftover vegetables in an airtight container in the refrigerator. They will keep for around 4 days. Leftover shrimp will keep for 2 to 3 days. Reheat it on the stove in a skillet with some olive oil over medium heat for just a few minutes until warmed through. Or simply enjoy it at room temperature. More easy shrimp recipes to tryBrowse all Mediterranean Recipes  Shrimp Lettuce Wraps Recipe
Light and delicious shrimp lettuce wraps loaded with flavor from crunchy vegetables, fresh herbs, and a drizzle of sauce. Ready in about 10 minutes! The best lettuce to use for lettuce wraps is butter lettuce (also called bibb or Boston bibb lettuce). Choose larger, sturdier leaves that will hold up under all the toppings. Serve lettuce wraps by themselves for a light lunch or appetizer, or alongside a white bean salad or potato salad for something heftier.
Servings 4 people
Calories 62.1kcal
Ingredients
Instructions
Notes
Nutrition
Calories: 62.1kcal | Carbohydrates: 5.5g | Protein: 9.1g | Fat: 0.8g | Saturated Fat: 0.1g | Polyunsaturated Fat: 0.2g | Monounsaturated Fat: 0.1g | Trans Fat: 0.1g | Cholesterol: 71.4mg | Sodium: 327mg | Potassium: 295.2mg | Fiber: 1.6g | Sugar: 2.1g | Vitamin A: 2191.2IU | Vitamin C: 32.3mg | Calcium: 65.4mg | Iron: 1.2mg
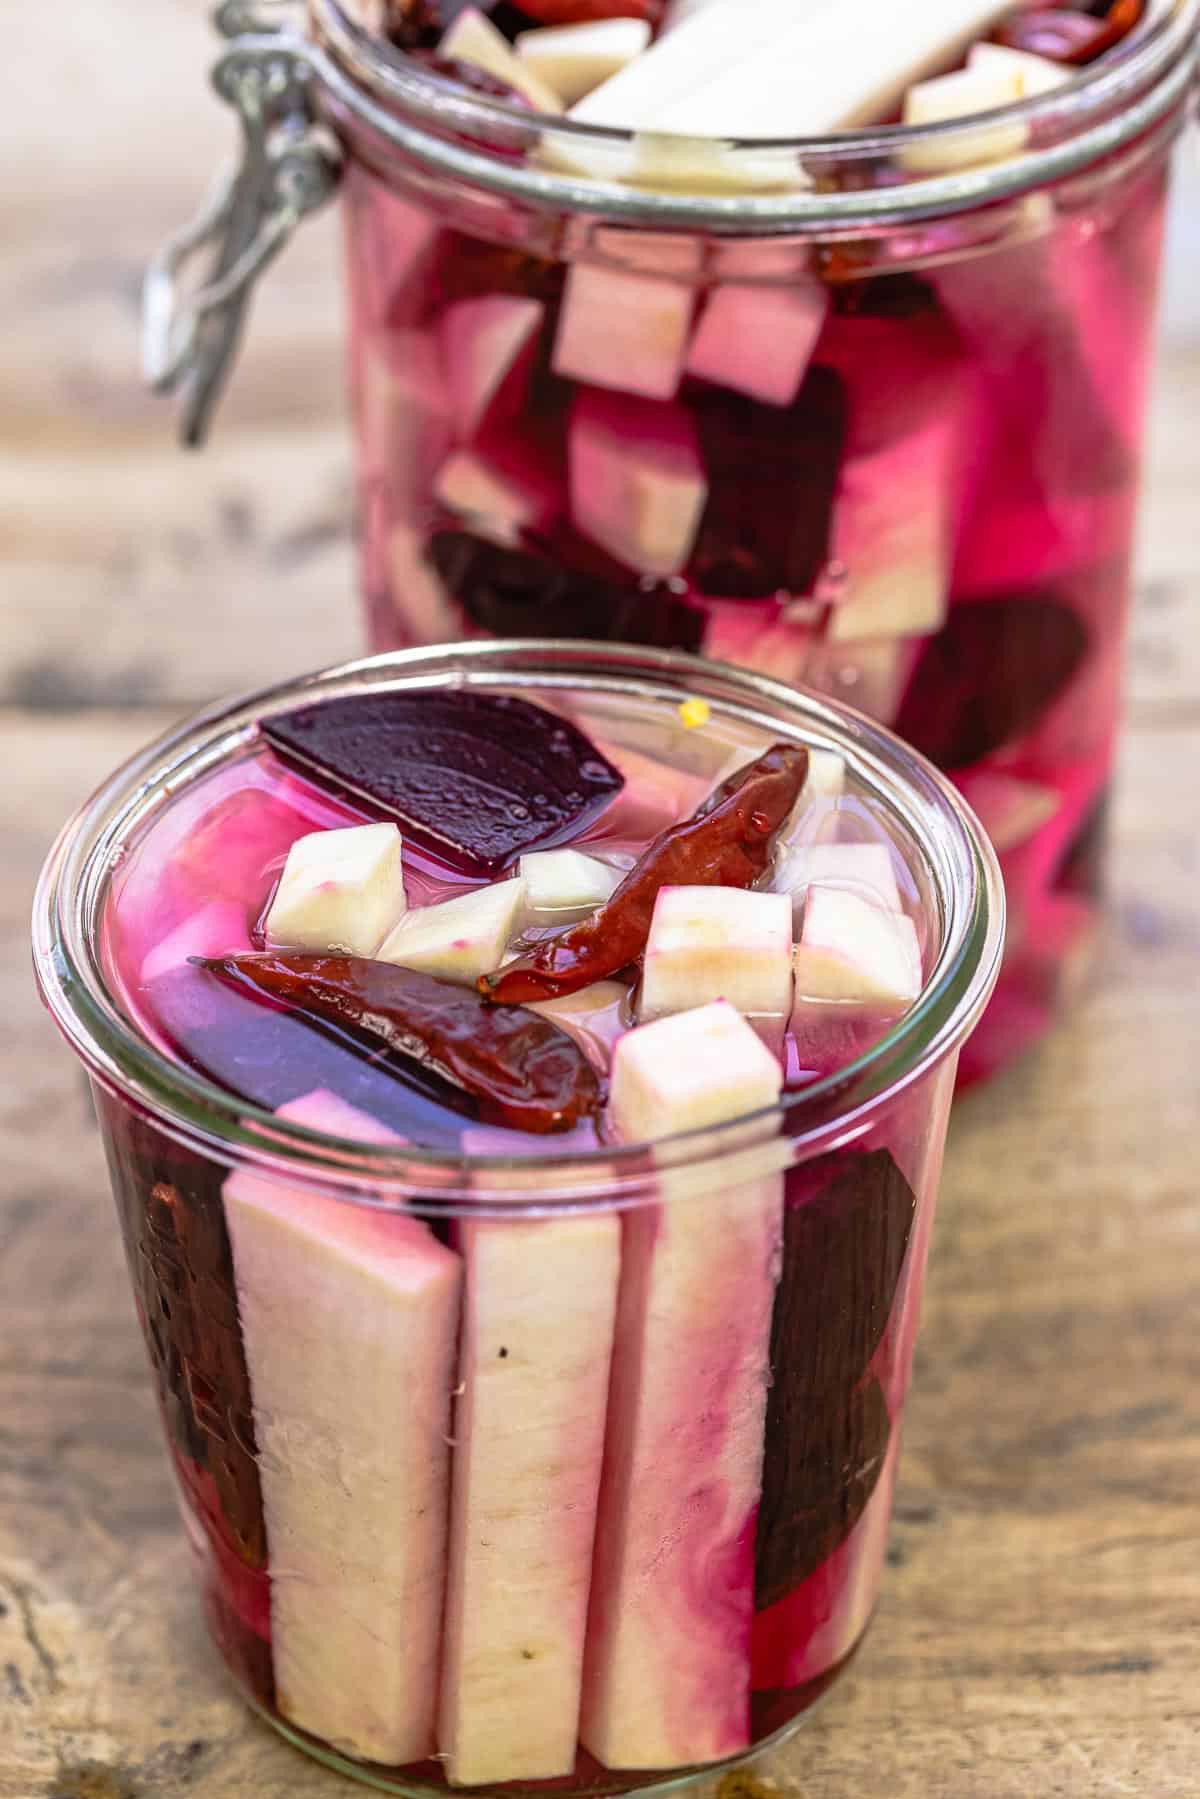
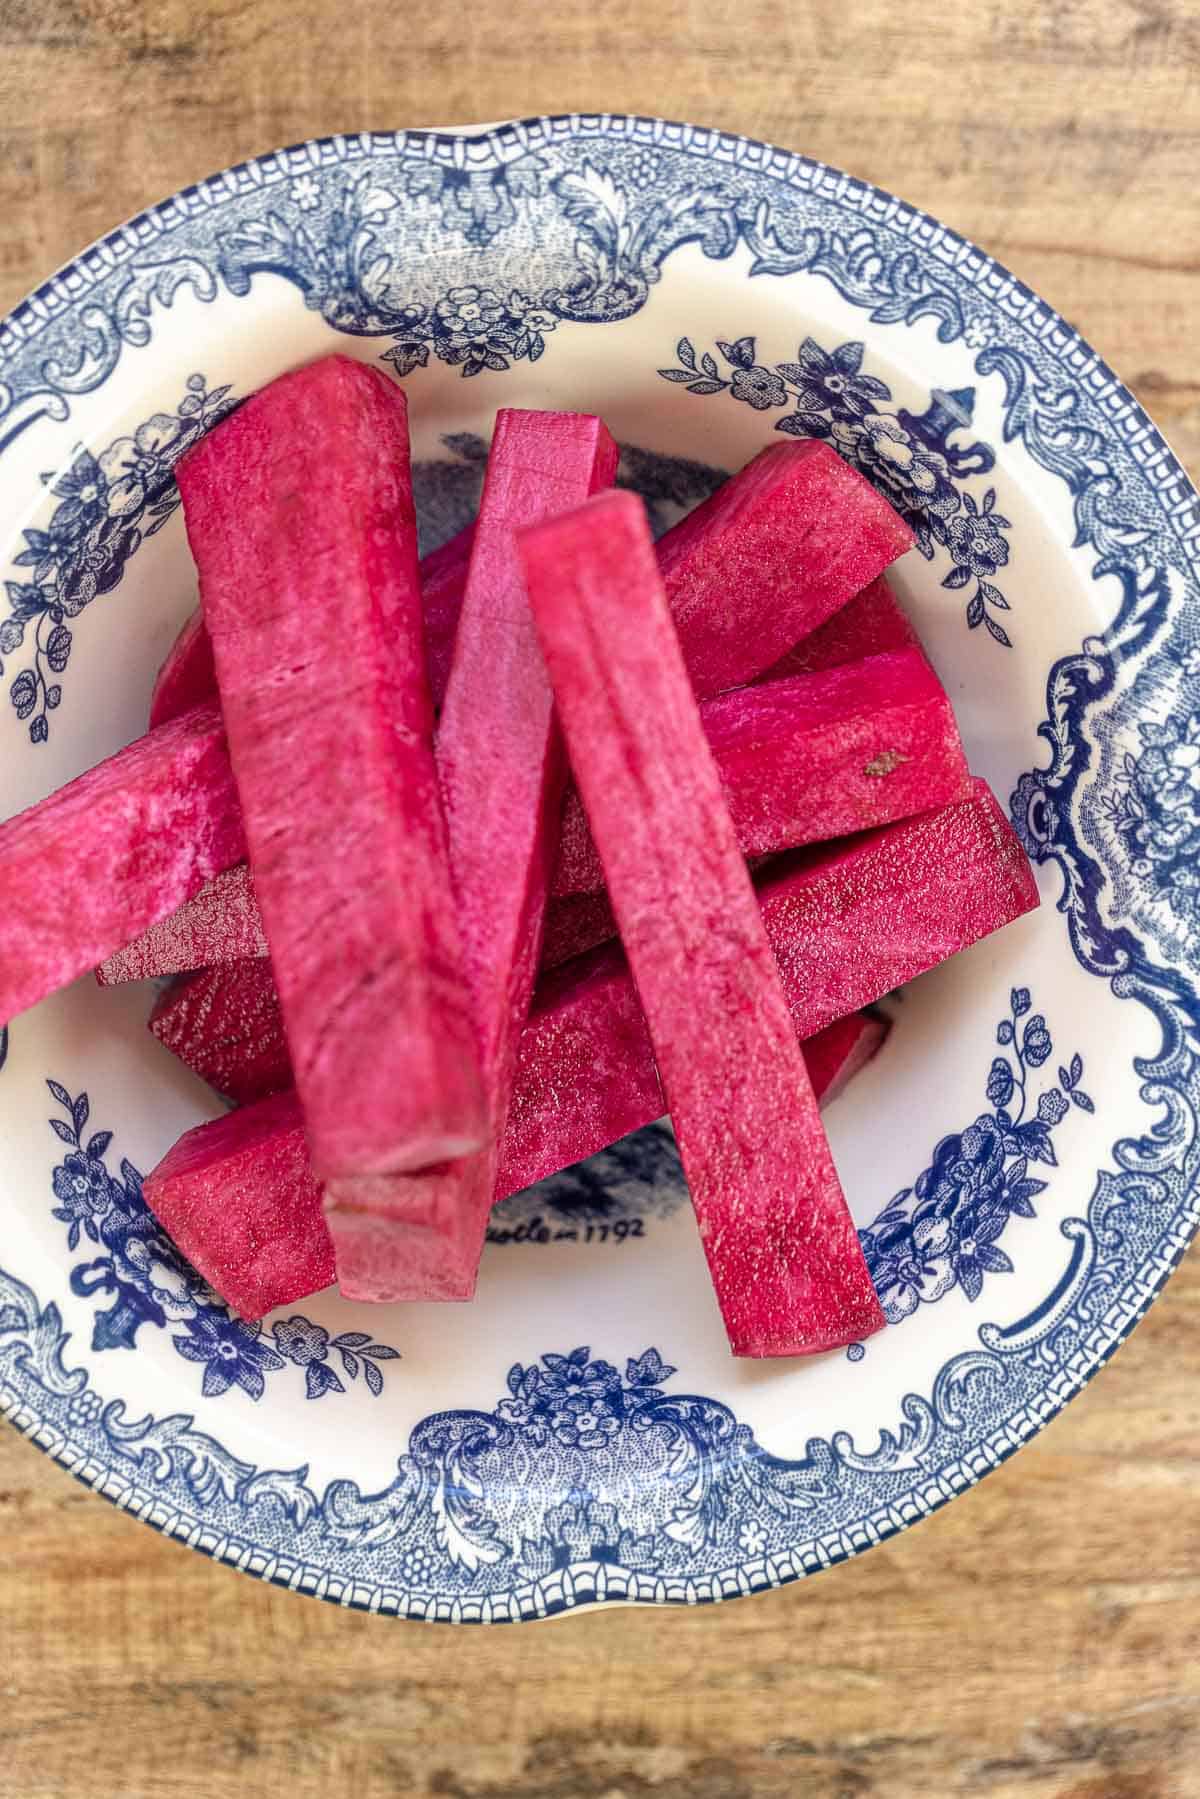
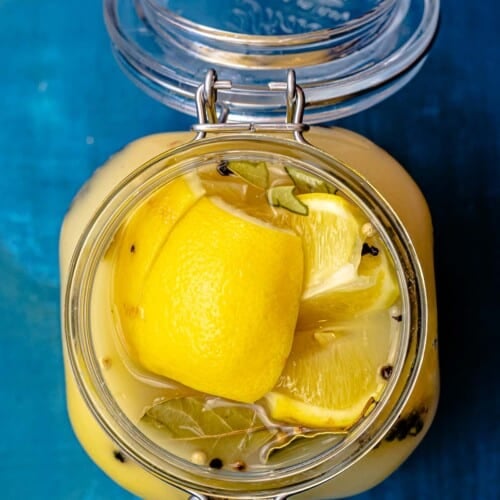
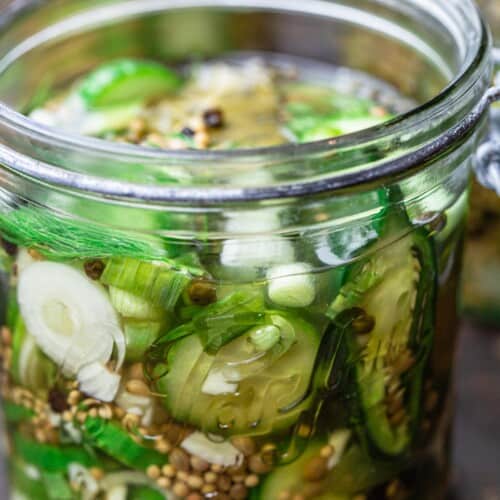
The post Shrimp Lettuce Wraps Recipe appeared first on The Mediterranean Dish. via The Mediterranean Dish https://www.themediterraneandish.com/shrimp-lettuce-wraps/ Bold, tangy, and perfectly crunchy, Middle Eastern pickled turnips are an easy condiment you’ll love on sandwiches, salads, mezze platters and more! 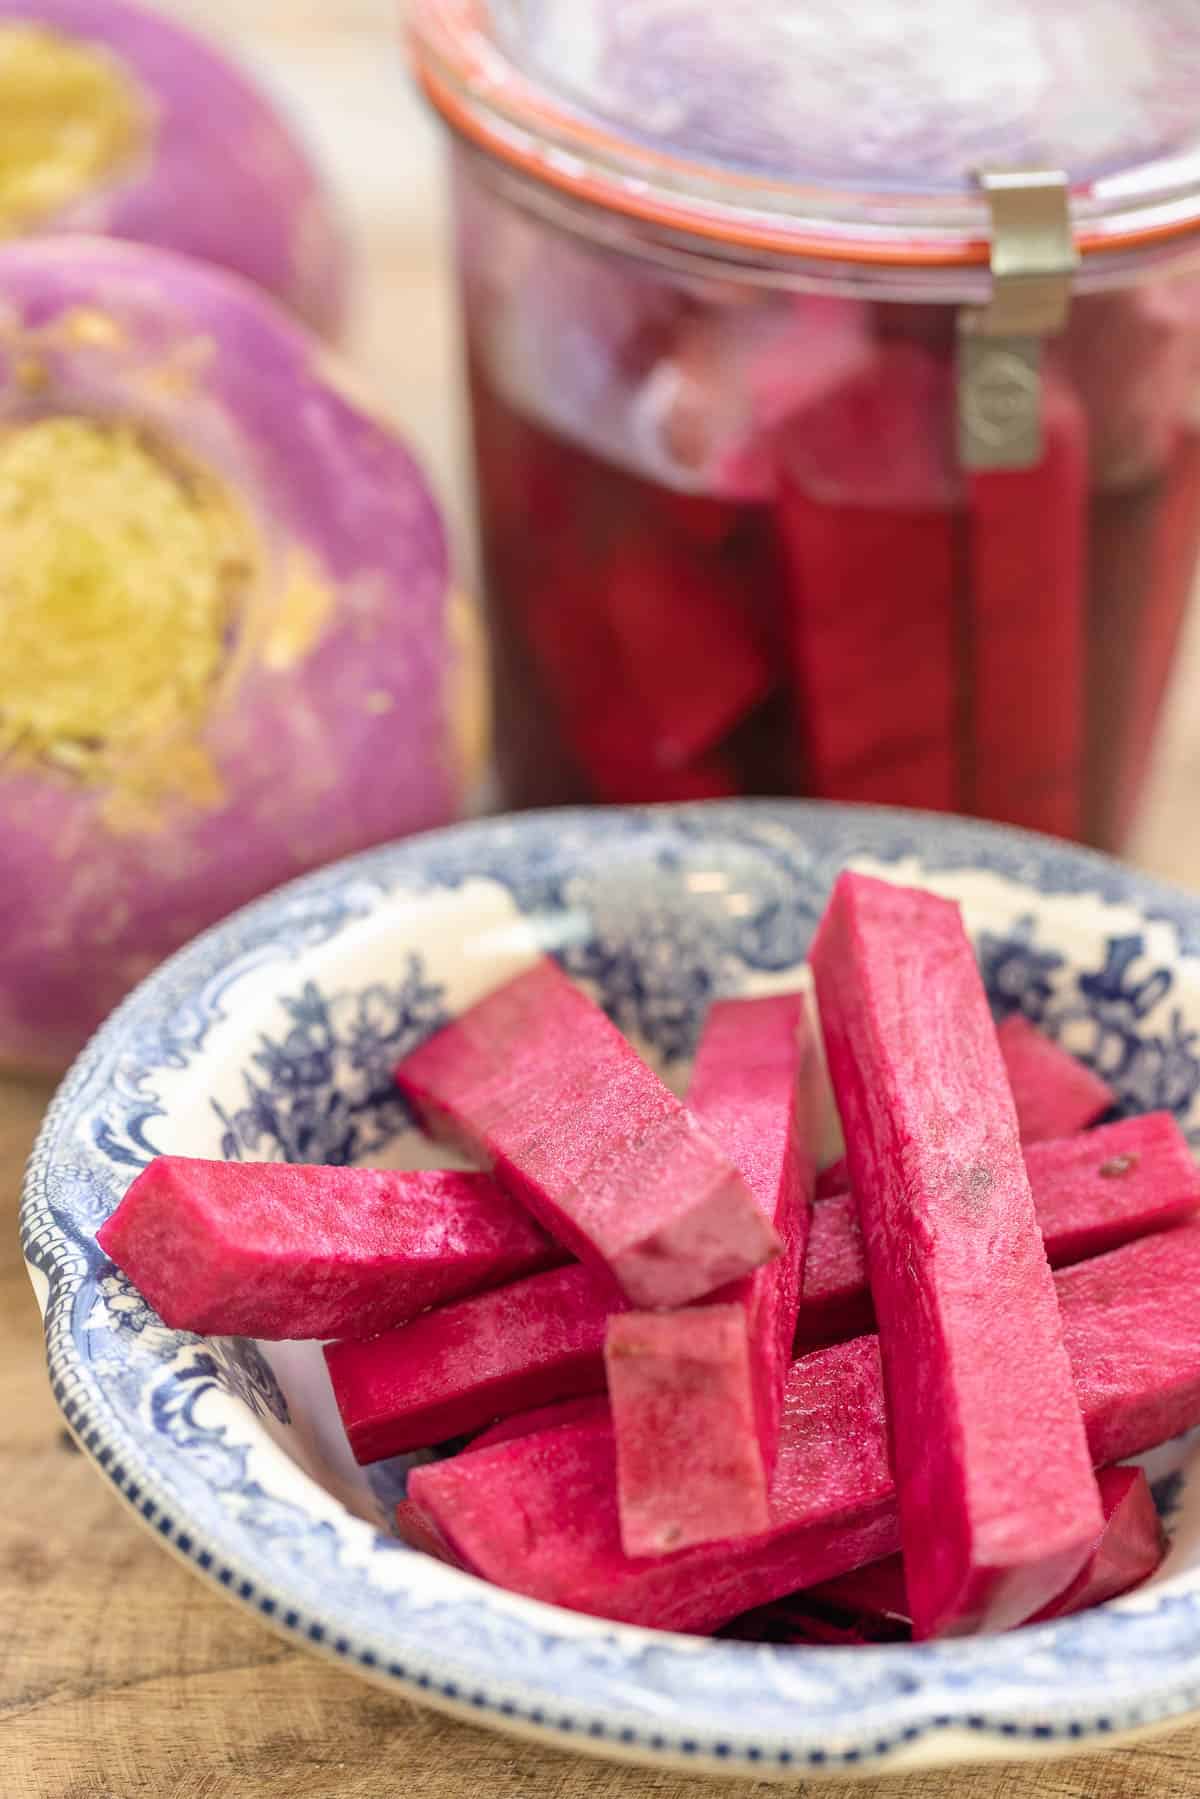 Pickled turnipsBeautiful pink pickled turnips are a staple in Middle Eastern kitchens. Perfectly vinegary, slightly sour, and subtly spicy, these crisp refrigerator pickles are easy to make in just 10 minutes. Simply brine, refrigerate, and let the magic happen. This simple 6-ingredient recipe is a riff off of one from my mother-in-law Dina, who keeps jars of pickled turnips, pickled cucumbers, and preserved lemons to serve for brunch next to favorites like foul mudammas, tangy labneh, and boiled eggs. Turnips (and beets, which are responsible for the beautiful magenta hue) + a quick brine make up this recipe... 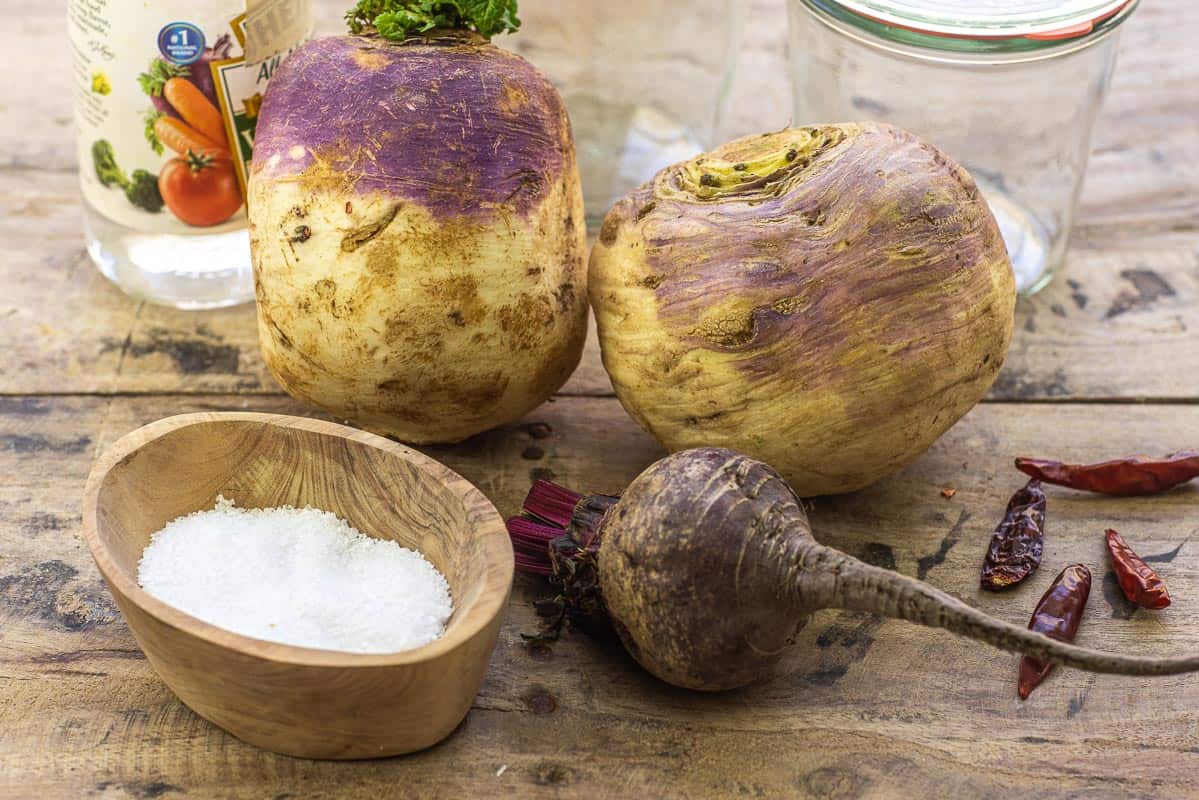 Turnips and beetsTurnips are root vegetables that are mostly white in color with a hint of lovely purple or pink skin. Younger, smaller turnips tend to be sweeter and more crisp, while older turnips have a sharper flavor. I use large turnips in this recipe, but you could use smaller ones as well – just get about 2 pounds! Avoid turnips with brown, soft spots. You need the turnips to be as fresh and crisp as possible so your pink pickles are nice and crunchy. The secret to Middle Eastern pickled turnips’ pretty pink hue is red beets. You just need 1 small sliced beet, which is enough to tint the white turnips varying shades of pink. Once the turnip pickle is ready, you can eat both the turnips and the beetroot. Just remember that the beets will not be crunchy – they will be chewy and a bit more rubbery. The pickling brineThe brine is probably the most important part of this quick pickling process. Its strong flavor comes from salt and vinegar, which give the pickled turnips perfectly balanced tang and sourness. This super easy brine takes just 3 simple ingredients and no boiling! Here’s what you’ll need to make it:
 How to make Middle Eastern pickled turnipsTurnip pickle is so easy to make in just 3 steps! Here’s how:
VariationsTo change up the flavor of your pink pickles, you can add different herbs and aromatics. Play around and see what combination you like best!
 All the ways to use pink pickled turnips!Trust me, once you try them, you’ll want to eat these pickled turnips with everything (or by themselves, straight out of the jar, like I do!) I like to stuff them into pita wraps with falafel or chicken shawarma, maybe with a Mediterranean cucumber and tomato salad and a drizzle of tahini sauce on top. Middle Eastern pickled turnips are also a delicious addition to a simple mezze platter alongside briny olives, roasted eggplant, and creamy hummus. How to store pickled turnipsMiddle Eastern turnip pickle can be stored in the refrigerator for up to 1 month. Be sure to close the lid tightly each time you grab some pink pickles to help them last longer. More Mediterranean condimentsBrowse all Mediterranean Recipes  Middle Eastern Pickled Turnips (Pink Pickles!)
Easy Middle Eastern pickled turnips and beets take just 10 minutes to prepare thanks to the no-boil brine! Perfectly tangy, slightly sour, and so crunchy, you'll love eating these pink pickles with pretty much any Middle Eastern meal! I love them for brunch with some boiled eggs and labneh, chopped and sprinkled onto salads, and stuffed into pita sandwiches with falafel or shawarma.
Servings 16 servings
Calories 20.9kcal
Ingredients
Instructions
Notes
Nutrition
Calories: 20.9kcal | Carbohydrates: 4.1g | Protein: 0.6g | Fat: 0.1g | Saturated Fat: 0.1g | Polyunsaturated Fat: 0.1g | Monounsaturated Fat: 0.1g | Sodium: 1812.9mg | Potassium: 125.6mg | Fiber: 1.2g | Sugar: 2.5g | Vitamin A: 1.7IU | Vitamin C: 12.2mg | Calcium: 21.2mg | Iron: 0.2mg
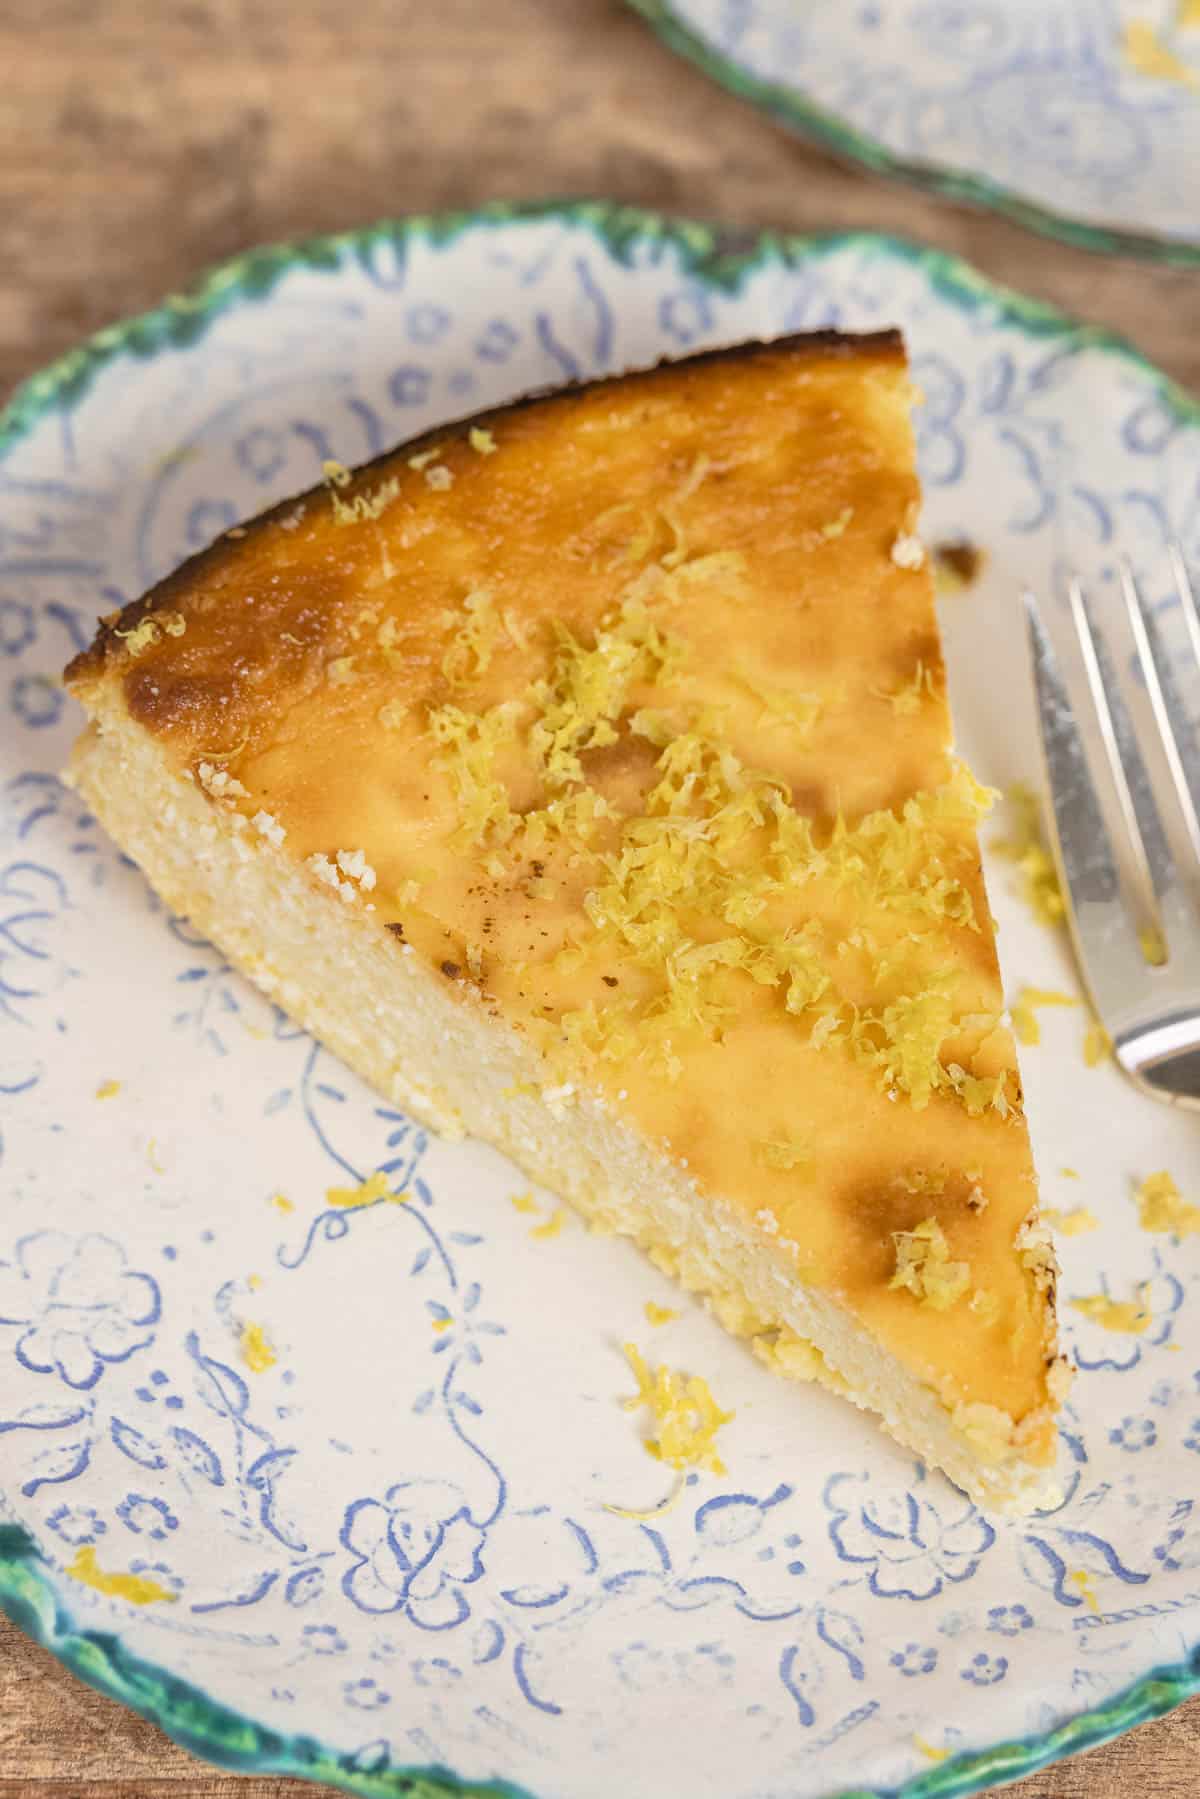
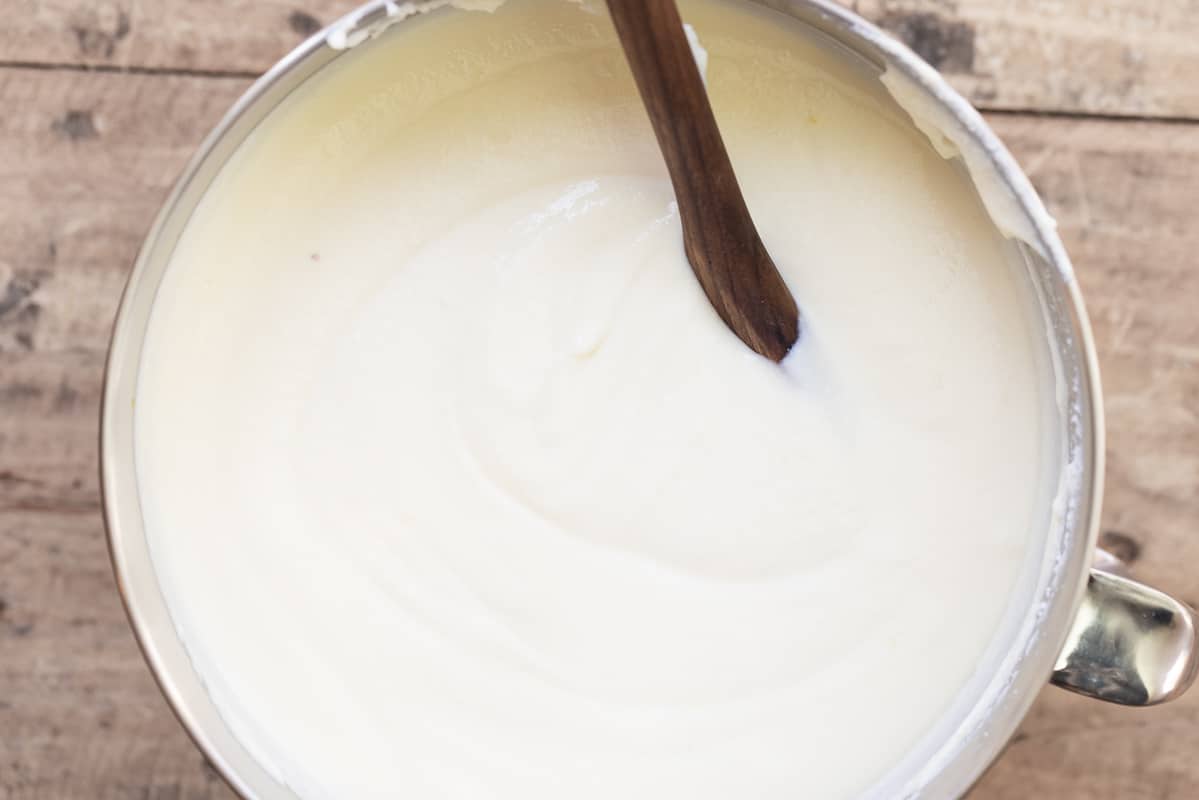
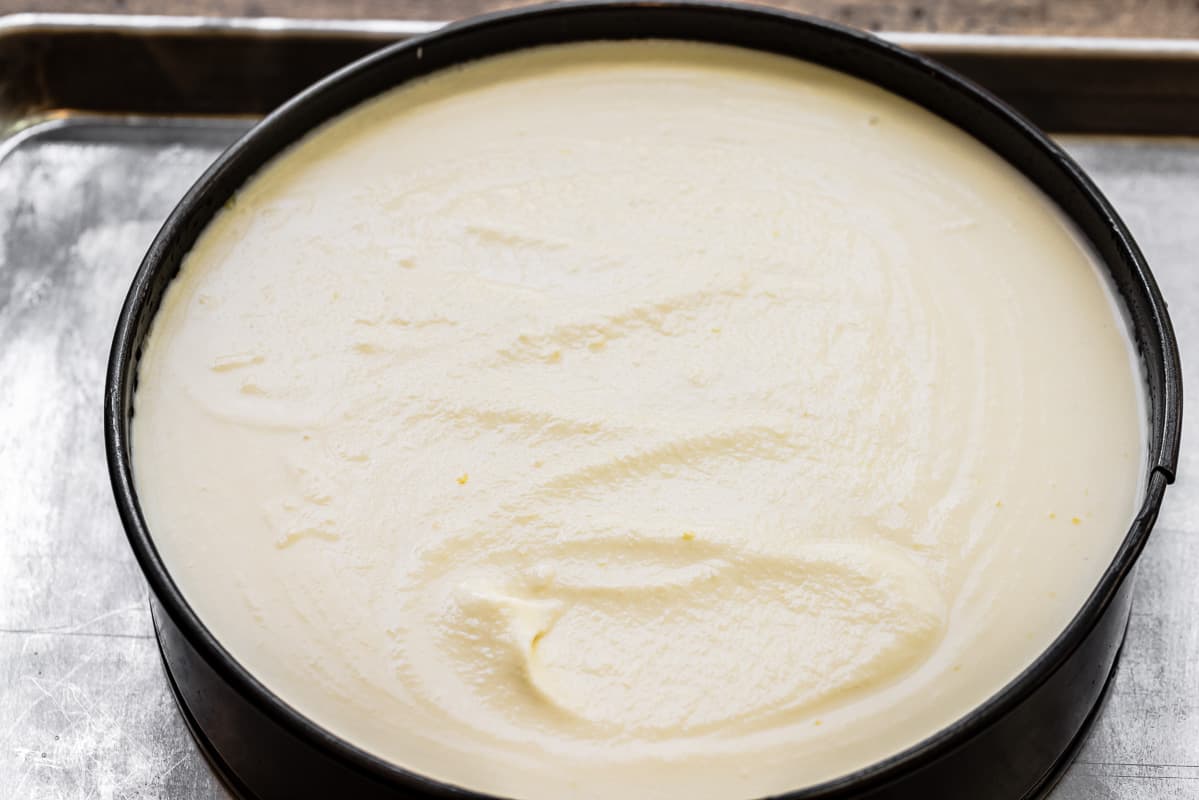
The post Middle Eastern Pickled Turnips Recipe appeared first on The Mediterranean Dish. via The Mediterranean Dish https://www.themediterraneandish.com/pickled-turnips/ 5 ingredients is all you need to make this easy Italian cheesecake recipe with fluffy whipped ricotta, lemon zest, and just the right amount of sugar. With no crust and no water bath, this lighter ricotta cheesecake is a great no-fuss dessert for your next gathering! 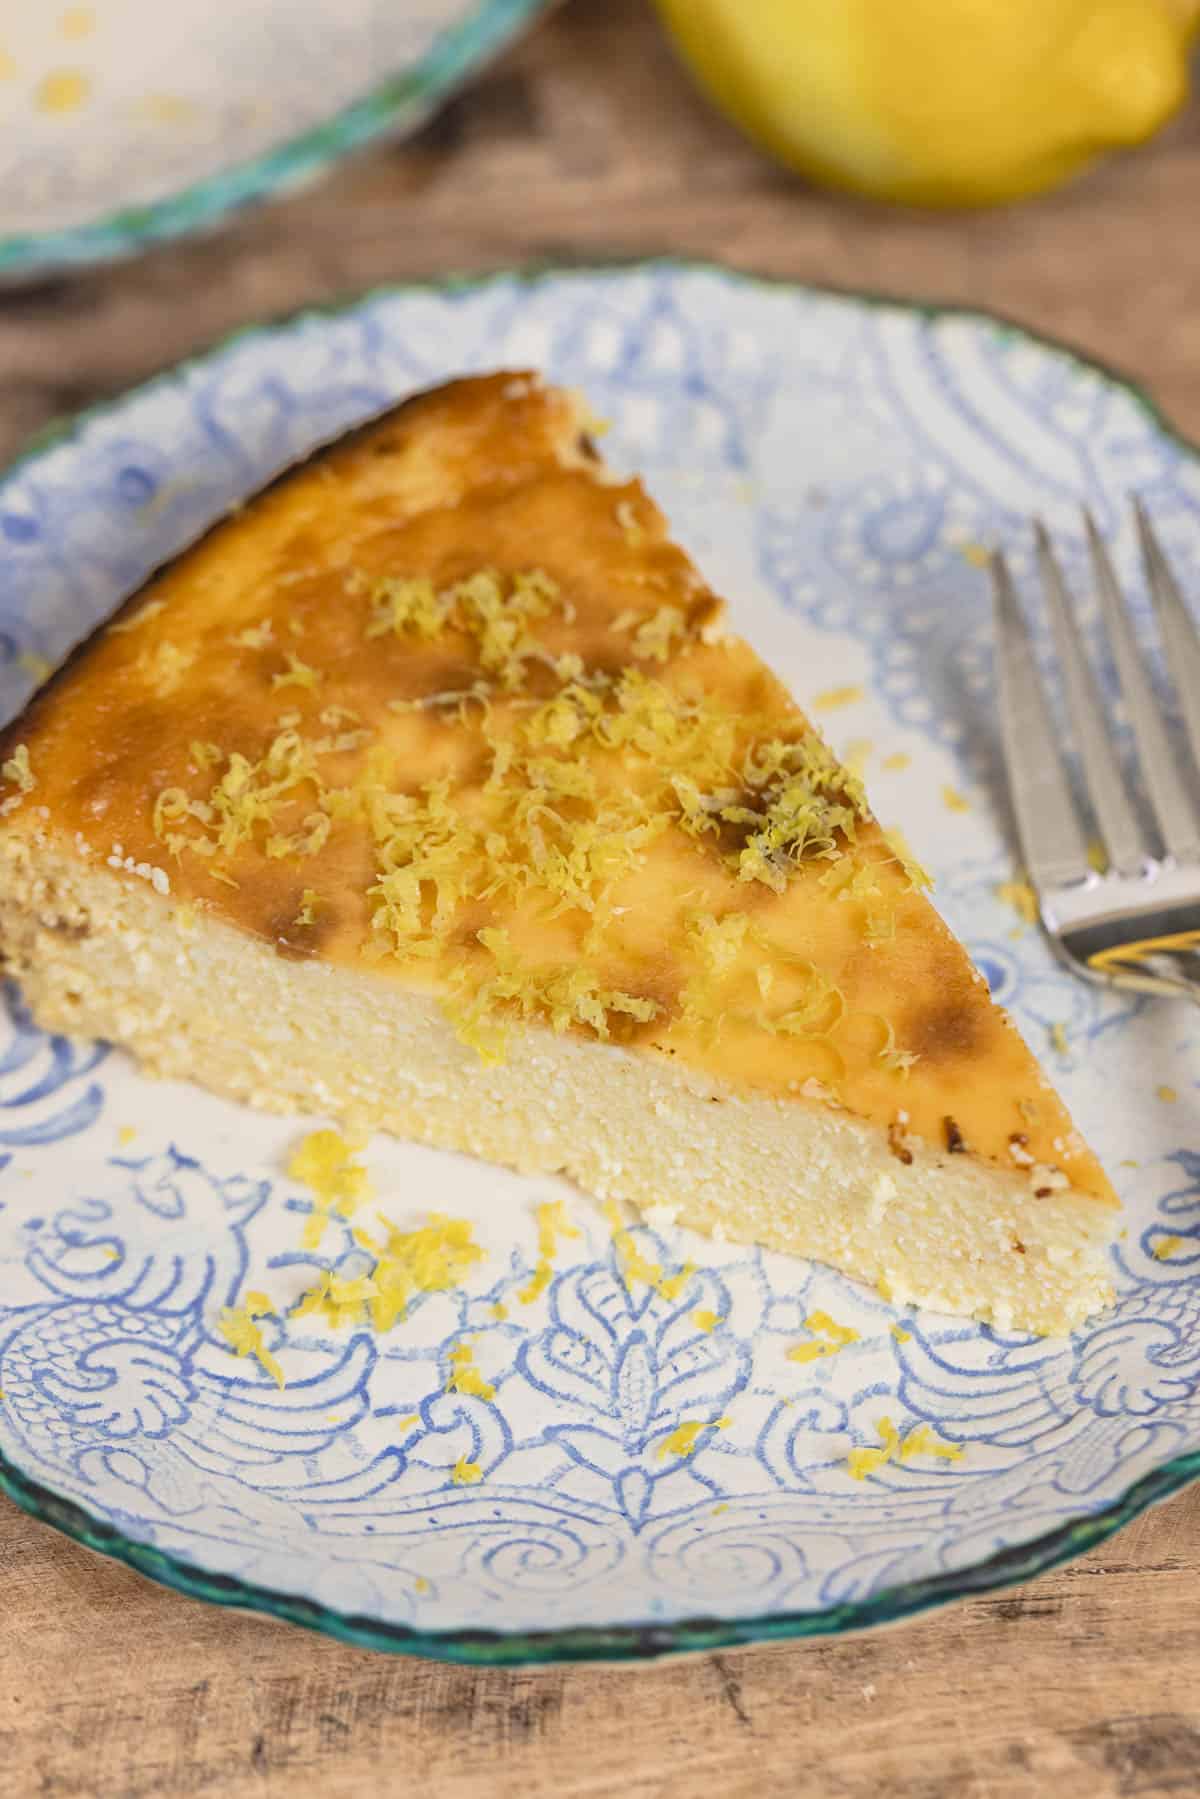 Ricotta cheesecake!This elegant Italian ricotta cheesecake bridges the gap between those who love a full and dense cheesecake, and others like me who prefer a lighter, more airy cheesecake. The star ingredient here is none other than whole milk ricotta cheese, which is whipped for a good 10 minutes with eggs and sugar, to create an unbelievably indulgent, yet airy and light batter. Not only does this ricotta cake strike just the right balance in terms of texture and flavor, but it is easy to make with just 5 simple ingredients! How is ricotta cheesecake different from regular cheesecake?The kind of cheese used makes the biggest difference between Italian ricotta cheesecake and regular cheesecake (or New York-style cheesecake). American cheesecake is made with cream cheese, which is made with milk and cream and will give you a richer, more dense cake. Versus this Italian cheesecake, which uses ricotta cheese, made with milk only and, therefore, will give you a lighter, more airy cake. Also, another big difference to note here is that this is a gluten-free crustless cheesecake, which contributes to the cake’s lightness, giving you a daintier finish. 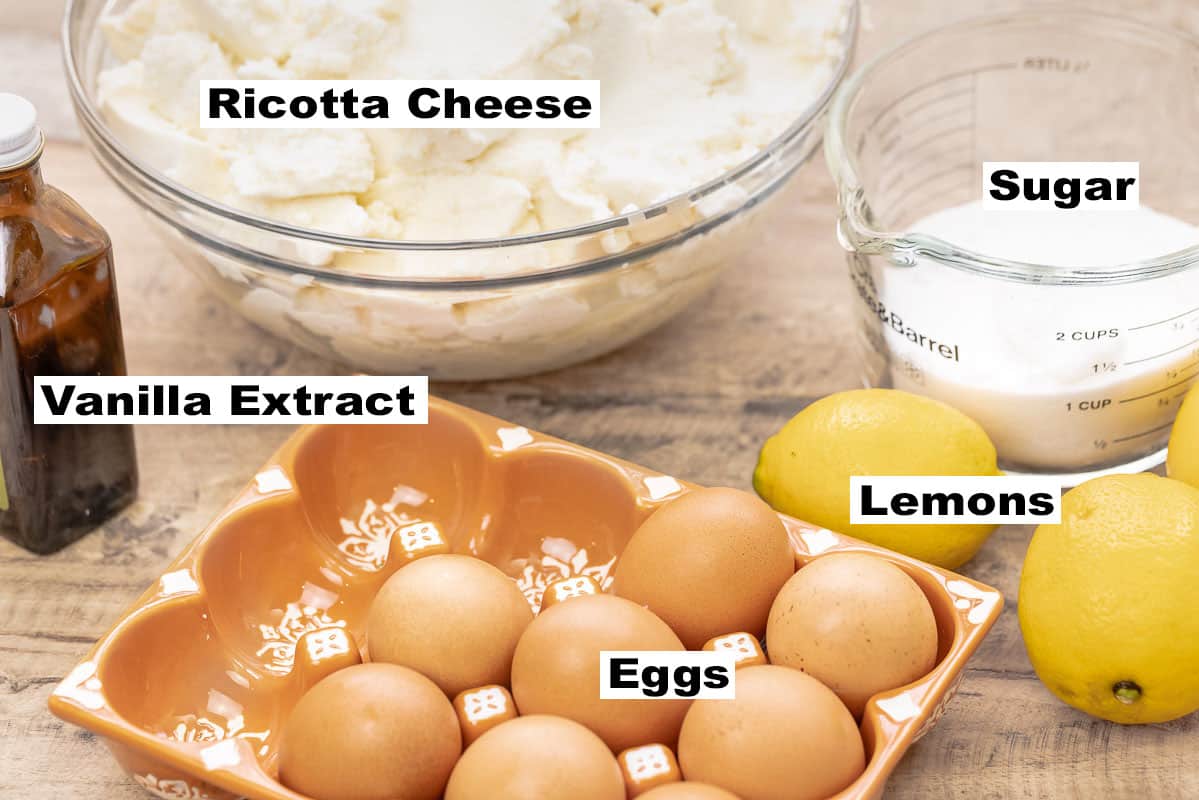 Ingredients and notes for Italian cheesecake with ricottaYou only need 5 ingredients to make this gluten-free ricotta cheesecake recipe:
How to make ricotta cheesecakeWith a little advance preparation, you can have a show-stopping ricotta cheesecake for your next dinner party. Here’s how you make it (printer-friendly recipe below):
 Tips for the best ricotta cheesecake
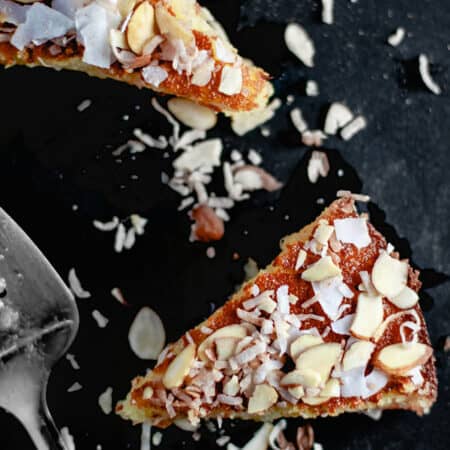
Cheesecake serving tipsAs mentioned earlier, you'll need to allow the cake to cool completely overnight in the fridge. About 15 minutes before serving, take the cheesecake out of the fridge and remove the springform pan. Slice the no-crust cheesecake with a sharp (not serrated) knife. It helps to keep a pitcher of water nearby to clean the knife and wipe it between slices. You can serve this cake plain with just a sprinkle of lemon zest (or orange zest). You can also add some fresh berries to top your Italian cheesecake for a pop of color Can I freeze ricotta cheesecake?Yes! You can freeze this crustless cheesecake. Leftovers can keep in the fridge, in a tightly closed container, for up to 5 days. But to freeze it, simply wrap the chilled baked cheesecake tightly in plastic wrap and also a layer of foil and freeze for up to 2 months. You can also wrap and freeze individual slices so you only thaw as much as you need at a time. Thaw overnight in the fridge. If thawing out individual slices, they may only need a few hours in the fridge to thaw completely. More cake recipesBrowse all Mediterranean Recipes  Italian Lemon Ricotta Cheesecake Recipe
All you need is 5 ingredients for this lighter, airy, gluten-free cheesecake recipe. With some advance preparation and by following my simple tips, you can have the perfect ricotta cheesecake to serve at your next gathering. For best results, make Italian cheesecake a night in advance to give it several hours to chill and set in the fridge. And be sure to mix the batter for a good 10 minutes -- this is the secret to a perfectly airy lemon ricotta cheesecake!
Servings 10 slices
Calories 384.5kcal
Ingredients
Instructions
Notes
Nutrition
Calories: 384.5kcal | Carbohydrates: 29.3g | Protein: 19.8g | Fat: 21.1g | Saturated Fat: 12.4g | Polyunsaturated Fat: 1.2g | Monounsaturated Fat: 6.2g | Trans Fat: 0.1g | Cholesterol: 200.3mg | Sodium: 164.6mg | Potassium: 192.6mg | Sugar: 25.5g | Vitamin A: 795.6IU | Calcium: 301.7mg | Iron: 1.1mg
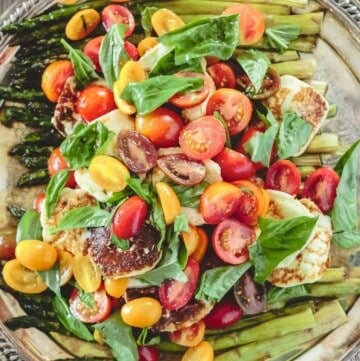
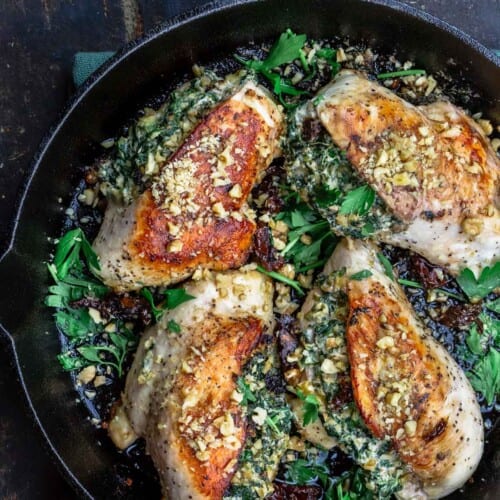
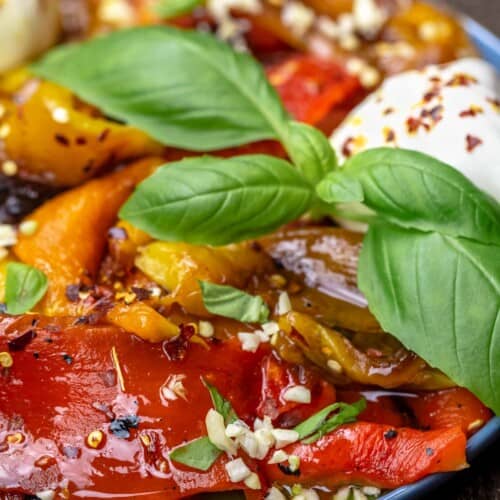
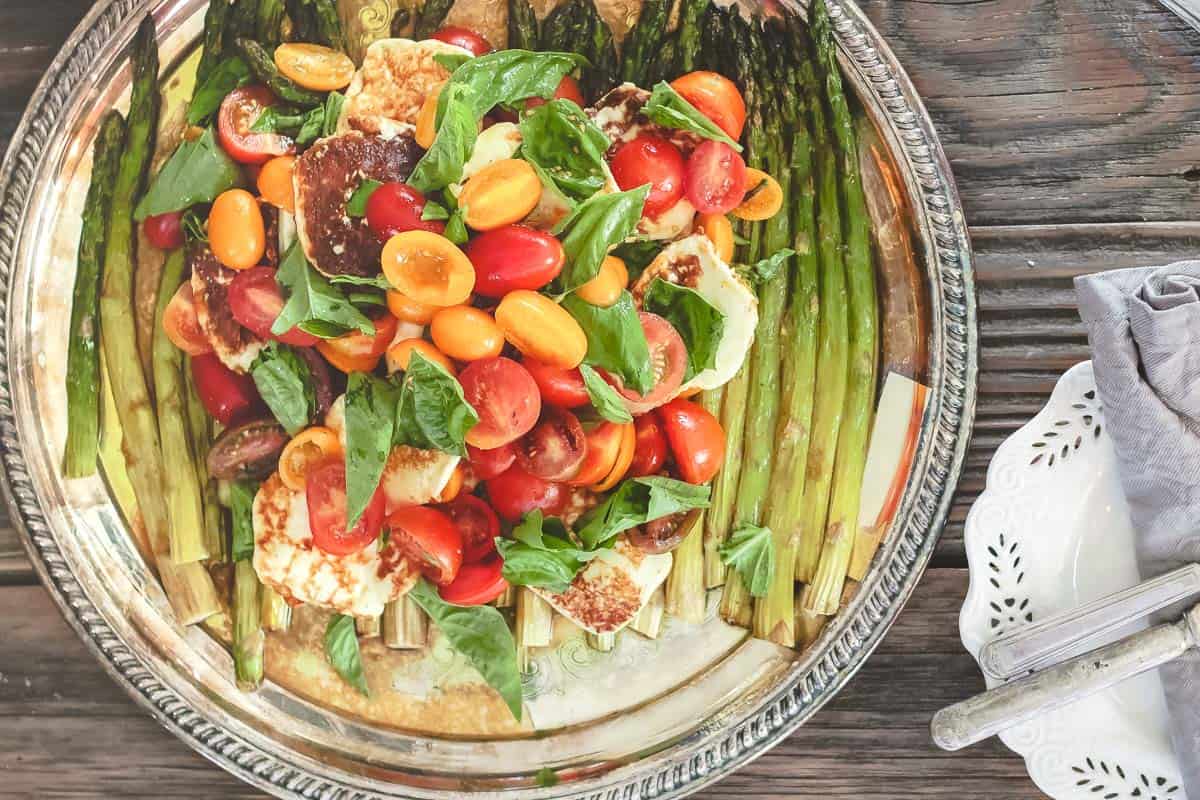
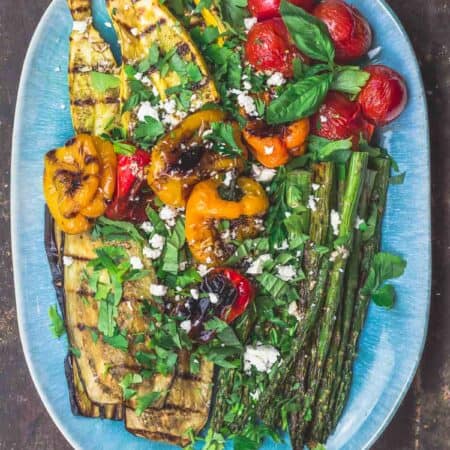
The post Italian Lemon Ricotta Cheesecake Recipe appeared first on The Mediterranean Dish. via The Mediterranean Dish https://www.themediterraneandish.com/lemon-ricotta-cheesecake/ Easy roasted asparagus salad recipe with tomatoes, basil, and a light sherry vinaigrette! Add your favorite cheese like fried halloumi, crumbled creamy feta, or shaved Parmesan, or skip the cheese to keep this delicious roasted asparagus recipe vegan! 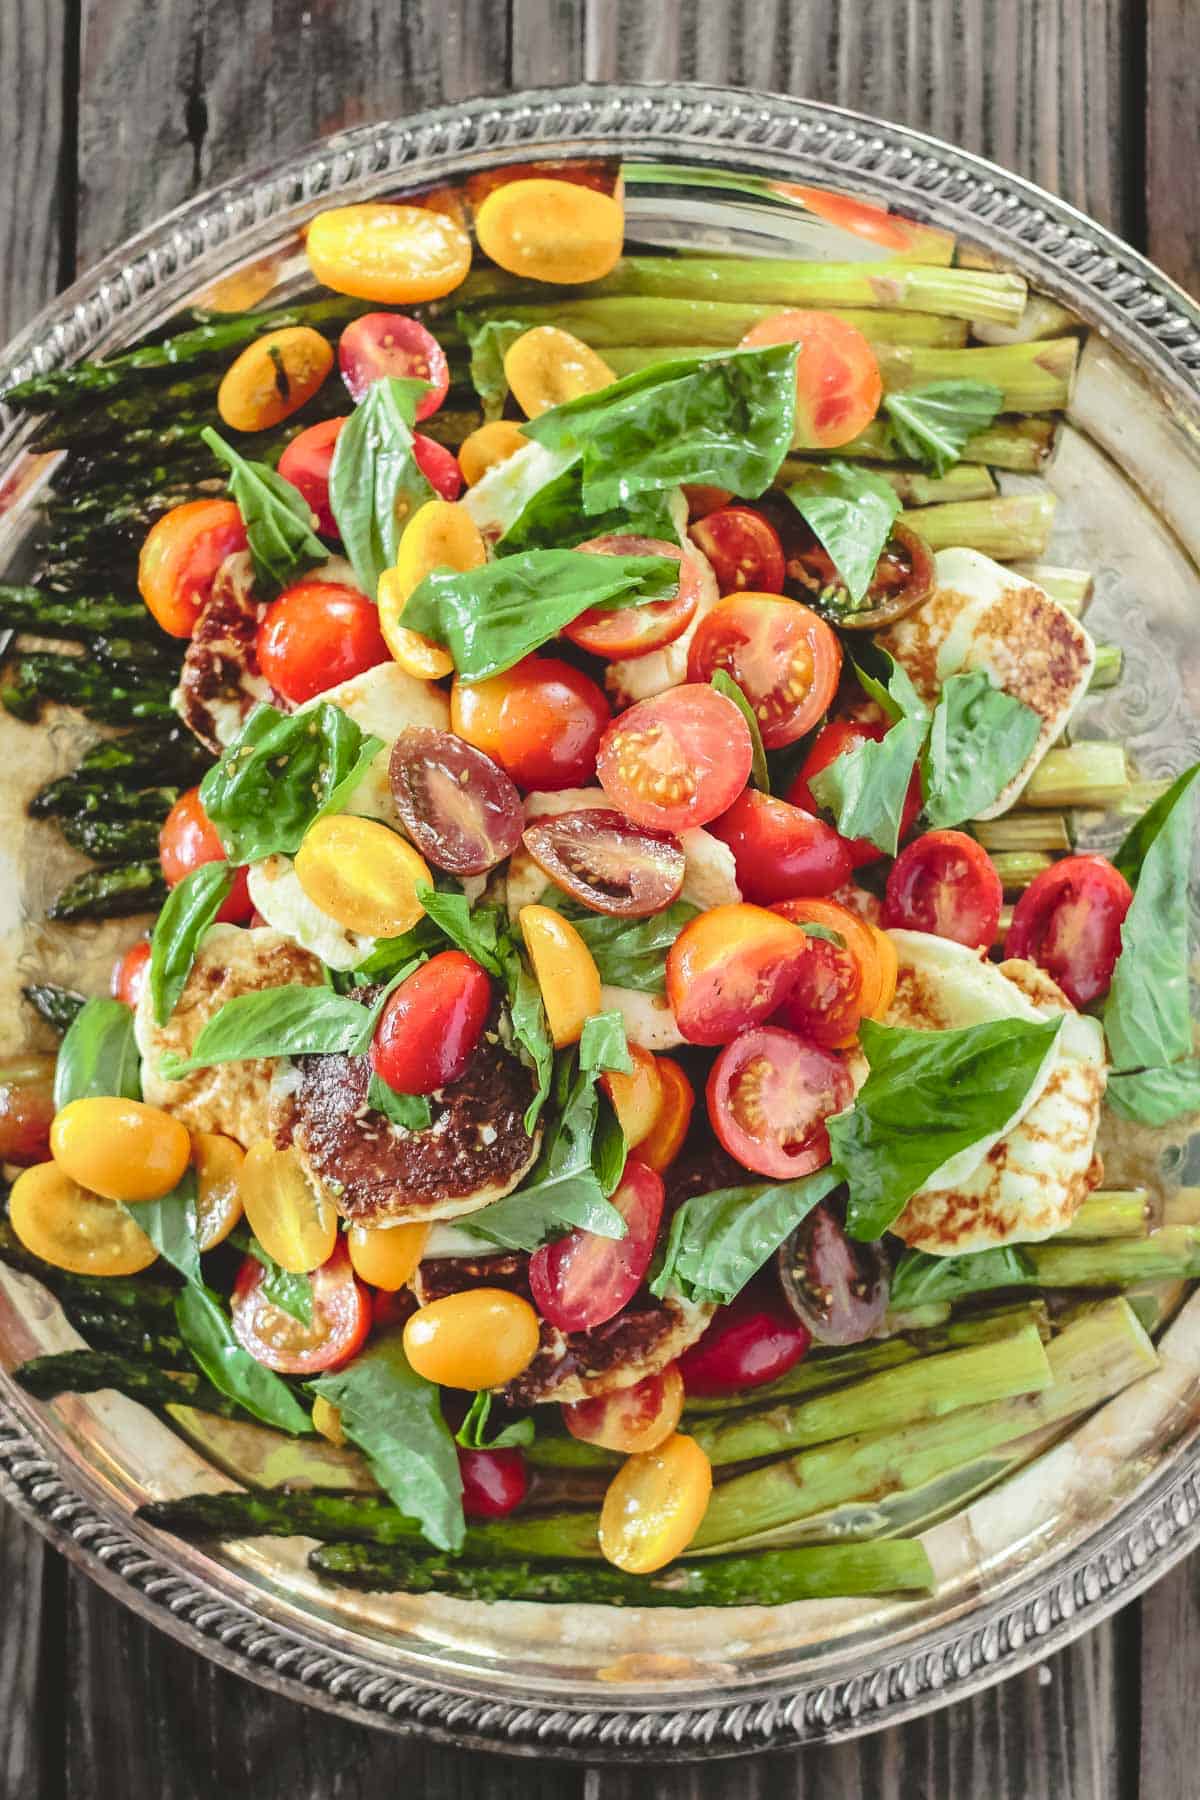 Best roasted asparagus saladAsparagus is one of my favorite spring vegetables. I’m a big fan of it any way it comes – sautéed with some lemon and garlic, grilled with other bright vegetables, or even blanched (as long as it’s topped with a little Mediterranean-style salsa!) But I especially love the convenience of tender roasted asparagus, which needs little more than a dash of salt, good extra virgin olive oil, and a hot oven to make! (I added some last night next to my favorite baked cod)! In this recipe, tender roasted asparagus spears make the perfect bed for a topping of fresh little tomatoes and basil with a bright sherry vinaigrette. To me, this roasted asparagus salad makes a show-stopping side, with or without a little cheese. I used fried halloumi over the asparagus, which gives the salad a bit of a unique and indulgent twist. But you can use feta, goat cheese, or shaved parmesan. (Of course, to keep this asparagus recipe vegan, you can simply omit the cheese altogether). Tips for the best oven-roasted asparagusRoasting asparagus is one of the easiest things to do, but a few tips ensure tender spears that still have a good bite:
Asparagus salad ingredients and prep notes
The vinaigretteThe homemade vinaigrette is what brings this composed tomato asparagus salad together. It’s made of a few simple ingredients whisked together. You’ll need:
How to make roasted asparagus salad
Cheese options for this saladYou can absolutely serve the oven-roasted asparagus salad vegan, but if you want to add cheese, you can try feta, goat cheese, shaved parmesan, Pecorino Romano, or even fried halloumi as I do in this recipe. Fried halloumi is my guilty pleasure, and it does make this roasted asparagus salad recipe unique. If you want to add the halloumi, start by cutting 4 ounces of halloumi cheese into ¼-inch thick squares. Fry the halloumi cheese in a large skillet with some EVOO that’s been heated over medium heat. You’ll need to fry the cheese in batches, for a minute or two, turning once. The cheese is ready when it’s golden brown. Make ahead tipsIf you want to work ahead, trim your asparagus a night in advance and store it in an airtight container in the refrigerator. You can also cut the grape tomatoes in half ahead of time and store them in the fridge as well. The vinaigrette will keep well refrigerated, so make that a night ahead to save some time the next day. 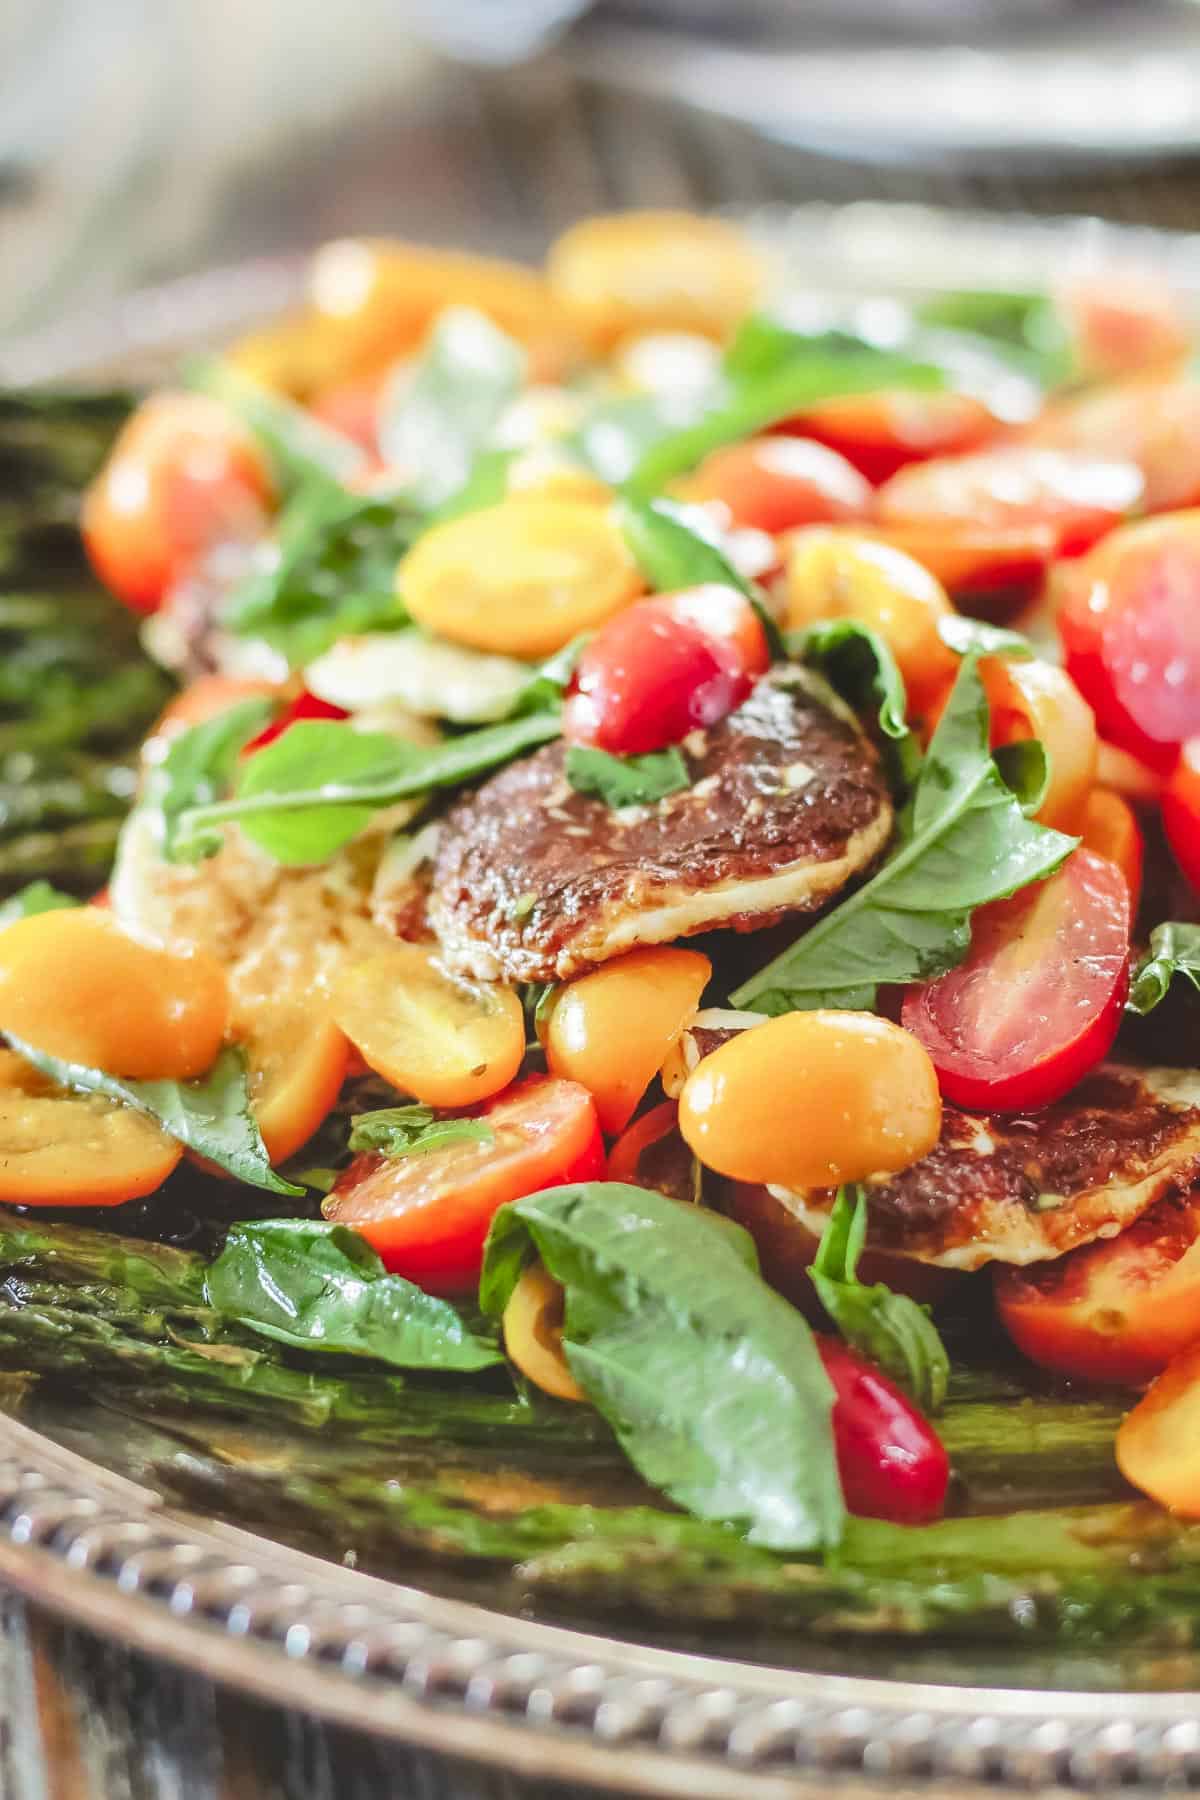 Serve it withThis beautiful roasted asparagus salad with many dishes. Serve it next to a simple fish like baked cod. For a special spring dinner, I love serving it next to rack of lamb, salmon kebabs, or grilled chicken. It’s also the perfect item for brunch next to a heftier egg dish like my baked egg casserole or herby potato omelet. This roasted asparagus recipe also makes a delicious, nutritious light lunch by itself. Leftovers and storageThis tomato asparagus salad is best assembled and eaten immediately, but leftovers may last up to 3 days or so (it’s best to keep the cheese off the salad). More asparagus recipesBrowse all Mediterranean Recipes  Roasted Asparagus Salad with Tomato and Basil
Easy roasted asparagus salad recipe with tomatoes, basil, and a light sherry vinaigrette! Keep it vegan, or add your favorite cheese like fried halloumi, feta cheese, or shaved Parmesan. Serve roasted asparagus salad with baked cod, rack of lamb, salmon kebabs, or grilled chicken. It's also a light and nutritious lunch by itself!
Servings 6 servings
Calories 118.5kcal
IngredientsFor the Sherry Vinaigrette
Instructions
VideoNotes
Nutrition
Calories: 118.5kcal | Carbohydrates: 7.5g | Protein: 3.2g | Fat: 9.3g | Saturated Fat: 1.3g | Polyunsaturated Fat: 1.1g | Monounsaturated Fat: 6.6g | Sodium: 7.1mg | Potassium: 414.6mg | Fiber: 3.3g | Sugar: 4.1g | Vitamin A: 1530.7IU | Vitamin C: 16.9mg | Calcium: 38mg | Iron: 2.8mg
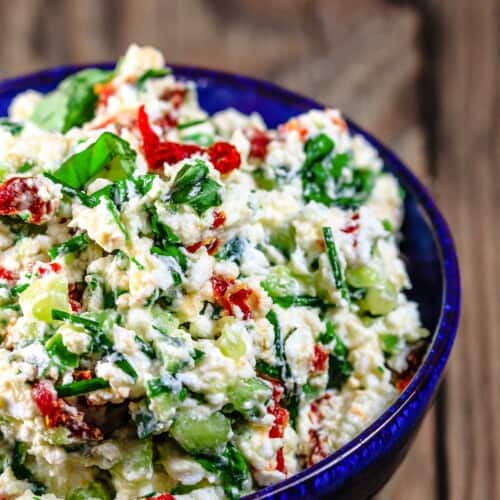
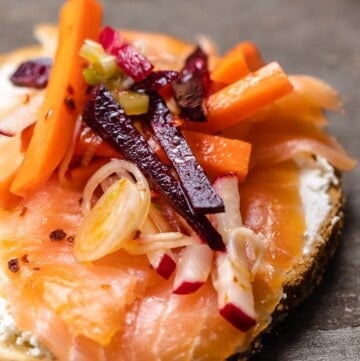
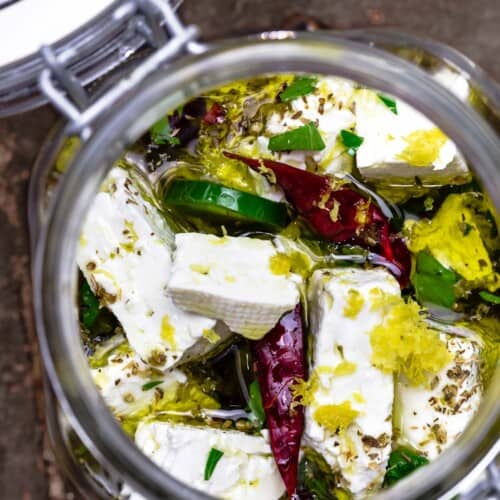
The post Roasted Asparagus Salad with Tomato and Basil appeared first on The Mediterranean Dish. via The Mediterranean Dish https://www.themediterraneandish.com/fried-halloumi-cheese-asparagus-salad/ Loaded salmon toast with smoked salmon, feta, and crunchy root veggies! This smoked salmon sandwich (or lox sandwich) is perfect for a quick brunch or a snack that is both fancy and satisfying. And if you love lox and bagels, this fresh take with a bold Mediterranean twist will win your heart! 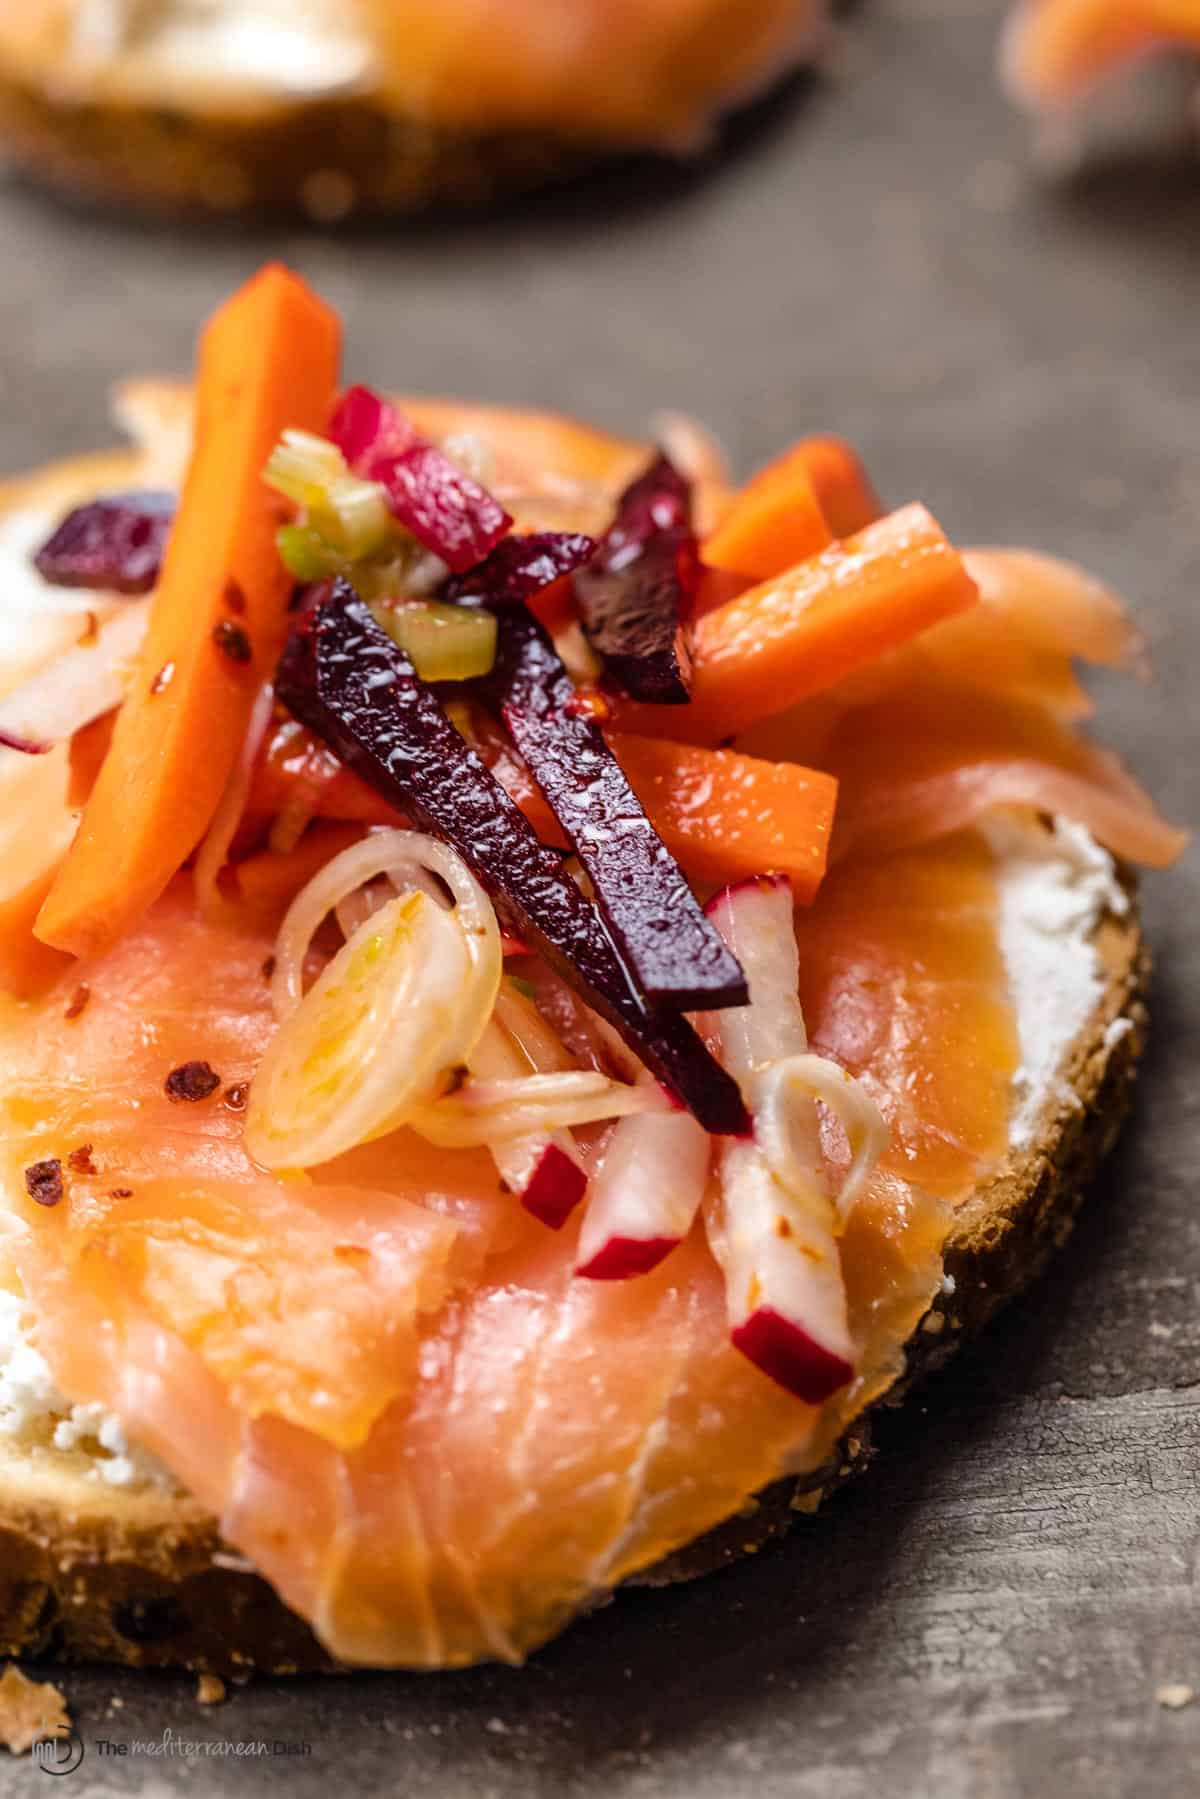 BEST smoked salmon sandwichThis feta and smoked salmon toast, topped with a simple root vegetable salad, is one of my favorite ways to use smoked salmon. And it’s basically the kind of hand-held meal I crave all the time! Think of this open-faced smoked salmon sandwich as a Mediterranean twist on classic lox and bagels, only this is possibly bolder and lighter. (Ditching the bagel alone saves you like 200 calories!) You’ll love the bright flavors, beginning with a schmear of good feta cheese and ending with crunchy root veggies that have been tossed in lime juice, olive oil, and a dash of Aleppo-style pepper. I love that it’s quick to put together on a whim when I don’t feel like cooking, but also fancy enough to serve for brunch! Choosing your smoked salmonSmoked salmon is already cooked and a convenient ingredient that you can find in the refrigerator near the fish counter at most grocery stores. There are options to fit nearly every budget, but it’s important to buy quality smoked salmon even if it means paying a little extra. Before you buy it, look carefully at the label to make sure it does not contain too much salt or sugar. Avoid salmon that looks overly oily or slimy or too dry with dark brown edges or spots. (Dark spots on your lox or salmon mean that it has gone bad). 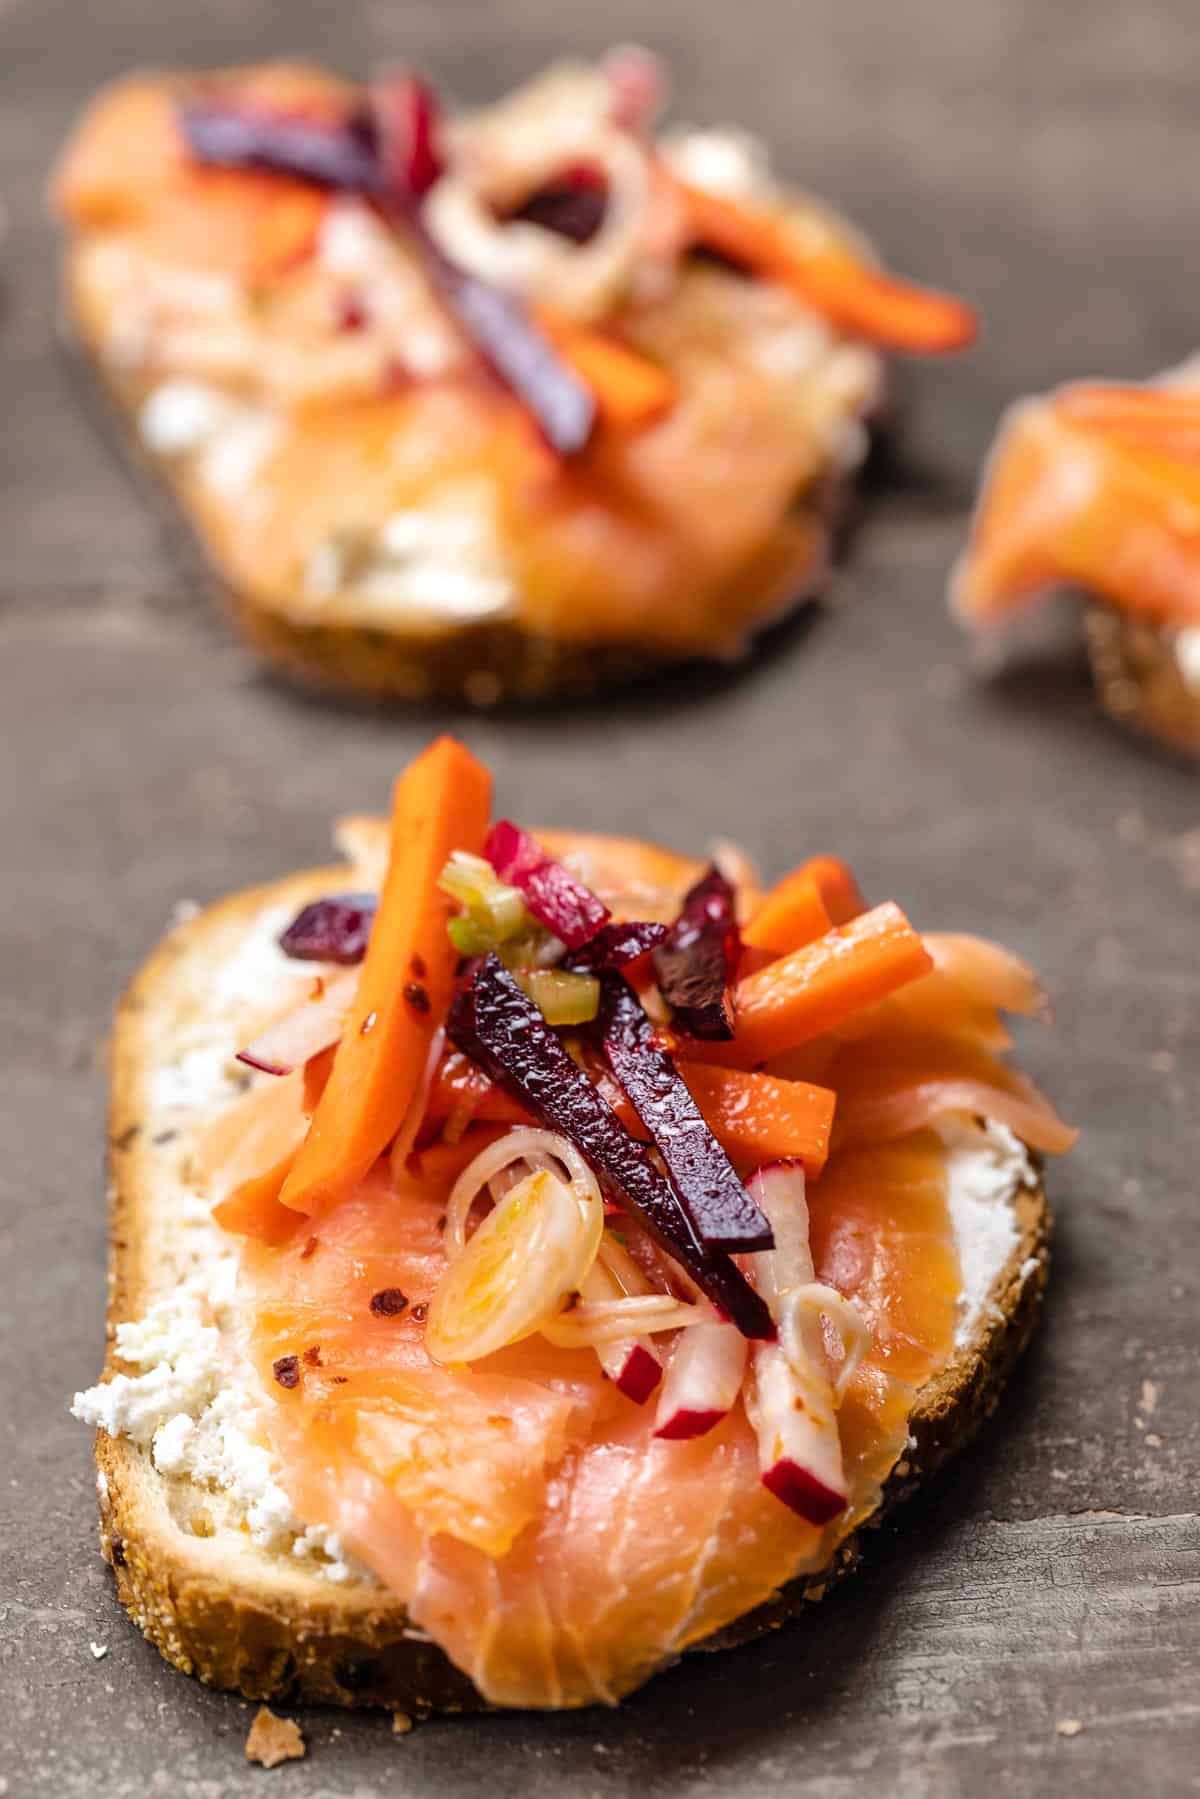 Cheese to use with smoked salmonCream cheese is the classic, obvious choice to pair with lox, but other soft cheeses such as goat cheese, labneh, brie, or feta (my favorite!) could work as well. To make my feta more spreadable, I break it up with the back of a spoon and mix it with some quality extra virgin olive oil. (Now, if I ever have leftover whipped feta on hand, I use it on this salmon sandwich instead). 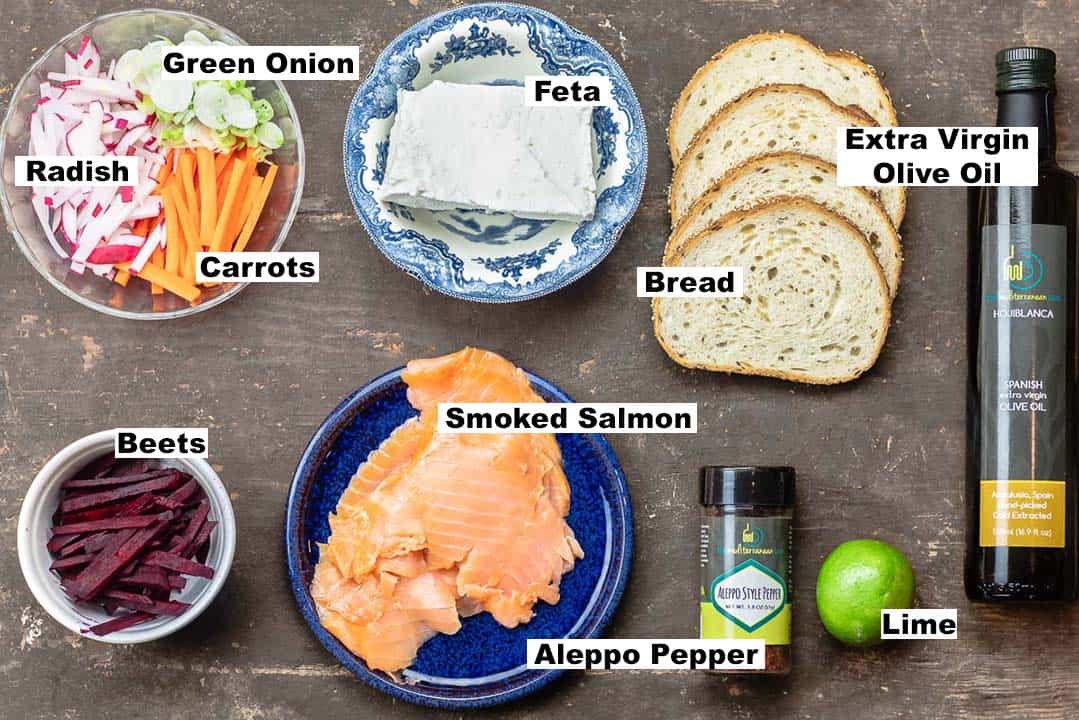 Ingredients and notes for smoked salmon toastMy smoked salmon toast comes together with just a few simple ingredients. Here's what you'll need:
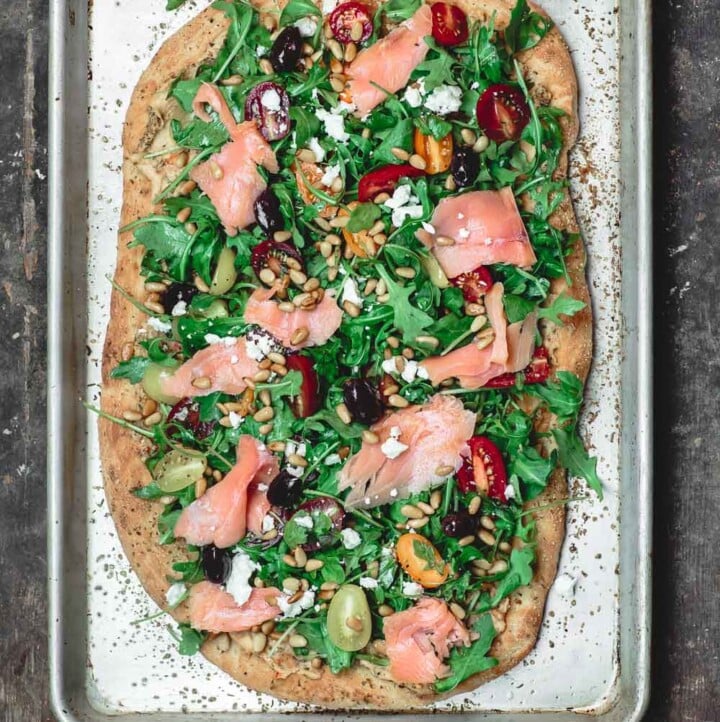
 How to make itTo make these salmon toasts, simply spread the feta cheese on each piece of toast. Top each toast with salmon slices, and finish with the fresh root veggies (I like to toss them in a bit of lime juice and olive oil first before topping the toast). To season, a dash of Aleppo-style pepper or red pepper flakes and kosher salt. Serving ideas!These colorful smoked salmon sandwiches are a satisfying little meal, especially with the crunchy root vegetable salad on top. They’re best prepared and served right away before they lose their crunch and freshness. Serve them by themselves or as part of a bigger brunch buffet next to some salads and egg dishes like my herby potato omelet, frittata, or egg casserole. Leftovers and storageSmoked salmon can typically last in its package in the fridge for up to 1 week (read your package instructions), so assemble only as many toasts as you need. Store leftover root vegetables for this sandwich in an airtight container in the fridge for up to 3 days. More smoked salmon recipes and breakfast toast recipes:Browse all Mediterranean Recipes  Smoked Salmon Sandwich with Feta
Think of this open-faced smoked salmon sandwich as a lighter Mediterranean twist on classic lox and bagels, except lighter and maybe even bolder with flavor, thanks to feta and a delicious crunchy root veggie salad! To make it spreadable, don't forget to smash the feta with some olive oil to schemer on the salmon toasts.
Servings 4 toasts
Calories 155.7kcal
Ingredients
Instructions
VideoNotes
Nutrition
Calories: 155.7kcal | Carbohydrates: 16.6g | Protein: 13.3g | Fat: 4.4g | Saturated Fat: 1.6g | Polyunsaturated Fat: 0.8g | Monounsaturated Fat: 0.9g | Cholesterol: 15.7mg | Sodium: 542.9mg | Potassium: 213.2mg | Fiber: 2.7g | Vitamin A: 2617.8IU | Vitamin C: 6.8mg | Calcium: 63mg | Iron: 1.2mg
The post Must-Try Smoked Salmon Sandwich with Feta appeared first on The Mediterranean Dish. via The Mediterranean Dish https://www.themediterraneandish.com/smoked-salmon-sandwich/ |
ABOUT MEHi, I am Daniel Jones from Overland Park, MO. I am a chef by profession, & also publish my recipe tips online on blogs and social media. Archives
April 2023
Categories |


 RSS Feed
